13 Stunning Valentine’s Day Nail Ideas for Every Style
Valentine’s Day nails can be romantic without looking overly sweet. From glossy reds and soft pink gradients to playful checkerboards and tiny heart details, these ideas offer plenty of ways to make a manicure feel festive while still reflecting your personal style.
Some designs are subtle enough for everyday wear, while others lean into chrome shine, dimensional charms, or sparkle. You can adapt most of them to short or long nails, and an accent nail or two is an easy way to try a bolder look without committing to a full set.
Whether you’re planning a salon appointment or painting your nails at home, use these ideas as a starting point. Choose details that suit your nail length and comfort level, then keep the palette and finish consistent for a manicure that feels polished and personal.
1. Red Chrome Glazed Tips
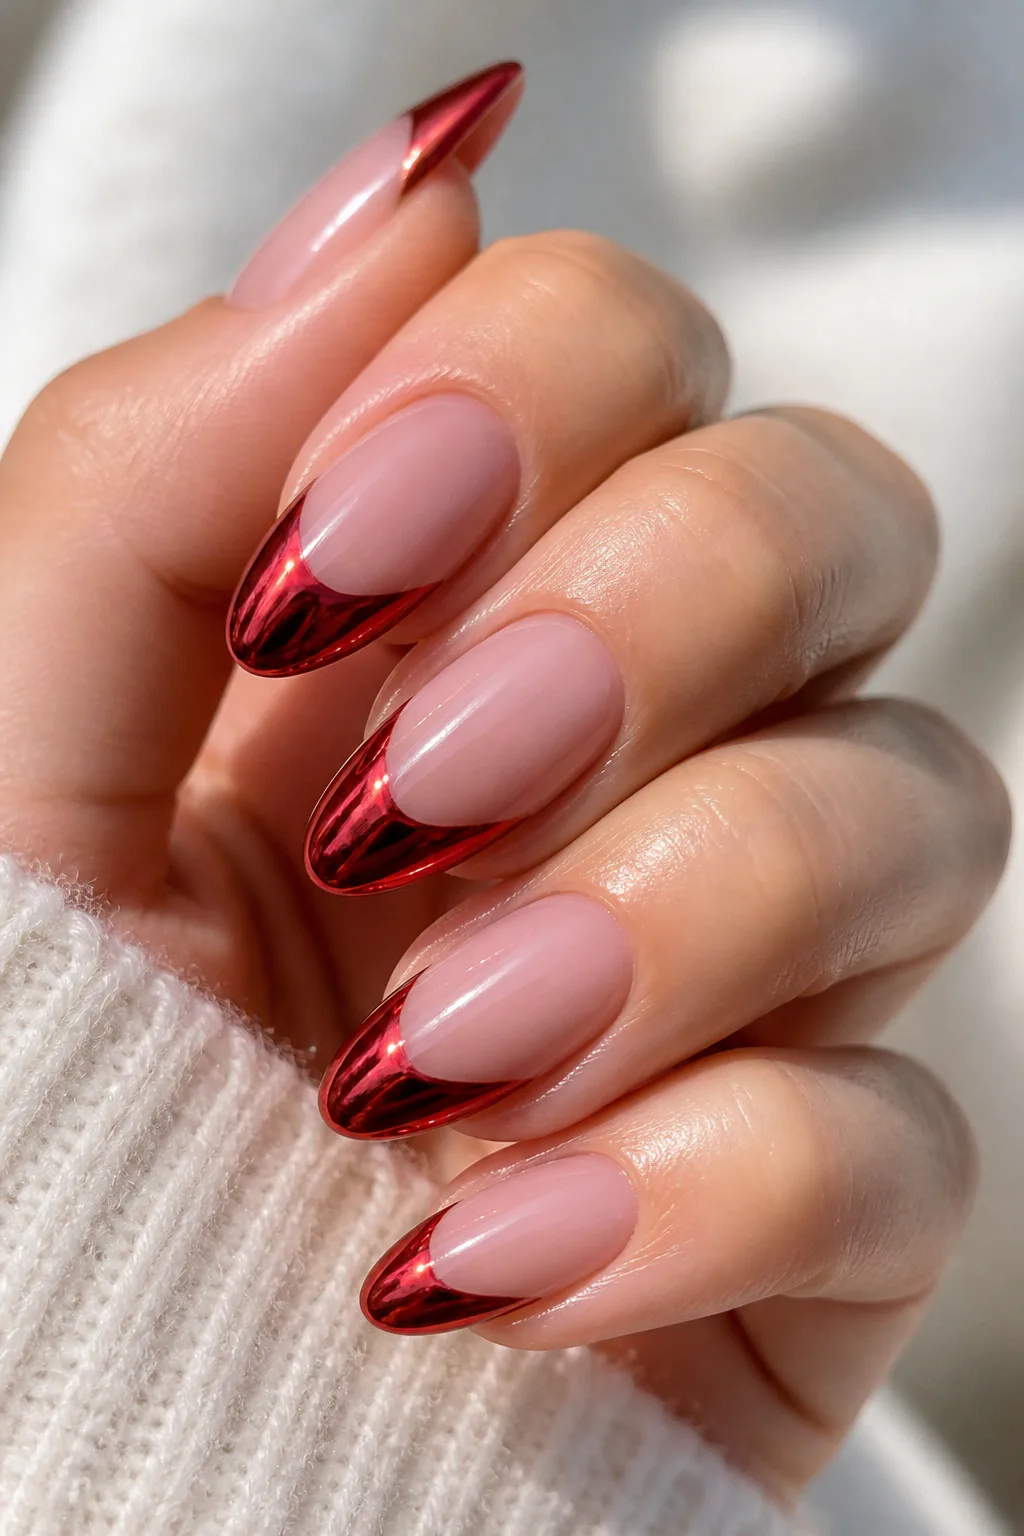
Red chrome glazed tips bring together a classic Valentine’s color and a modern, mirrorlike finish. The metallic sheen catches the light as your hands move, giving the manicure a molten effect that feels dramatic without relying on extra decorations. Long almond or oval nails give the tips room to curve elegantly, though the look can be adapted to other shapes.
A sheer, neutral base helps the red stand out while keeping the overall design balanced. For a bolder version, choose a deeper red or carry the chrome across the entire nail; for a softer take, keep the reflective color just at the tips.
How to pull it off
Ask for a smooth, even chrome finish and a clean, symmetrical tip line. If you’re trying the design at home, use a fine brush to define the red before applying the reflective finish, and work in thin layers for a tidy result.
- Choose almond or oval shaping for a flowing tip.
- Pair the red with a sheer pink or nude base.
- Keep jewelry and other nail accents simple so the shine remains the focus.
2. Blush Ombré with Tiny Hearts
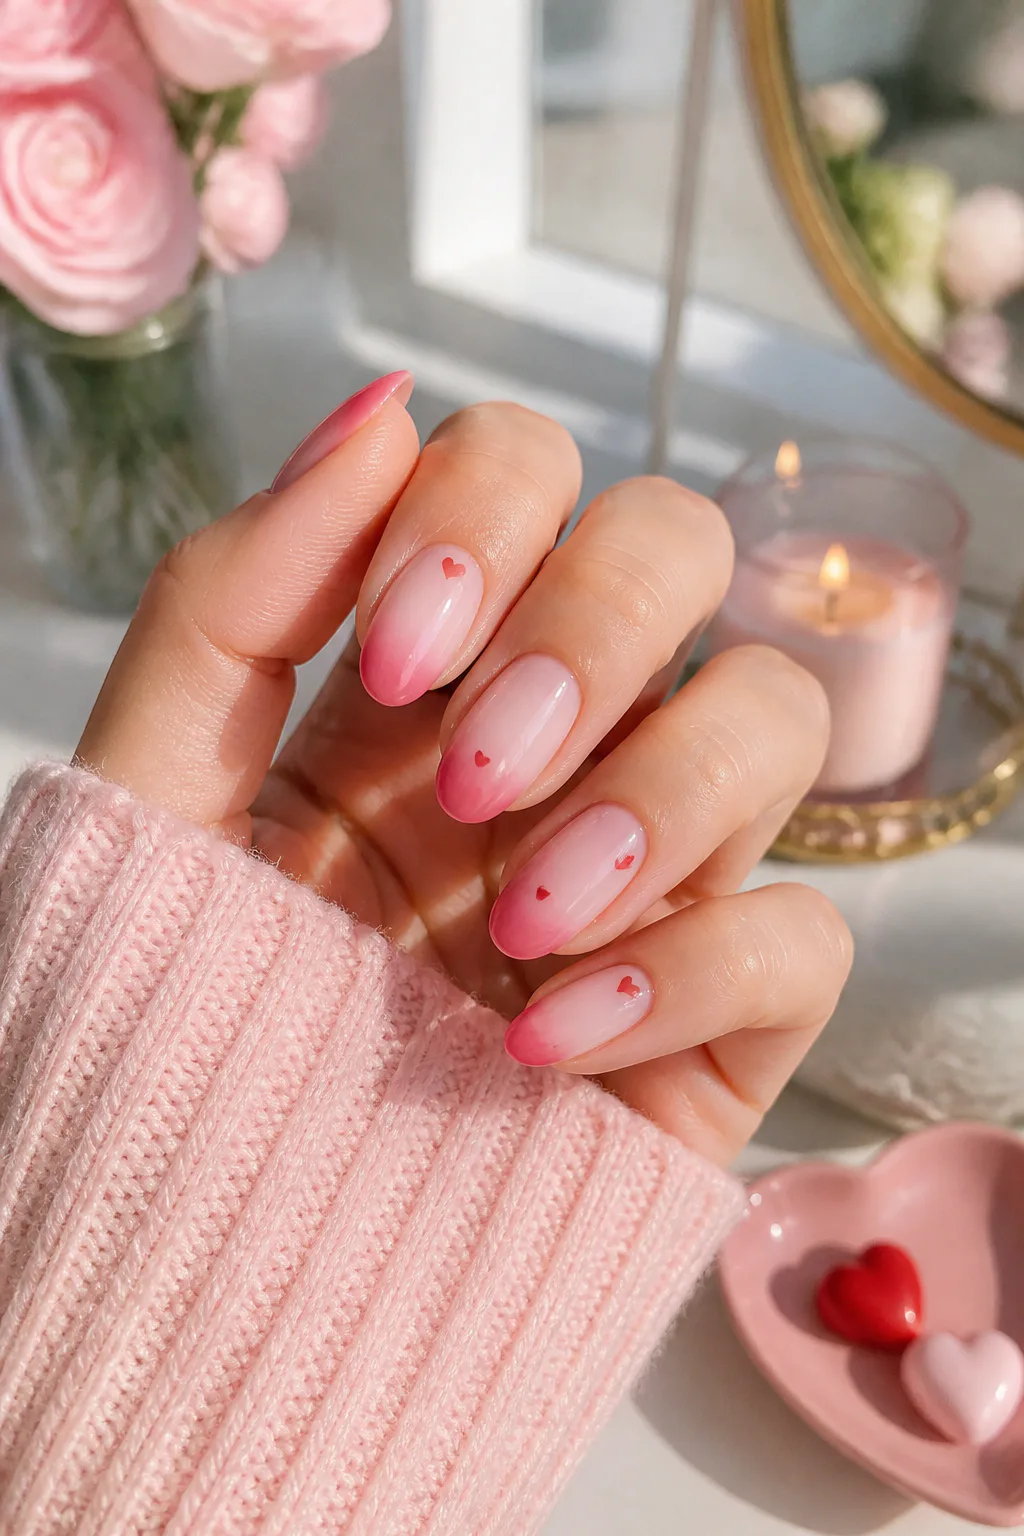
Blush ombré nails create a soft, romantic foundation by blending milky pink into a deeper blush tone. The gradual color shift adds dimension without a sharp boundary, making the manicure feel polished and wearable. Tiny red hearts provide the Valentine’s detail while leaving plenty of the delicate gradient visible.
This design suits short and long nails alike, and the heart placement can change the mood. A single heart on each nail feels restrained, while a few scattered accents bring a more playful finish. Keep the shapes small so they complement rather than compete with the ombré.
Design tips
A makeup sponge or a softly blended brush can help create a seamless transition between pink shades. If hand-painting hearts feels tricky, a stamping tool or decals can make the shapes more consistent; place them after the gradient has fully dried or cured.
- Use a milky pink near the cuticle and blush toward the tips.
- Choose bright red hearts for contrast or a softer red for a muted look.
- Vary heart placement slightly to keep the set from looking too rigid.
3. Vintage Hearts with Gold Trim
Vintage heart details give a manicure a keepsake-like quality. A neutral base in a shade such as beige, soft pink, or creamy white lets raised metallic gold outlines become the focal point. On short almond or square nails, the heart shapes feel like tiny framed charms rather than oversized decorations.
The balance of understated color and dimensional trim makes this idea especially useful if you want a festive design that still feels refined. A glossy finish brings out the metallic shine, while a matte base creates a gentler contrast. You can use the outlined hearts on every nail or reserve them for a few accents.
How to style the details
Keep the gold lines delicate and the heart shapes relatively simple. If you’re using raised gel or nail embellishments, make sure edges are smooth and secure so the design feels comfortable in daily wear.
- Start with a neutral base that complements your skin tone.
- Use gold outlines on one or two accent nails for a quieter look.
- Pair the design with simple rings so the metallic details have room to shine.
4. Cherub and Renaissance Nail Accents
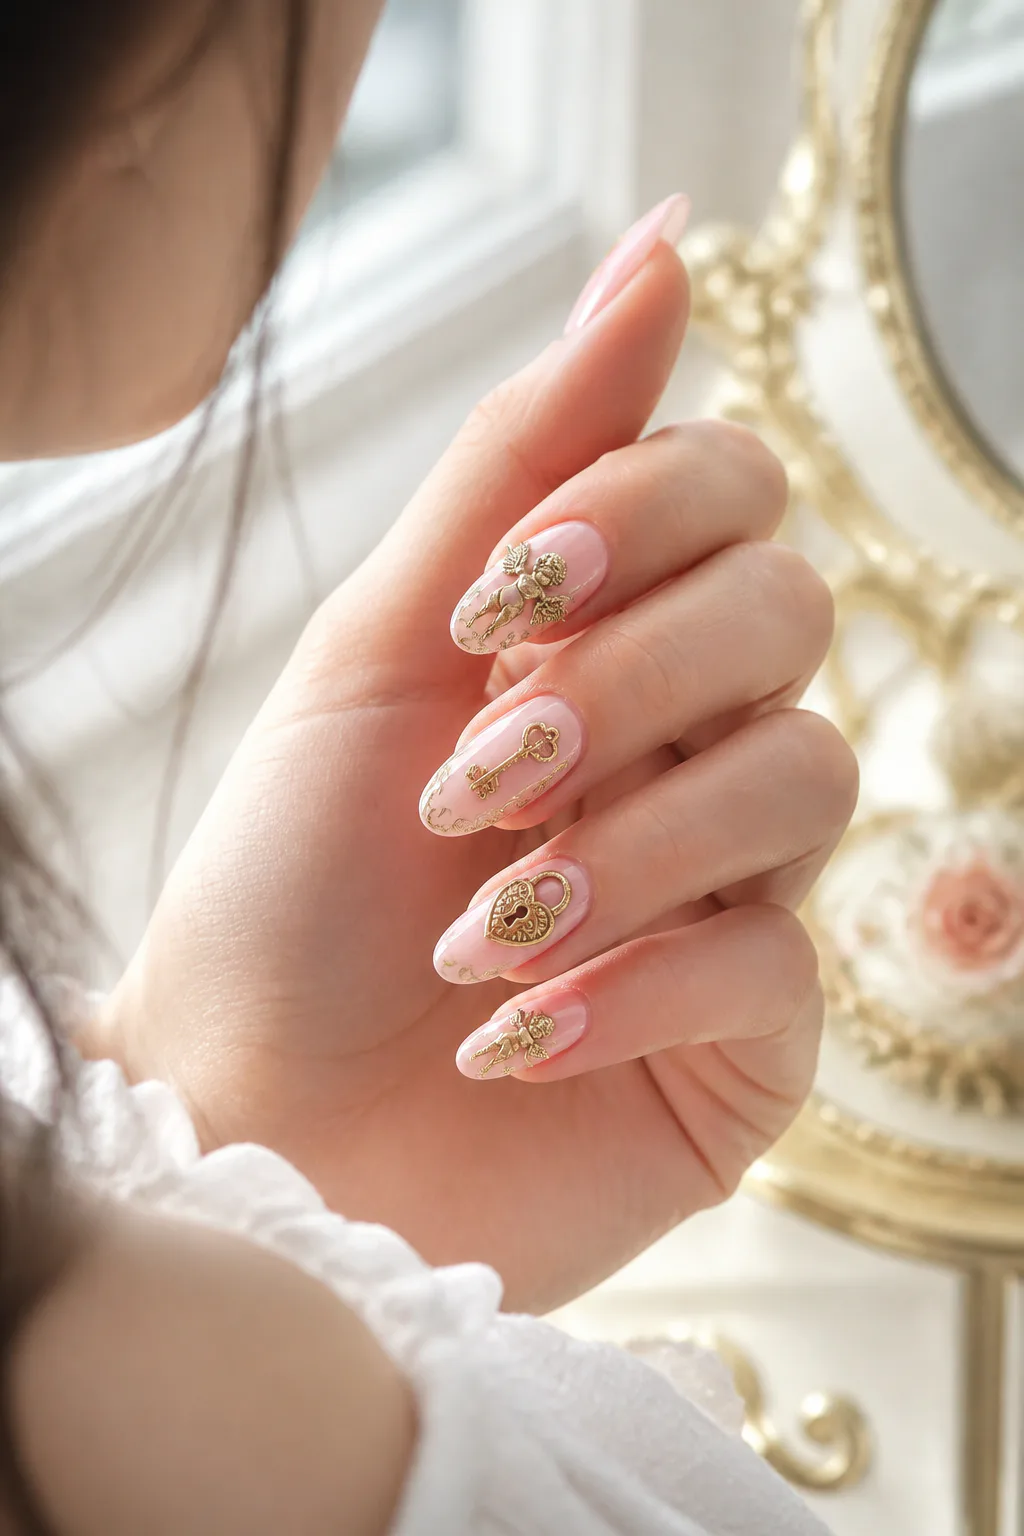
Cherub and Renaissance-inspired accents turn a blush-pink manicure into a miniature work of art. Tiny gold cherubs, lock-and-key motifs, and delicate scrollwork bring an antique, decorative mood that feels distinct from simple hearts. A soft pink base keeps these ornate details from making the whole set feel too heavy.
Because charms and intricate artwork need space to read clearly, this idea works well as an accent design on a few nails. The remaining nails can stay solid blush or carry a subtle shimmer, creating a considered mix of detail and breathing room. It’s a playful choice for anyone drawn to vintage-inspired jewelry and romantic motifs.
Keeping ornate accents wearable
Choose one main motif rather than combining every decorative element on each nail. Flat artwork may feel easier for everyday wear, while raised charms add dimension but can catch on fabric if they are not attached smoothly.
- Use a blush or milky-pink base to anchor the gold accents.
- Place the most detailed design on one or two feature nails.
- Keep neighboring nails simple to make the artwork easier to notice.
5. Cherry-Red French Tips
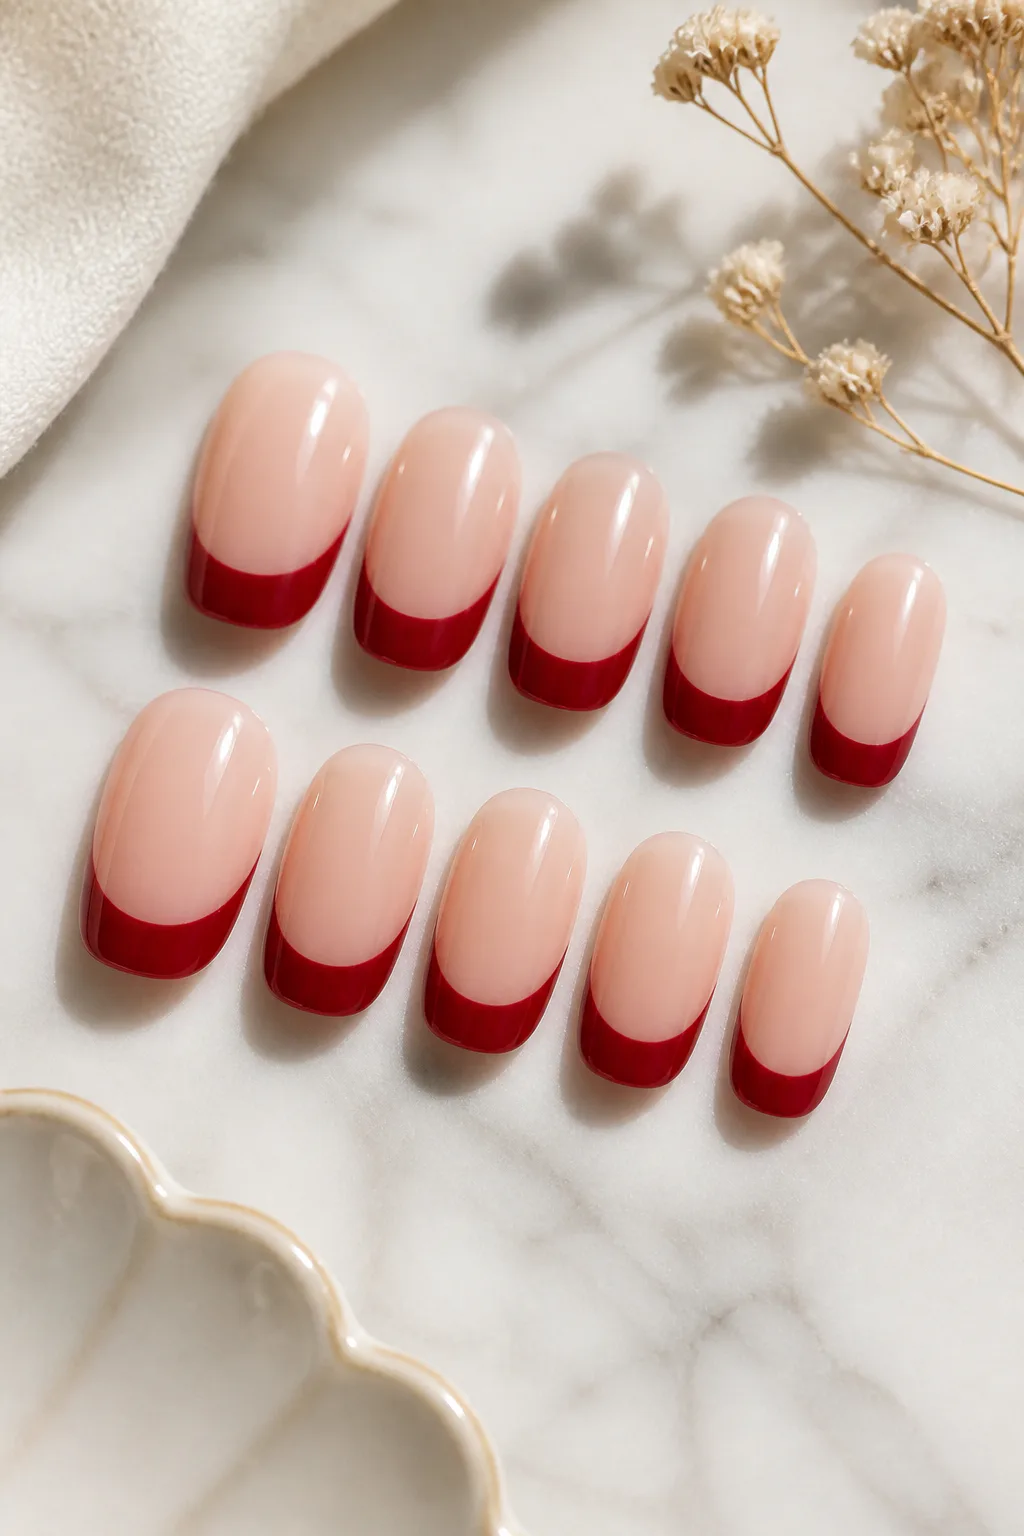
Cherry-red French tips put a festive spin on a familiar manicure. Instead of a white edge, a crisp band of glossy cherry red or deep wine follows the natural curve of the nail. The result feels romantic and recognizable, but the saturated color gives it a more seasonal finish.
This design works across a range of nail lengths and shapes. A narrow red line can keep short nails looking neat, while a wider tip makes a bolder statement on longer nails. A sheer pink or nude base creates a clean contrast, though a milky base can soften the look.
Getting a clean tip
Even curves are the key to making this design look polished. A fine liner brush offers control for painting the smile line, while guides can help at home; adjust the depth of the curve to suit your nail shape instead of forcing the same line onto every finger.
- Choose cherry red for a bright, playful finish or wine for a moodier one.
- Keep the tip slim on shorter nails to preserve a balanced look.
- Finish with a glossy top coat for a smooth, unified surface.
6. Negative-Space Corner Hearts
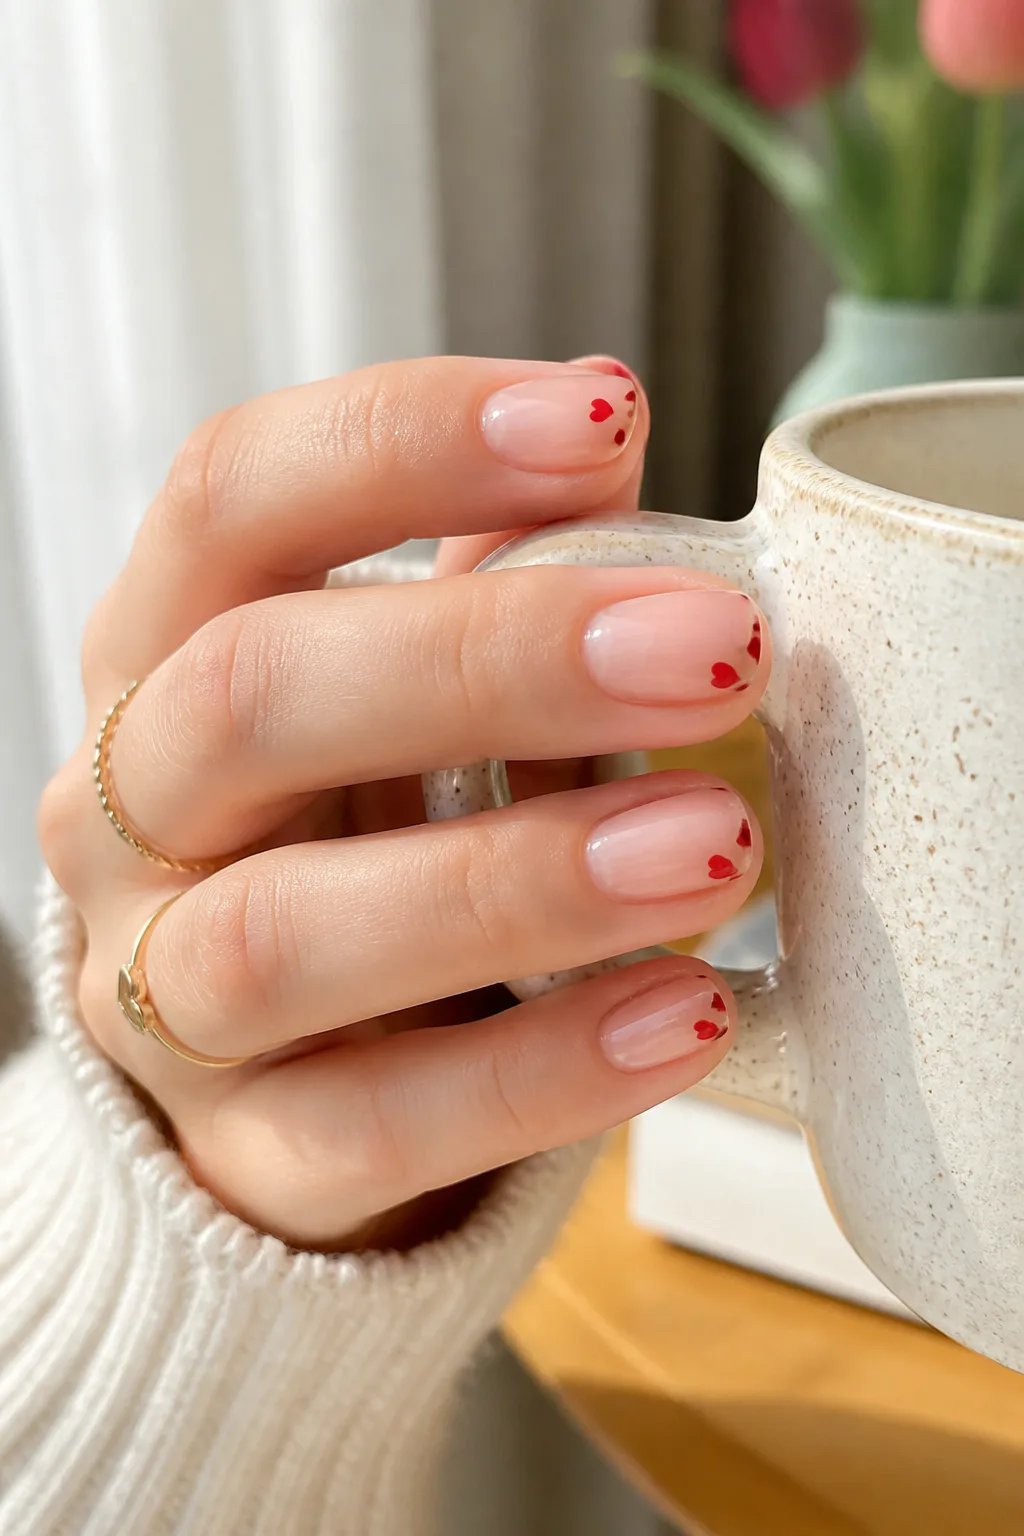
Negative-space corner hearts make a small Valentine’s statement while leaving most of the nail bare. A clear or nude glossy base lets the natural-looking space become part of the design, while a tiny heart near the cuticle or bottom corner adds a neat pop of color. The placement feels unexpected compared with a heart centered on every nail.
This is a good option if you prefer understated nail art or want a design that grows out gracefully. The open base keeps the manicure visually light, and the hearts can be painted as complete shapes, half-hearts, or simple geometric outlines.
Choosing the placement
Pick one consistent area, such as the lower outer corner, to give the set a deliberate rhythm. If you want a less uniform look, alternate between cuticle-side and corner placements while keeping the hearts similarly sized.
- Use a sheer nude or clear base for a clean, minimal effect.
- Choose a fine brush or small decal for crisp heart shapes.
- Leave plenty of open space around each accent.
7. Velvet Red Cat-Eye Nails
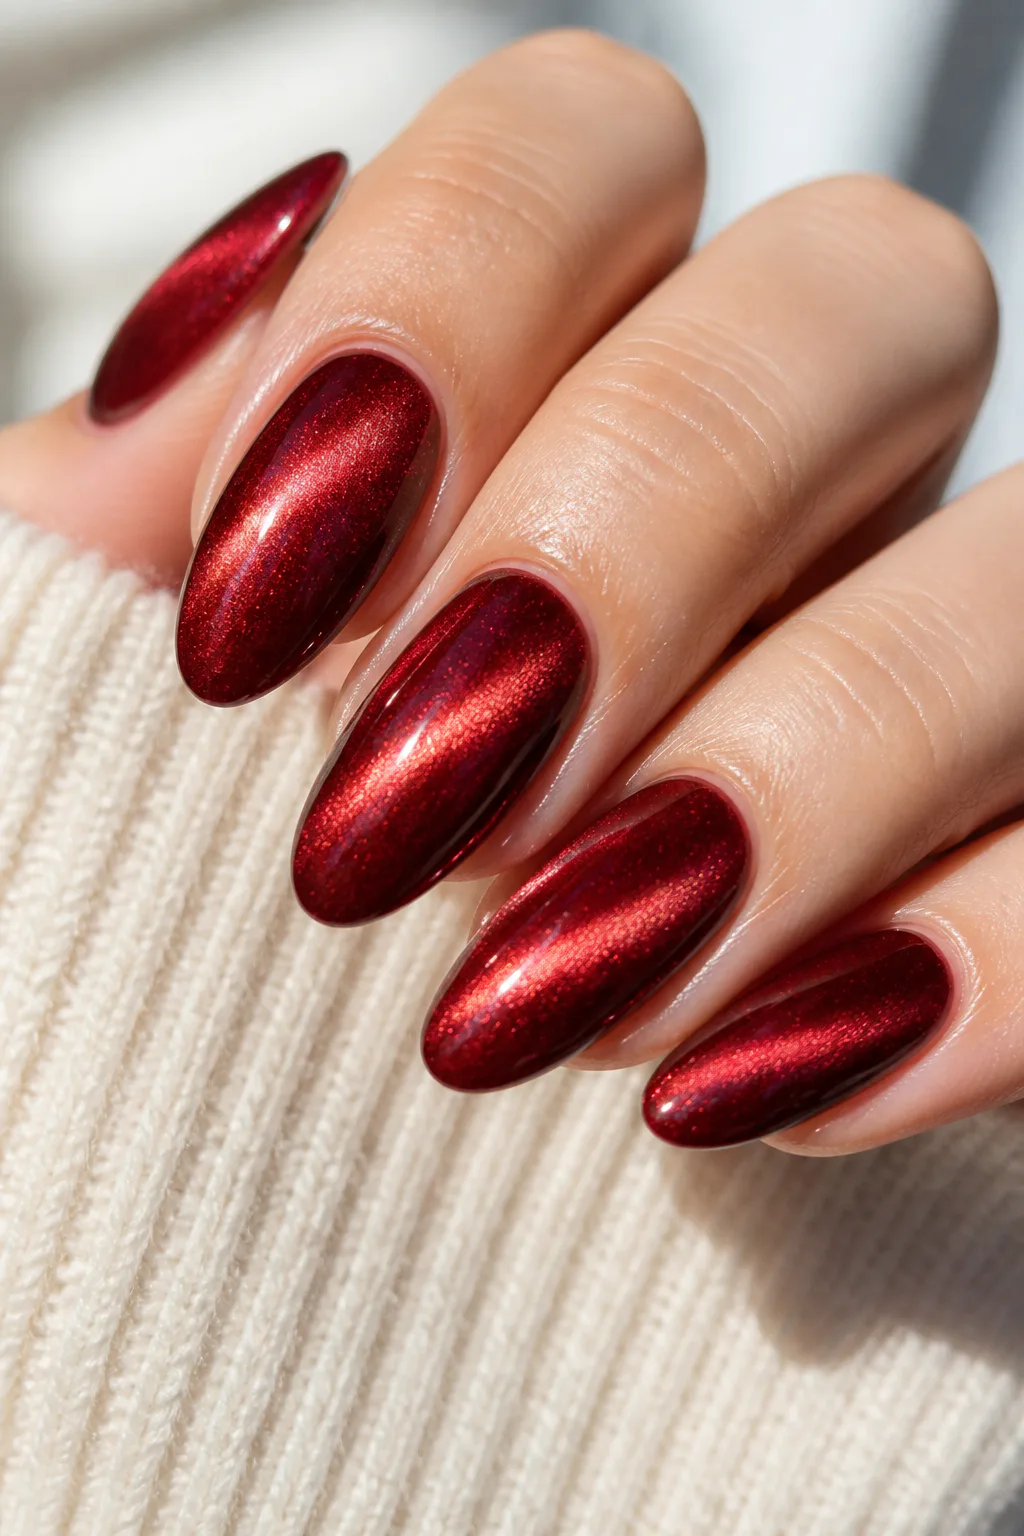
Velvet red cat-eye nails use magnetic shimmer to create a plush, light-catching effect. Depending on how the reflective pigment is moved, the finish can look like a glowing stripe, a soft halo, or a sweep of crushed velvet. Red keeps the manicure classic for Valentine’s Day, while magenta shifts it toward a more vivid, playful mood.
The color and shifting light do most of the work, so extra nail art is optional. A full set gives the magnetic finish a dramatic, cohesive look; alternatively, use it on a few nails alongside a coordinating solid shade. The effect is especially noticeable under changing indoor and outdoor light.
Making the shimmer stand out
Magnetic polish is typically shaped with a magnet while the polish is still workable, so follow the product’s directions and take care to keep the effect consistent across nails. A smooth application helps the reflective pattern look intentional rather than patchy.
- Try deep red for a classic finish or magenta for brighter color.
- Use a magnetic wand to direct the shimmer into a stripe or halo.
- Skip busy add-ons and let the shifting finish remain the feature.
8. Pastel XOXO Mismatched Nails
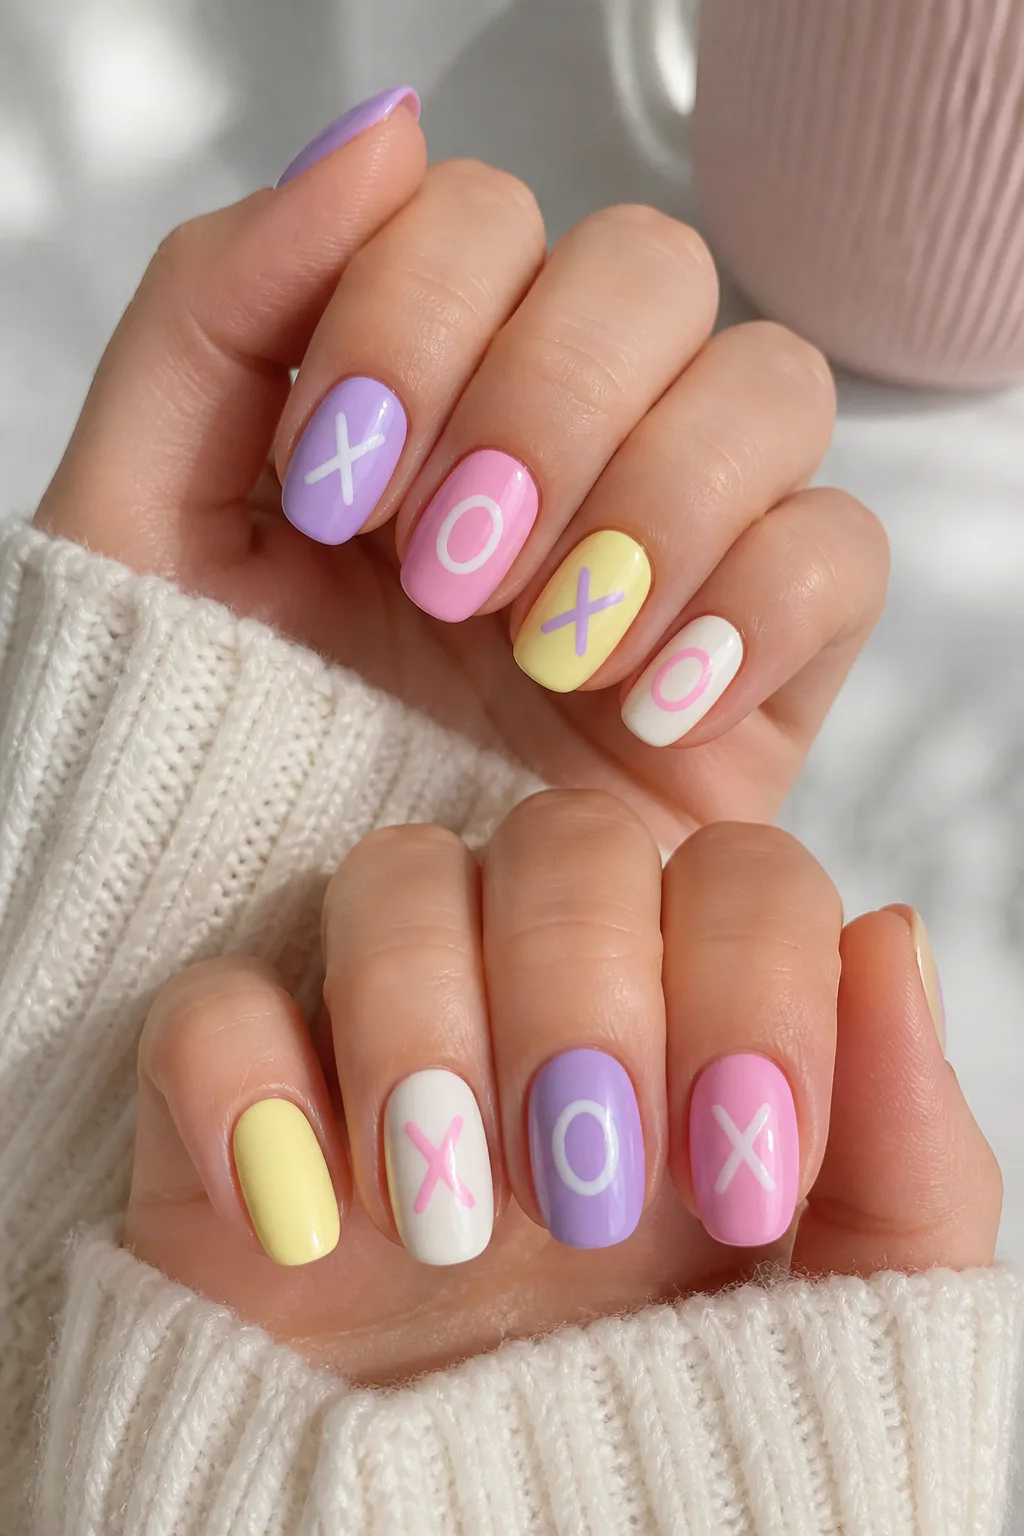
Pastel XOXO nails bring a lighthearted feel to Valentine’s nail art. Alternating soft lavender, baby pink, butter yellow, and cream creates a cheerful mix, while handwritten-style letters add the love-note theme. The colors don’t need to match exactly; keeping them within a gentle pastel palette helps the set feel coordinated.
This design gives each nail a small role, so it’s ideal if you enjoy playful details and don’t mind a manicure that invites a closer look. You can spell out a message across several nails or use just a few letters and leave the rest in solid pastel shades.
Planning the color and lettering
Map out the shades and letters before painting so the design reads clearly across both hands. Small lettering needs space and contrast, so choose a nail shape and length that give you enough room, or simplify the words if you’re working on shorter nails.
- Repeat each pastel shade to keep the mismatched set connected.
- Use a fine nail-art brush or lettering decals for the text.
- Keep some nails solid to give the letters visual breathing room.
9. Strawberry Milk with Berry Drips

Strawberry milk nails pair a milky-pink base with glossy red drips or melting-heart accents. The pale background feels soft and creamy, while the red details add a playful burst of color. Drips along the tips can look like a sweet, stylized spill without requiring a complicated pattern across the whole nail.
The design is easy to adapt: use one or two drip accents for a subtle version, or repeat the motif across the set for a more whimsical look. Rounded nail shapes suit the soft theme, but the contrast between pink and red also looks striking on square or almond nails.
Shaping the berry details
Vary the height and width of each drip slightly so the edges feel natural rather than like identical stripes. A fine brush gives you control, and a glossy top coat helps blend the red details into the finished manicure.
- Choose an opaque milky pink as the base for clear contrast.
- Paint drips at the tips or add a melting-heart accent on one nail.
- Keep the red glossy and the shapes simple for a crisp finish.
10. Tortoiseshell with Red Hearts

Tortoiseshell and red hearts make a distinctive combination of warm pattern and bright color. Amber, brown, and black tones create a layered shell-like effect on selected nails, while cherry-red polish and floating heart decals bring in the Valentine’s theme. The mix feels stylish rather than overly sweet.
Alternating patterned nails with solid red or nude ones gives the tortoiseshell design room to stand out. This approach also makes the manicure easier to balance: the print supplies visual texture, and the plain nails keep the overall set from feeling crowded.
Balancing pattern and color
Tortoiseshell patterns look most convincing when their warm tones overlap softly instead of forming hard, uniform spots. Use the hearts sparingly, placing them on a solid nail or over a clear section so they remain easy to see.
- Reserve tortoiseshell for a few accent nails.
- Pair the pattern with cherry red, nude, or a sheer base.
- Place small heart decals where they won’t disappear into the print.
11. Pink and Red Checkerboard Hearts
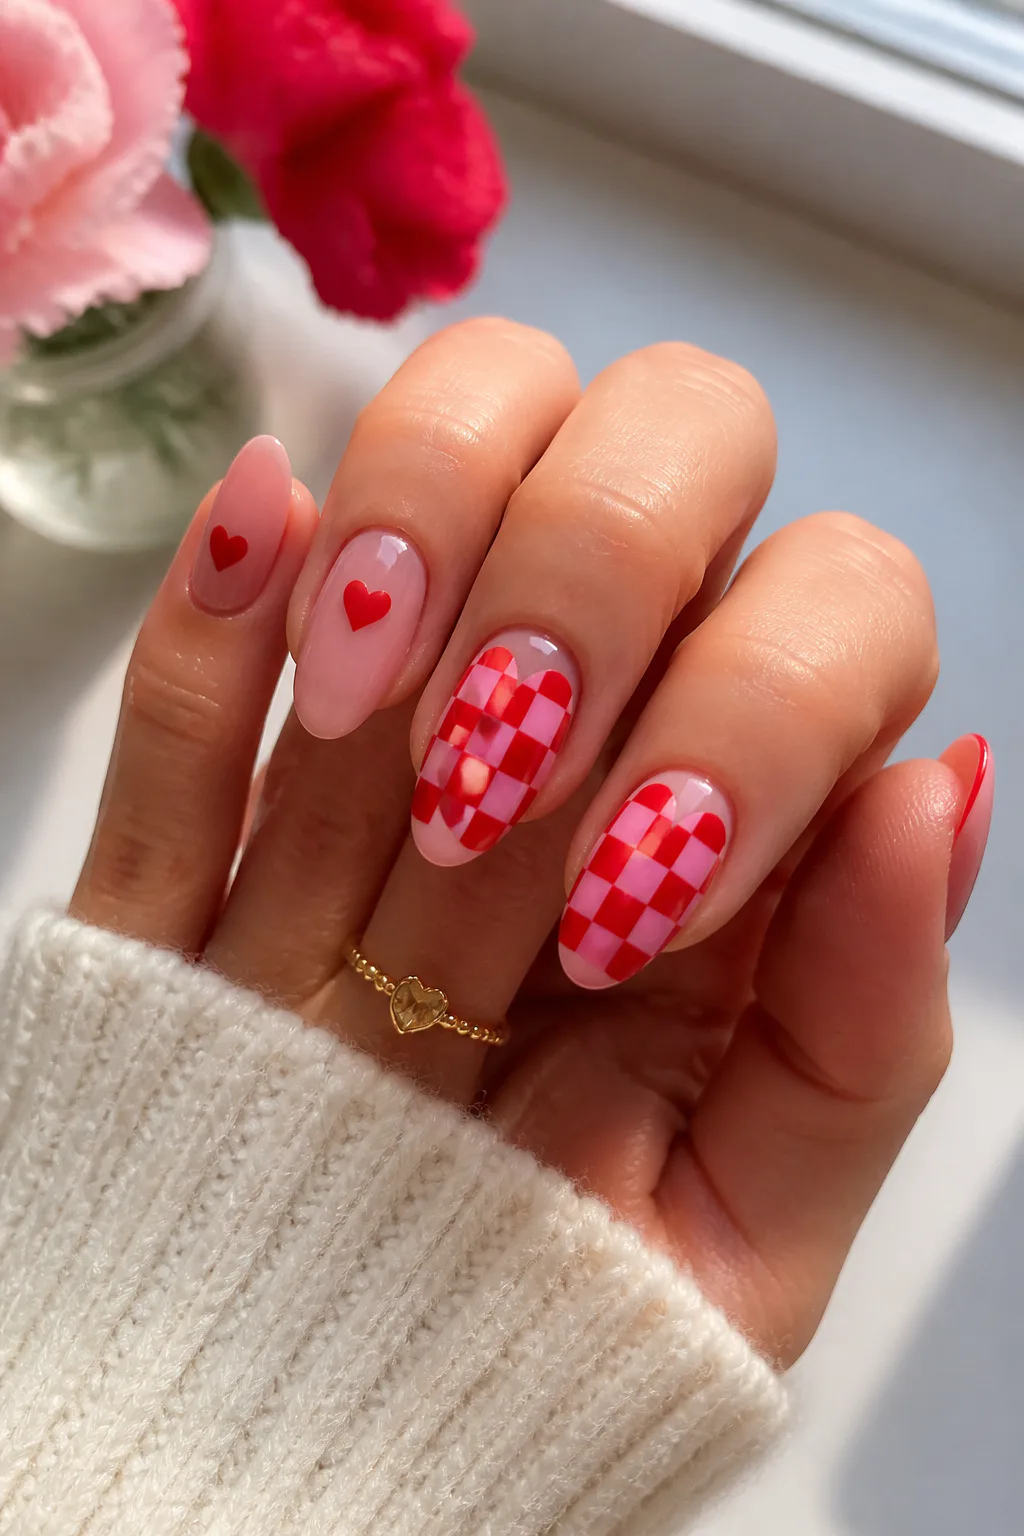
Pink-and-red checkerboard nails bring a retro graphic element to a Valentine’s manicure. The repeating squares feel lively and bold, while clean nude nails or simple red-heart accents prevent the pattern from taking over the entire set. The mix of geometry and curved heart shapes gives the design an upbeat, slightly nostalgic character.
Checkerboard works especially well on a couple of accent nails, where the pattern can be seen clearly. You can choose soft pink and red for a sweeter look or use stronger, more contrasting shades for a punchier effect. The other nails can echo one of the colors to tie everything together.
Making the pattern feel balanced
Keep the squares as even as possible, especially near the sidewalls, and use a fine brush or striping guides to help create clean edges. If detailed painting isn’t your preference, a checkerboard accent paired with solid nails still makes the idea recognizable.
- Limit the checkerboard to one or two nails per hand.
- Pair it with nude nails or small red-heart details.
- Repeat one pattern color on the remaining nails for cohesion.
12. Rhinestone Heart Centers

Rhinestone heart centers add a point of sparkle to a familiar red or pink manicure. Paint a heart on the nail, then place a tiny rhinestone or crystal cluster in its center for a dimensional glint. The embellishment catches light differently from the polish, making the motif feel more like a little piece of jewelry.
This idea can be scaled to suit your style. A single crystal gives a delicate highlight, while a small cluster feels more decorative. Using the stones on only a few nails helps keep the manicure comfortable and lets the details stand out against a simple base.
Securing the embellishments
Place stones carefully with a wax pencil or detail tool, and use an appropriate adhesive or gel method for your manicure. Smooth attachment matters: raised edges can catch on clothing or hair, so keep embellishments small and check that they feel secure.
- Choose a red or pink base that contrasts with the heart design.
- Use one rhinestone for a subtle glimmer or a small cluster for more impact.
- Apply stones to accent nails rather than crowding every finger.
13. Milky White with Red Confetti
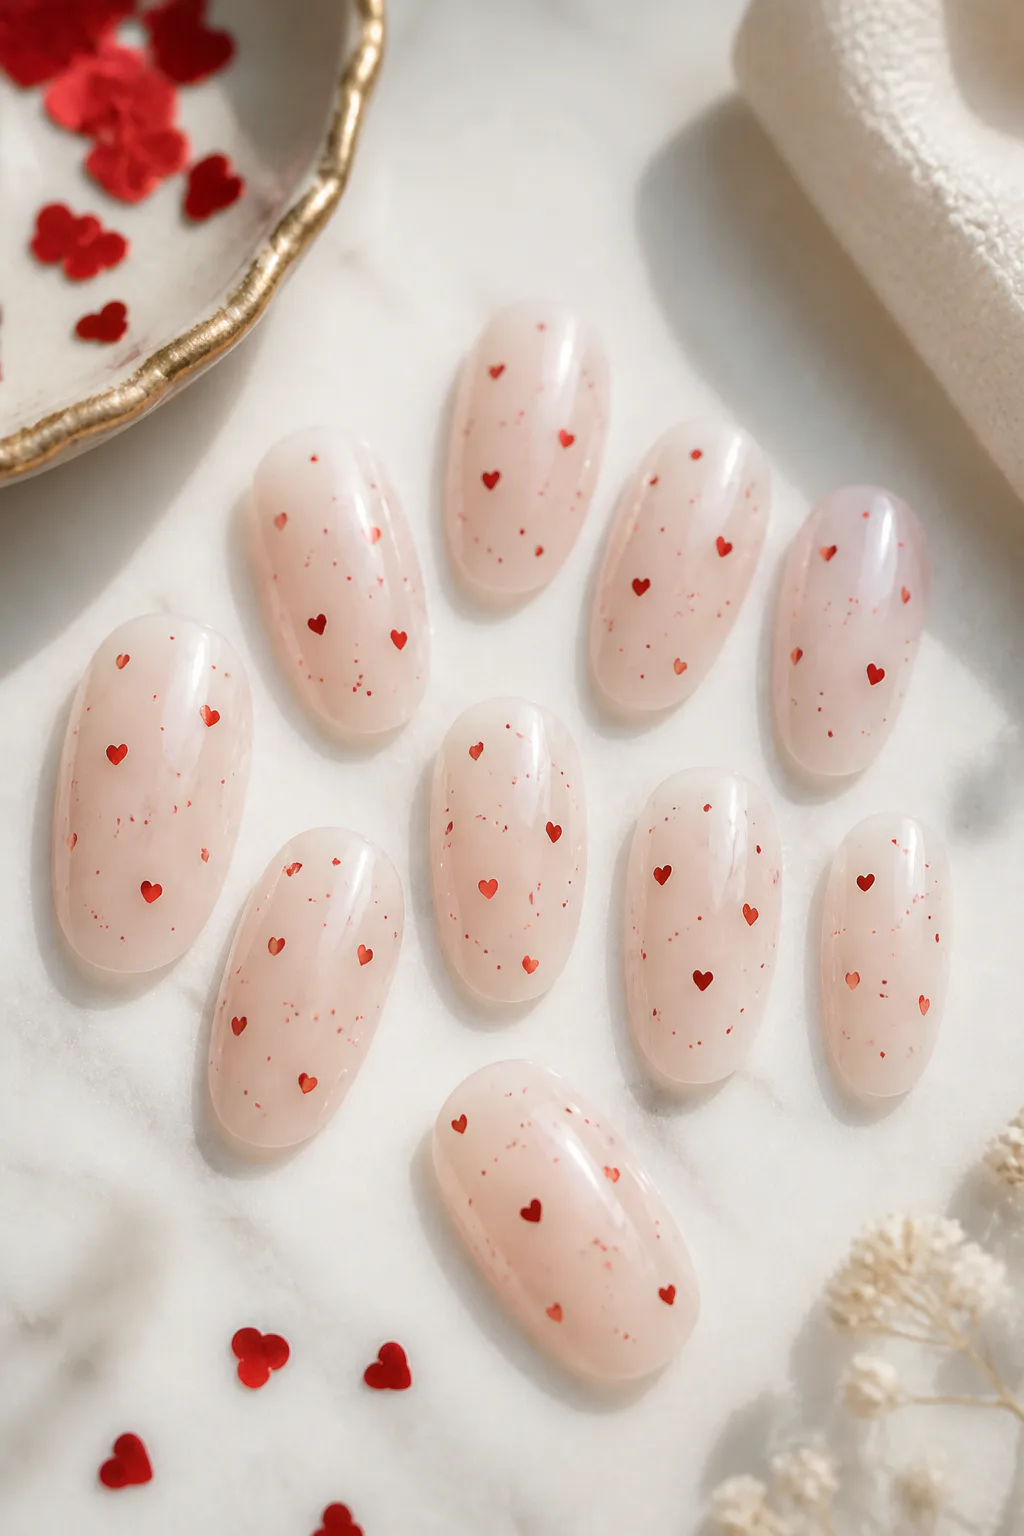
Milky white nails scattered with tiny red hearts or confetti have a clean, airy look. The sheer base lets some natural nail show through, while the red flecks bring just enough color to make the set feel festive. Because the decoration is small, the manicure stays delicate rather than turning into a bold, full-coverage pattern.
This design suits a range of nail lengths and shapes, and the confetti can be spaced out for a minimal finish or scattered more densely for extra playfulness. It also pairs easily with everyday outfits because the pale base remains understated.
Spacing the confetti
Vary the distance and direction of the tiny pieces so the pattern feels casually scattered, not arranged in identical rows. Tweezers or a dotting tool can help position individual hearts, while a carefully applied top coat keeps the surface smooth.
- Use a sheer milky-white base rather than an opaque white.
- Mix tiny hearts with a few simple red dots if desired.
- Leave open space between pieces to preserve the light look.
Final Thoughts
Valentine’s Day nails can be as subtle or expressive as you like. A sheer base with a tiny heart offers a quiet seasonal touch, while chrome, cat-eye shimmer, charms, and checkerboard patterns make a stronger statement. Choosing one focal detail and giving it room to shine is an easy way to keep any design feeling considered.
Use these ideas as inspiration, then adjust the colors, placement, and level of detail to suit your nail length and routine. Whether you choose a salon design or try a simple accent at home, the best manicure is one that feels fun to wear well beyond the holiday.