13 Stunning Red and White Christmas Nail Ideas
Red and white make a timeless Christmas pairing, but the combination can feel polished and wearable well beyond a party manicure. A rich cherry shade, a milky base, or a few carefully placed details can bring in the holiday mood without crowding your nails with decoration.
These 13 ideas range from delicate snowflakes and candy-cane lines to velvet finishes and cozy knit texture. Each design balances festive color with a clean, considered detail, so you can choose something subtle or make one accent nail the focus.
Whether you’re planning a salon appointment or painting your nails at home, you’ll find options for different nail shapes, lengths, and comfort levels. Use the ideas as inspiration, and adjust the number of accent nails or the intensity of the red to suit your style.
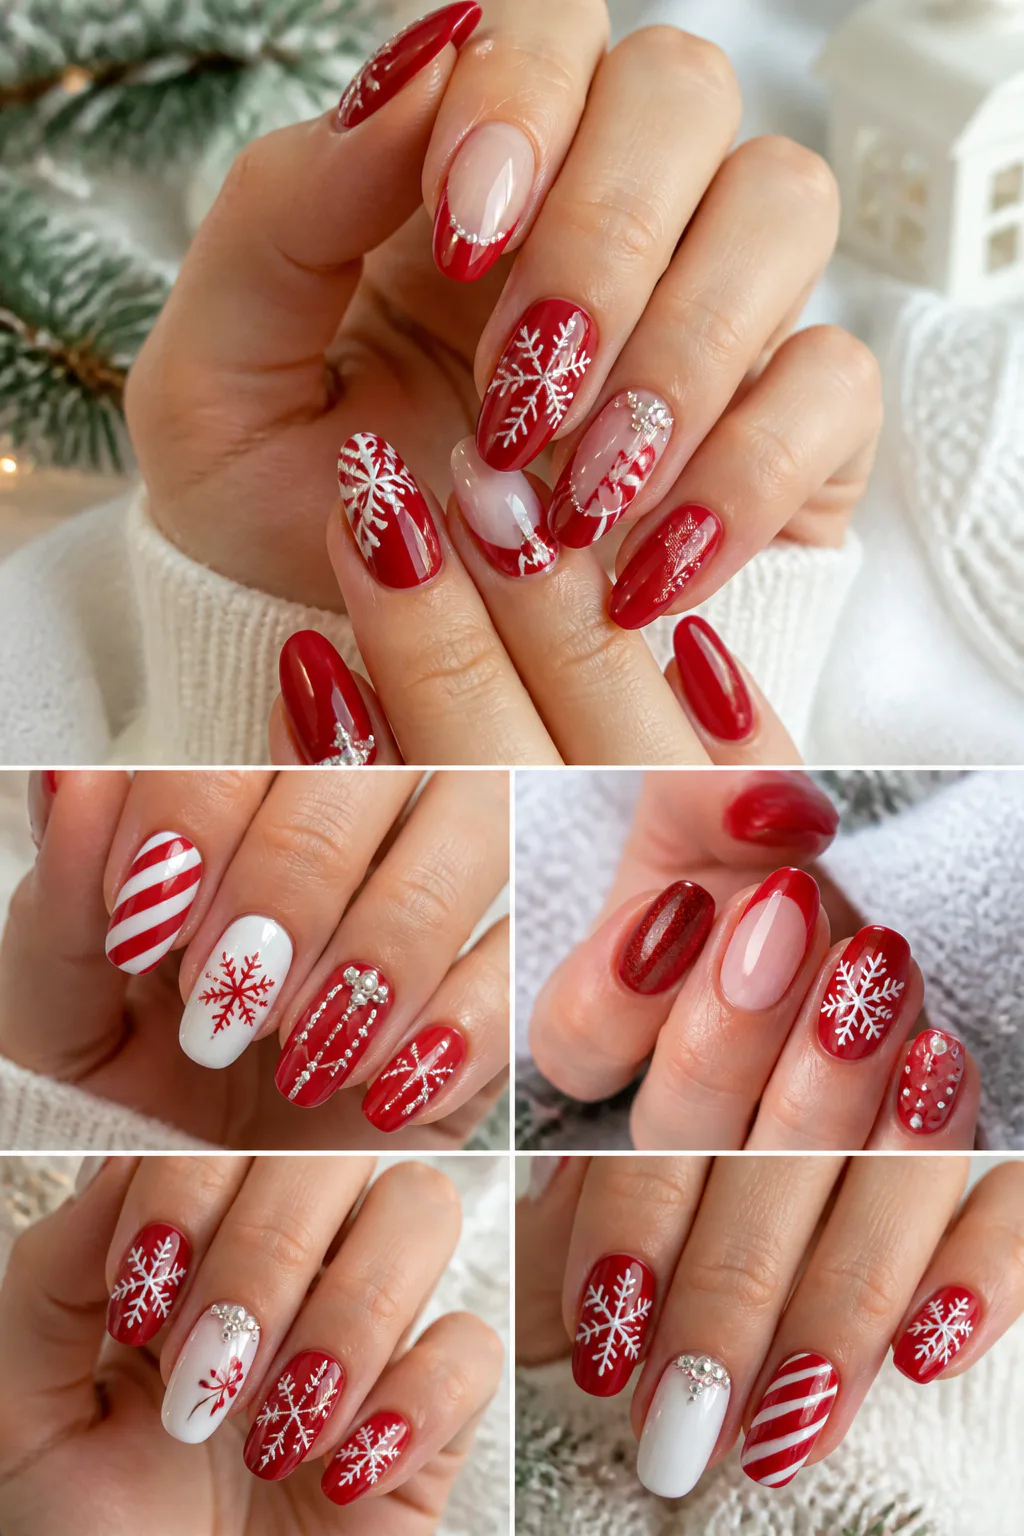
1. Cherry Red Nails with Fine White Snowflakes

A deep cherry or burgundy manicure feels festive without relying on bright, glittery color. Add one fine white snowflake to each ring finger, leaving the rest of the nails solid for a design that reads as elegant from a distance and detailed up close.
This look works especially well on short or medium nails because the saturated base gives the manicure presence while the small accent keeps it balanced. Choose a creamy white for visible contrast, and keep the snowflake delicate rather than filling the nail with additional winter motifs.
How to keep the snowflake delicate
Start with a smooth, opaque cherry base and let it dry fully before adding the accent. A fine liner brush or a nail-art pen can help create thin strokes; finish with a glossy top coat to seal the design and unify the shine.
- Place the snowflake slightly off-center for a natural, airy look.
- Use a few fine branches instead of a dense, intricate pattern.
- Keep the remaining nails plain to let the detail stand out.
The result is a classic holiday manicure that feels thoughtful rather than busy.
Photo: @maison.nailspa on Instagram. Style shown: sparkling cherry-red base with hand-painted white snowflakes.
2. Milky White Nails with Crimson French Tips
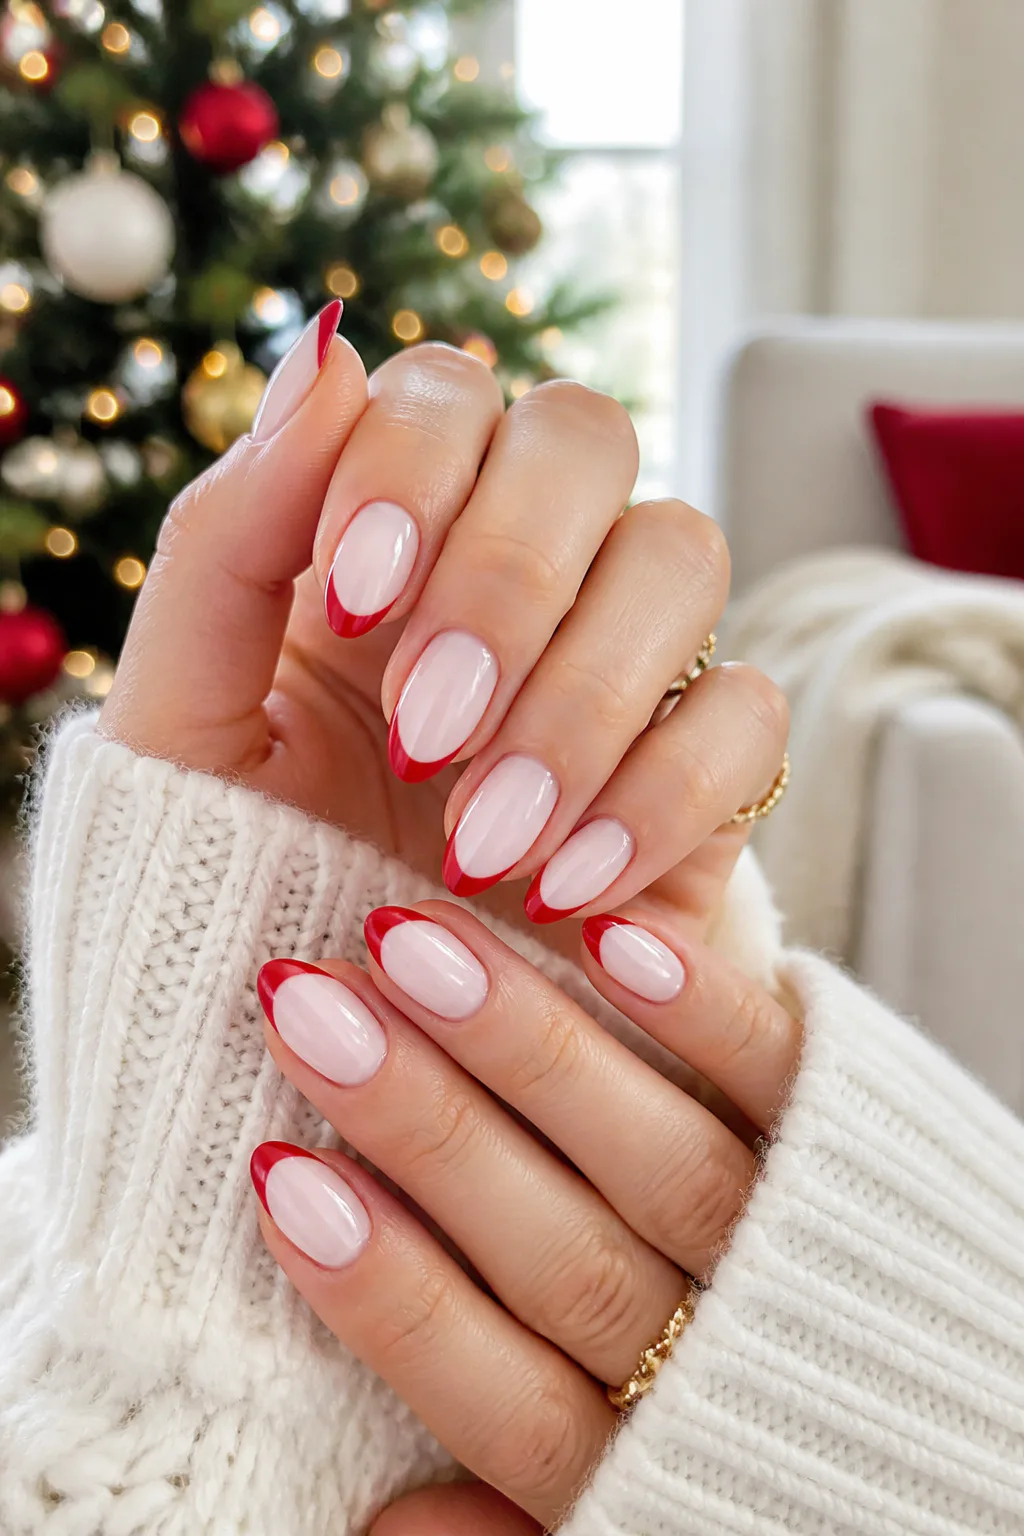
Give the familiar French manicure a seasonal update by replacing the usual white tips with crisp crimson. A milky-white base softens the contrast, while the red edge brings a clear Christmas accent without covering the entire nail in color.
This design suits many lengths and shapes, though a softly rounded or almond tip gives the red curve room to follow the nail naturally. On shorter nails, a slim tip keeps the look light; longer nails can carry a slightly bolder band without losing the clean French-inspired finish.
Getting a neat red tip
Apply a sheer milky base in thin coats and let it dry before painting the tip. If drawing a smile line freehand feels tricky, use a fine brush and work from each side toward the center, keeping the curve consistent across the set.
- Choose a creamy, translucent white rather than a stark opaque base.
- Match tip width to nail length for a balanced appearance.
- Use a glossy top coat to smooth the color transition.
It’s an easy way to make a familiar manicure feel festive while staying refined.
Photo: @titannailbar on Instagram. Style shown: bold red French tips on a delicate glittery milky-white base.
3. Milky Nails with Candy Cane Swirls

A single slim red swirl on a milky-white nail suggests candy-cane stripes without turning the whole manicure into a literal pattern. The open space around the line keeps the design light, while the glossy red adds just enough seasonal color.
Try this idea across every nail for a coordinated look, or use it on a few fingers and leave the others plain. A diagonal curve can visually lengthen the nail, making the design especially appealing on shorter shapes where a full striped pattern might feel crowded.
Making the swirl look intentional
Keep the red line narrow and let it travel along one side of the nail rather than crossing the whole surface. A fine detail brush offers control, but a nail-art pen can also work if you draw slowly over a fully dry base.
- Use one flowing curve instead of several tight twists.
- Keep the line glossy to contrast gently with the milky base.
- Vary the starting point slightly while keeping the overall style consistent.
The subtle candy-cane reference feels playful, but the restrained linework keeps the manicure polished.
Photo: @simply._.nail._.art on Instagram. Style shown: red-and-white candy-cane stripes with red glitter.
4. Velvet Red Nails with Pearl Accents

Magnetic velvet-red polish creates a soft, shifting effect that changes as the light moves across the nail. A tiny white pearl near each cuticle adds a delicate highlight, pairing a plush finish with a simple, jewelry-like detail.
This look is especially striking on medium or longer nails, where the velvet effect has room to show its depth. It can also work on shorter nails if you keep the pearl very small and place it consistently, allowing the color and finish—not oversized embellishment—to carry the design.
Balancing texture and detail
Use the magnetic polish according to its directions before sealing the manicure, since the velvet effect depends on the polish particles shifting into place. Place each flat-backed pearl near the cuticle while the appropriate adhesive or top layer is ready, then secure it without covering the surrounding finish.
- Choose a deep red that reads as cherry, ruby, or burgundy.
- Use one small pearl per nail for a tidy, repeated accent.
- Keep additional nail art minimal so the texture remains the focus.
The combination feels festive and dressed up without needing glitter or elaborate decoration.
5. Sheer White Nails with Tiny Holiday Stars

A translucent milky-white base creates a soft, clean canvas for tiny gold stars and understated red dots. Because the decoration is sparse, the manicure feels airy and refined instead of resembling a full holiday print.
This idea is a good fit if you like a natural-looking nail but still want a seasonal detail. The sheer base allows the nails to remain subtle, while small metallic accents catch the light. Keep the stars and dots spread out so the design has room to breathe.
Keeping the pattern light
Apply one or two sheer coats, depending on how much natural nail you want to show. Add just a few small motifs on each nail, or concentrate the stars on accent fingers and use tiny red dots elsewhere for a coordinated, less uniform finish.
- Pick fine, small stars rather than large, chunky shapes.
- Use red dots sparingly to echo the holiday palette.
- Leave visible space between each motif.
A glossy top coat helps smooth the surface and gives the delicate details a finished look.
6. Crimson Nails with a White Plaid Accent

Solid crimson nails bring rich color to this manicure, while one matte white accent nail introduces a tailored plaid pattern. The contrast makes the design feel cozy and classic, but limiting the pattern to a single finger keeps the overall effect neat.
The accent can sit on the ring finger or another nail you’d like to highlight. Fine red lines create a coordinated look against the crimson manicure, and a few subtle intersecting strokes suggest a plaid weave without making the small nail surface feel overly complicated.
Planning a crisp plaid accent
Paint the accent nail with an opaque white base and allow it to dry thoroughly before adding the pattern. Use a fine brush to draw thin vertical and horizontal lines, spacing them carefully; a matte finish on the accent can contrast nicely with glossy crimson nails.
- Keep most nails solid red to preserve the design’s balance.
- Use thin, even lines rather than a dense check.
- Let the white base dry fully before adding plaid details.
This is a charming choice if you want a recognizable winter motif with a clean, understated finish.
7. Soft White-to-Red Christmas Ombré

A seamless gradient that fades from milky white at the cuticle into glossy holiday red at the tips offers a softer alternative to a solid red manicure. The blended color feels festive, but its gradual transition keeps the look elegant and wearable.
The ombré effect can suit almond, oval, or square nails, and it looks particularly graceful when the fade follows the nail’s length. Because the design already carries two strong colors, it usually needs no extra decoration; a smooth finish lets the gradient remain the main feature.
Blending the two shades
For a salon set, ask for a soft transition without a visible dividing line. At home, a makeup sponge can help dab the colors together in light layers, allowing each pass to dry before building the blend so the result stays smooth rather than thick.
- Choose a milky white that blends naturally with your base tone.
- Build the red gradually at the tips for a soft fade.
- Use a glossy top coat to even out the final surface.
The finished manicure feels like a festive color story rather than a graphic pattern.
8. Matte Cherry Nails with White Outline Art

Matte cherry polish gives this manicure a velvety, modern base, while delicate raised white lines trace the shape of each nail. The outline adds definition without filling the surface with a separate motif, so the saturated red stays in focus.
This look works well when you want a coordinated set that feels a little more artistic than plain polish. The white borders can follow the nail’s natural curve or frame a narrow strip of negative space, creating a fine, clean contrast against the matte finish.
Creating a clean outline
Apply the cherry color evenly and let it dry before drawing the white lines with a fine brush or raised nail-art gel. Keep the outline consistent in thickness, and avoid placing the lines too close to the sidewalls, where they may be harder to keep crisp.
- Use a matte top coat on the red base for a soft finish.
- Keep the white line thin and continuous where possible.
- Try the detail on accent nails first if you prefer a quieter look.
The contrast between matte color and raised white art gives a simple palette a refined, graphic edge.
9. Cream Nails with a Cozy Knit Accent

Pair cream-white nails with a few ruby-red fingers for a manicure inspired by cozy winter knits. On one or two nails, raised white cable-knit lines add a tactile sweater detail that feels seasonal without requiring every finger to carry a pattern.
The mix of soft neutrals and rich red keeps the design balanced. Use the textured accent on a ring or middle finger, and leave the other cream nails simple so the raised pattern has room to stand out. This idea works especially well when you enjoy a more noticeable, dimensional manicure.
Building the sweater detail
Start with a smooth cream base, then use white builder gel or a suitable textured nail-art product to create the cable lines. Work in small sections and cure or dry as directed, since raised details need careful application to keep their shape.
- Limit the knit pattern to one or two nails.
- Use ruby red as a solid accent rather than adding extra motifs.
- Keep the cream shade soft to complement the cozy texture.
The finished set has the charm of a winter sweater while retaining a polished, coordinated look.
10. Glossy Red Nails with Tiny White Bows

A glossy crimson manicure becomes quietly festive with a tiny white bow painted near each cuticle. The small ribbon detail has a sweet holiday feel, while the uncluttered red base keeps the set from looking overly themed.
This design can work on short nails as long as the bows remain fine and compact. On longer nails, you have more space to shape the loops and tails, but it’s still best to keep the motif small so the high-shine red remains the dominant feature.
Painting a dainty bow
Apply an even crimson base and let it dry completely. Use a fine brush or nail-art pen to make two small loops, a center knot, and short ribbon tails; if drawing every bow feels challenging, place the design on just one or two accent nails.
- Use opaque white so the bow shows clearly against red.
- Position the motif close to the cuticle without touching the skin.
- Keep the bows similar in scale for a coordinated set.
A glossy top coat brings everything together and gives the red color an especially polished finish.
11. Jewel Red Nails with White Half-Moons
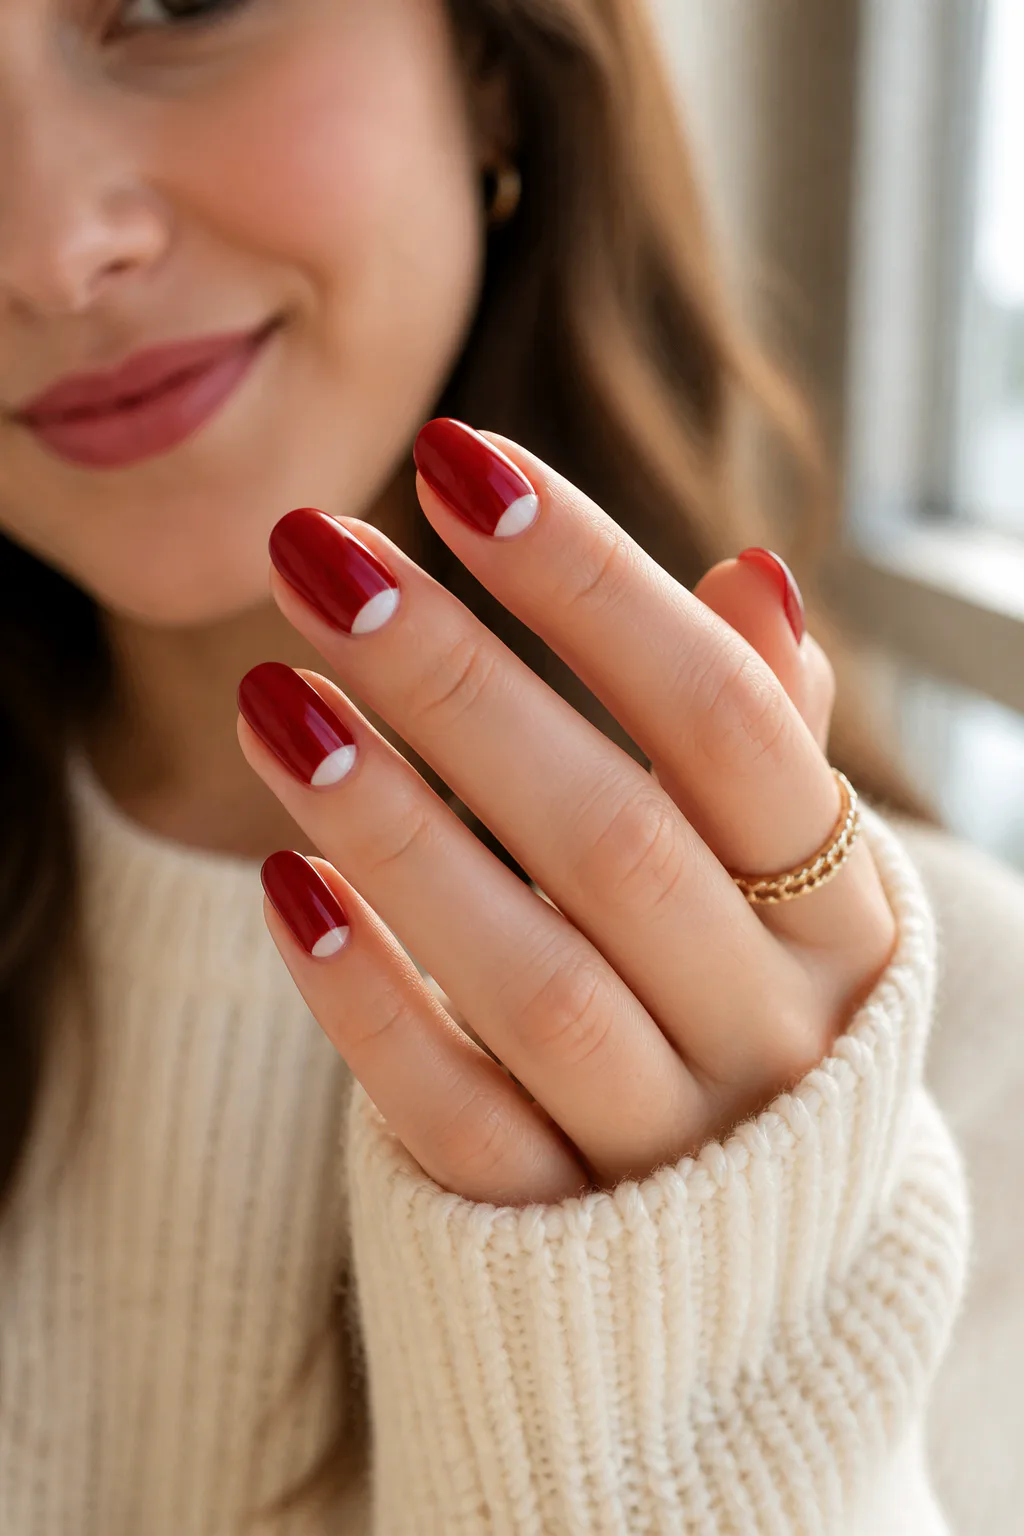
A crisp white half-moon at the cuticle gives jewel-red nails a retro-inspired shape. Leaving the small curved area white creates a clean contrast, while the high-shine red across the rest of the nail keeps the manicure rich and unmistakably festive.
The half-moon can be painted white or left as a neat negative-space detail, depending on the finish you prefer. It tends to look especially balanced on oval or almond shapes, but the curve can be adjusted to suit shorter, squarer nails too.
Shaping the cuticle curve
Use a guide or a steady fine brush to create a smooth arc before filling in the red. Take care not to flood the cuticle area, and allow the layers to dry before applying top coat so the boundary stays crisp instead of smudging.
- Keep the white crescent similar in size across each nail.
- Choose a jewel-toned red with a glossy finish.
- Use thin coats to preserve a clean curve and smooth surface.
The result is a classic shape with a festive palette, offering a little detail without added decoration.
12. Red Nails with a Golden Constellation

Deep glossy red provides a dramatic backdrop for delicate white starburst dots connected by fine metallic lines. The constellation-inspired detail brings a touch of sparkle and wonder while keeping the palette controlled and the pattern light.
Gold linework adds warmth against the red, though the design can be adapted with another fine metallic shade if that better suits your style. You can create a small constellation on every nail or reserve the pattern for a couple of accent fingers for a more understated finish.
Keeping the linework delicate
Begin with a smooth, fully dry red base, then map out a few small points before connecting them with very thin lines. Add white starburst details sparingly so they read as tiny accents rather than large snowflakes or an all-over celestial print.
- Use just a few connected points on each decorated nail.
- Keep metallic lines fine and avoid crossing them densely.
- Repeat one simple motif for a cohesive set.
This design feels festive and slightly luminous, with the red base keeping it grounded and wearable.
13. Red and White Nails with Silver Foil Lines
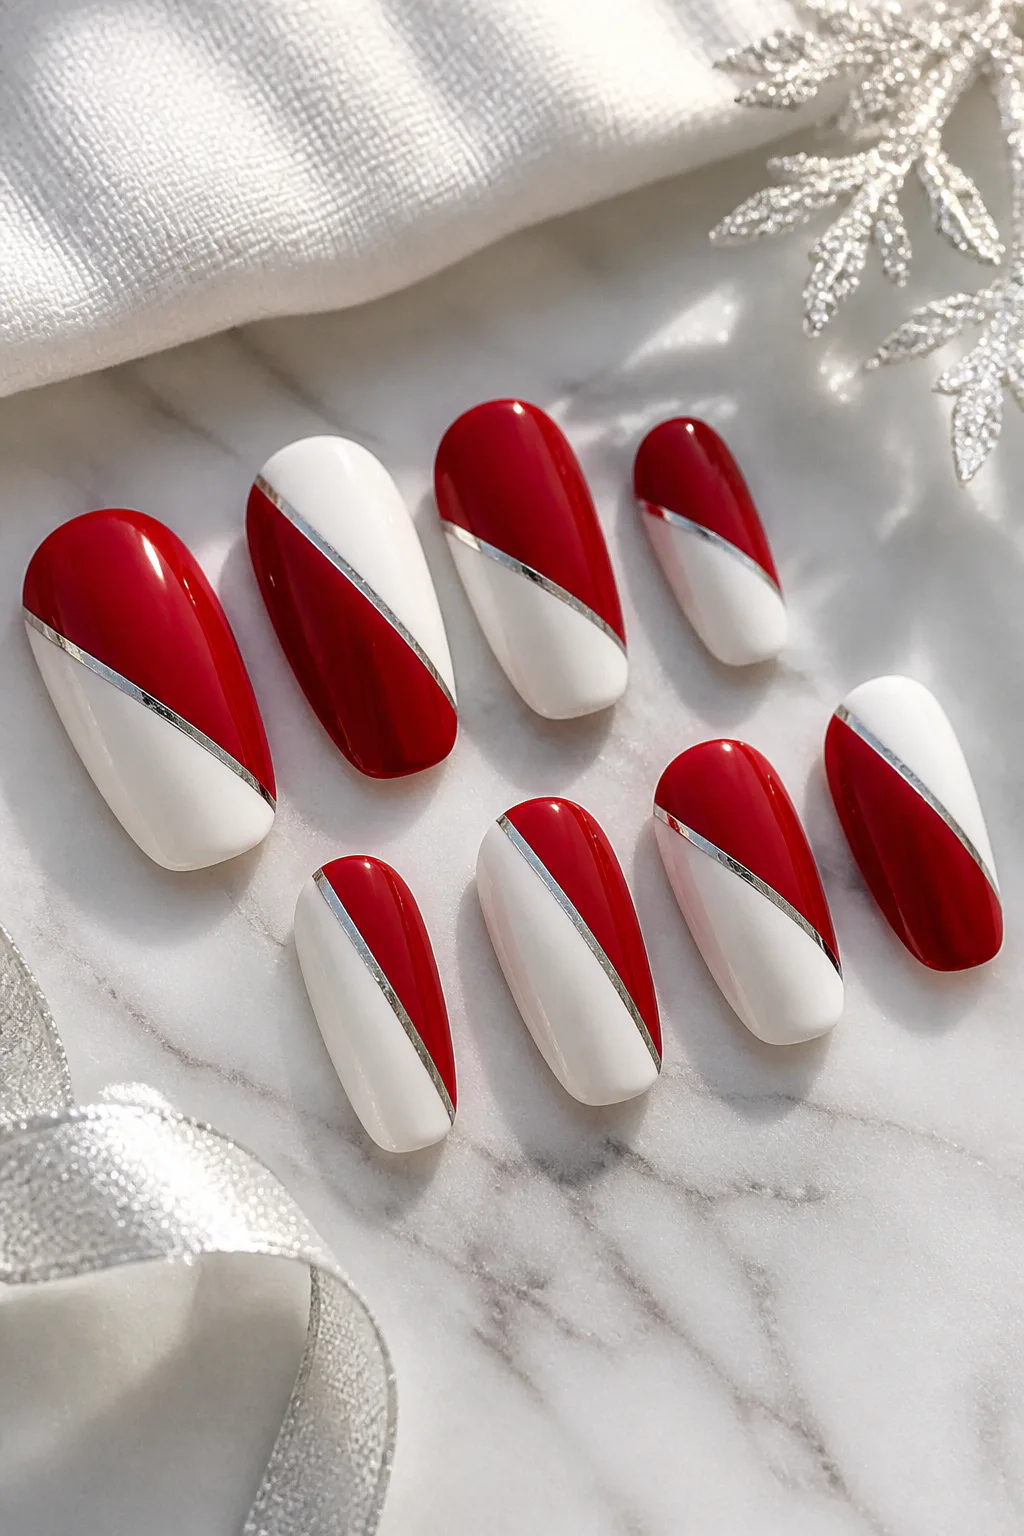
Split each nail into red and white sections, then separate the colors with a narrow silver foil stripe. The clean color blocking gives the manicure a modern, graphic feel, while the metallic line adds a small reflective detail instead of a large glitter accent.
The division can run vertically or diagonally, depending on the look you prefer. A diagonal split feels dynamic, while a straight line creates a more orderly finish. Keep the sections simple and the stripe slim so the red-and-white contrast remains the focus.
Making the color block crisp
Plan the dividing line before applying color, and use tape or a steady detail brush to define the two sections. Let each shade dry fully before placing the foil, then seal carefully with top coat so the edge stays smooth and the metallic accent remains in place.
- Choose a rich red and a clean white for clear contrast.
- Keep the silver foil stripe narrow and centered on the division.
- Repeat the same direction across the set for a unified look.
This polished design is a sleek way to wear holiday colors with a subtle, light-catching finish.
Final Thoughts
Red and white Christmas nails can be as understated or as detailed as you like. A fine snowflake, a milky French tip, or one small bow keeps the look simple, while velvet polish, cable-knit texture, and metallic linework add more dimension.
Choose a design that feels comfortable for your nail length and the level of detail you enjoy. You can also adapt nearly any idea by using fewer accent nails or simplifying the pattern, creating a festive manicure that feels polished and personal.