Simple Christmas Nails: 20 Looks Worth Saving (With Shade Picks)
Simple Christmas nails rely on one good color and, at most, one small detail. They take minutes, suit work and family gatherings, and are easy to touch up when holiday chores chip a nail. Here are 20 looks, each with polish shades to use and a short how-to.
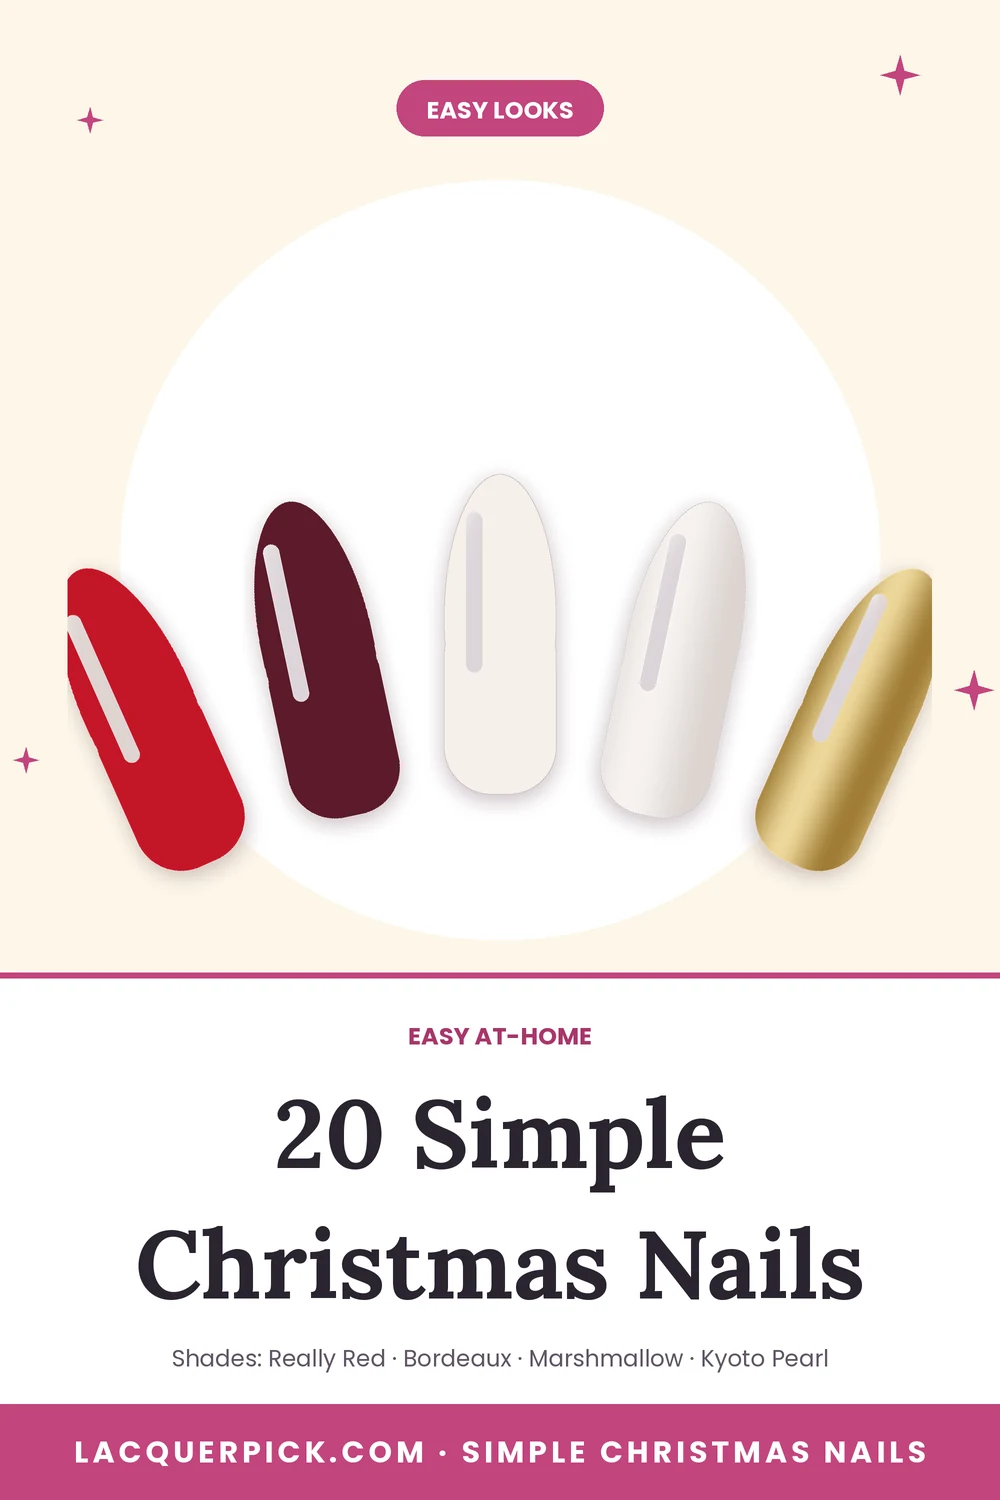
The illustrations show each look before you paint. Colors are close approximations of the named shades, and availability varies by retailer, so check the shade name before buying.
What you need
- Base coat and top coat
- One festive shade (red, wine, white, pearl or gold)
- Optional: a dotting tool or the end of a bobby pin for a single detail
One-color simple Christmas nails
Pick the finish that matches the mood: crème looks classic, pearl looks soft and metallic looks festive.
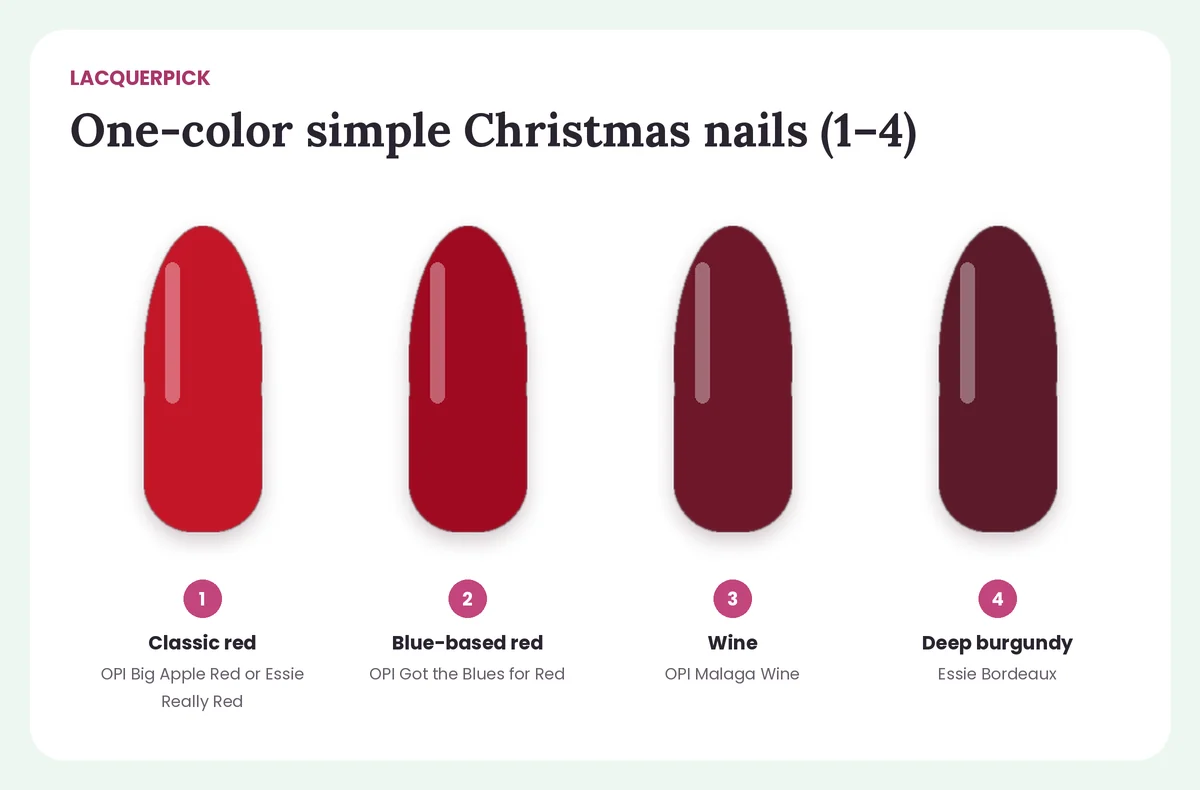
1. Classic red
Polish to use: OPI Big Apple Red or Essie Really Red
The simplest Christmas look of all. Two thin coats and a glossy top coat; nothing else needed.
Photo: @nail.avenue.perth on Instagram. Shade shown: Classic red.
2. Blue-based red
Polish to use: OPI Got the Blues for Red
A cooler red that looks especially polished on short nails and flatters pink undertones.
3. Wine
Polish to use: OPI Malaga Wine
Deep wine is quieter than red and lasts visually through the whole month.
4. Deep burgundy
Polish to use: Essie Bordeaux
A rich burgundy crème. Two coats give full, glossy depth.
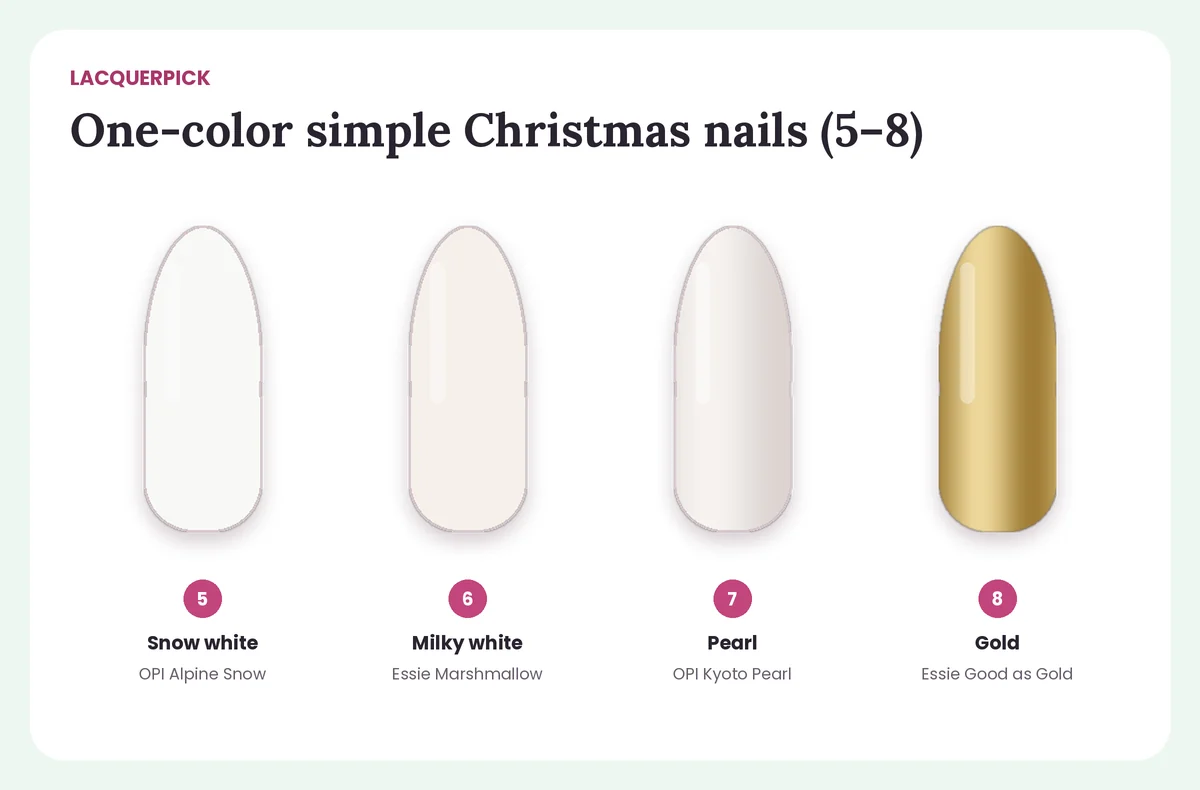
5. Snow white
Polish to use: OPI Alpine Snow
Bright white in thin coats. Let each coat set for two to three minutes to avoid drag marks.
6. Milky white
Polish to use: Essie Marshmallow
A sheer, soft white that looks clean and wintry and is forgiving to apply.
7. Pearl
Polish to use: OPI Kyoto Pearl
Pearl shimmer catches fairy lights and hides brush strokes.
8. Gold
Polish to use: Essie Good as Gold
Metallic gold on all nails for a festive look with no nail art at all.
Each finish behaves differently. Our guide to nail polish finishes explains crème, shimmer, pearl and metallic.
Simple Christmas nails with one detail
Add just one small element to a base color. Each of these takes under five extra minutes.
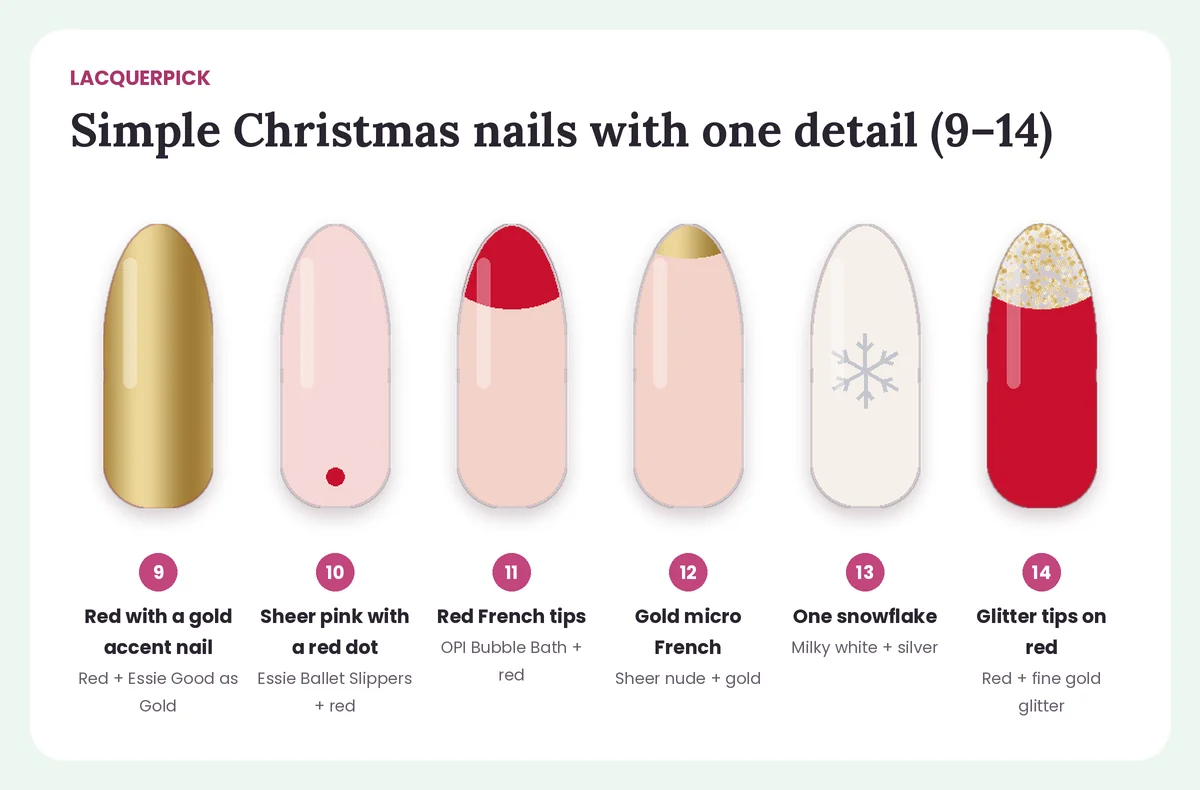
9. Red with a gold accent nail
Polish to use: Red + Essie Good as Gold
Paint the ring finger gold and the rest red.
10. Sheer pink with a red dot
Polish to use: Essie Ballet Slippers + red
One tiny red dot near the cuticle of each nail. Office-friendly and quick.
11. Red French tips
Polish to use: OPI Bubble Bath + red
A sheer base with thin red tips; use tip guides if freehand is tricky.
Photo: @nailsbyalsn on Instagram. Shade shown: Red French tips.
Video: @voloshka_purple on TikTok. Shade shown: Red French tips.
12. Gold micro French
Polish to use: Sheer nude + gold
An ultra-thin gold edge. Looks expensive, takes minutes.
Photo: @bycheznails on Instagram. Shade shown: Gold micro French.
13. One snowflake
Polish to use: Milky white + silver
Draw one small snowflake on the ring finger with a striping brush.
Photo: @nailed_byemily on Instagram. Shade shown: One snowflake.
14. Glitter tips on red
Polish to use: Red + fine gold glitter
Dab glitter on the tips only; it hides tip wear.
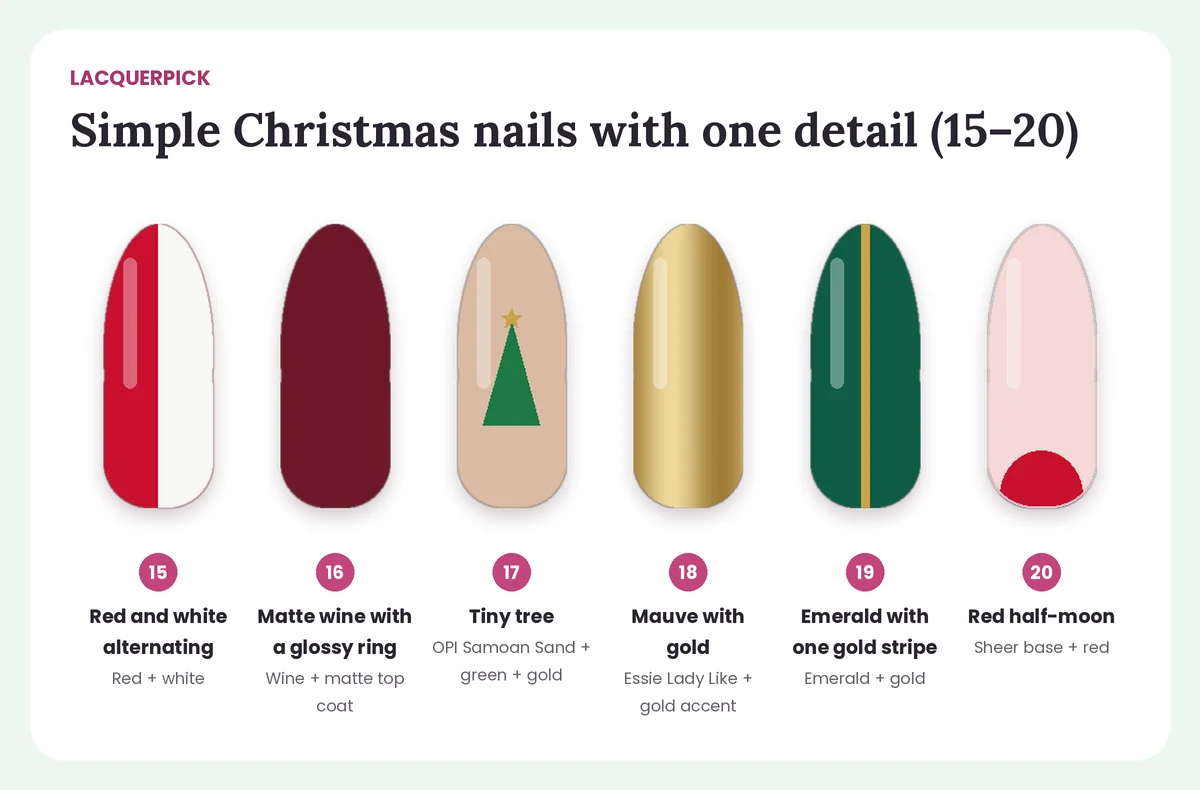
15. Red and white alternating
Polish to use: Red + white
Alternate the two colors across each hand. No art skills needed.
16. Matte wine with a glossy ring finger
Polish to use: Wine + matte top coat
Matte top coat on four nails, glossy on one.
17. Tiny tree
Polish to use: OPI Samoan Sand + green + gold
A small green triangle and a gold dot on a nude base.
18. Mauve with gold
Polish to use: Essie Lady Like + gold accent
A muted mauve with one gold nail: festive but quiet.
19. Emerald with one gold stripe
Polish to use: Emerald + gold
One fine vertical gold line down the center of the accent nail.
20. Red half-moon
Polish to use: Sheer base + red
A red crescent at the cuticle over a sheer base.
Quick reference: every look and the polish to use
| Look | Polish to use | Difficulty |
|---|---|---|
| 1. Classic red | OPI Big Apple Red or Essie Really Red | Easy |
| 2. Blue-based red | OPI Got the Blues for Red | Easy |
| 3. Wine | OPI Malaga Wine | Easy |
| 4. Deep burgundy | Essie Bordeaux | Easy |
| 5. Snow white | OPI Alpine Snow | Easy |
| 6. Milky white | Essie Marshmallow | Easy |
| 7. Pearl | OPI Kyoto Pearl | Easy |
| 8. Gold | Essie Good as Gold | Easy |
| 9. Red with a gold accent nail | Red + Essie Good as Gold | Easy |
| 10. Sheer pink with a red dot | Essie Ballet Slippers + red | Easy |
| 11. Red French tips | OPI Bubble Bath + red | Medium |
| 12. Gold micro French | Sheer nude + gold | Medium |
| 13. One snowflake | Milky white + silver | Medium |
| 14. Glitter tips on red | Red + fine gold glitter | Easy |
| 15. Red and white alternating | Red + white | Easy |
| 16. Matte wine with a glossy ring finger | Wine + matte top coat | Easy |
| 17. Tiny tree | OPI Samoan Sand + green + gold | Medium |
| 18. Mauve with gold | Essie Lady Like + gold accent | Easy |
| 19. Emerald with one gold stripe | Emerald + gold | Medium |
| 20. Red half-moon | Sheer base + red | Medium |
How to paint the designs in this post
Most of the looks above use a handful of techniques. Here is how to do each one with regular polish at home.
Dots and stars
Pour a drop of polish onto foil and dip the dotting tool into it rather than into the bottle. Re-dip every two or three dots so they stay the same size. For stars, use star-shaped nail stickers or press a small star stud into wet top coat.
French and metallic tips
Paint your base and let it dry for at least five minutes. Load a thin striping brush with the tip color, rest your painting hand on the table, and rotate the finger rather than the brush as you sweep from one side of the free edge to the other. For a micro French, keep the line no wider than a grain of rice. Tip-guide stickers or a strip of tape give a cleaner line if freehand is difficult; peel them while the polish is still wet.
Snowflakes
Use a thin striping brush with white or silver polish. Draw a vertical line, then two diagonal lines crossing it in the center to make six arms. Add a tiny V at the end of each arm and a dot in the center with a dotting tool. Small snowflakes look neater than large ones, so keep each one to about half the nail width.
Glitter tips and glitter fades
Wipe most of the glitter polish off the brush, then dab (do not stroke) it onto the free edge. For a fade, dab heavily at the tip and with less polish each time you move toward the cuticle. A makeup sponge gives a softer gradient. Glitter is textured, so finish with two layers of glossy top coat, letting the first set before the second.
Small motifs (holly, trees, bows and hearts)
Keep motifs small and in the center third of the nail. Build them from simple shapes: a holly leaf is two teardrops, a tree is a triangle, a heart is two dots pulled into a point, and a bow is two small triangles meeting at a dot. Use a dotting tool for berries and centers and let each color dry before adding the next.
Thin stripes
Use striping tape or a long, thin striping brush. Place your elbow on the table to steady your hand, start the stripe at the cuticle and pull toward the tip in one stroke. One thin vertical stripe makes short nails look longer.
Half-moons
Place a hole-punch reinforcement sticker over the lunula (the pale half-moon near the cuticle) once the base is dry, paint the accent color above or below it, and peel the sticker off while the polish is wet. You can also paint the crescent freehand with a small brush.
How to paint simple Christmas nails in 20 minutes
- Remove old polish, shape the nails and wipe the nail plate with remover.
- Apply one thin base coat.
- Apply two thin coats of your main color, letting each set for two to three minutes.
- Add your one detail with a dotting tool or thin brush.
- Seal with a glossy top coat, capping the free edge.
For a faster dry, see our tips on making nail polish dry faster.
Save these ideas for later
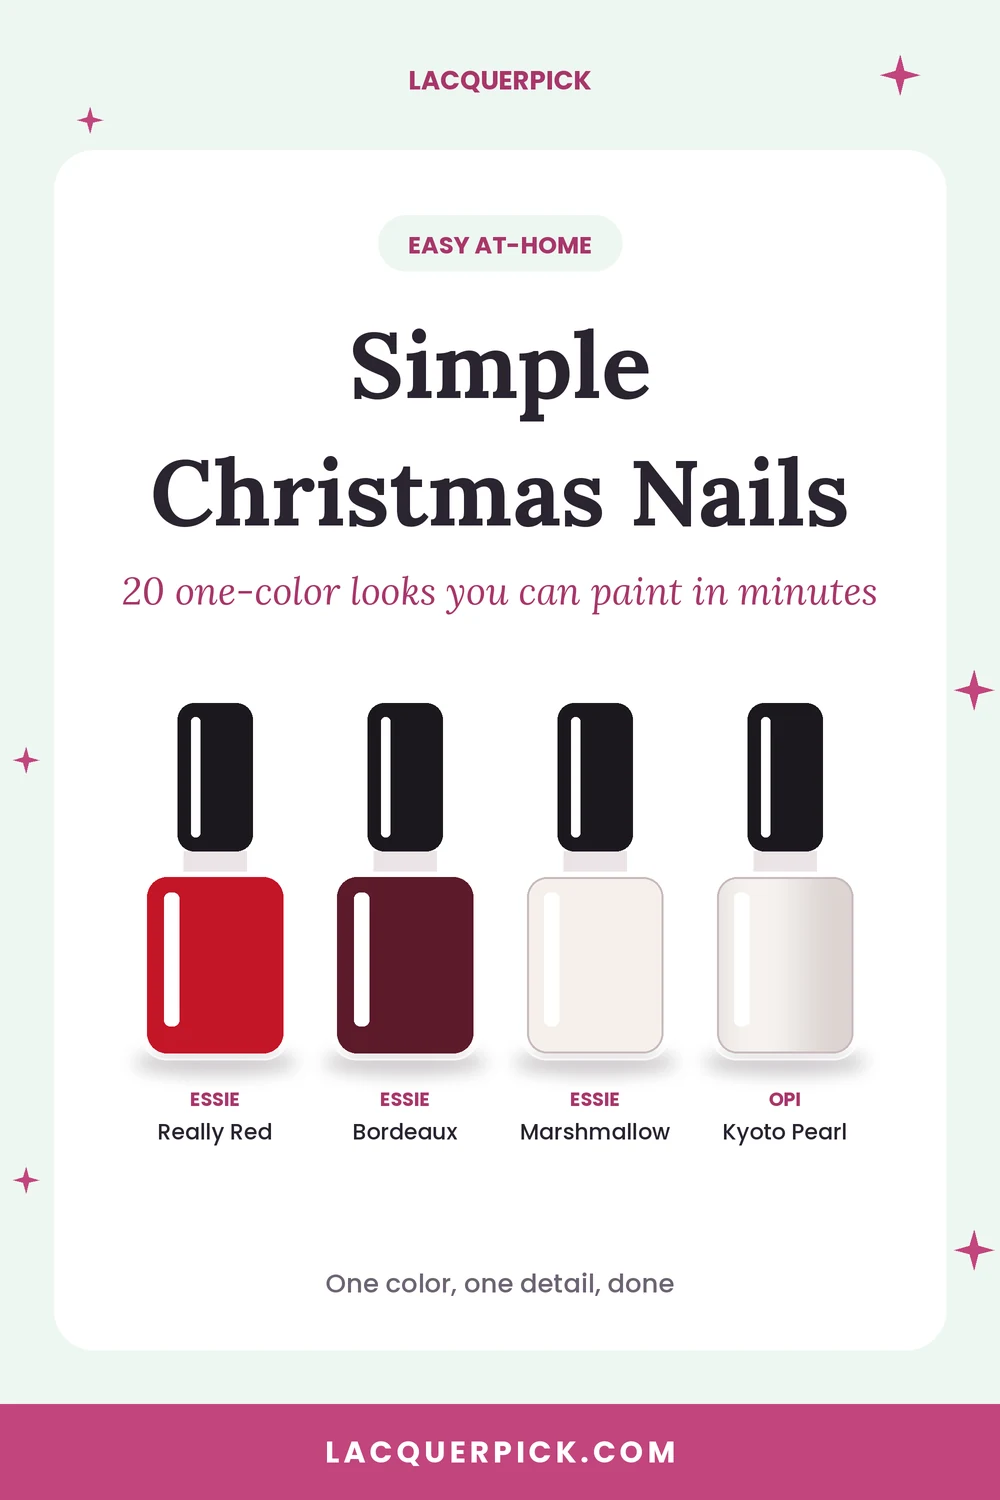
Pin this graphic to your nail board so you have the shade list on hand when you shop.
More holiday nail ideas
FAQs
What is the simplest Christmas nail look?
A solid glossy red. It needs no nail art and reads as festive immediately.
Are simple Christmas nails OK for work?
Yes. Sheer pink with a small red dot, a deep wine crème or a pearl white all look festive without being loud.