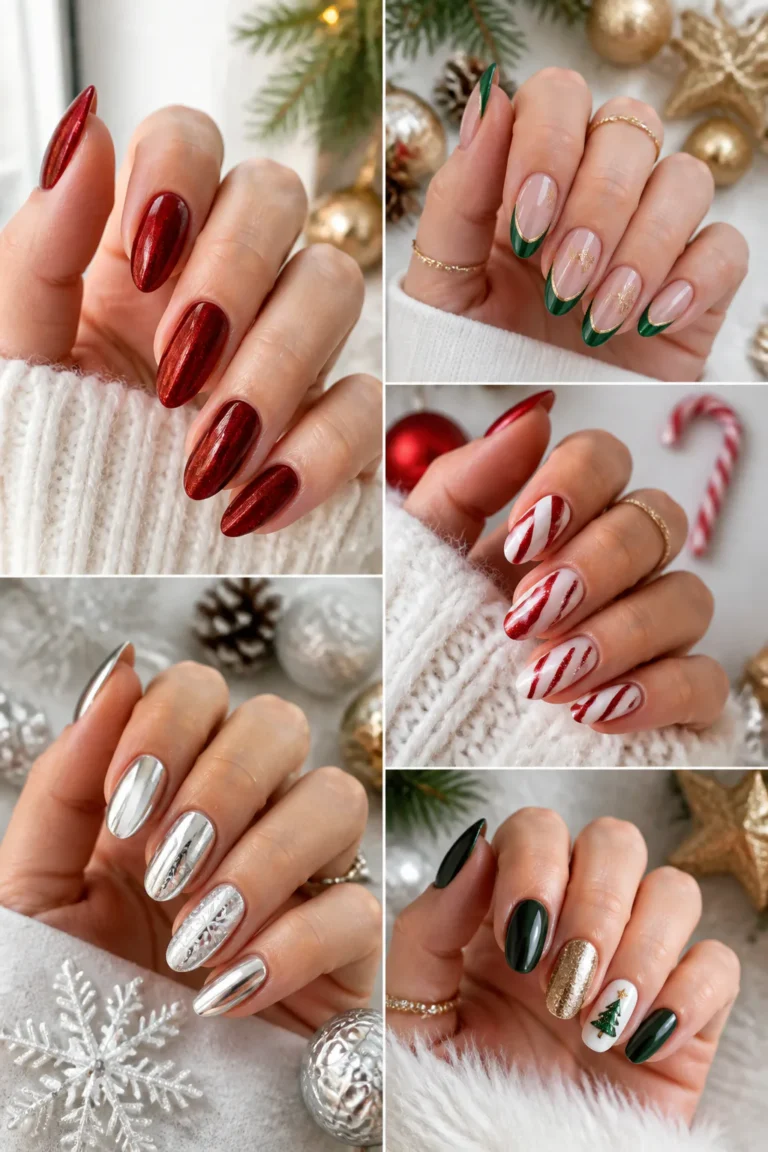
14 Stunning Christmas Tree Nail Ideas
Christmas tree nails can be subtle, sparkly, playful, or full-on dimensional. These ideas use the familiar evergreen shape as a starting point, with finishes and details that make the design feel personal rather than predictable.
Whether you prefer a clean manicure for everyday wear or a statement set for a holiday party, you’ll find options for different skill levels and styles. Some designs work on every nail, while others shine as a single accent against a simpler manicure.
For the crispest results at home, start with a smooth base and let each layer dry before adding details. A fine liner brush, dotting tool, nail tape, or a few carefully placed embellishments can help create a festive look without requiring the same technique for every idea.
1. Draw Minimalist Line-Art Christmas Trees
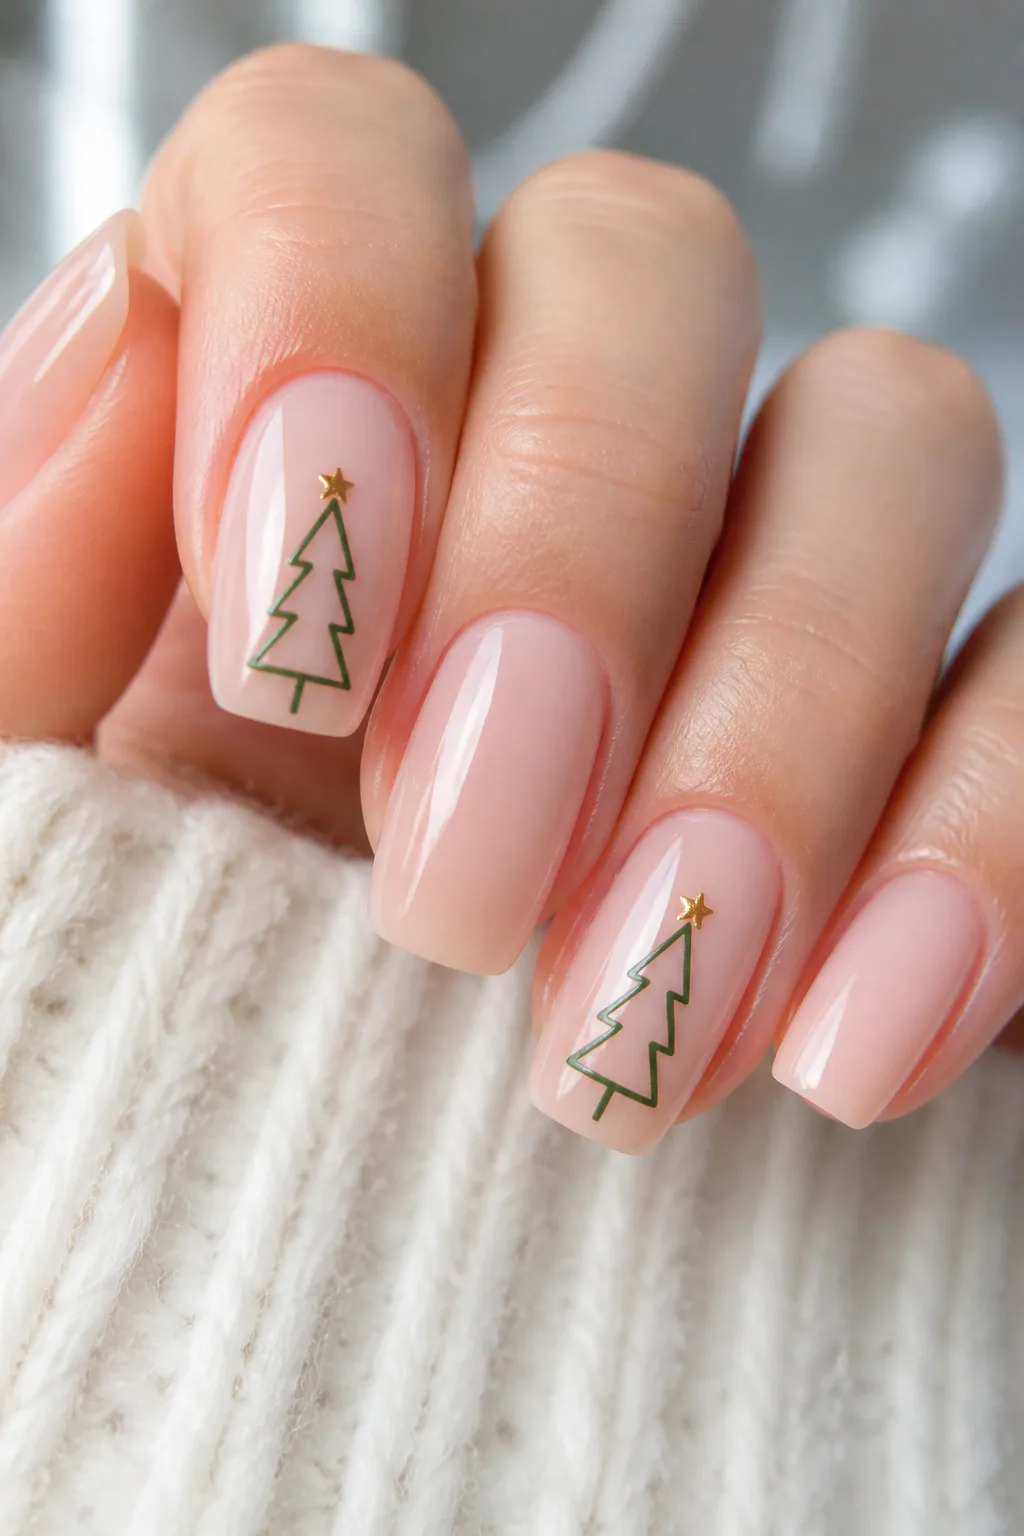
A simple outline of a tree brings a festive touch to a nude, sheer pink, or milky-white manicure without covering the whole nail. Use a fine green line to sketch a narrow triangle, a loose zigzag, or a single continuous branch-like shape. The open design feels light and modern, making it a lovely choice if you like holiday nail art that stays understated.
Place the tree on one or two accent nails, or repeat a smaller version across the set for a coordinated look. A tiny gold star at the top adds a bright focal point, while a bare or translucent background keeps the design from feeling crowded.
How to pull it off
Work with a liner brush and a small amount of polish so the outline stays fine. Let the green design dry before adding the star, then seal it with top coat.
- Choose a milky base for a soft, delicate effect.
- Keep the tree narrow to suit shorter nails.
- Use a gold dot if a star is difficult to paint.
Video: @bycheznails on Instagram. Shade shown: Island Hopping.
2. Try Emerald Cat-Eye Shimmer Trees
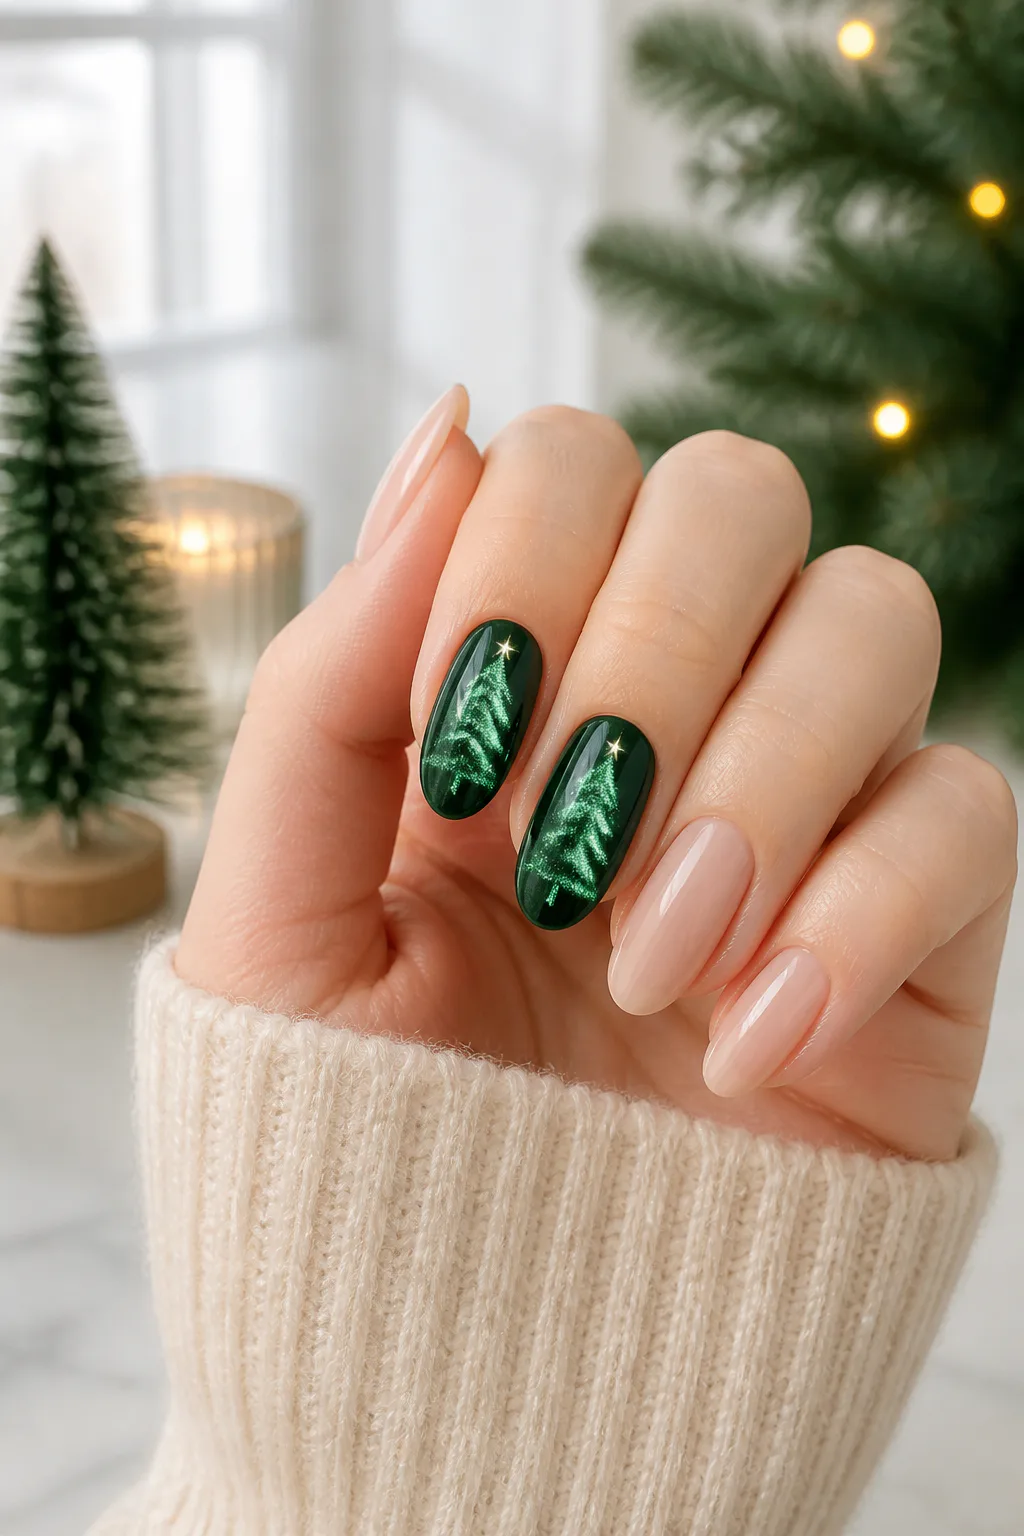
Emerald cat-eye polish gives nails a shifting, velvet-like glow that recalls light moving across evergreen branches. The magnetic shimmer can stand on its own as a tree-inspired manicure, or you can use it to paint a defined tree over a contrasting base. Either way, the finish adds depth without needing lots of separate ornaments or hand-painted details.
This look suits evening gatherings and festive outfits, but it can also feel polished for everyday wear when you keep the color to one or two nails. A sheer neutral manicure beside the emerald accent helps the magnetic effect catch the eye without overwhelming the set.
Design tips
Magnetic polish needs to be shaped while it is still workable, so follow the product’s directions and hold the magnet in place as instructed. If you’re creating a tree, keep the silhouette simple so the shimmer remains the star.
- Pair emerald with nude or soft pink nails.
- Use a dark green base for a richer, jewel-like look.
- Choose a single accent nail for a more subtle finish.
Video: @daily_charme on Instagram. Style shown: emerald cat-eye shimmer trees with rhinestone accents.
3. Create Negative-Space Triangle Trees
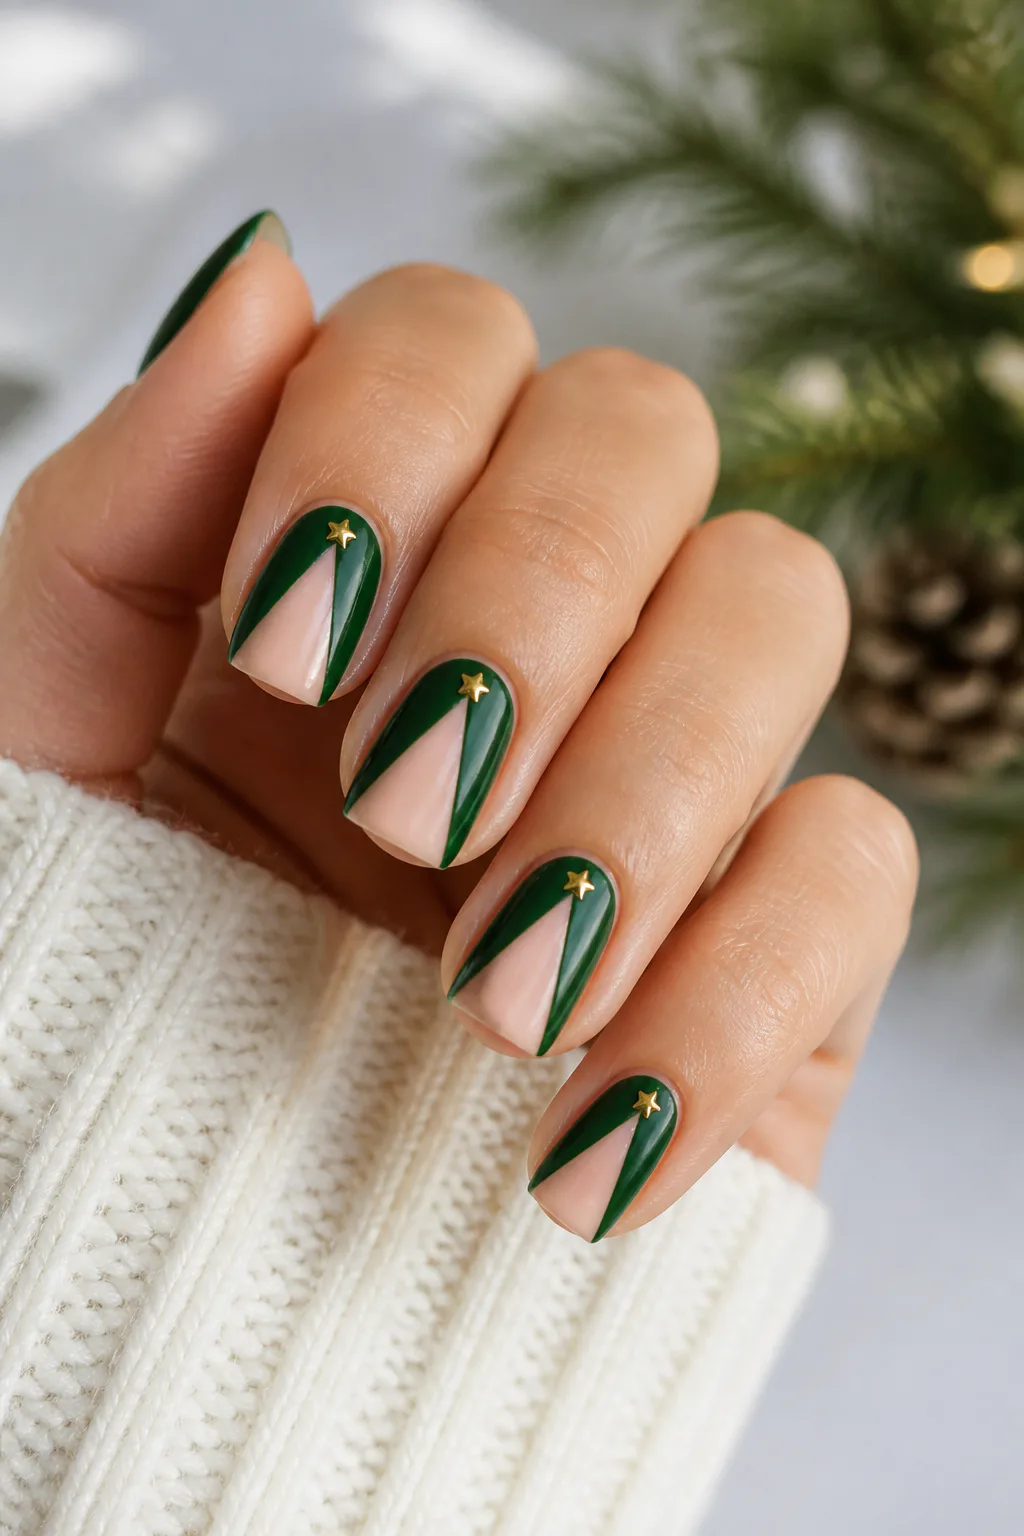
Negative-space triangle trees let your natural or nude base become part of the design. Tape or a stencil marks a crisp triangular shape, and deep pine-green polish around it creates a clean geometric frame. The bare center reads as a modern tree silhouette, offering a graphic alternative to a fully painted evergreen.
This design works well on a single accent nail, especially alongside solid green or neutral polish. It also suits shorter nails because the strong outline gives the tree shape definition without requiring tiny branches, ornaments, or other fine details.
For a crisp outline
Apply the base color and allow it to dry fully before placing tape. Press the edges down carefully, paint the surrounding area, and remove the tape while the polish is still slightly wet to help avoid ragged edges.
- Use narrow tape strips to form a symmetrical triangle.
- Choose a pale base for contrast with pine green.
- Add a small star above the point if you want extra detail.
4. Scatter Glitter Across Forest-Green Nails

Chunky glitter over forest-green polish gives the nails the festive glimmer of ornaments scattered across a tree. Gold and silver create a classic holiday palette, while multicolored pieces add a playful, party-ready finish. You can distribute the sparkle evenly or concentrate it near the tips for a twinkling gradient effect.
Because glitter is already a strong feature, this idea works beautifully across the full set without needing a separate tree illustration. If you prefer a more restrained manicure, use the glitter on one or two nails and keep the rest glossy forest green.
Layering the sparkle
Apply glitter in thin layers so the polish underneath remains visible and the finish does not become overly thick. A careful top coat can smooth the surface and help the glitter catch the light.
- Mix gold and silver for a traditional festive feel.
- Try multicolored glitter for a playful look.
- Keep glitter to accent nails for a more subtle set.
5. Build 3D Rhinestone and Pearl Trees

Turn a simple tree silhouette into a tactile holiday accent by arranging tiny beads, rhinestones, and pearls in a tapered shape. On a neutral base, the embellishments feel elegant and jewel-like; on a red base, they create a richer, more dramatic contrast. Varying the size and finish of the pieces gives the tree dimension, much like ornaments on a real evergreen.
This design is especially suited to a special occasion or a single feature nail. Since raised details can catch on clothing and hair, keeping the embellished tree to one nail can make the manicure easier to wear while still delivering a statement.
Arranging the details
Place the pieces in a narrow tree shape and use a small amount of nail-safe adhesive or gel appropriate for your manicure. Allow the arrangement to set securely, and avoid coating large raised stones with top coat if you want to preserve their shine.
- Use pearls for a softer, classic effect.
- Add colorful rhinestones as tiny ornaments.
- Choose small beads to outline the tree shape.
6. Add Pine Trees to French Tips

A French manicure makes an easy partner for a small evergreen accent. Keep the familiar white or red tips on most nails, then paint a delicate green tree on one or two accent nails. The contrast between a clean French edge and the festive motif creates a manicure that feels seasonal without abandoning a polished, classic look.
You can place the tree just above the smile line, or let its lower branches visually connect with the tip. A sheer pink or nude base gives the design room to breathe, while a matching red tip adds a brighter holiday note.
Balancing the manicure
Keep the tree small enough to complement the French tips rather than compete with them. A fine brush helps with the outline, and a single gold dot at the top can finish the motif neatly.
- Choose white tips for a crisp, traditional pairing.
- Try red tips for a bolder festive combination.
- Use one accent tree if you want a cleaner overall look.
7. Contrast Matte Nails with Glossy Trees

A glossy tree against a matte nude base creates a subtle finish contrast that feels modern and refined. The design relies on texture rather than lots of color, so it is a good option if you want Christmas tree nails that look understated up close and from a distance. A deep green silhouette stands out clearly while the matte background softens the overall effect.
Try the tree on one or two nails and leave the rest matte, or repeat the motif across a neutral set for a cohesive look. The same idea can work with other muted base shades, as long as the glossy design remains easy to see.
Getting the contrast right
Apply the matte finish to the base first and let it dry fully. Paint the tree with glossy polish or apply gloss only over the finished design, taking care not to brush over the surrounding matte surface.
- Use dark green for a clear silhouette.
- Pick a nude base that complements your skin tone.
- Keep the branches simple to emphasize the finish.
8. Pair Plaid Nails with a Pine Accent

Red-and-green tartan brings a cozy, classic holiday pattern to a manicure, while a hand-painted evergreen on an accent nail gives the set a clear focal point. The mix of plaid and pine feels inspired by warm winter fabrics, making it a natural fit for festive gatherings and seasonal outfits.
Because plaid can be visually busy, it helps to reserve the tree for one nail and keep the other designs consistent. A cream or neutral accent background can give the evergreen room to stand apart from the crossing lines and rich colors on the plaid nails.
Keeping the pattern balanced
Build the plaid with thin intersecting lines rather than filling the nail with thick stripes. If freehand lines feel tricky, use a small brush and work slowly, allowing each color to dry before painting across it.
- Use red and green as the main tartan colors.
- Add a thin pale line for definition if desired.
- Keep the tree on a solid, uncluttered background.
9. Paint Pastel Winter Wonderland Trees

Pastel shades offer a softer take on traditional Christmas tree nails. Mint, sage, or baby pink makes a gentle base for frosted white and silver trees, creating the feel of a quiet winter landscape rather than a bold evergreen display. The palette looks especially pretty with a sheer or softly shimmering finish.
This style works well if you enjoy seasonal nail art but prefer cooler, lighter colors. You can place a small tree on an accent nail or repeat simple silhouettes throughout the set, keeping the shapes delicate so the manicure stays airy.
Choosing a soft palette
Pair one pastel base with white or silver details to keep the design cohesive. A fine brush makes narrow tree outlines, while a dotting tool can add snow-like accents without crowding the nail.
- Combine mint with white for a fresh winter look.
- Try sage and silver for a muted, elegant palette.
- Use baby pink for a soft, playful background.
10. Form Trees with Dotted Ombre

Dots of polish can build a charming tree shape without requiring a steady hand for branches. Arrange larger dots near the base and gradually smaller ones toward the top, using shades of green with touches of white or gold. The tapered pattern reads as an evergreen while giving the design a playful, pointillist texture.
A dotting tool makes the pattern easier to control, but the end of a small tool can work for simple dots too. This idea suits a neutral base and can be scaled down for shorter nails by using fewer dots and keeping the tree narrow.
Creating the tapered shape
Map out the tree with a light touch before adding polish, then place each row with a little space between dots. Varying the green tones adds depth, while a gold dot at the top can serve as a star.
- Start with the largest dots at the bottom.
- Gradually reduce dot size toward the tip.
- Mix in white or gold for a festive accent.
11. Light Up Trees with Glow-in-the-Dark Details

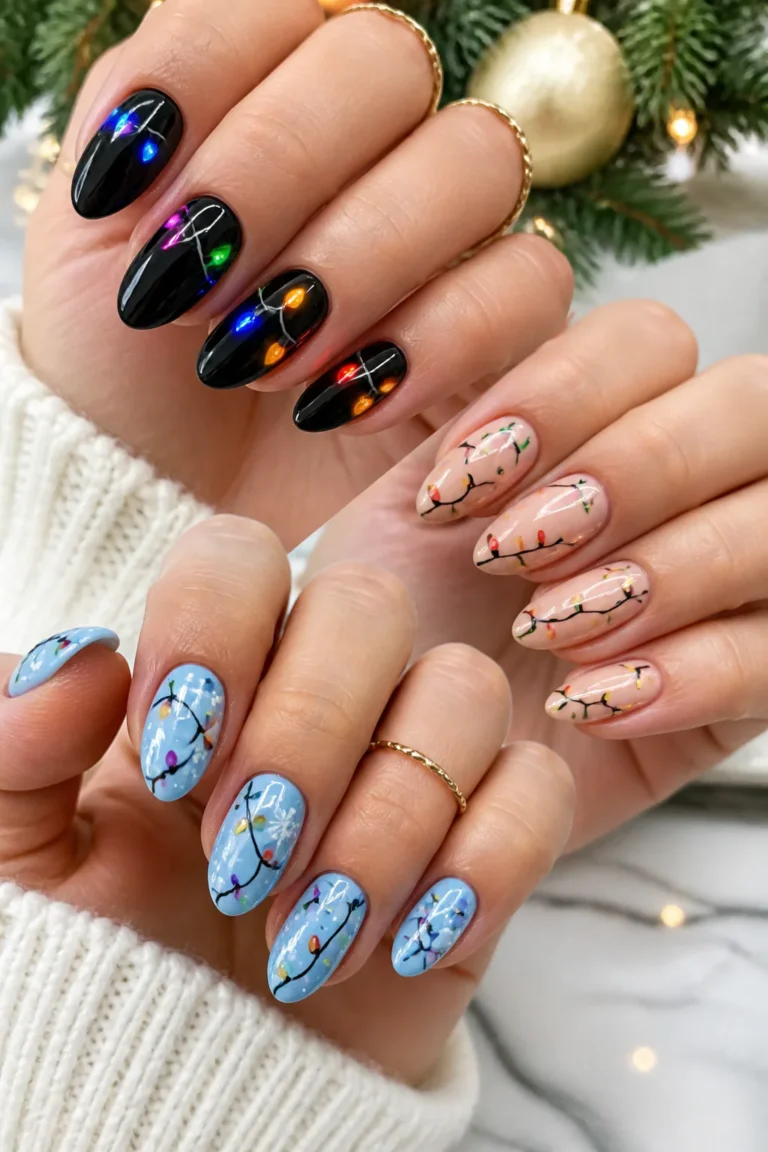
A dark night-sky base gives a Christmas tree design a dramatic backdrop, while bright dots suggest fairy lights winding around the branches. Midnight blue or black makes the green silhouette stand out, and neon or metallic accents add color and sparkle. The result feels playful and especially suited to a party manicure.
You can keep the tree simple and let the dots provide most of the detail, or add a few tiny stars around it to suggest a winter night. Glow-in-the-dark polish can be used for the lights if available, while regular bright polish still creates a lively look.
Adding the lights
Paint the tree first and let it dry before placing the light dots in a loose winding line. Use a dotting tool or the tip of a fine brush, and check that each accent remains visible against the dark background.
- Choose midnight blue for a softer night-sky base.
- Use neon dots for a vivid, playful effect.
- Try metallic lights for a more polished finish.
12. Add Gold Foil Evergreen Silhouettes

Gold foil flakes create a gilded tree silhouette with an irregular, handmade finish. Press the flakes into a triangular shape against a green or clear base, letting the broken edges give the design a little texture. The metallic surface catches the light and feels festive without requiring a detailed painted outline.
This idea can be adapted to suit different styles: a clear background keeps the look light, while deep green makes the gold stand out dramatically. Use it on a single accent nail for a statement, or repeat the small foil trees across a set for a coordinated manicure.
Shaping the foil
Arrange the flakes carefully over a tacky layer or with suitable nail-art adhesive, following the product directions. Press gently with a tool rather than dragging the foil, then seal the design to help keep the pieces in place.
- Use a clear base for a delicate, airy effect.
- Choose deep green for strong gold contrast.
- Keep the silhouette tapered toward the top.
13. Make Sweater-Texture Christmas Trees
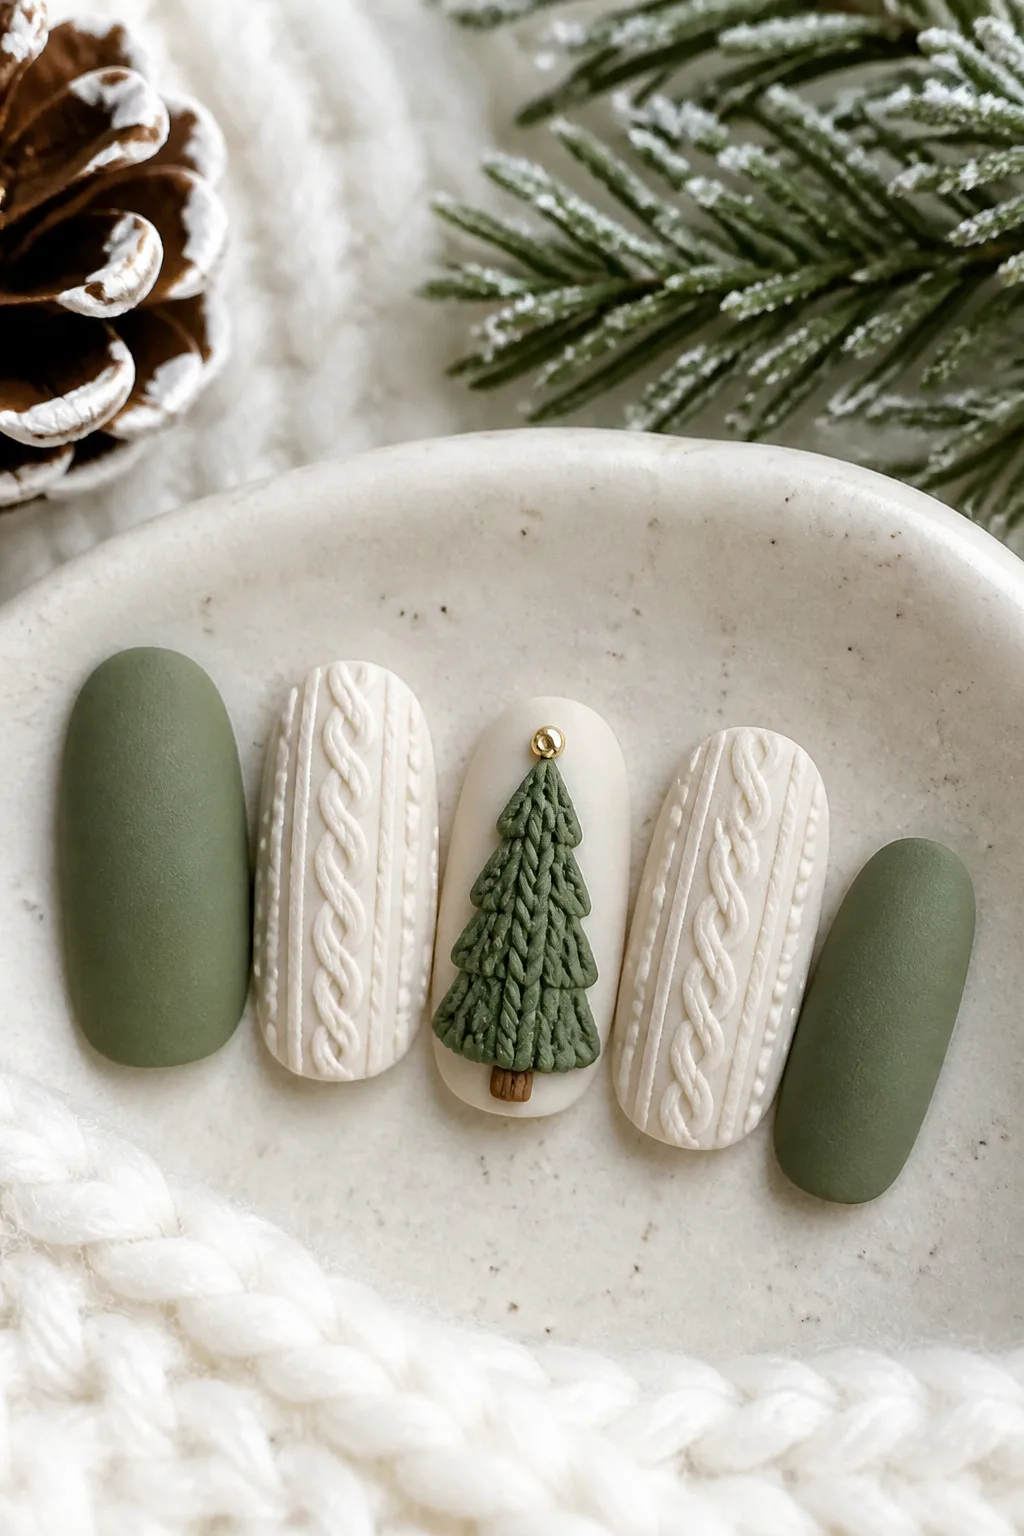
Raised cable-knit details bring the cozy look of a winter sweater to nail art. Add a textured green tree on an accent nail to connect the pattern with the Christmas theme, while keeping the surrounding nails in a soft neutral or coordinating green. The combination feels tactile and seasonal, especially in a matte finish.
Texture can make a design look more intricate even when the colors stay simple. Since raised details are easier to appreciate on a feature nail, a single sweater-style tree can balance the set without making every nail feel busy.
Building the cozy effect
Use a fine brush to create raised lines and small cable-inspired shapes, following the direction of the tree. Work in controlled sections and allow the texture to set as directed so the pattern stays defined.
- Choose a muted green for a soft, cozy look.
- Pair the tree with a neutral sweater-pattern nail.
- Keep raised details confined to an accent nail.
Photo: @una_mae_salon on Instagram. Style shown: dark green cable-knit sweater texture with Christmas tree accents.
14. Top Trees with 3D Bows or Charms

A sculptural red bow or a small gold star charm can turn a painted evergreen into a festive focal point. Paint a green tree on a neutral or contrasting base, then place the decoration at its tip to give the design a finished, gift-like touch. The detail is simple in concept but adds noticeable dimension.
This look works best when the charm complements the tree instead of competing with it. A red bow gives the manicure a playful feel, while gold creates a more classic finish. Keep other nails relatively simple so the raised accent has room to stand out.
Securing the finishing touch
Choose a charm sized for the nail and attach it with nail-safe adhesive or the appropriate product for your manicure. Press it into place carefully, let it set, and avoid placing it too close to the edge where it may catch.
- Choose a red bow for a cheerful, gift-inspired look.
- Use a gold star for a classic tree-top detail.
- Keep the charm on one accent nail for easier wear.
Video: @daily_charme on Instagram. Style shown: emerald green nails with 3D gold bow charms and rhinestones.
Final Thoughts
Christmas tree nails can be as minimal or as detailed as you like, from fine line-art and negative space to glitter, foil, and raised embellishments. Choosing one technique that suits your comfort level—and limiting the boldest details to an accent nail—can make the look feel festive while still fitting your everyday style.
Use these ideas as a starting point and adjust the colors, scale, and finish to suit your nails. A small evergreen, a little shimmer, or a single star can be all it takes to bring a touch of holiday spirit to your manicure.