15 Stunning Christmas Lights Nails Ideas
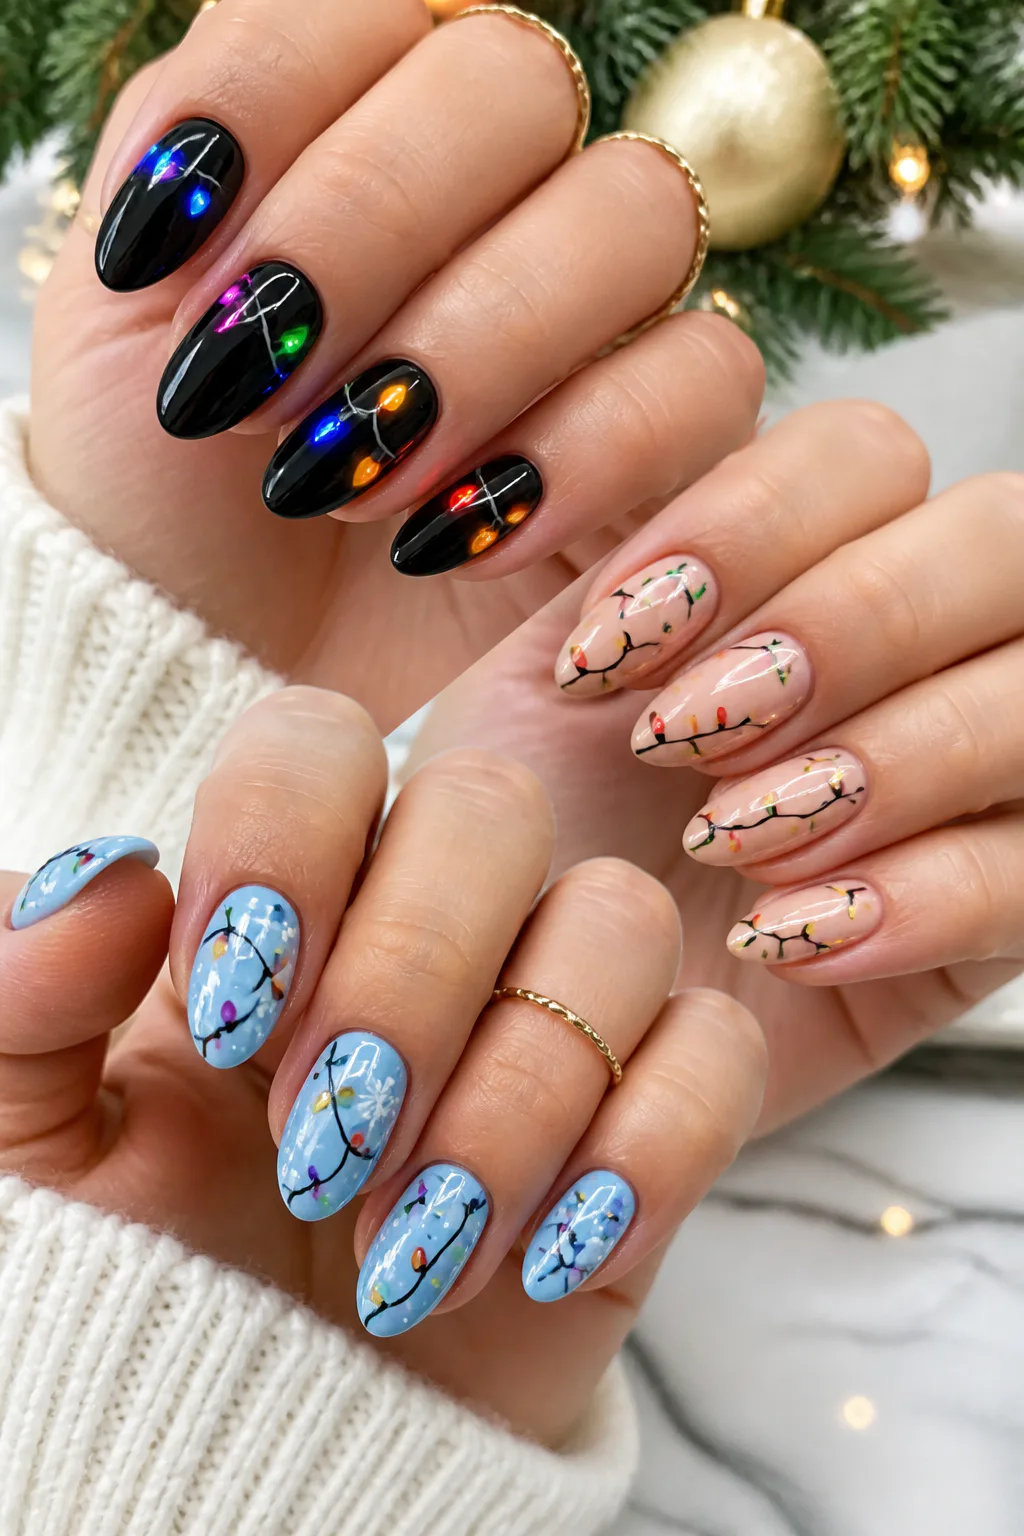
Christmas lights nails bring the familiar glow of holiday décor to your manicure, whether you love a subtle seasonal detail or a bold, colorful design. The key is pairing the bulbs and wire with a base that suits your style, from sheer pink to midnight blue.
These ideas range from delicate hand-painted accents to glittery, textured looks, with options for short and long nails alike. You can feature the design on every nail or keep it to one or two accent fingers alongside a classic holiday color.
If you’re doing your nails at home, a dotting tool, fine nail-art brush, or toothpick can help create the tiny details. For intricate lines, raised gel, or a long-wearing finish, bring a reference photo to your nail appointment and ask your technician which version will work best with your preferred shape and length.
Quick Answer
Christmas lights nails show a string of tiny colored bulbs across the nail. The easiest versions are delicate lights on a nude base, pastel lights on milky pink and light-string French tips; for a bolder look, paint neon bulbs on black, chunky retro bulbs or a midnight ombré; for texture, try floating glitter bulbs or raised 3D gel lights.
1. Paint Delicate Lights on a Nude Base
Best for: Subtle, everyday festive look
Skill level: Beginner–Intermediate
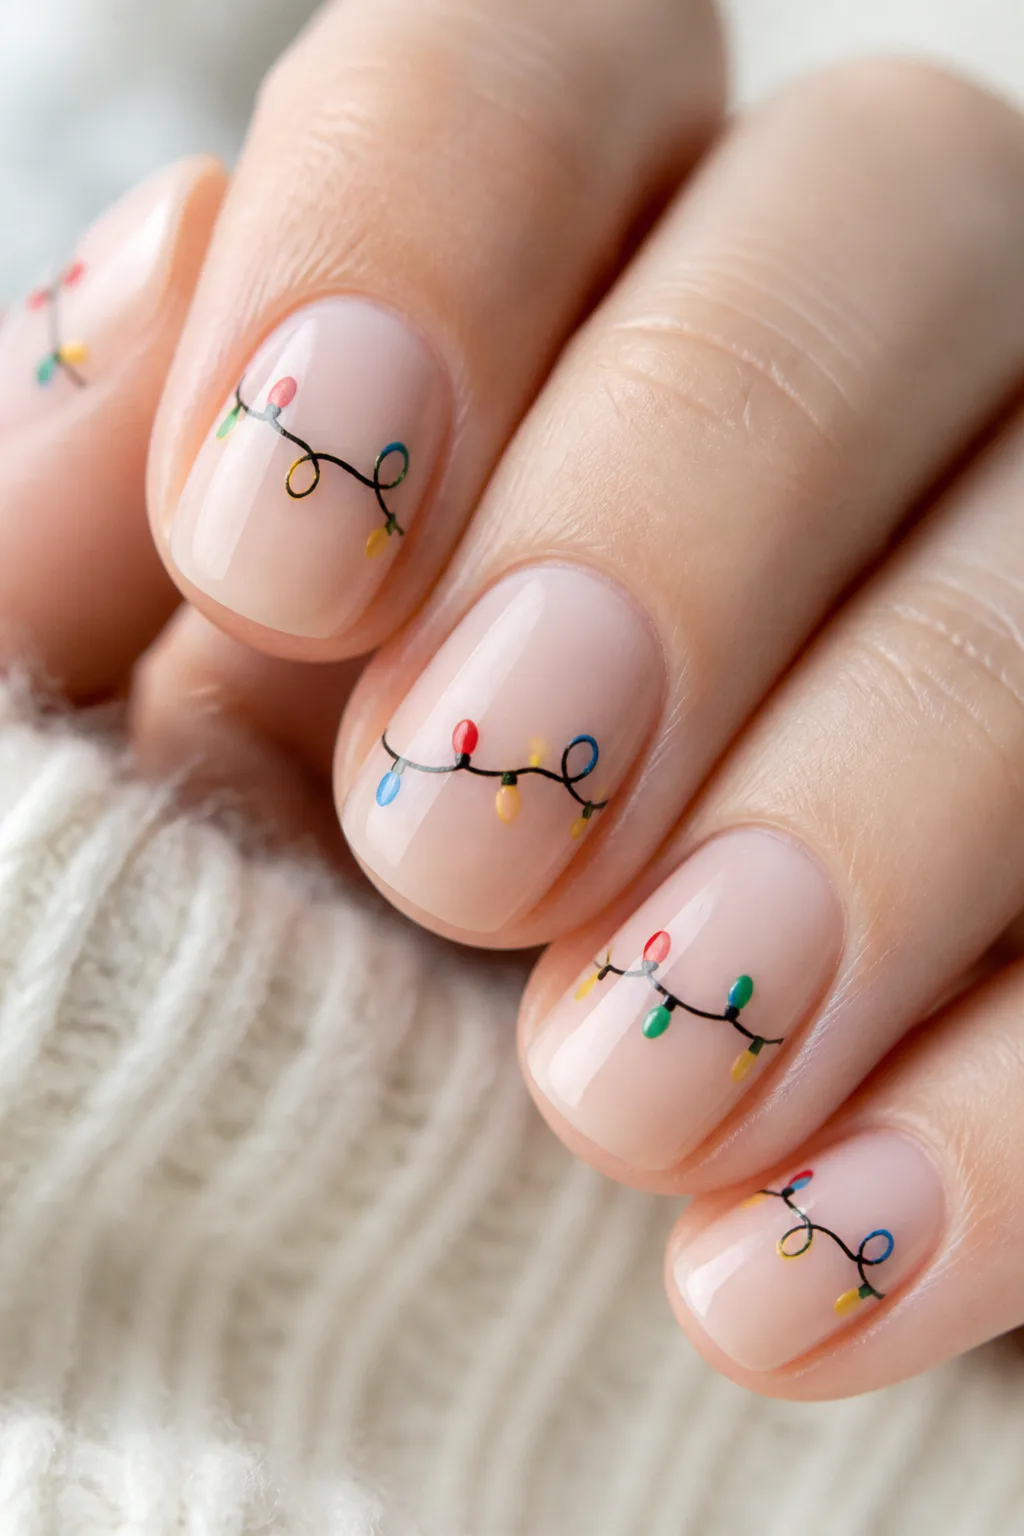
A sheer nude or milky base makes a fine string of Christmas lights feel light and wearable. Draw a thin, looping black wire across the nail, then add tiny red, green, blue, and yellow dots as bulbs. The neutral background lets the design read clearly without making the manicure feel overly busy.
This look works especially well on short or medium nails, where a simple line can follow the natural shape of the nail. It also pairs easily with everyday outfits, making it a lovely choice if you want a seasonal manicure that still feels understated.
Keep the details delicate
Let the base coat dry fully before adding the wire, and use a fine brush or a steady toothpick for the curves. Place bulbs along the line with enough space between them to keep each color distinct.
- Choose a sheer pink, beige, or milky-white base.
- Make the wire thin and gently irregular rather than perfectly straight.
- Use a glossy topcoat to smooth and protect the finished art.
The result is a cheerful, minimalist take on Christmas lights nails that works across seasons and styles.
2. Make Neon Bulbs Pop on Black
Best for: Bold, high-contrast party nails
Skill level: Intermediate
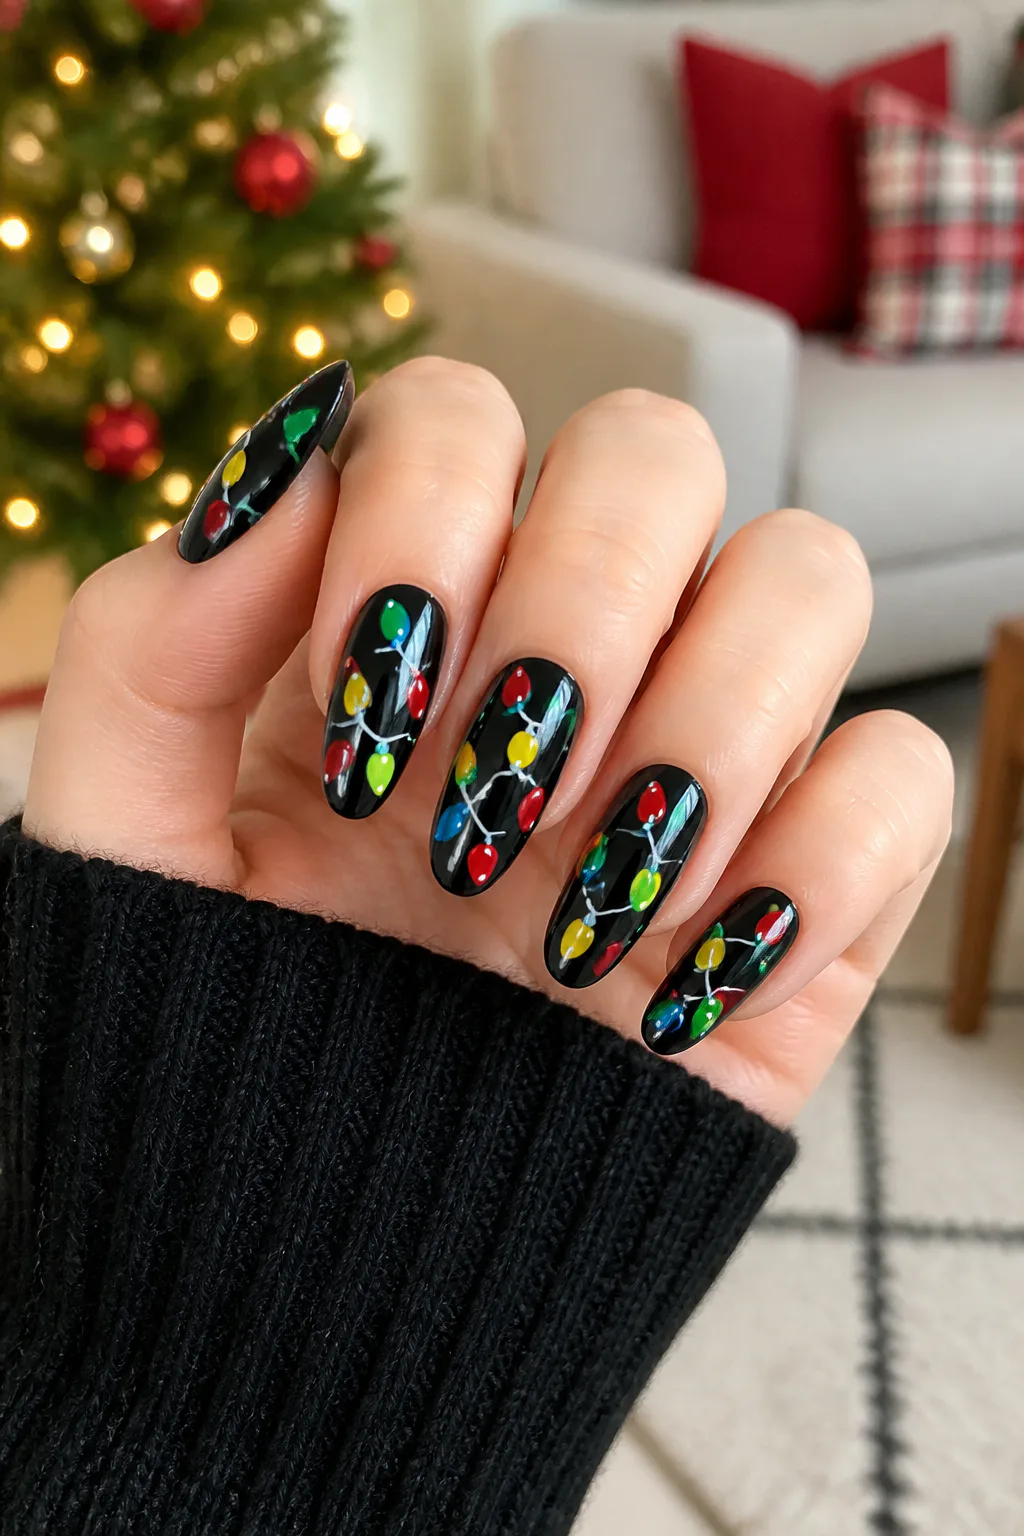
A pitch-black base turns colorful bulbs into the star of the manicure. Bright red, green, blue, and yellow details stand out against the dark background, creating the look of lights glowing after sunset. Keep the wire visible with a fine contrasting line, or let the bulbs appear to float for a simpler graphic effect.
This bold design is a natural fit for longer nails, where there is room to draw a full looping strand. On shorter nails, a few carefully placed bulbs near the tips can deliver the same high-contrast effect without crowding the surface.
Build a crisp, vivid design
Opaque black polish gives the colors their strongest backdrop. Allow it to dry before placing the bulbs, and use small dots or rounded teardrops so each one reads as a tiny holiday light.
- Use bright, saturated shades rather than muted pastels.
- Vary the wire’s curves across nails for a connected, wrapped-around look.
- Add tiny white highlights if you want the bulbs to look glossy.
It’s a playful statement manicure that brings a little nighttime sparkle to holiday outfits.
3. Create a Grinchy Green Glitter Look

Video: @caitlinvnails on Instagram. Style shown: vivid lime-green base with colorful Christmas light bulbs on a dark wire.
Best for: Playful, cheeky sparkle
Skill level: Beginner
A vivid lime-green base sets a mischievous, storybook mood for Christmas lights nails. Add red and green glitter bulbs along a dark wire, or use contrasting solid dots so the individual lights stay easy to see. The bright background gives the manicure plenty of personality before you even add the festive details.
This idea suits anyone who likes playful holiday color more than a traditional red-and-green palette. It can cover every nail for a bold, coordinated set or appear on one or two fingers beside simple green polish for a more balanced result.
Balance sparkle with clear shapes
Because both the base and bulbs bring strong color, keep the wire and bulb placement simple. A gentle curve across the nail creates movement, while a little glitter near the bulbs adds shine without requiring a complicated pattern.
- Choose a bright lime or yellow-green polish for the base.
- Use red glitter for contrast and green glitter for a tone-on-tone accent.
- Keep some nails solid green to give the design visual breathing room.
The finished look feels spirited and fun, especially for a holiday party or a playful seasonal set.
4. Hang Lights Across a Snowy Blue Manicure
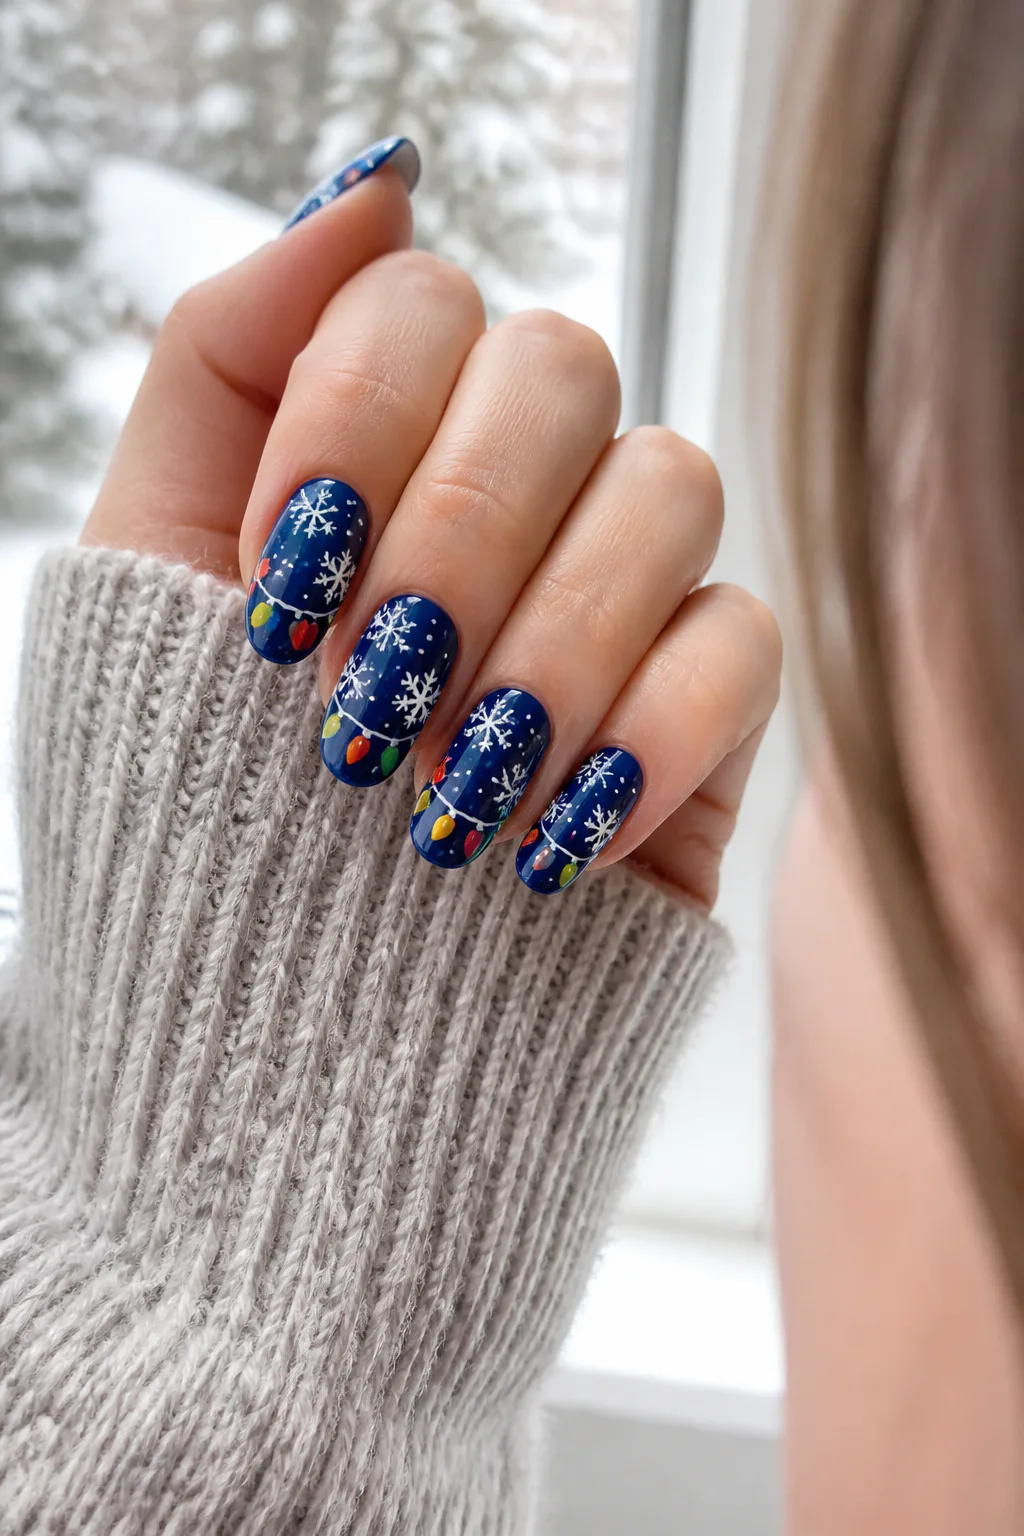
Best for: Wintry color with fun detail
Skill level: Intermediate
Deep blue polish makes a beautiful winter-night backdrop for small white snowflakes and multicolored lights. Place the bulbs near the tips so they seem to hang across a cold, starry sky, and use snowflake details on nearby nails to complete the seasonal scene. Midnight or royal blue both work well, depending on how dramatic you want the color to feel.
This design is a good choice when you want Christmas art that leans wintry rather than purely festive. A few accent nails keep the pattern from feeling crowded, while a full set can tell a more complete snow-and-lights story on longer nails.
Layer the details carefully
Start with the blue base, then add white snowflakes before painting the light strand. Keeping the bulbs near the free edge leaves the center of the nail open and helps each element remain distinct.
- Use a fine brush or stamping design for crisp snowflakes.
- Choose small, bright bulbs that contrast with the blue.
- Add a subtle shimmer topcoat for a frosty finish.
The combination feels festive while still fitting the calm, cool palette of winter.
5. Add Pastel Lights to Milky Pink Nails
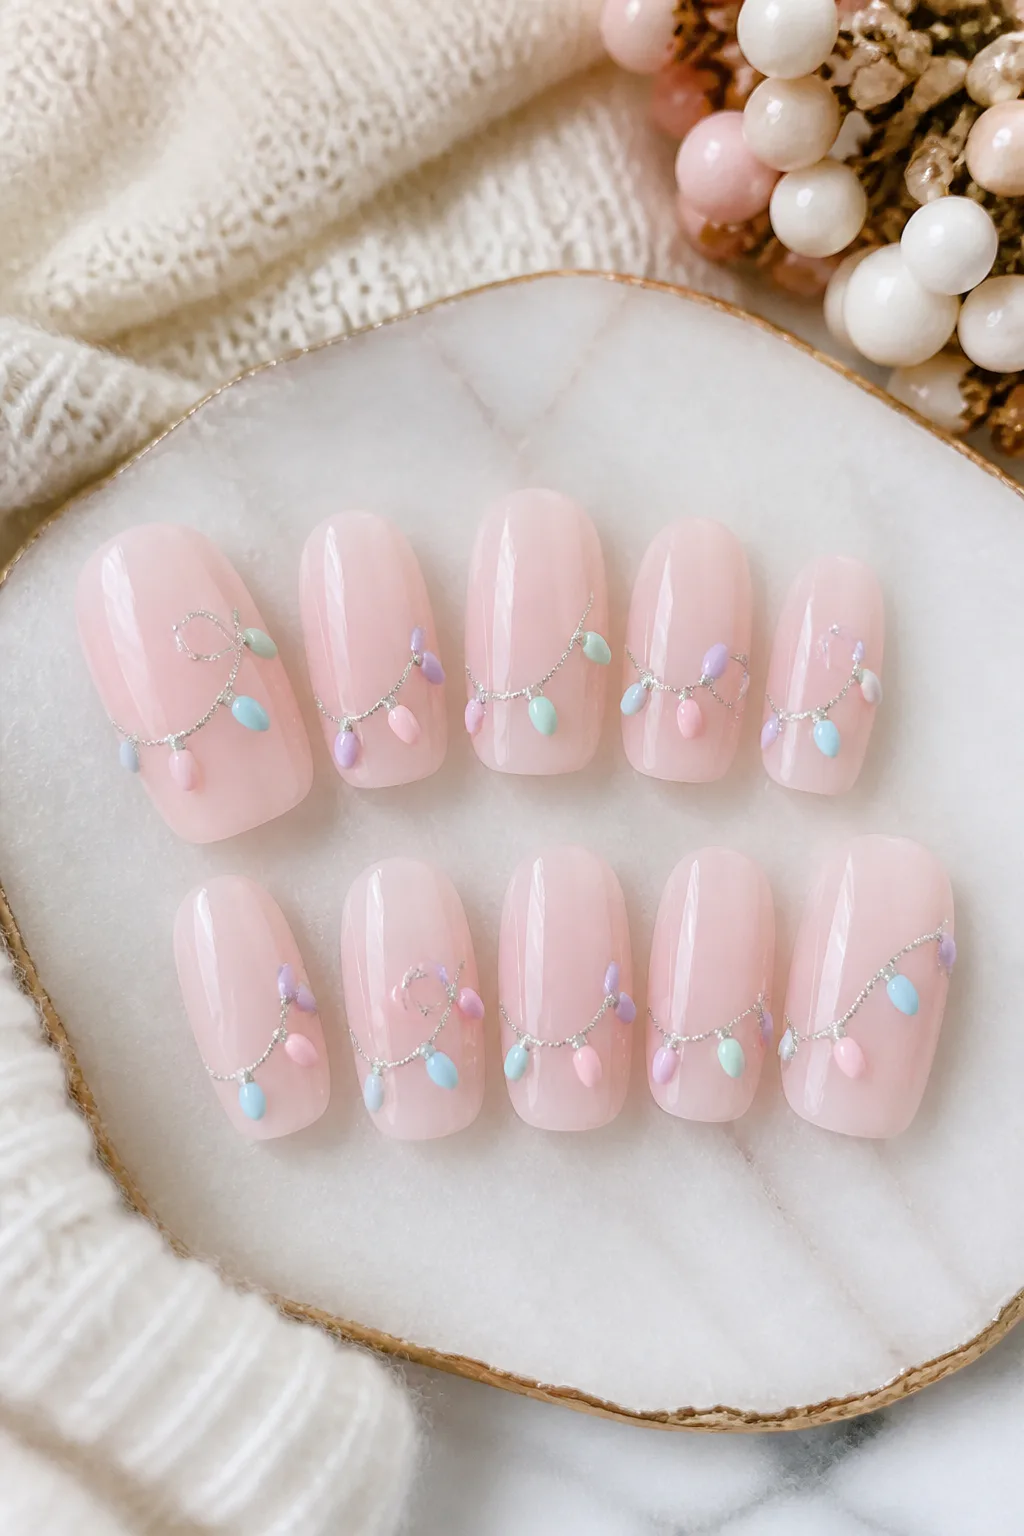
Best for: Soft, sweet pastel style
Skill level: Intermediate
Soft milky pink gives Christmas lights nails a gentle, romantic feel. Tiny pastel bulbs in shades like pale blue, mint, lilac, and blush bring a delicate pop of color, while fine silver glitter can suggest a strand catching the light. The overall effect is festive without relying on bold red or green.
This look is especially lovely for short nails, bridal-season appointments, or anyone who prefers a softer manicure. A sheer pink base also makes natural nail growth less noticeable, so the design can feel polished and easy to wear between holiday events.
Keep the palette airy
Use a thin silver line or a few scattered flecks rather than heavy glitter, so the pastel bulbs remain the focus. Small, evenly spaced dots help the lights read clearly against the pale background.
- Pick a translucent pink or milky rose base.
- Limit the bulbs to a few soft colors for a cohesive look.
- Place silver glitter lightly along the wire or near the tips.
This understated take is a sweet option when you want a holiday manicure that still feels fresh and delicate.
6. Showcase Holographic Chrome Bulbs
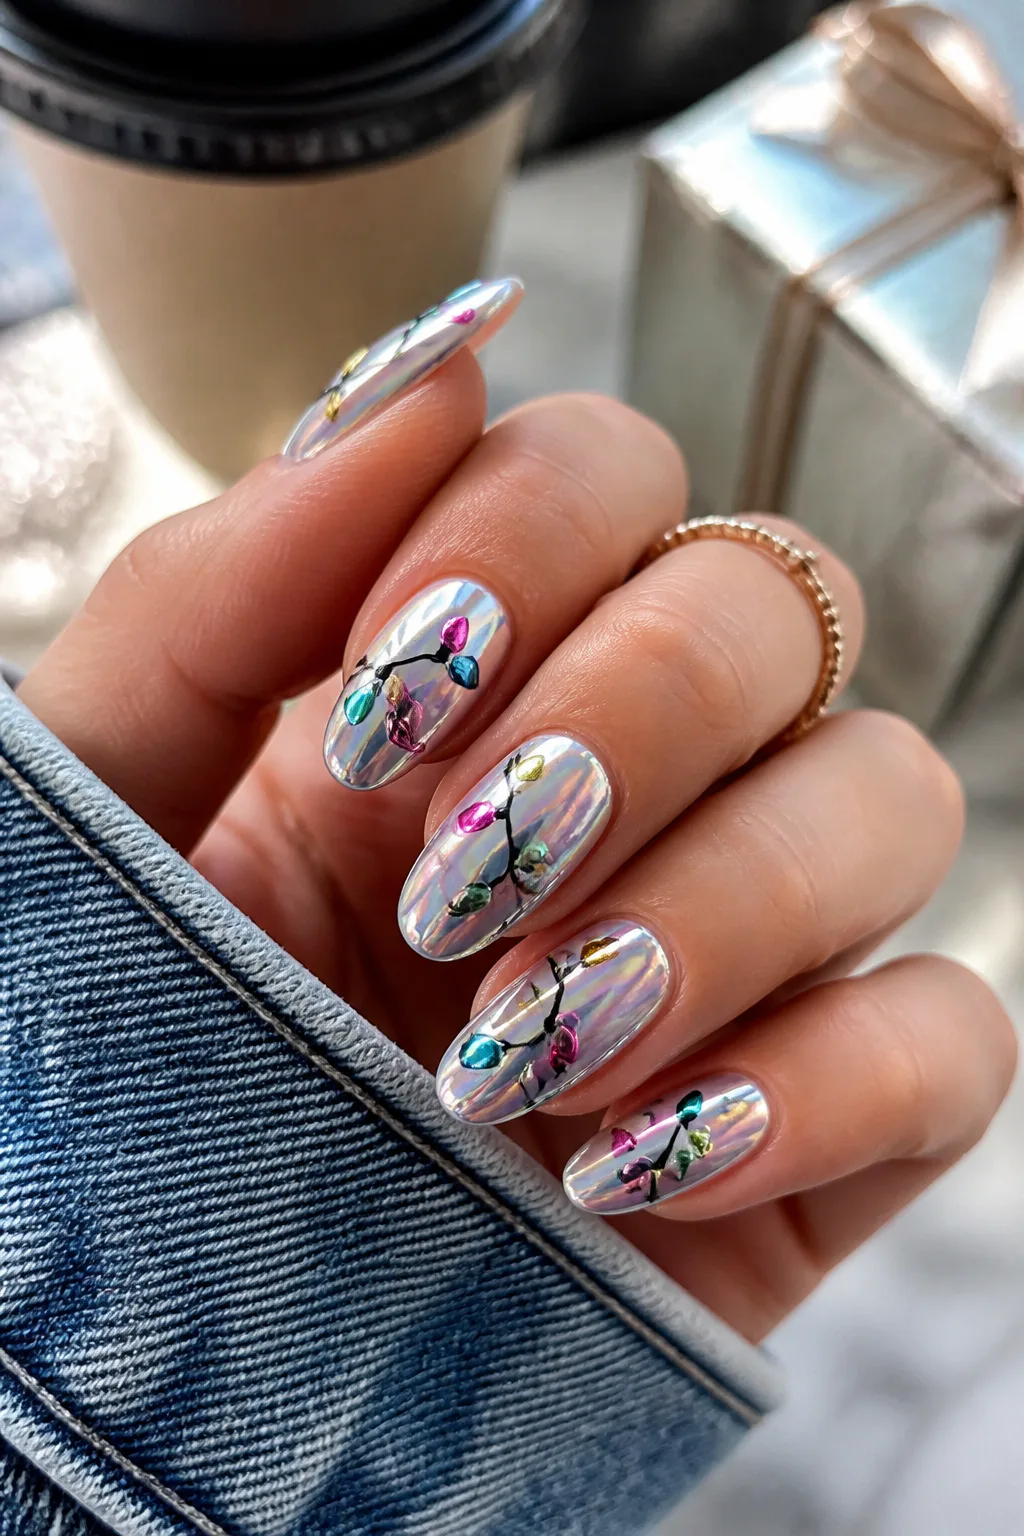
Best for: Eye-catching iridescent shine
Skill level: Intermediate
A glazed or silver chrome base gives Christmas lights nails a sleek, reflective finish. Add metallic or holographic bulbs that shift color as the light changes, creating a modern interpretation of classic holiday décor. The base can be a soft pearly glaze for a subtle sheen or a brighter chrome when you want the manicure to feel more dramatic.
Because the background already reflects light, the design works well with simple bulb shapes and minimal extra decoration. It suits medium or long nails especially nicely, but a couple of chrome accent nails can also make a shorter manicure feel special.
Let the finish do the work
Keep the wire delicate and the bulbs spaced apart so the reflective surfaces don’t overwhelm one another. If you’re visiting a salon, ask about the order of chrome, art, and topcoat so the details stay crisp.
- Choose a pearly glazed base for a softer effect.
- Use holographic or metallic accents for the bulbs.
- Keep other nail art minimal to preserve the shine.
The result is a polished, contemporary holiday look that catches the eye from every angle.
7. Turn French Tips into Light Strings

Best for: Minimal festive French
Skill level: Intermediate (fine brush)
Give a familiar French manicure a festive twist by extending the smile line into a string of Christmas lights. The white or silver tip can become the starting point for a fine dark wire, which curves across the nail and carries tiny colorful bulbs. This creates a design that feels recognizable and seasonal at the same time.
The idea works on many nail shapes, though a longer free edge leaves more room to blend the tip and wire gracefully. For short nails, keep the French line narrow and use just a few bulbs so the manicure stays neat rather than crowded.
Connect the tip and the strand
Use the French smile line as part of the composition instead of adding a separate decorative band. A thin wire that begins near one side of the tip can curve toward the center, making the design feel intentional.
- Choose classic white tips or a subtle silver alternative.
- Keep the wire fine so it doesn’t compete with the French edge.
- Use small bulbs in a limited mix of holiday colors.
This is a wearable choice for anyone who wants festive nail art with a clean, salon-classic foundation.
8. Top Velvet Green Nails with Glossy Lights

Best for: Rich texture with gloss
Skill level: Intermediate
Emerald green or deep burgundy velvet polish creates a rich, textured foundation for glossy light-bulb accents. A cat-eye finish shifts as you move your hands, while smooth, shiny dots add a contrasting glass-like effect. The difference between the soft-looking base and reflective bulbs gives this manicure depth without needing a lot of extra art.
Use the lights on one or two accent nails if you want the velvet finish to stay central. For a more decorative set, repeat a small strand across several fingers, keeping the curves simple so the manicure doesn’t lose its elegant feel.
Play with texture and shine
Apply the velvet or magnetic finish first, then add the bulb art once the base is set. Glossy dots can be made with gel color or regular polish, depending on the service and finish you prefer.
- Try emerald for a classic holiday mood or burgundy for warmth.
- Use a magnetic effect to bring out the cat-eye shimmer.
- Keep the bulbs glossy and the wire thin for contrast.
This combination feels festive and sophisticated, especially with cozy winter outfits.
9. Paint Chunky Retro Christmas Bulbs
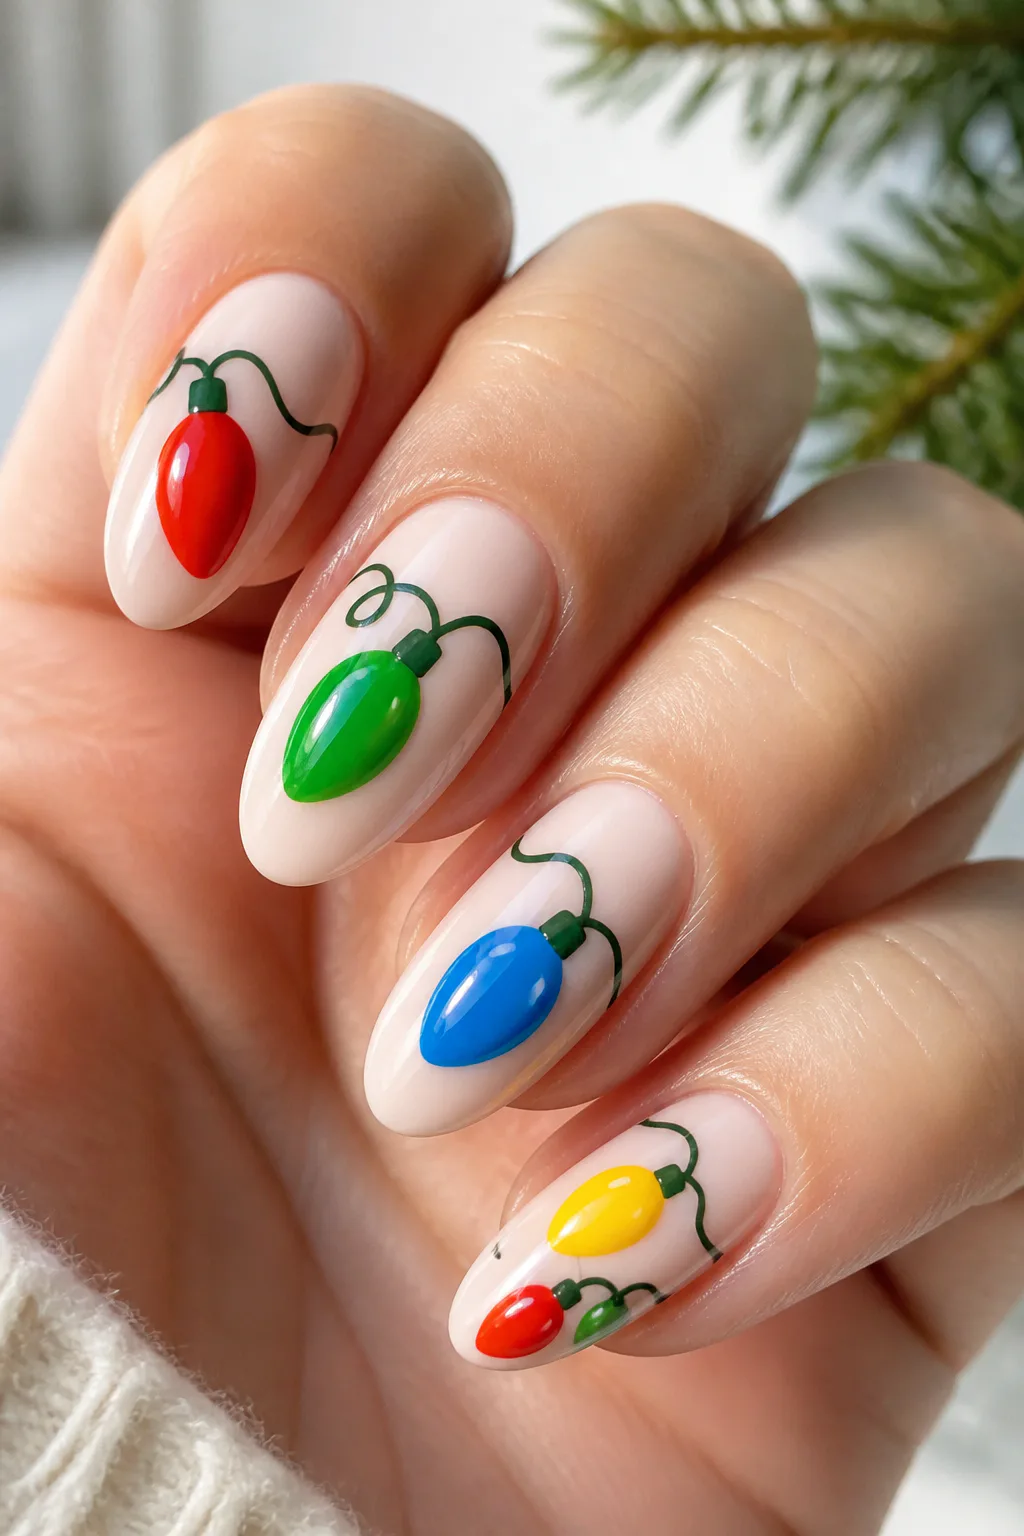
Photo: @maison.nailspa on Instagram. Style shown: oversized cartoon Christmas light bulbs in red, green, blue and pink.
Best for: Retro holiday charm
Skill level: Intermediate
Oversized vintage-style bulbs bring a nostalgic, playful mood to a holiday manicure. Paint rounded or teardrop shapes in bright red, green, blue, and yellow, then add a small white reflection mark to make each bulb look shiny. A dark wire ties the shapes together and helps the design resemble a strand of old-fashioned lights.
These larger details need a bit of space, so they’re easiest to show on longer nails or a few feature fingers. On shorter nails, choose one or two bulbs per nail rather than trying to fit a complete string across every surface.
Make each bulb easy to read
Start with the bulb shapes and let them dry before adding highlights and wire. A simple silhouette is more effective than adding many tiny details, especially when the colors are already bold.
- Use rounded teardrops or oval shapes for a vintage feel.
- Add a small white dash or dot as a reflection.
- Keep the wire dark and slightly curved between bulbs.
The finished manicure feels cheerful and nostalgic, like a little holiday decoration on each hand.
10. Draw Gold Wires with Jewel-Toned Bulbs

Best for: Elegant jewel-tone detail
Skill level: Intermediate
Swap a dark wire for delicate gold foil or painted gold lines to create a more polished holiday design. Pair the metallic strand with jewel-toned bulbs in ruby, emerald, sapphire, or amethyst. The combination feels festive but refined, making it a lovely alternative to a high-contrast, cartoon-like string of lights.
A neutral, deep red, or forest-green base can all complement the gold details. Keep the design to accent nails if you want the metallic elements to stand out, or spread the fine strands across the full set for a more decorative finish.
Choose a controlled metallic accent
Gold foil can give the wire a reflective, textured look, while gold gel paint offers more control over curves. Use small gems or carefully placed dots for bulbs, taking care not to overload the nail with embellishment.
- Pair gold with deep, saturated bulb colors.
- Use fine foil strips or a thin brush for the wire.
- Choose small gems for extra shine or dots for a flatter finish.
This design brings a dressier touch to Christmas lights nails without losing the playful holiday theme.
11. Mix Candy Cane Stripes and Light Accents

Video: @salemnailbar on Instagram. Style shown: red-and-white candy cane swirls paired with a glittery Christmas light strand.
Best for: Mixing two classic motifs
Skill level: Intermediate
Red-and-white candy cane stripes make a lively partner for Christmas light art. Alternate striped nails with one or two feature nails showing a colorful wire strand, so each pattern has space to shine. The mix ties together two recognizable holiday motifs while keeping the manicure varied and fun.
This combination is easy to customize for different nail lengths. Wider stripes are simpler to paint on shorter nails, while longer nails can carry narrower lines and more detailed light strands. You can also use a simple red or white nail between patterns to create a calmer rhythm.
Plan the pattern across the set
Decide which fingers will carry stripes before painting, then place the light-art nails where they’ll balance the stronger pattern. Consistent reds and whites help the whole set look coordinated.
- Use diagonal stripes for a classic candy cane effect.
- Keep the light strand to one or two accent nails.
- Add a solid red nail if the overall design feels too busy.
The mix-and-match approach gives you a festive manicure that feels full of personality but still thoughtfully composed.
12. Light Up a Midnight Ombré Manicure
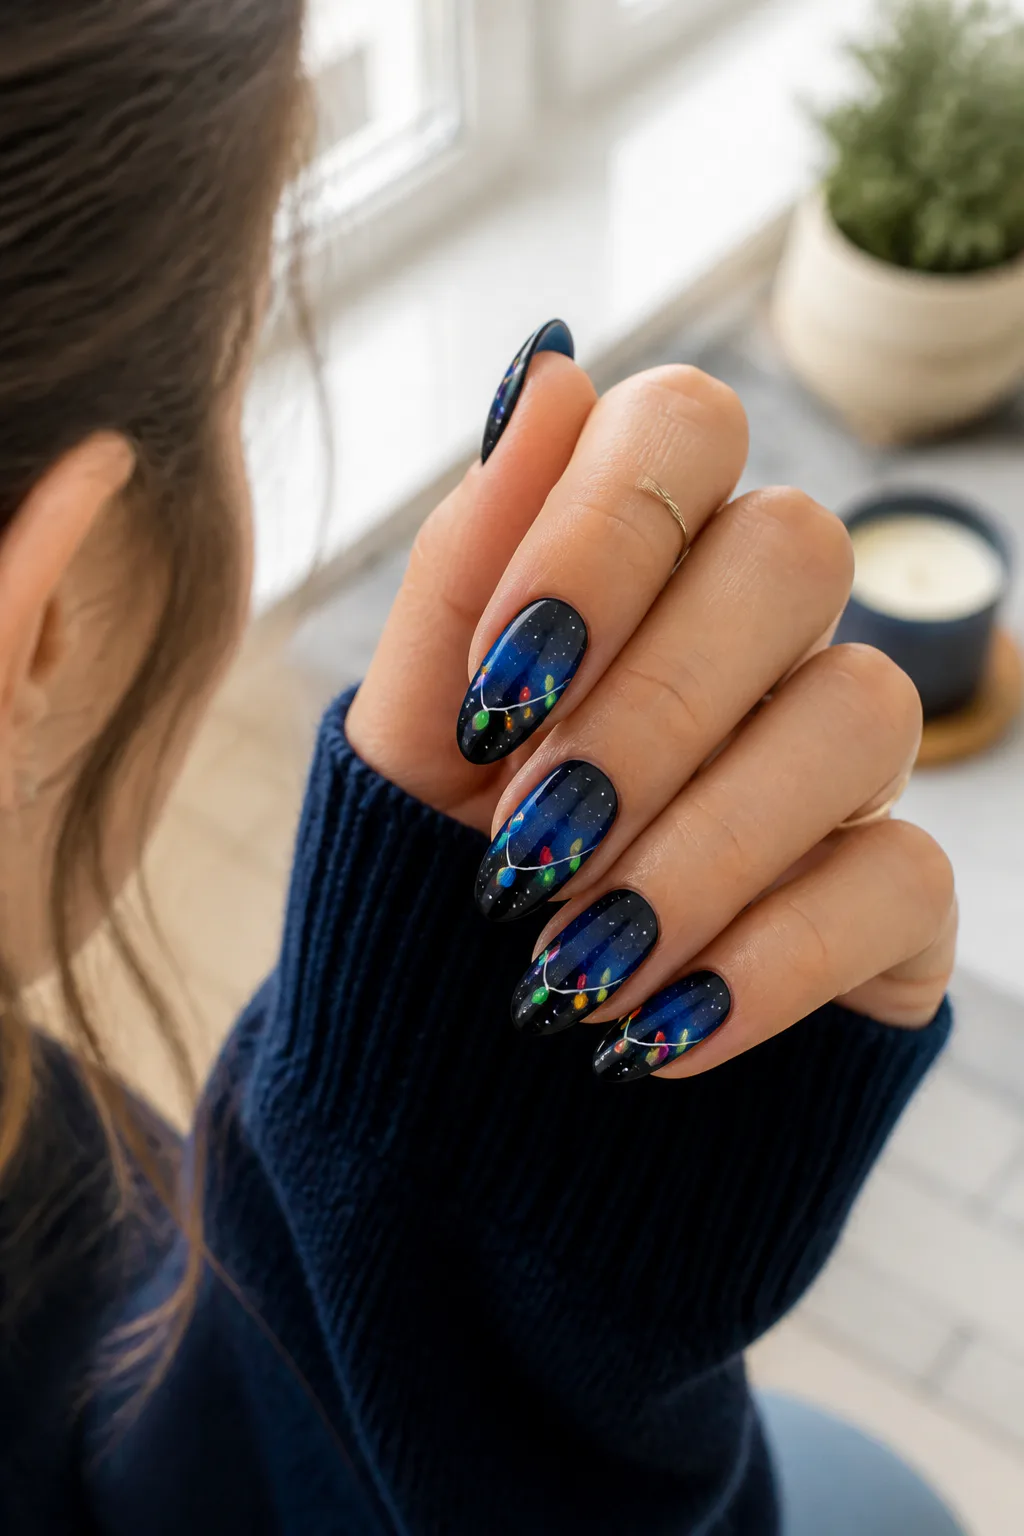
Best for: Moody night-sky look
Skill level: Intermediate
A navy-to-black gradient creates the feeling of a winter sky after dark. Add a bright string of fairy lights across the ombré, using vivid dots that stand out against the shaded background. The darker color near the tips can make the lights look especially luminous, while the blend adds depth even before the nail art goes on.
This design works well for longer nails, where there’s room to show off the gradient and a curved strand. On shorter nails, use a soft transition and place a few bulbs near the center so the pattern remains clear and balanced.
Layer the night-sky effect
Blend the navy and black before painting the wire, and let the base dry completely to avoid muddying the colors. Keep the bulbs bright and neatly spaced so they remain easy to distinguish from one another.
- Blend navy into black with a sponge or a salon ombré technique.
- Choose saturated red, green, blue, and yellow bulbs.
- Add a few tiny silver flecks for a subtle starry finish.
The result is dramatic but still unmistakably festive, perfect for evening gatherings and winter celebrations.
13. Pair Holiday Plaid with String Lights
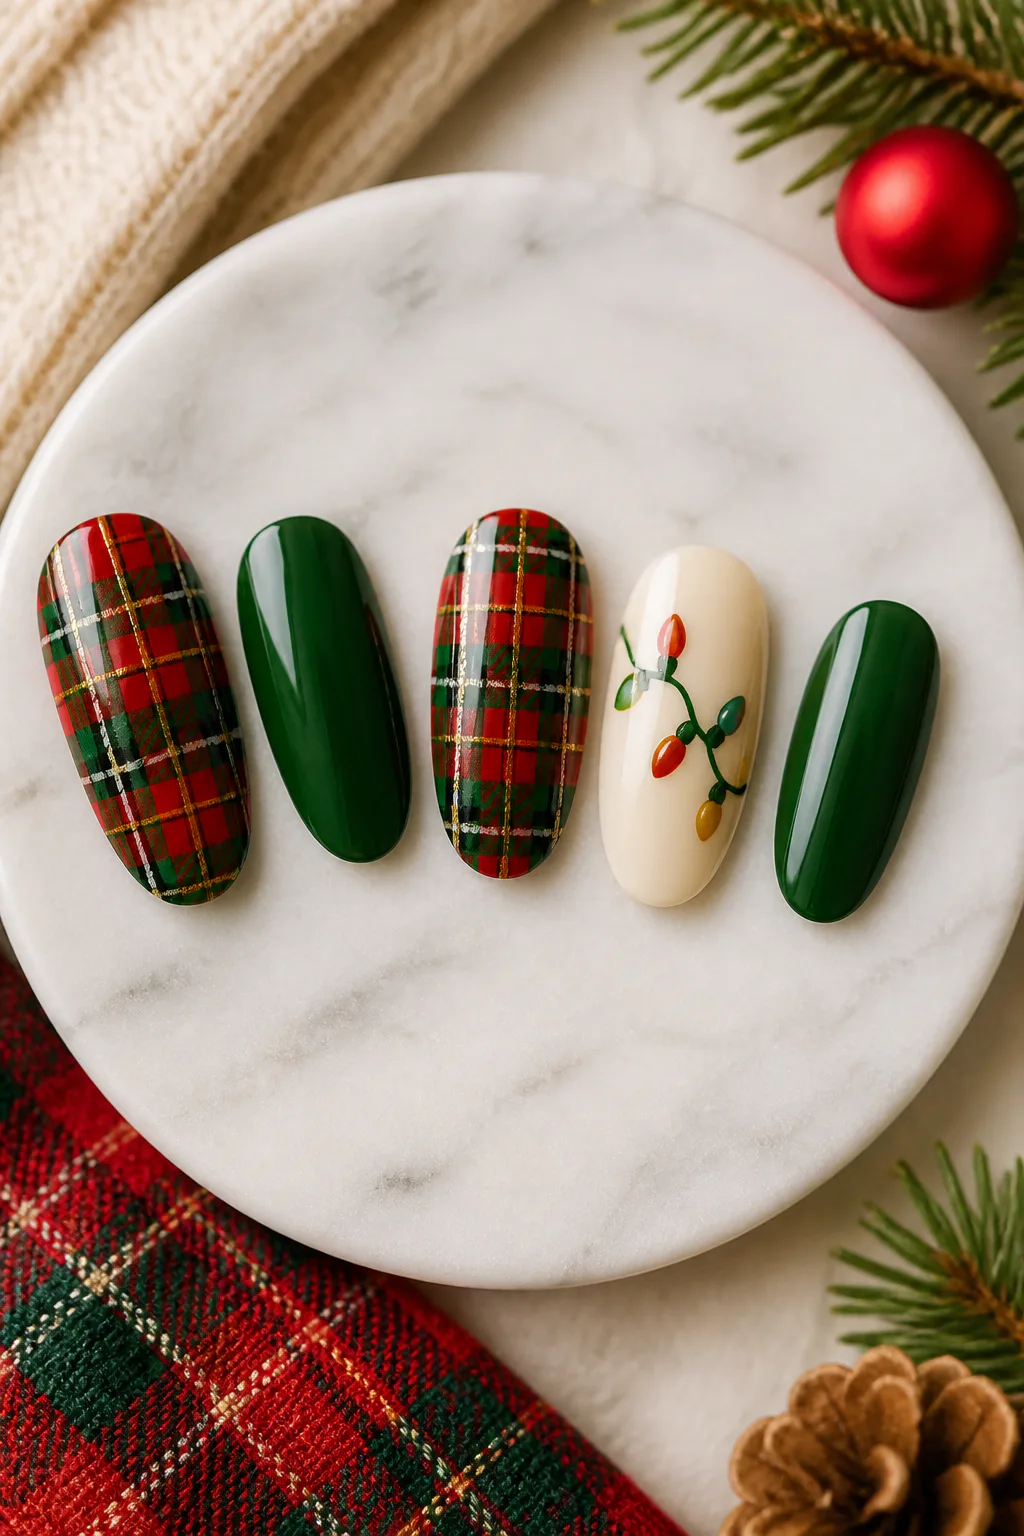
Best for: Cozy pattern sets
Skill level: Advanced (fine lines)
Traditional red-and-green tartan gives Christmas lights nails a cozy, layered look. Use plaid on a couple of nails, then reserve accent fingers for a string of colorful bulbs. The two patterns share a holiday palette but bring different kinds of detail: plaid feels tailored and classic, while the lights add a playful glow.
This design can be adapted to suit your comfort with nail art. A simple check pattern with broad lines is easier to create at home, while fine intersecting stripes can give a salon manicure a more detailed fabric-like effect. Keep the other nails in a matching solid shade for balance.
Coordinate the patterns
Choose a small color family and repeat it in both the plaid and the light bulbs. If the tartan is detailed, keep the string-light design simple so the manicure doesn’t become visually crowded.
- Use red and green as the main plaid colors.
- Add thin black, white, or gold lines for extra tartan detail.
- Place lights on one or two nails rather than over the plaid.
The mix feels warm and seasonal, with enough variety to make each finger feel considered.
14. Build Floating Glitter Light Bulbs
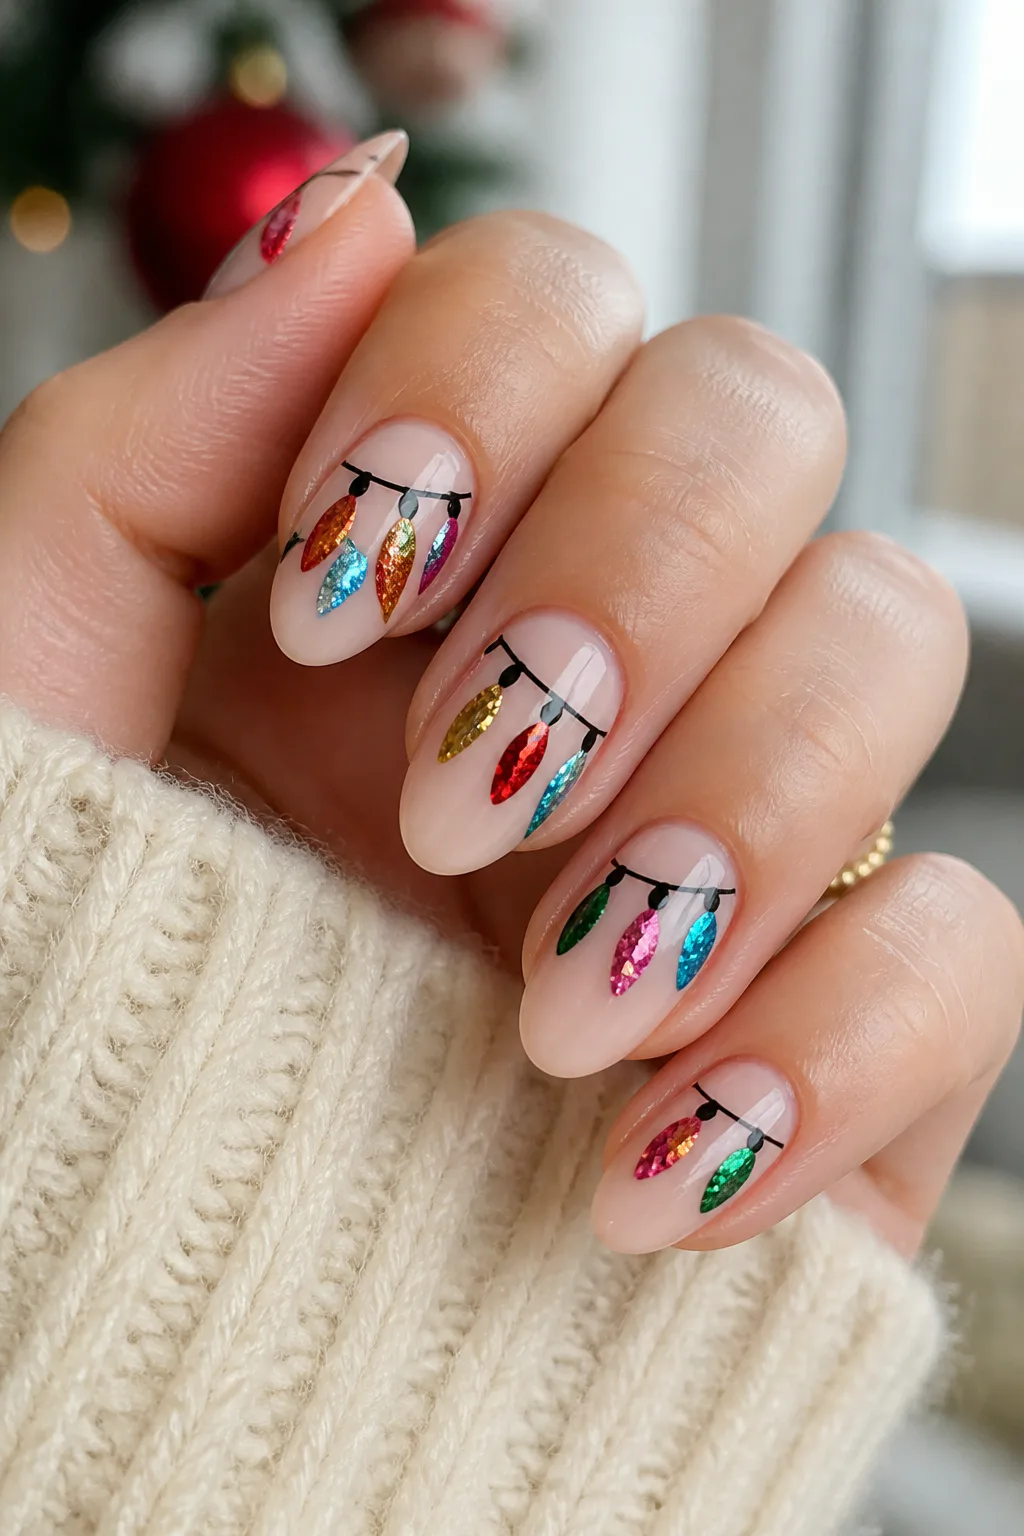
Best for: Sparkly, dimensional bulbs
Skill level: Intermediate
Chunky elongated glitter pieces can stand in for colorful bulbs, giving a string-light manicure extra dimension and sparkle. Place the pieces along a painted black arch so they appear to hang from a wire. Teardrop or narrow hexagon shapes work especially well because their length suggests the silhouette of a tiny decorative light.
This style is a good choice when you want a more textured look without sculpting every bulb from gel. It can be applied to one feature nail for a manageable accent, or repeated across the set if you prefer a bolder, more glitter-forward manicure.
Arrange the glitter with intention
Use a clear base or a contrasting color that lets each piece show clearly. Set the glitter along the curve before sealing it, and check that no sharp edges are left exposed at the nail surface.
- Choose elongated glitter in a mix of bright holiday colors.
- Draw the arch first to guide the placement.
- Seal carefully with topcoat or the appropriate salon finish.
The floating effect adds movement and dimension while keeping the familiar string-light outline.
15. Create Raised 3D Gel Christmas Lights
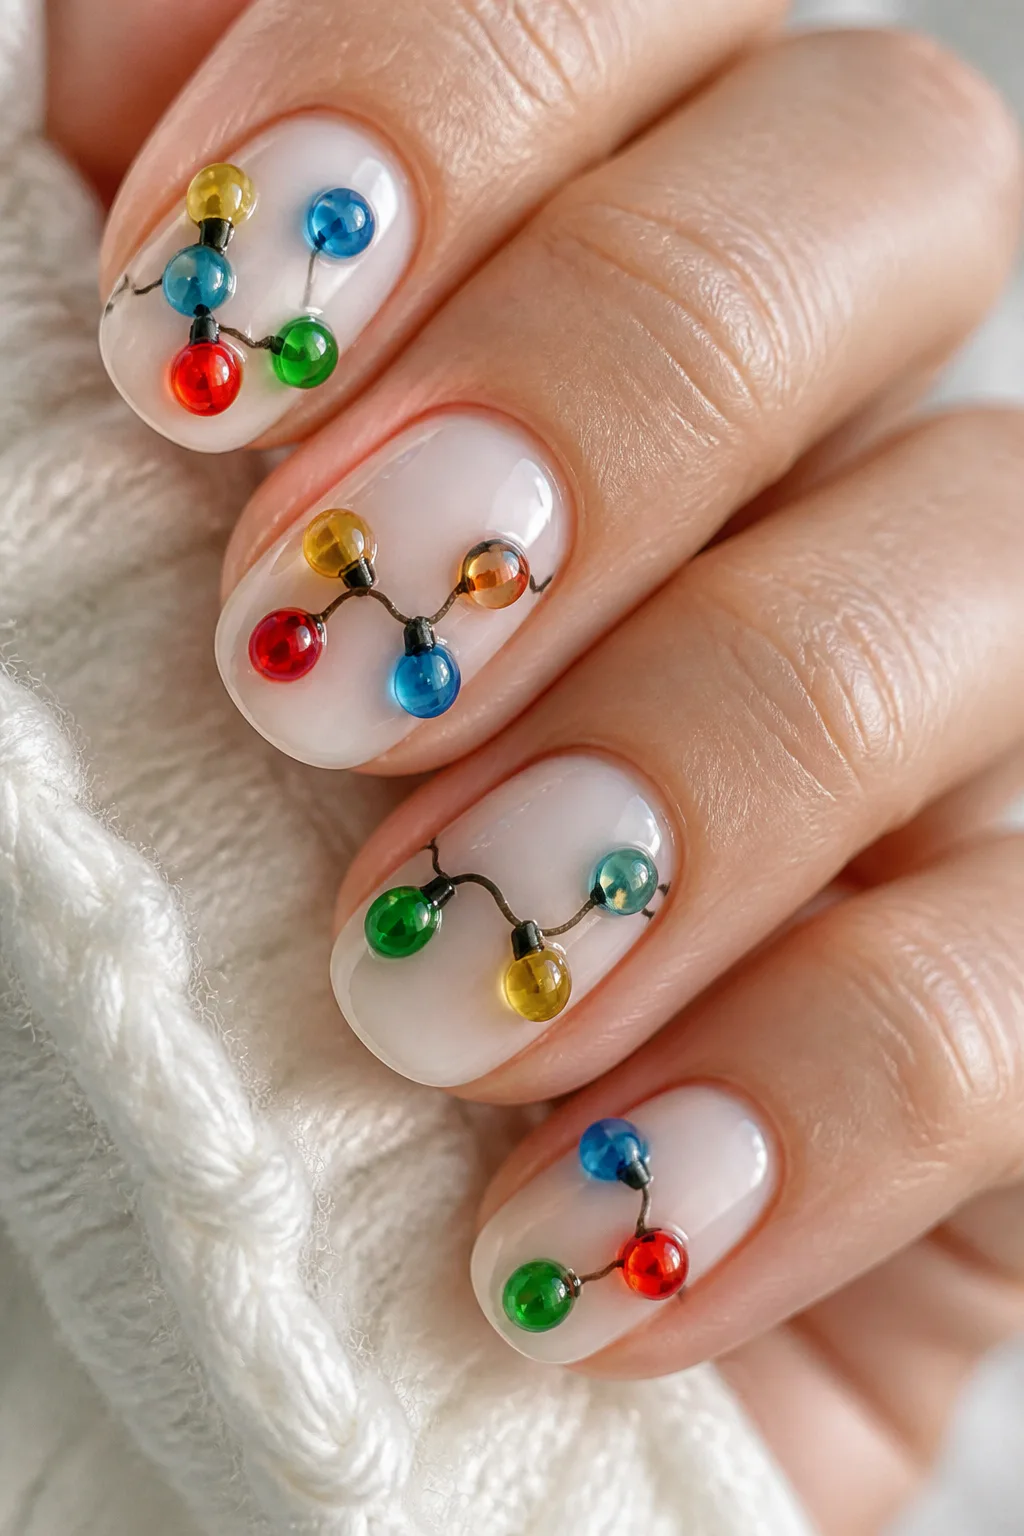
Video: @beetles_community on Instagram. Style shown: small raised 3D gel bulbs in red, green and gold on a nude base.
Best for: Statement 3D nail art
Skill level: Advanced (raised gel)
For a glassy, tactile finish, place clear builder gel or a thicker topcoat over painted bulb dots. The raised surface catches light and makes each color look like a tiny rounded glass bulb. Against a simple base and fine wire, the dimension becomes the main feature without requiring a complicated background.
This look is easiest to achieve with a nail technician, especially if you’re unfamiliar with working safely with gel products. On shorter nails, a few small raised accents may be more comfortable and practical than adding bulky details across every finger.
Keep the raised accents neat
Paint the wire and colored bulbs first, then add clear gel in controlled, rounded layers over each bulb. Follow the product and salon curing process carefully, and avoid placing too much product near the skin or cuticle.
- Use a modest number of bulbs so the surface stays comfortable.
- Choose a clear, rounded overlay for a glass-like effect.
- Ask your technician about removal and upkeep before choosing the style.
These dimensional lights make a memorable holiday manicure with a playful, polished finish.
Frequently Asked Questions
How do you paint Christmas lights on nails?
Draw a thin wavy line with a striping brush for the wire, then add small oval dots in different colors with a dotting tool and seal with top coat.
What base color works best for Christmas lights nails?
Black and navy make bulbs glow, while nude, milky pink and white give a softer, everyday look.
Are Christmas lights nails good for short nails?
Yes. Use one short wire with three or four small bulbs, or put the lights only on French tips.
How do I make the bulbs look shiny?
Add a tiny white dot on each bulb as a highlight, or use holographic, chrome or glitter polish for the bulbs.
Final Thoughts
Christmas lights nails can be as subtle or as vivid as you like. A nude base with tiny bulbs offers an easy everyday option, while black, chrome, velvet, plaid, and 3D designs bring more color, texture, or holiday drama.
Choose a look that fits your nail length and how much detail you enjoy wearing. Whether you paint a simple strand at home or take a favorite idea to the salon, a few colorful lights are an easy way to make your manicure feel festive.