16 Stunning Christmas Glitter Nails Ideas
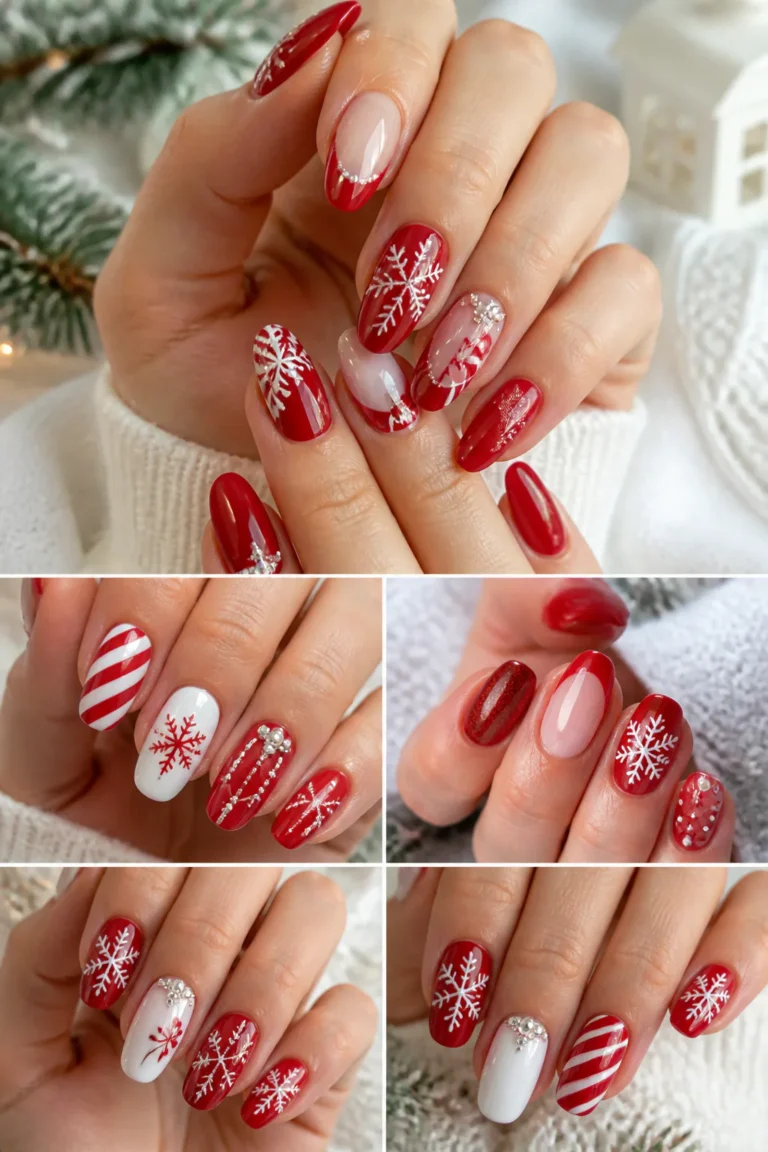
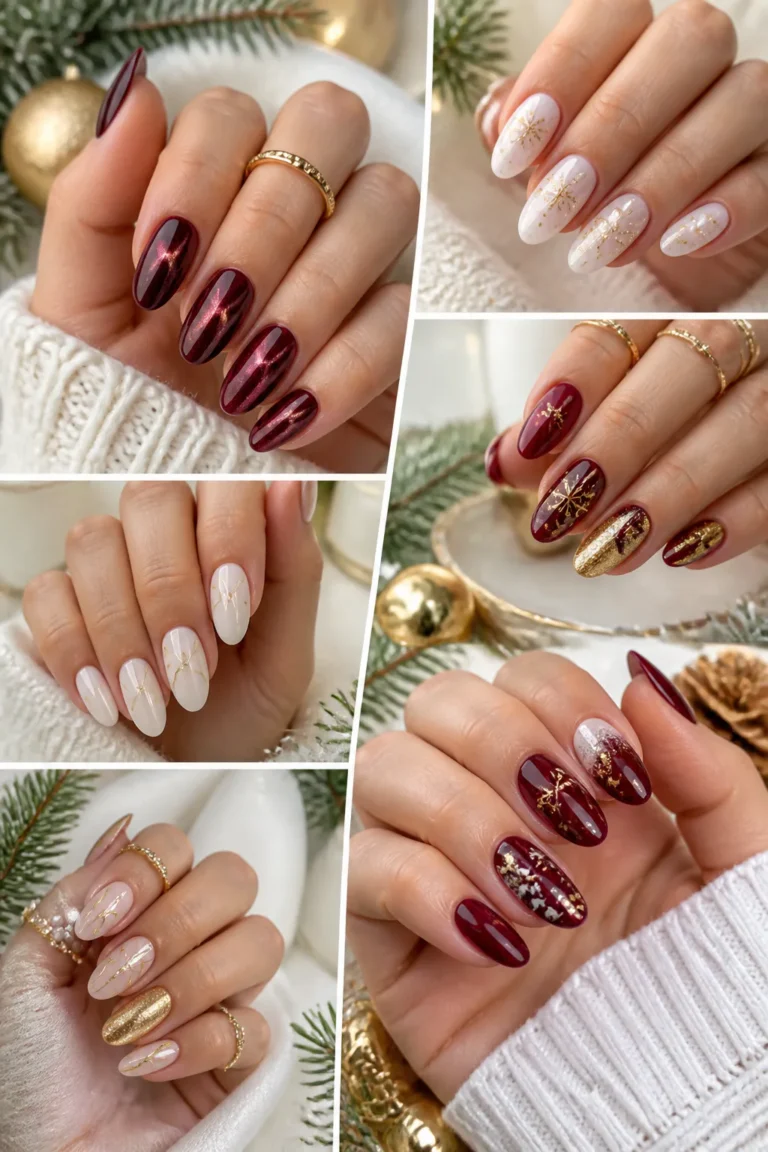
Christmas glitter nails can be as subtle or as showstopping as you like, from a delicate sparkle at the tips to full-coverage shine that catches every twinkle of holiday lights. The best design for you depends on your preferred colors, nail length, and how much detail you want to wear.
This collection brings together classic red and green looks, snowy winter effects, glowing golds, and playful festive details. Each idea includes practical ways to adapt the look for a salon appointment or a careful at-home manicure.
Use these designs as inspiration rather than strict rules: switch the accent nail, adjust the glitter placement, or choose a finish that suits your everyday style. Short nails can look just as festive as long ones, especially when the color and sparkle are thoughtfully balanced.
Quick Answer
Christmas glitter nails range from soft sparkle to full shine. The easiest options are a ruby red glitter fade, champagne glitter French tips and a blushing snow-globe ombré; for full drama, try diamond snow nails, liquid gold chrome with glitter or a gilded starry night; for festive detail, add snowflakes, a candy cane accent, tartan or Christmas tree tips.
1. Ruby Red Glitter Fade
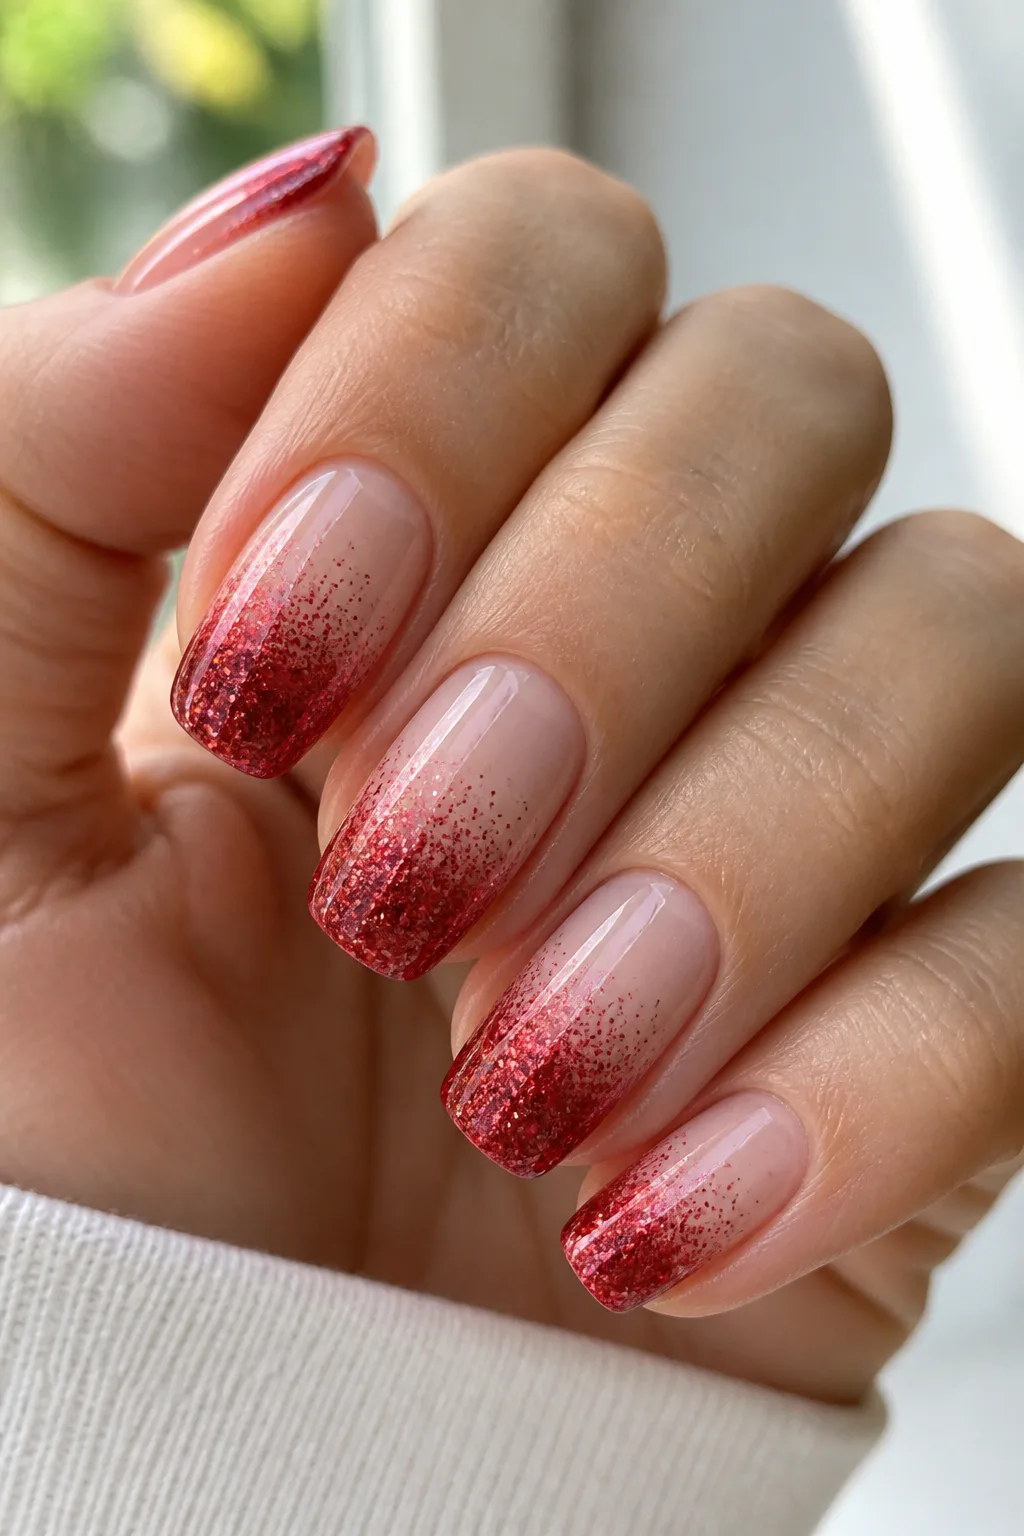
Video: @Archi.S007 on YouTube. Style shown: red glitter ombre fade over a nude base.
Best for: Easy, classic holiday sparkle
Skill level: Beginner
A ruby red glitter fade gives you the festive feel of a bold red manicure without covering every nail in dense sparkle. The design begins with a sheer nude base, then builds into concentrated red micro-glitter near the tips for a soft gradient that feels polished and celebratory.
Because the color is focused at the ends, this look works on short, rounded nails as well as longer almond or square shapes. It pairs easily with holiday outfits and can be worn across all ten nails or limited to a few accents for a quieter finish.
How to create the fade
Apply a smooth nude or blush base and let it dry before adding glitter in light layers. Start at the tips, then use less product as you move toward the center of each nail so the transition looks gradual rather than like a sharp band.
- Choose fine red micro-glitter for a delicate gradient.
- Build the tips with thin coats instead of one thick layer.
- Keep the base sheer for a soft, elongated look.
- Finish with a glossy top coat to smooth the glitter.
The result is classic Christmas color with a lighter, more wearable feel.
2. Emerald Velvet with Gold Flakes

Video: @BeautyBliss-b1s on YouTube. Style shown: emerald green nails with gold flakes.
Best for: Rich jewel-tone glamour
Skill level: Intermediate
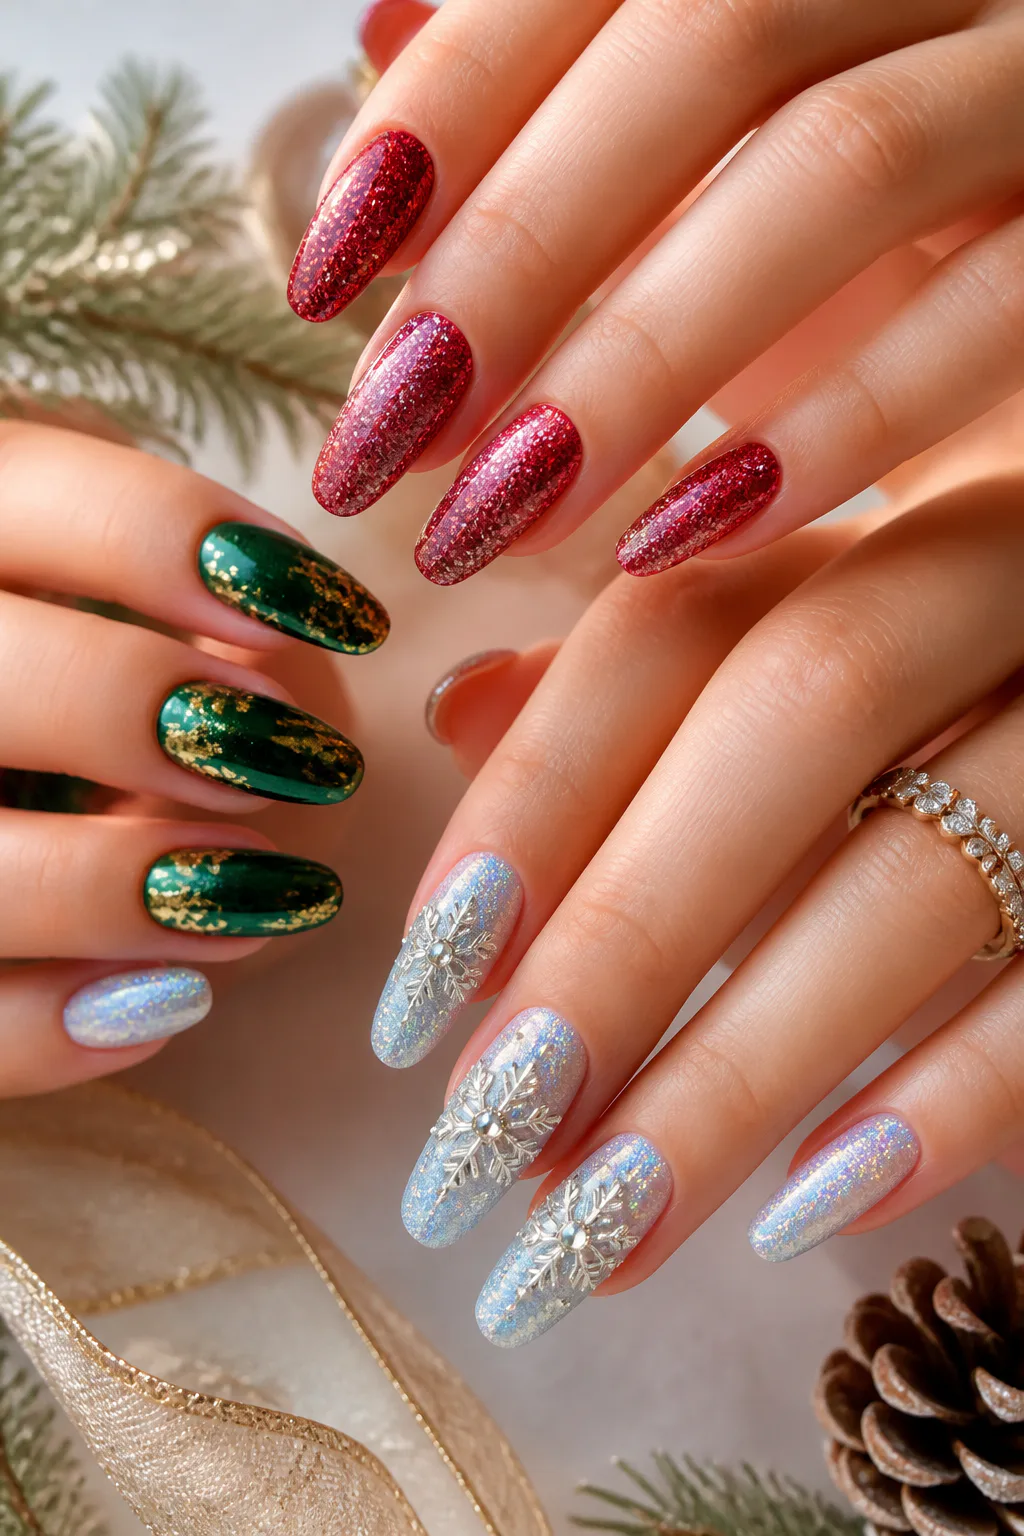
Deep emerald polish has a rich, jewel-like quality that feels especially striking during the holidays. A magnetic or velvet-effect green adds shifting depth as the light moves across the nail, while scattered gold flakes bring in a warm, decorative sparkle.
This combination suits a statement manicure, but it does not need elaborate nail art to feel special. Try it on every nail for a dramatic look, or use the gold flakes on just one or two fingers so the green finish remains the focus. It works beautifully on short and long nails alike.
Balancing the green and gold
Apply the emerald effect polish according to its directions, taking care to create an even color before adding foil. Place the gold sparingly, leaving some open green space so the manicure looks intentionally scattered rather than fully covered.
- Use a deep, blue-toned emerald for a cooler jewel effect.
- Choose small foil pieces for a refined finish.
- Concentrate flakes near one edge or the cuticle for a pattern.
- Seal foil beneath a suitable glossy top coat.
The mix of dimensional green and gold feels festive without relying on traditional holiday motifs.
3. Candy Cane Glitter Accent Nail
Best for: Playful festive accent
Skill level: Intermediate
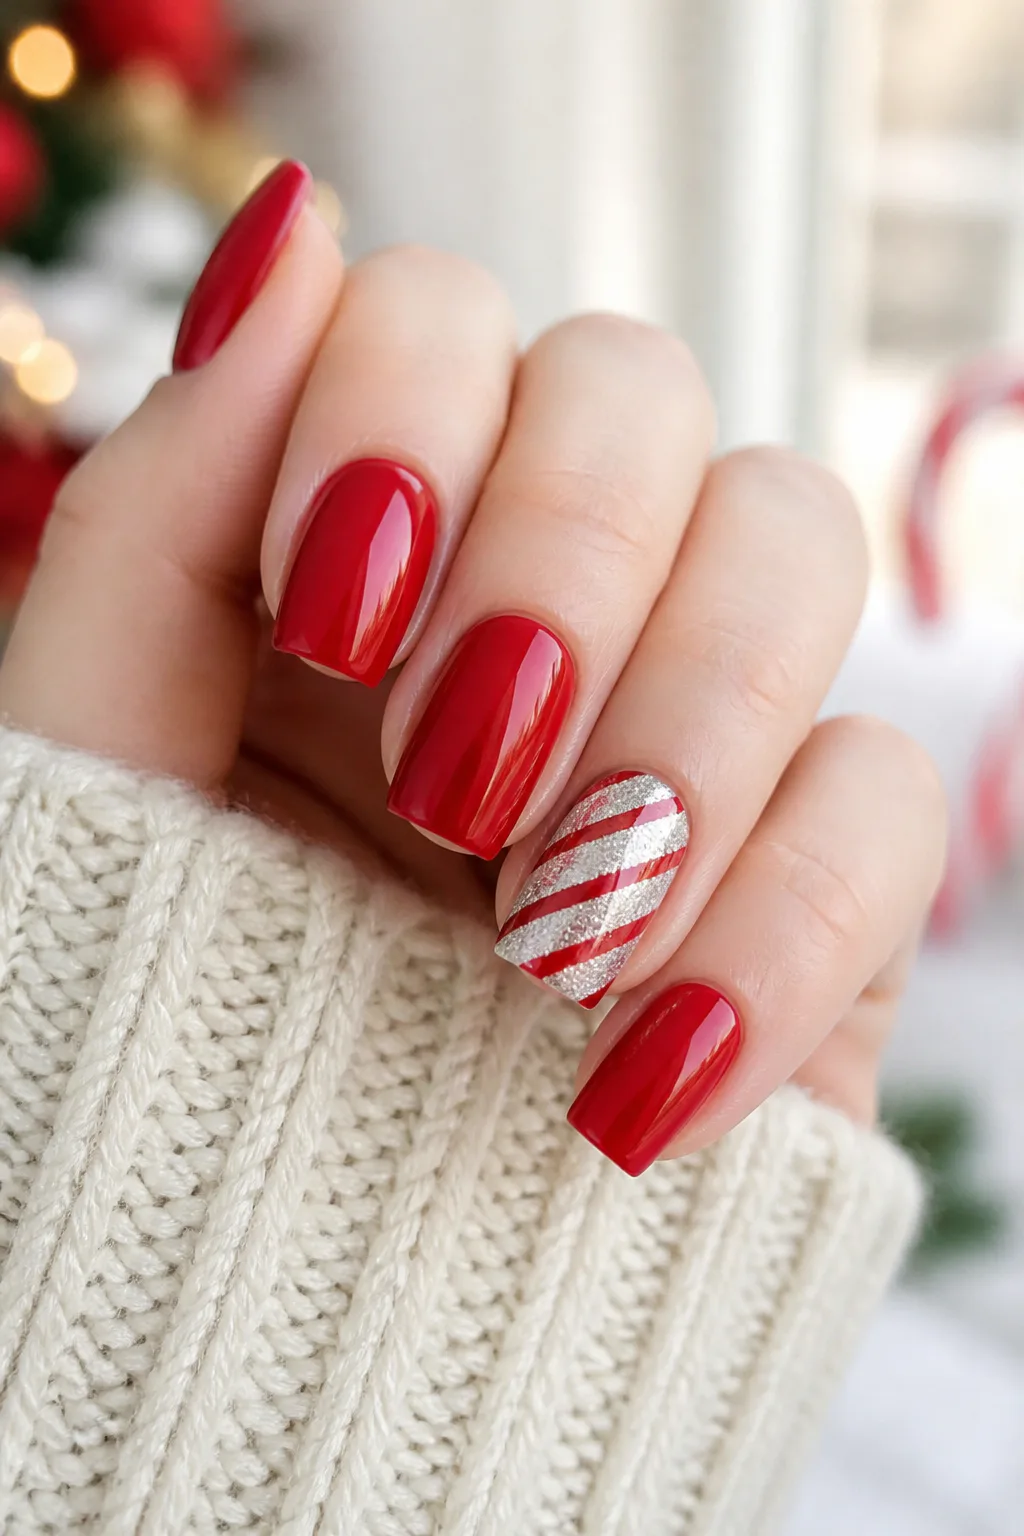
For a playful Christmas manicure, pair glossy cherry-red nails with one silver-glitter accent nail painted with peppermint stripes. The contrast keeps the design bright and recognizable, while limiting the detailed pattern to one finger makes it easier to wear and simpler to create.
A ring finger is a natural choice for the accent, though you can place it wherever you want the eye to land. The look works on short nails too; narrow stripes and a small amount of silver glitter can suggest candy-cane detail without crowding the nail.
Making the stripes neat
Paint the accent nail with silver glitter and let it dry fully before adding the red stripes. A fine nail-art brush or striping tool gives you more control than a standard polish brush, especially when working around a curved nail tip.
- Keep the other nails a consistent cherry-red shade.
- Use thin, evenly spaced stripes on the accent nail.
- Let the glitter base dry before painting over it.
- Add a glossy top coat to unify the different finishes.
It is a cheerful choice for parties, family gatherings, or anyone who loves a little holiday nostalgia.
4. Mistletoe Green Holographic Shimmer
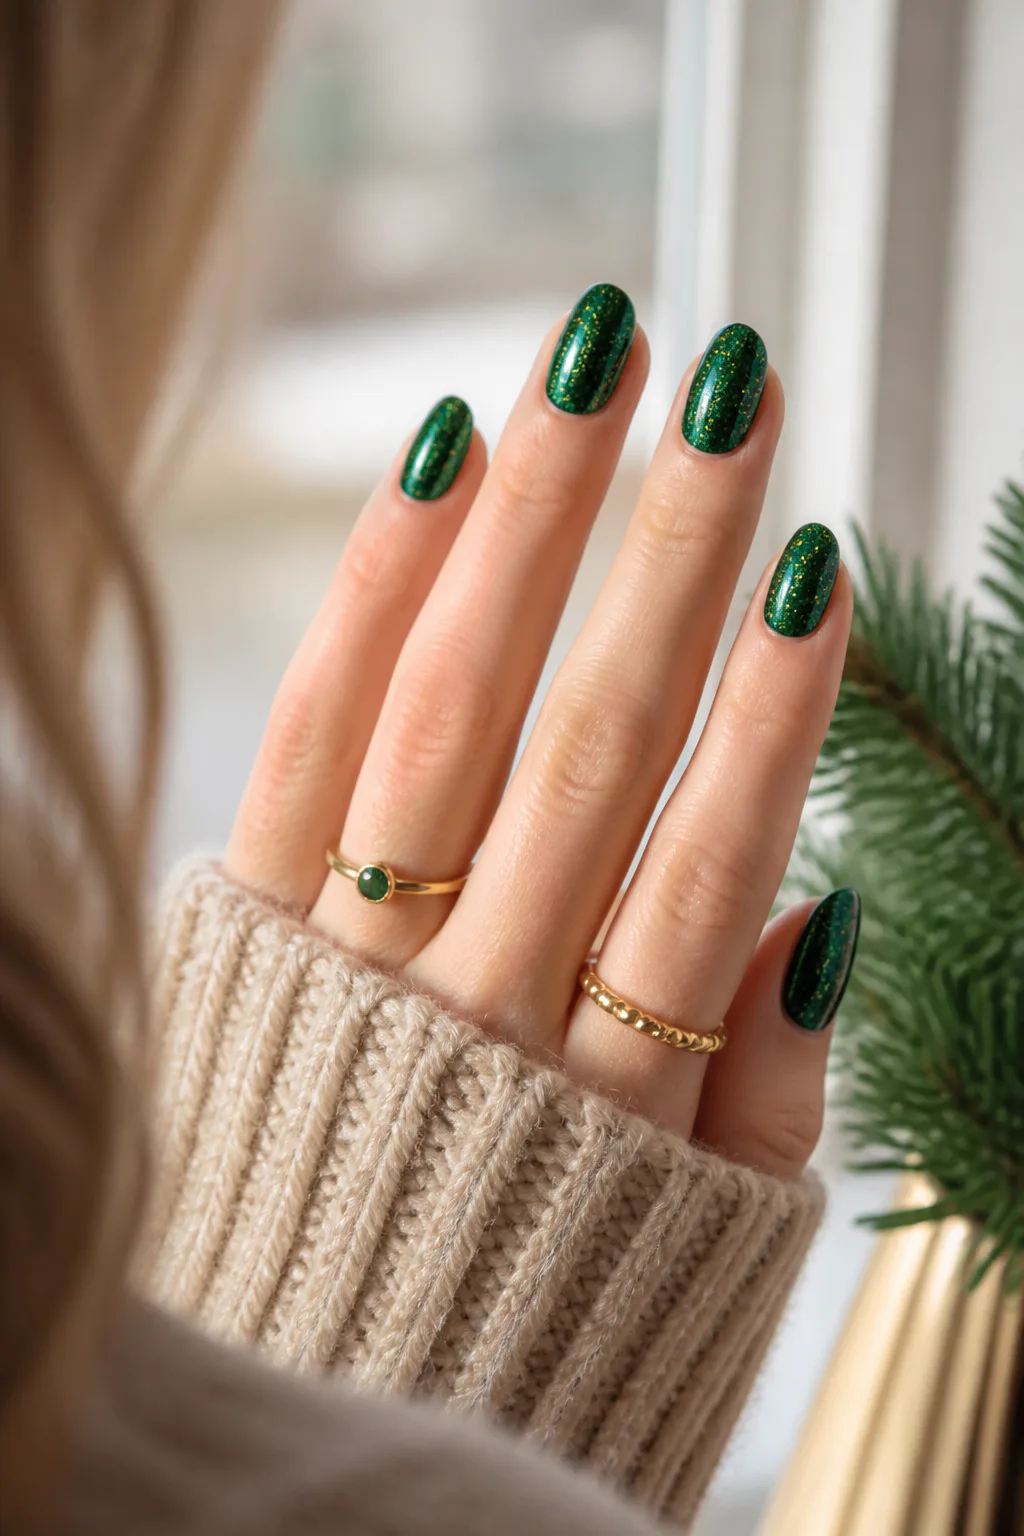
Best for: Shimmer that shifts in the light
Skill level: Beginner
Pine-green jelly polish gives this manicure a deep, slightly translucent base that looks layered rather than flat. Holographic green and gold flecks catch the light across the nail, creating a lively shimmer that shifts as your hands move.
This design is a good fit if you want a festive color but prefer sparkle to painted ornaments or detailed patterns. Wear it on every nail for a coordinated look, or pair it with a plain green manicure and use the glitter polish as an accent. The effect can be especially pretty on rounded or oval shapes.
Building a luminous finish
Jelly polish often looks best when applied in thin, even coats, allowing the flecks to remain visible beneath the color. Check the coverage as you go; a little translucency is part of the look, while extra layers can make the green more saturated.
- Choose a pine-green jelly base with visible reflective flecks.
- Apply thin coats to avoid a heavy, uneven finish.
- Use a glossy top coat to bring out the sparkle.
- Pair with simple jewelry so the shimmer stays central.
The result feels like evergreen foliage with a festive glint, but it is easy enough to wear beyond one event.
5. Silver Snowflakes on Glitter

Best for: Wintry nail art
Skill level: Intermediate (fine brush)
Icy silver glitter creates a sparkling backdrop for delicate white snowflakes and tiny rhinestones. The combination reads as a winter scene without needing a dark base, so it feels light and crisp against a range of skin tones and works well with cool-toned holiday outfits.
You can place snowflakes on every nail for a detailed frosted effect or keep the art to one or two fingers. The latter option gives the manicure more breathing room, especially on shorter nails, where small flakes and stones can otherwise make the design feel busy.
Keeping the snowflake art delicate
Apply the glitter base evenly and allow it to dry before adding white details. Snowflakes can be simple: a few fine intersecting lines with tiny branches suggest the shape without needing intricate painting. Add rhinestones sparingly where they will not catch or snag.
- Use fine silver glitter for a smooth background.
- Paint small snowflakes with a fine brush or dotting tool.
- Place only a few rhinestones on each accent nail.
- Seal painted details carefully with top coat.
This look brings a little winter sparkle to a manicure while keeping the palette clean and elegant.
6. Blushing Snowglobe Glitter Ombre
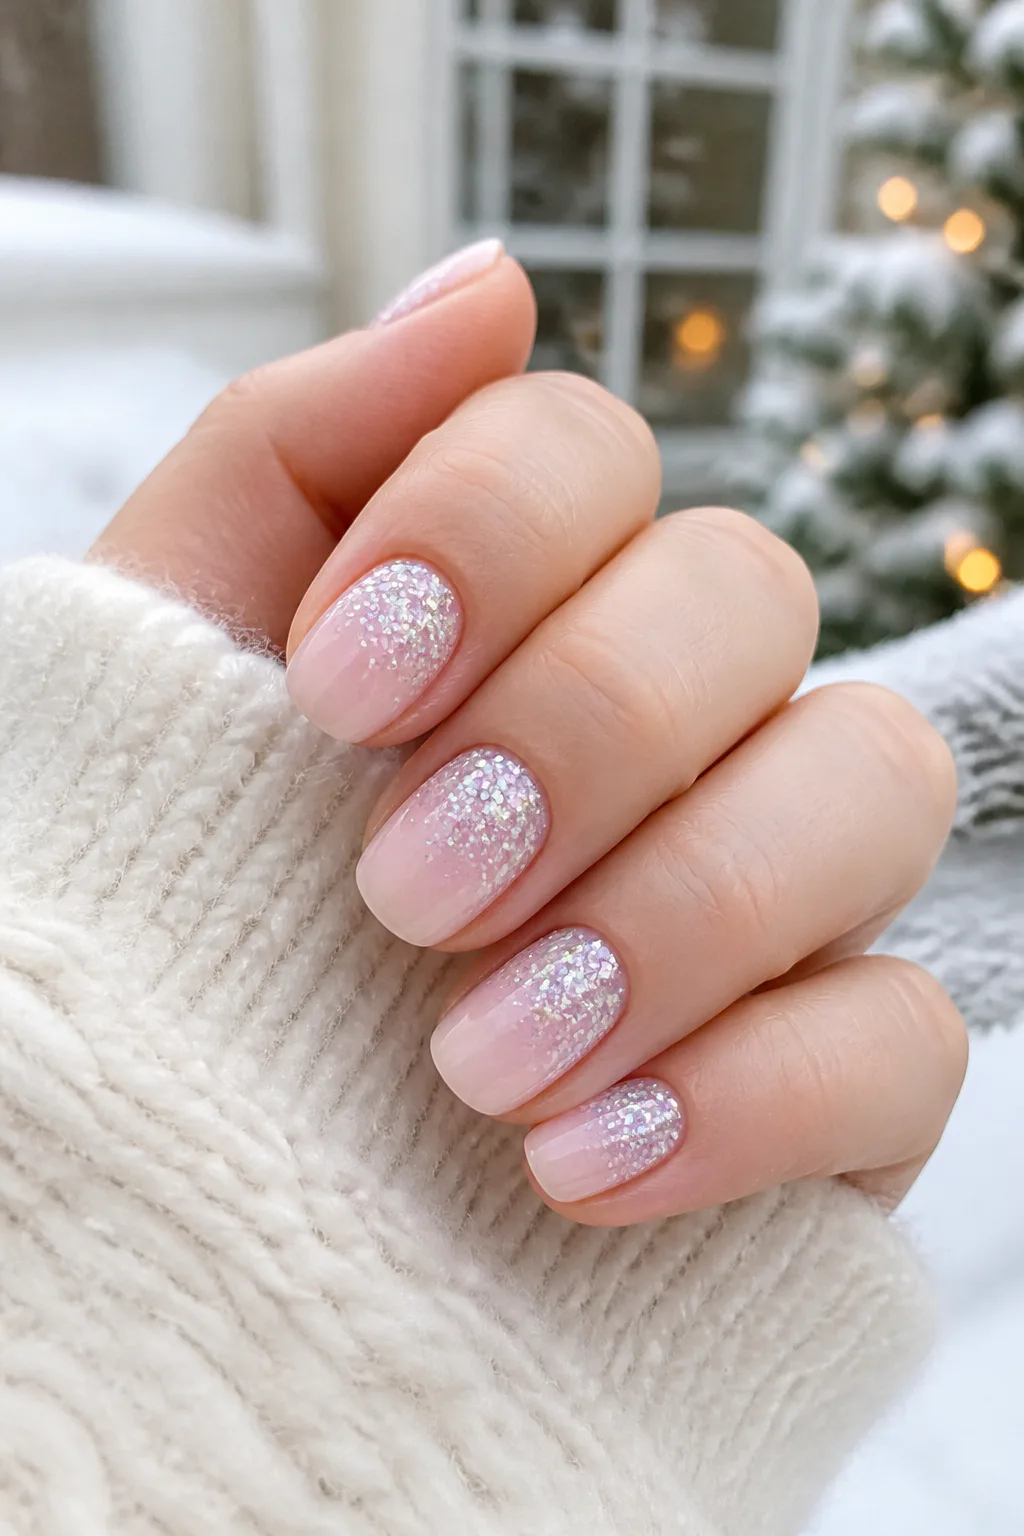
Best for: Soft, pretty sparkle
Skill level: Beginner
A pink or milky-white base gives this snowglobe-inspired manicure a soft, snowy glow. Chunky iridescent white glitter is concentrated near the cuticles, creating the impression of sparkling flakes suspended inside a miniature winter scene.
The placement makes the design feel different from a typical glitter tip, and the pale base keeps it delicate. It suits short nails particularly well because the color stays light and the glitter can be scaled to the available space. On longer nails, the gradient can extend farther down the nail for a more dramatic effect.
Placing the glitter
Begin with a sheer base color and let it dry before adding glitter in small amounts near the cuticle area. Use a sponge or a fine brush to soften the edge of the glitter so it fades gently into the open base rather than forming a hard line.
- Pick iridescent white glitter with mixed particle sizes.
- Keep the cuticle edge neat and free of polish.
- Blend glitter downward in a light gradient.
- Use a smoothing top coat if the glitter feels textured.
The finished manicure is subtle at a glance, with a little extra sparkle revealed as the light shifts.
7. Full-Coverage Diamond Snow Nails

Best for: Maximum party shine
Skill level: Beginner
For maximum icy shine, coat each nail in reflective silver-white glitter from base to tip. The dense coverage gives the manicure a diamond-like finish that catches holiday lights and makes a clear statement without requiring painted motifs or extra embellishment.
This idea works especially well when you want one cohesive look for a party or celebration. On shorter nails, full glitter can make the shape feel bright and polished; on longer nails, it creates a more glamorous effect. A fine, reflective glitter gives a smoother appearance than chunky particles.
Getting even coverage
Apply the glitter in thin coats, allowing each layer to settle before adding more. If you are using loose glitter, place it carefully over a suitable tacky layer and remove excess from the skin before sealing. A smooth finish helps the sparkle look intentional and makes the manicure more comfortable.
- Choose silver-white glitter with a reflective finish.
- Build coverage gradually to avoid thick patches.
- Clean the edges before the polish fully sets.
- Use a compatible top coat to seal and smooth the surface.
With no competing nail art, the glitter itself becomes the whole winter-inspired design.
8. Frosted Blue Aurora Nails

Best for: Icy, frosty look
Skill level: Beginner
Pastel blue polish layered with iridescent blue and silver glitter creates the look of frost on a winter window. The pale base keeps the manicure airy, while the shifting sparkle gives the surface more depth than a flat blue color alone.
This design is a lovely alternative to the traditional red-and-green palette and suits anyone drawn to cool, snowy shades. It can be worn across every nail for a soft statement or paired with solid pastel blue nails to make the glittered fingers stand out.
Layering the frosty effect
Start with an even pastel-blue base, then add a translucent glitter coat once it has dried. For a more atmospheric look, keep the glitter slightly denser toward the tips or outer edges, leaving some of the blue visible underneath.
- Use a soft pastel blue rather than an overly dark base.
- Select glitter with both blue and silver reflections.
- Apply the sparkle in thin layers for a translucent effect.
- Finish with a glossy top coat to enhance the shifting light.
The cool palette feels festive and wintry without being tied to a specific holiday motif.
9. Champagne Glitter French Tips

Video: @nailscare12 on YouTube. Style shown: champagne-gold glitter French tips on a nude base.
Best for: Polished glitter French
Skill level: Intermediate
Champagne-gold glitter tips offer a festive update to the classic French manicure. A nude or sheer pink base keeps the look familiar, while the sparkling edge adds warmth and shine without covering the full nail in glitter.
This design is easy to adapt to different lengths and shapes. A fine, narrow tip feels understated on short nails, while a wider glitter edge can make longer nails feel more glamorous. It also pairs well with gold jewelry and works for holiday gatherings as well as other winter occasions.
Shaping a clean glitter edge
Apply the base color and let it dry before defining the tips. You can follow the natural curve of the nail with a fine brush or use a guide if you want a more symmetrical smile line. Build the glitter coverage gradually for an even, luminous edge.
- Choose champagne rather than bright yellow gold for a softer tone.
- Keep the nude base sheer and even.
- Match the tip width to your nail length.
- Seal the edge to help prevent visible wear.
The result is a polished balance of everyday simplicity and holiday sparkle.
10. Gilded Starry Night Nails
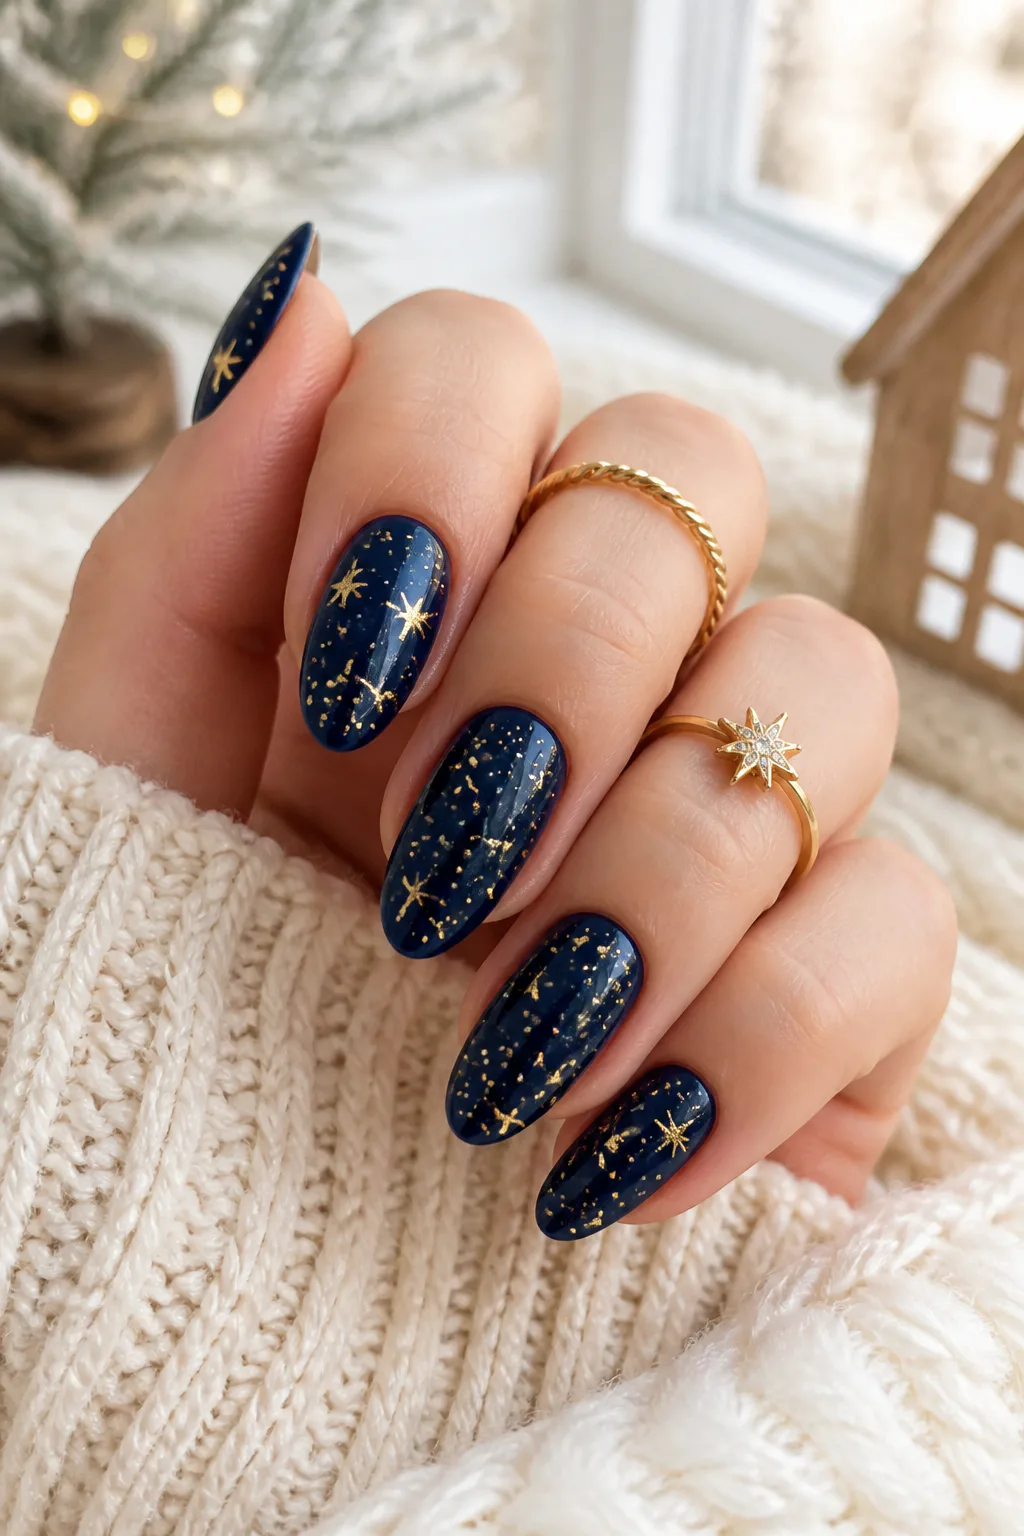
Video: @Nails-design-w1d on YouTube. Style shown: navy celestial nail art with gold stars.
Best for: Night-sky inspired detail
Skill level: Intermediate
Deep navy polish sets a dramatic backdrop for gold glitter stars and delicate constellation details. The rich blue brings to mind a winter night sky, while small metallic accents create a festive shimmer without filling the entire nail with glitter.
Try the design on a few accent nails if you want a more restrained manicure, or scatter tiny stars across every nail for a celestial theme. A glossy navy base makes the gold shine brightly, while a matte finish can give the design a softer, velvety contrast.
Creating a balanced sky
Begin with an even navy base and let it dry completely before placing any stars. Use a dotting tool or fine brush for small points and connecting lines, leaving plenty of open space so the pattern remains readable rather than crowded.
- Choose gold glitter stars or hand-painted details.
- Vary the size and spacing of the accents.
- Keep constellation lines thin and delicate.
- Use a top coat suited to your chosen glossy or matte finish.
This design is a lovely pick for anyone who wants holiday sparkle with a slightly more unexpected color palette.
11. Liquid Gold Chrome and Glitter

Best for: Luxe metallic statement
Skill level: Intermediate
Alternating solid gold chrome nails with fine gold glitter creates a manicure with two complementary kinds of shine. The chrome offers a smooth, mirror-like reflection, while the glitter adds texture and a more scattered sparkle.
The contrast gives each hand visual interest without requiring extra colors or detailed art. It works particularly well when you want a bold party manicure, though you can soften it by using the chrome on just one or two nails and keeping the rest in a sheer neutral.
Mixing the finishes
Plan the placement before painting so the two finishes feel balanced. Apply chrome products according to their specific instructions, and allow glitter polish enough time to dry before sealing it. Because the surfaces look different, neat edges help the alternating pattern feel intentional.
- Alternate chrome and glitter across neighboring fingers.
- Use a fine gold glitter for contrast with smooth chrome.
- Keep the shape and length consistent for a cohesive look.
- Follow product directions when applying and sealing chrome.
The result is a warm, high-shine manicure that feels celebratory without needing additional decoration.
12. Copper Bronze Holiday Sparkle

Best for: Warm metallic sparkle
Skill level: Beginner
Rich copper-bronze glitter brings a warm, glowing quality to a Christmas manicure. Its earthy metallic tone feels different from the usual silver or bright gold, while still catching light beautifully when you move your hands.
This color works well as a full-coverage manicure, especially if you want one cohesive finish that does not rely on nail art. It can also be used on accent nails alongside a warm nude, deep brown, or classic red, making it easy to adapt to your preferred level of sparkle.
Choosing the right warmth
Look for a copper-bronze shade that complements the rest of your look, from softly rosy metallics to deeper, burnished tones. Apply thin coats for even coverage and take time to clean around the cuticles, where metallic polish can make small mistakes more noticeable.
- Choose a fine or mixed-size glitter based on your preferred texture.
- Wear it across every nail for a unified statement.
- Pair accent nails with warm neutral polish.
- Apply a smoothing top coat for a more polished surface.
The warm shimmer feels cozy and festive, like a little glow against winter neutrals.
13. Tartan Plaid with Gold Glitter
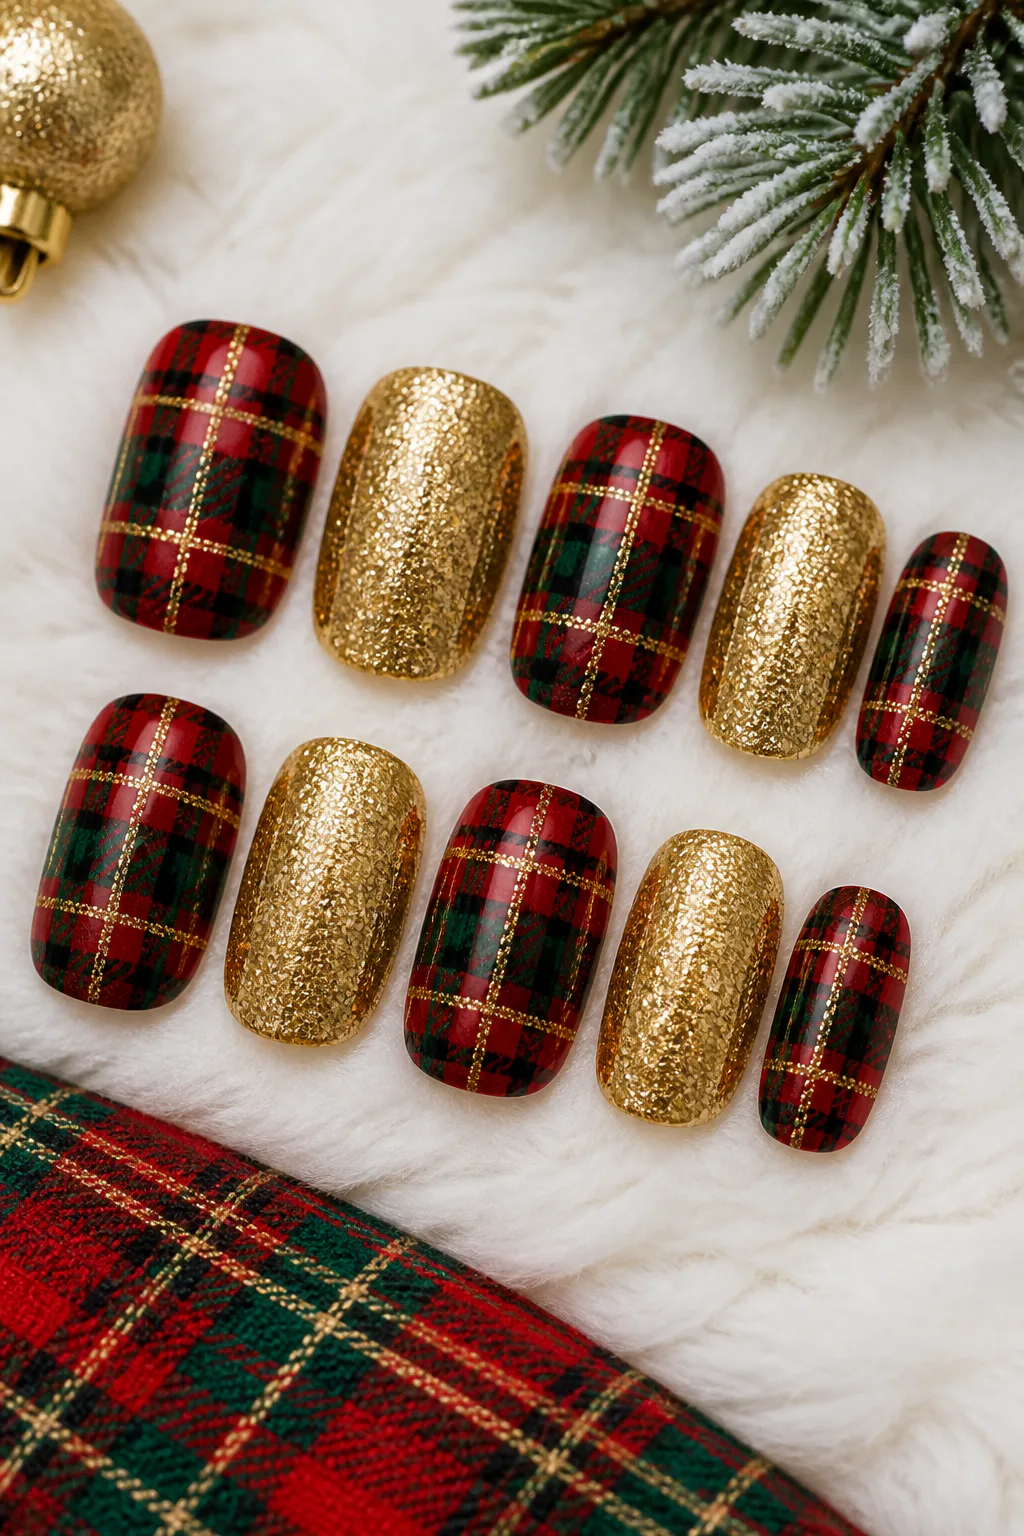
Video: @SolarFlairNails on YouTube. Style shown: red and green tartan plaid Christmas nail art.
Best for: Cozy pattern with shine
Skill level: Advanced (fine lines)
Red-and-green tartan plaid brings a cozy, classic holiday pattern to the nails, while solid gold glitter feature nails add a bright metallic contrast. Combining the two creates a manicure that feels playful and seasonal without making every nail carry the same amount of detail.
Because plaid involves multiple lines and colors, it is often easiest to reserve the pattern for one or two nails on each hand. The remaining nails can carry gold glitter or a simple matching red or green, keeping the overall design balanced on shorter as well as longer nails.
Keeping the plaid readable
Apply the plaid over a solid base color and let each layer dry before adding the next lines. A fine striping brush helps create narrow intersecting bands, but the pattern can be simplified if you are painting at home or working with limited nail space.
- Choose red and green as the main plaid colors.
- Use thin, intersecting lines for a tidy pattern.
- Place solid gold glitter on the nails without plaid.
- Keep accent placement similar on both hands.
The mix of tartan and sparkle feels festive while giving the manicure both pattern and shine.
14. Christmas Tree Glitter Tips
Best for: Cute festive tips
Skill level: Intermediate
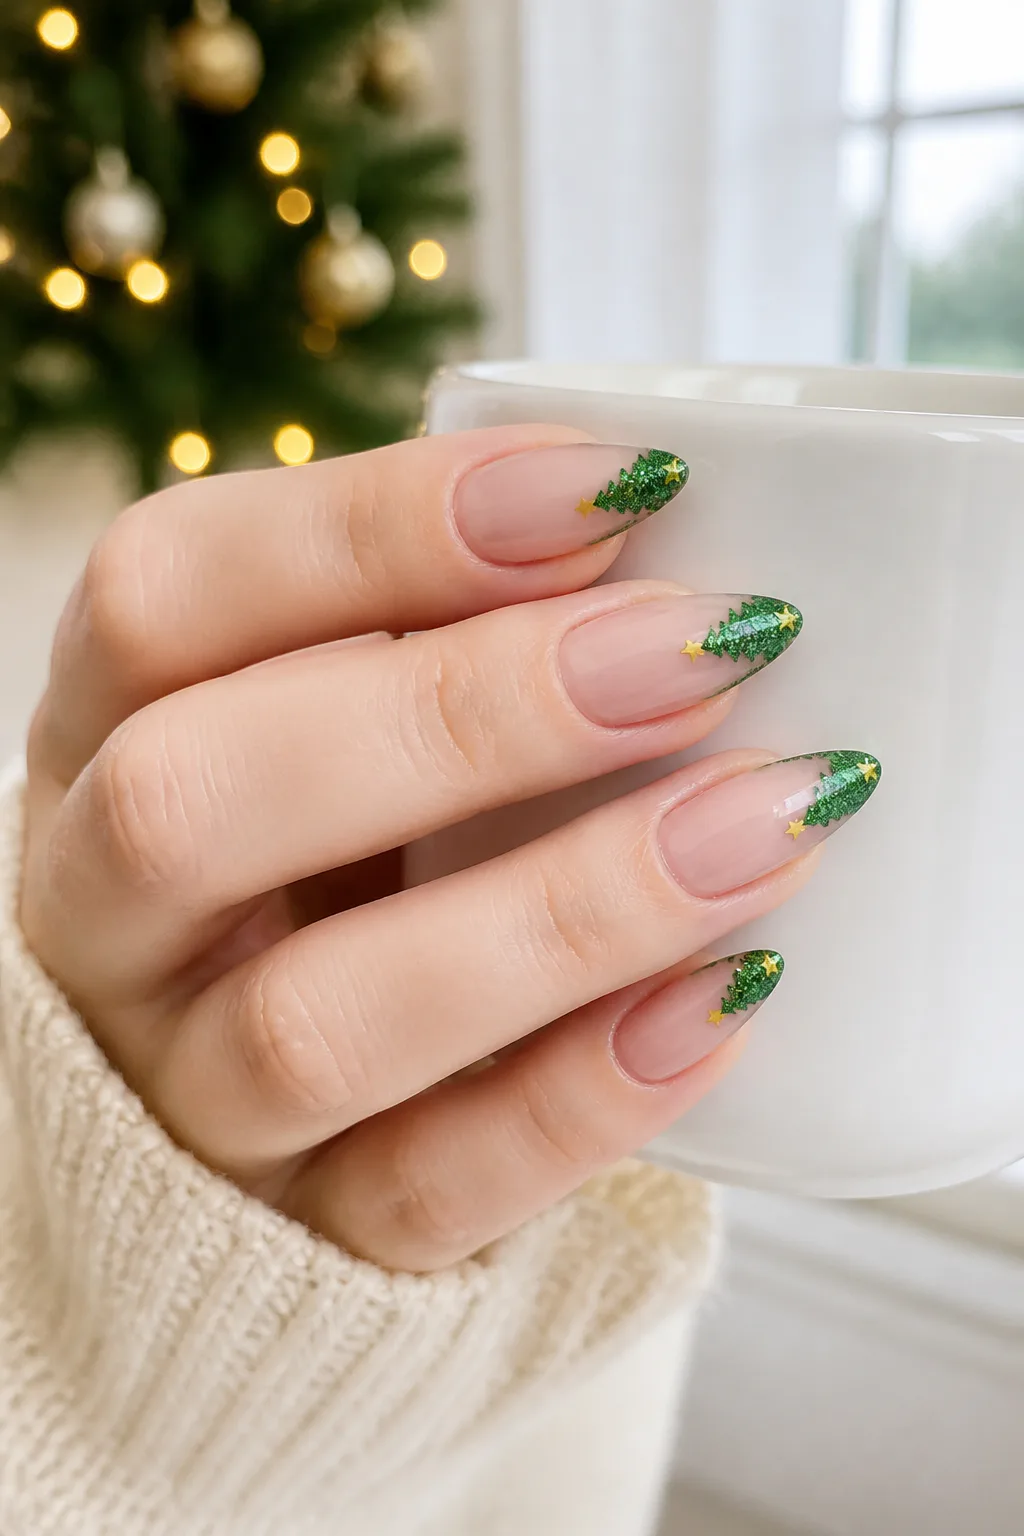
Emerald glitter tips shaped like miniature trees offer a whimsical way to bring Christmas imagery to your manicure. The green sparkle creates the tree silhouette, while a small yellow star dot at the top gives each accent its recognizable finishing detail.
This idea can be adapted to suit your nail shape: a narrow triangle works on shorter nails, while longer nails leave room for a fuller tree shape. You do not have to decorate every finger; one or two tree accents paired with plain green or nude nails can make the detail stand out.
Shaping the tree tips
Use a fine brush to draw a tapered green shape at the nail tip, then fill it with emerald glitter. Let the design dry before adding the yellow star, and keep the silhouette simple so the glitter remains visible rather than obscuring the outline.
- Choose emerald glitter that contrasts with the base color.
- Keep tree shapes small enough to suit your nail length.
- Add one tiny yellow dot or star at each top point.
- Use a glossy top coat to seal the design.
It is a charming option for anyone who enjoys playful holiday nail art.
15. Pearls and Crystal Bow Nails

Best for: Dressy, embellished sets
Skill level: Advanced (3D details)
A milky-white base gives pearls, silver glitter lines, and 3D crystal bows a soft backdrop that lets each detail shine. The combination feels dressed up and decorative, making it a natural choice for a holiday party or a special winter occasion.
With several embellishments in one design, restraint helps the manicure look graceful rather than crowded. You can use the bows and pearls on one or two accent nails, then keep the remaining nails milky white with a fine glitter line or a simple glossy finish.
Arranging the embellishments
Plan where each raised detail will sit before securing it, and avoid placing bulky pieces where they are likely to catch on clothing or hair. A neat silver line can guide the eye toward a bow or pearl, while open space around the accents keeps the pale base visible.
- Start with an even milky-white base coat.
- Use thin silver glitter lines instead of filling the whole nail.
- Reserve crystal bows and pearls for a few accents.
- Secure raised decorations with an appropriate nail adhesive.
The finished look is delicate in color but undeniably festive in detail.
16. Iridescent Berry Glitter Nails
Best for: Berry-toned sparkle
Skill level: Beginner
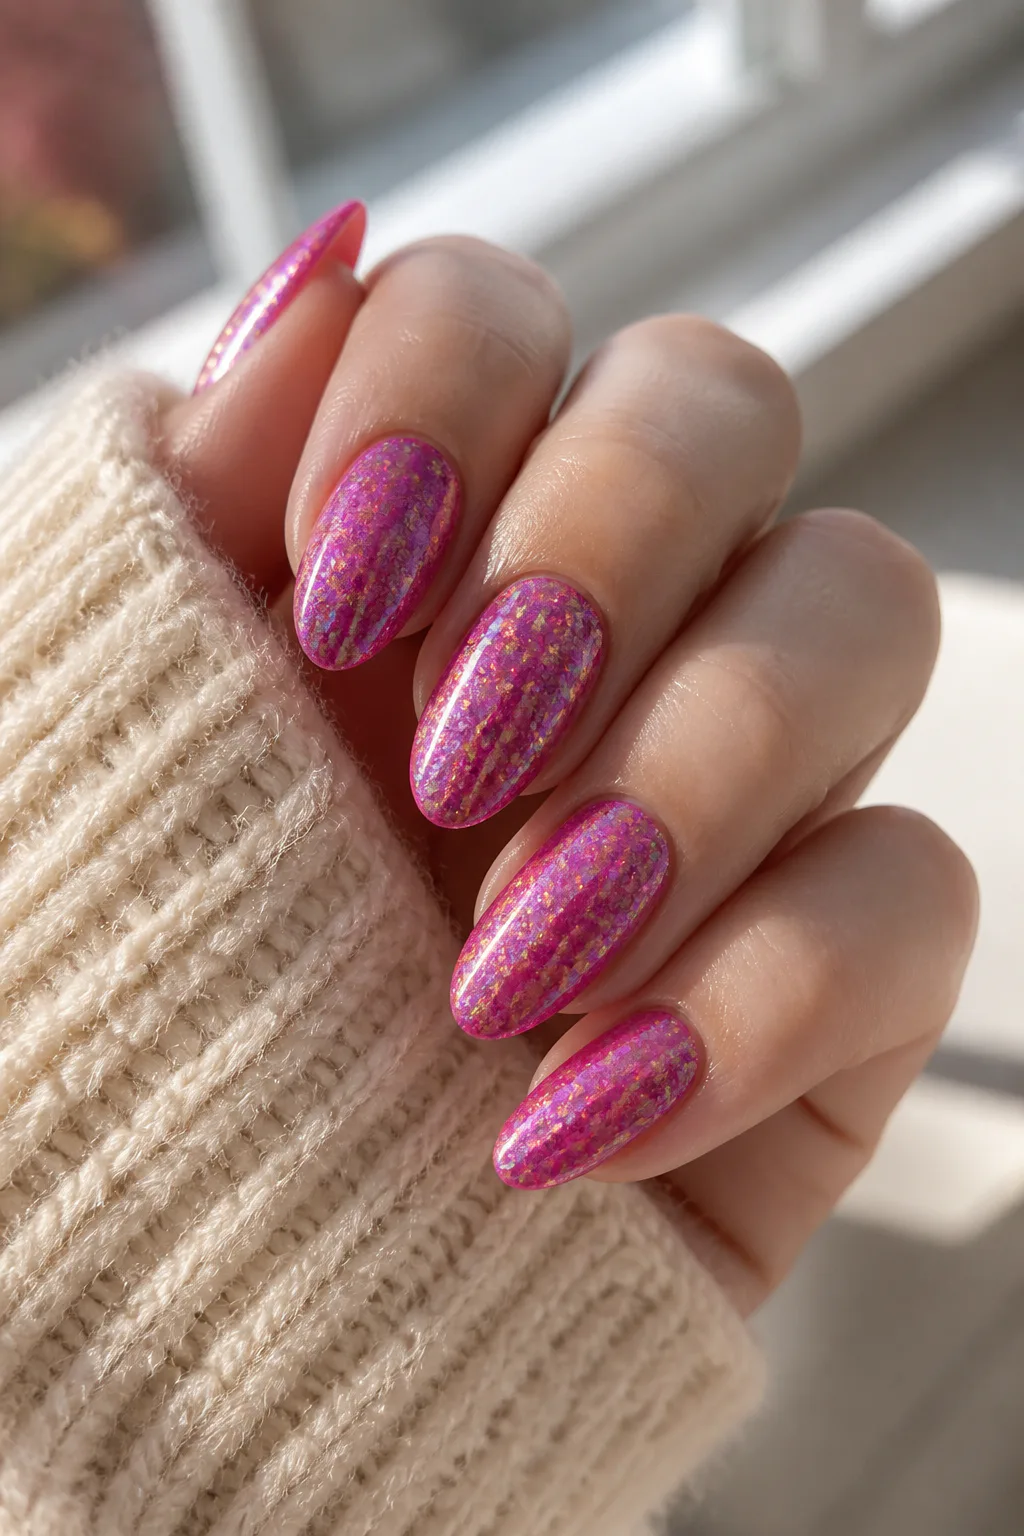
Iridescent berry polish combines red and pink tones with multidimensional glitter that shifts color as it catches the light. The result feels festive but less traditional than a straightforward red manicure, giving your nails a lively glow that changes with every angle.
This finish can stand on its own across all ten nails, so there is no need to add detailed art. If you prefer a more understated look, pair the berry glitter with a sheer pink or nude on a few fingers and let the shifting color take center stage on the rest.
Making the color shift stand out
Apply the polish in even coats over a smooth base so the reflective particles appear consistent. Check the finish in different lighting before deciding how many coats to add; natural light and indoor holiday lighting can show different facets of the same shade.
- Choose a red-pink glitter with noticeable color-shifting reflections.
- Apply thin layers for even coverage.
- Keep extra nail art minimal so the shimmer remains visible.
- Finish with a glossy top coat to enhance the multidimensional effect.
It is a simple way to get a colorful, sparkling manicure that feels both festive and distinctive.
Frequently Asked Questions
How do you make glitter nails look smooth?
Apply thin layers, let each dry, then finish with two coats of a thick glossy top coat to level the surface.
What is the easiest glitter nail design for Christmas?
A glitter fade from the tips, champagne glitter French tips or a single glitter accent nail are quick and forgiving.
How do I remove glitter polish easily?
Soak cotton pads in remover, hold them on each nail for a minute or wrap in foil, then wipe downward. A peel-off base coat also helps.
Which glitter colors are best for Christmas?
Red, gold, silver, emerald and champagne are classic holiday choices, while pink and berry glitter give a softer festive look.
Final Thoughts
Christmas glitter nails can be tailored to nearly any style, whether you love classic ruby red, frosty blue, warm metallics, or playful holiday art. A full-coverage sparkle makes a bold statement, while a glitter fade, French tip, or accent nail offers a more subtle way to join in.
Choose a design that feels comfortable for your nail length and the amount of detail you enjoy wearing. You can simplify intricate ideas, switch the color palette, or ask a nail artist to adapt the placement—and still end up with a festive manicure that feels like you.