16 Stunning Black Christmas Nails Ideas
Black Christmas nails are a chic way to give holiday color a moodier, more unexpected twist. From soft, light-catching finishes to playful seasonal art, these designs make black polish feel festive without losing its sleek, dramatic appeal.
This collection has ideas for different styles and comfort levels, whether you prefer a minimal accent nail or a full set of detailed holiday designs. There are glossy, matte, metallic, and colorful options to consider, with plenty of ways to adapt each look to your preferred nail shape and length.
Use these ideas as inspiration for a salon appointment or a DIY manicure. Many designs work best with a simple plan: choose one or two standout details, keep the rest of the nails balanced, and give decorative layers enough time to dry or set.
Quick Answer
Black Christmas nails make a moody, elegant base for festive details. The easiest options are a black-to-silver glitter ombré, holographic flakes in black jelly polish and gold chrome edges; for classic holiday motifs, add white snowflakes, reindeer or candy cane accents; for a dressy set, try velvet cat-eye, 3D metallic bows or tuxedo nails with pearls.
1. Midnight Velvet Cat-Eye Nails
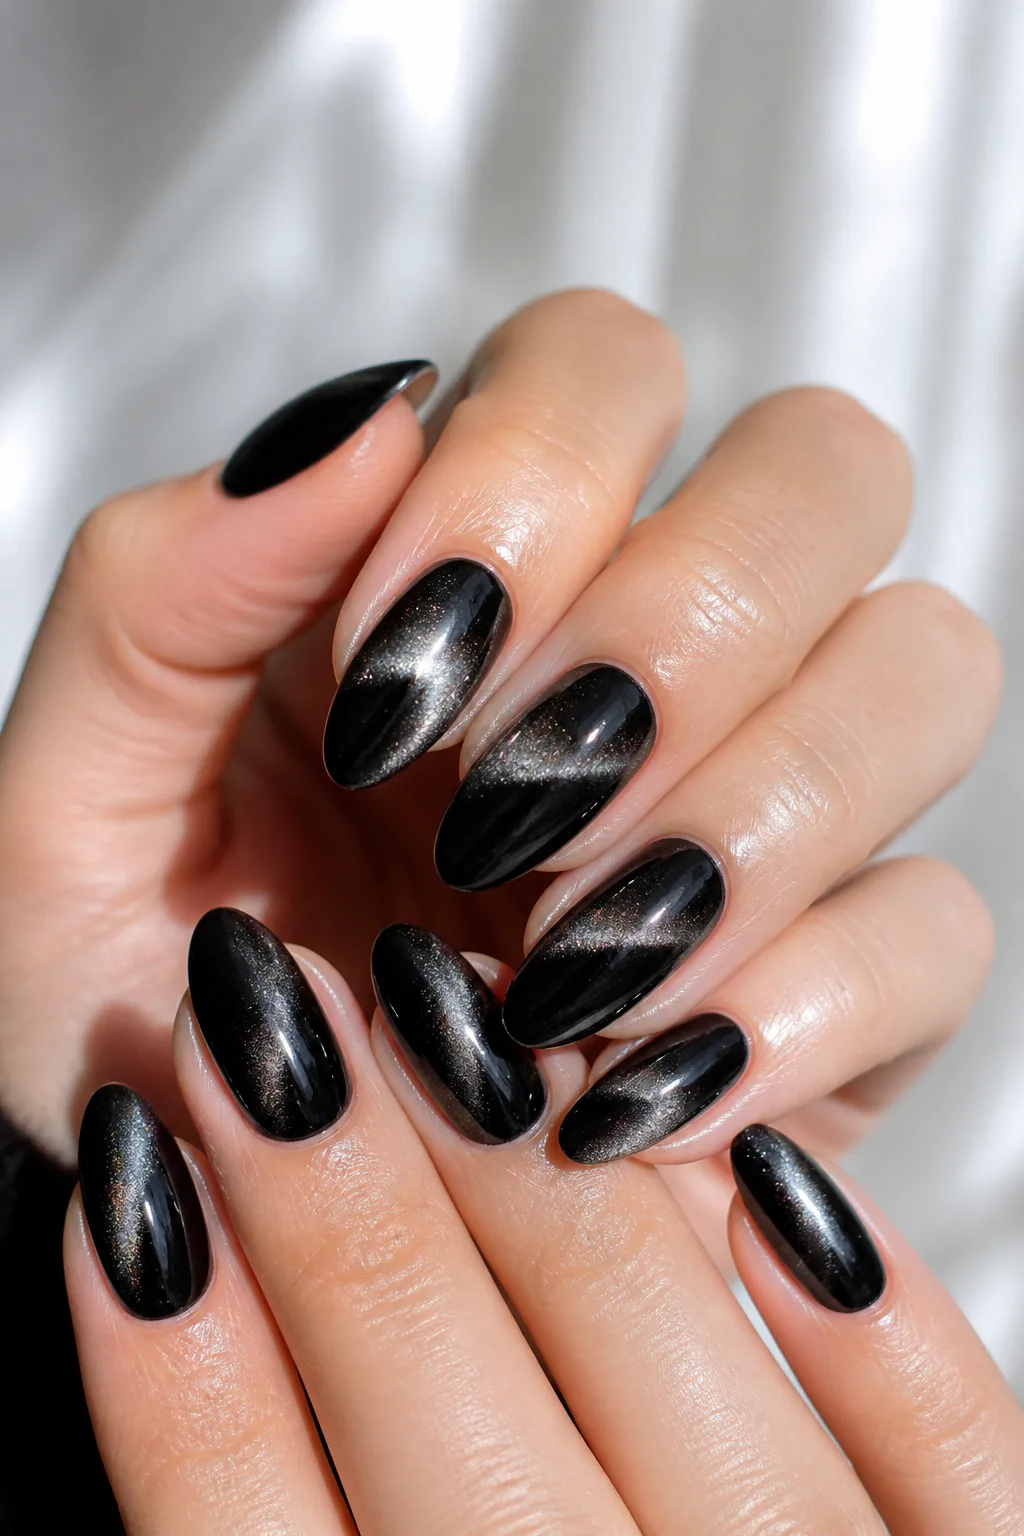
Best for: A deep, glowing statement
Skill level: Beginner (magnet needed)
Magnetic cat-eye polish gives a black Christmas manicure a plush, shifting glow that feels festive without relying on traditional red and green. The reflective stripe moves as your hands catch the light, creating a velvet-like finish that looks especially striking in the soft glow of holiday gatherings.
Try the effect across every nail for a dramatic set, or reserve it for a few accents and keep the rest glossy black. It works on short nails as well as longer almond or coffin shapes; the magnetic shimmer supplies the detail, so extra art is optional.
How to create the velvet effect
Start with an even black base, then apply magnetic cat-eye polish according to its directions. Hold the magnet near the nail before curing or allowing the polish to dry, positioning the shimmer where you want the glow to appear.
- Use a narrow highlight for a sleek, elongated look.
- Angle the shimmer differently on each nail for movement.
- Finish with a compatible top coat to protect the surface.
The result is a polished, low-art holiday manicure with plenty of dimension.
Video: @l1nails on Instagram. Style shown: black velvet cat-eye nails with a silver magnetic glow.
2. Black French Tips with Silver Stars
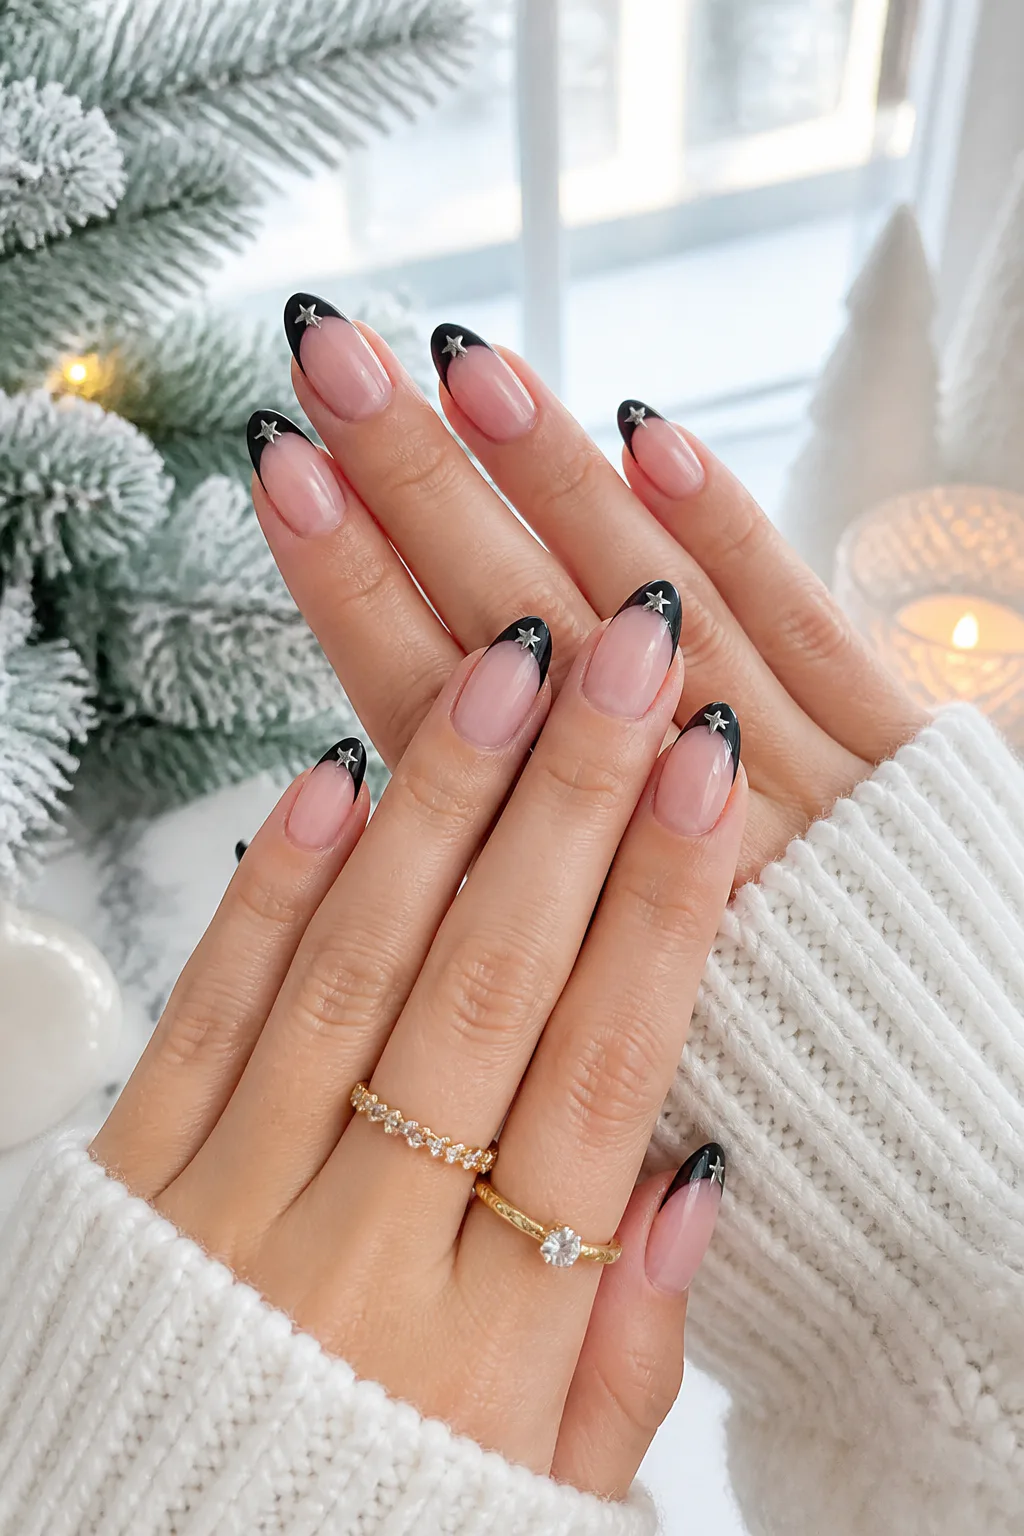
Best for: Chic festive French tips
Skill level: Intermediate
A black French tip adds a crisp, modern edge to a sheer nude or soft pink base. Tiny silver stars bring in a wintry sparkle, keeping the design festive while leaving much of the natural-looking base visible. The contrast feels polished rather than overly busy.
This look suits anyone who wants holiday nail art that can transition easily from daytime plans to an evening celebration. A fine smile line looks especially clean on short or medium nails, while longer tips provide more room for a curved or angled edge.
Design tips
Shape the black tip carefully and let the base remain the main background. Place the stars sparingly, such as near one corner of the tip or along a couple of nails, so they read like little flashes of winter sky.
- Choose a sheer base close to your natural nail tone.
- Keep tip thickness consistent across the set.
- Use small metallic decals or a fine brush for the stars.
- Seal carefully so raised details do not catch on fabric.
For a softer finish, choose icy silver; for a bolder glint, use brighter metallic accents.
3. Gold Constellations and Snowflakes
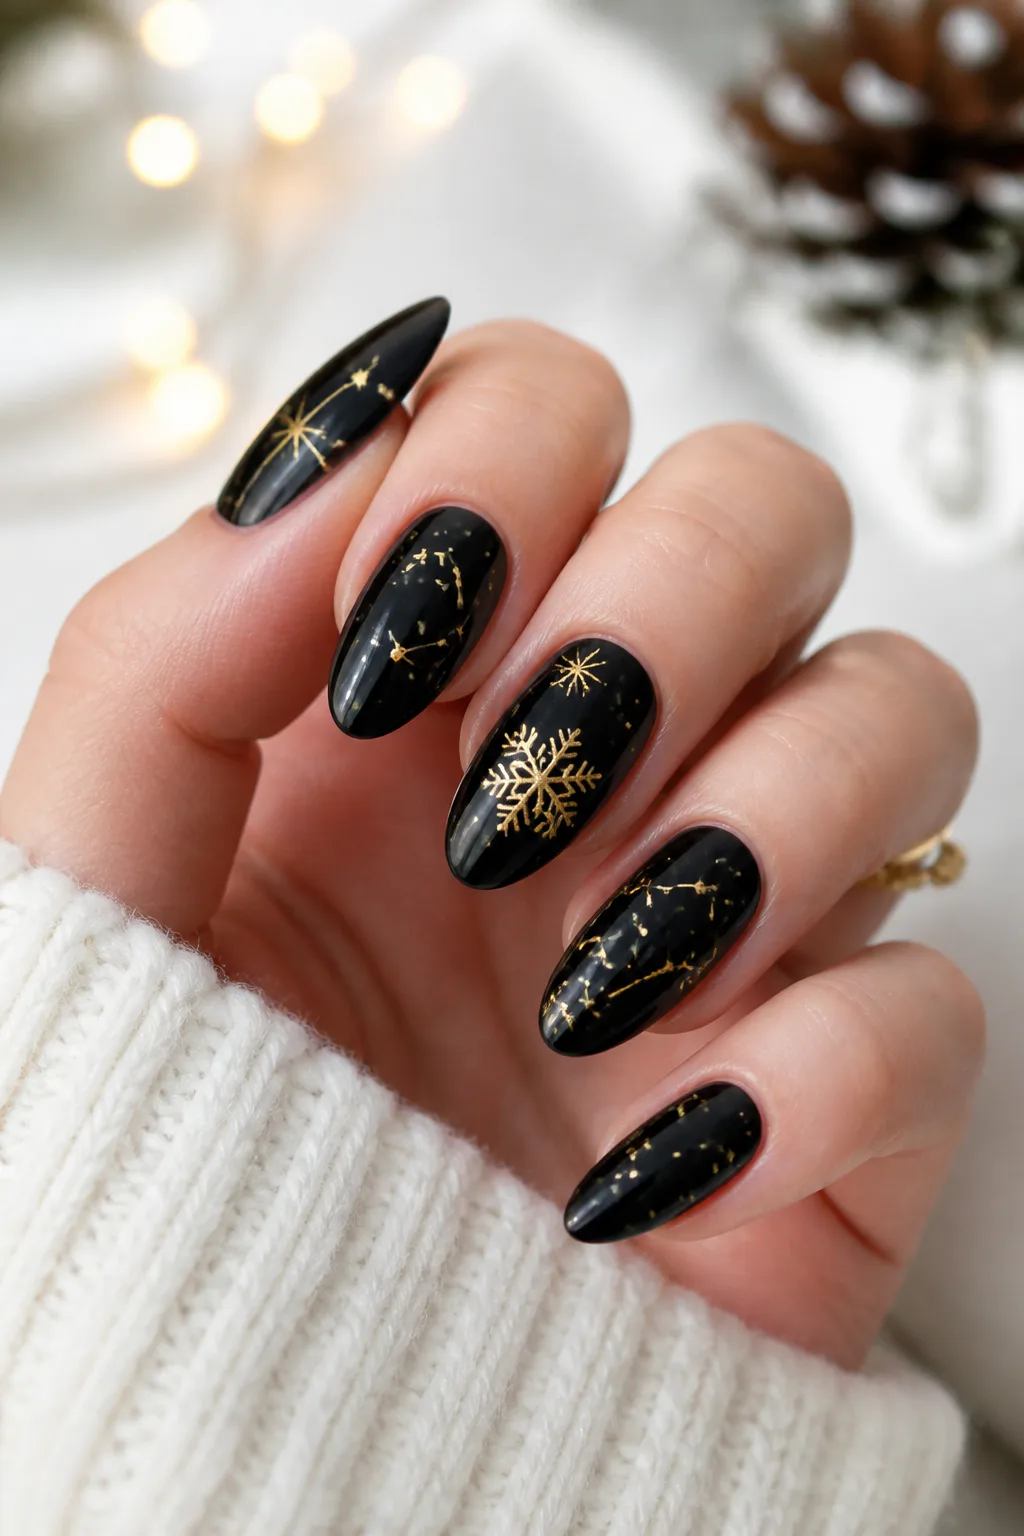
Best for: Elegant night-sky details
Skill level: Intermediate (fine brush)
Glossy jet-black polish makes a dramatic backdrop for delicate gold snowflakes and constellation-inspired starbursts. The dark base gives fine metallic lines strong contrast, while the gold adds warmth that feels festive without competing with the rest of your outfit.
Rather than filling every nail with intricate art, let a few motifs take center stage. A snowflake on one nail and a loose scattering of stars on another can create a cohesive set while keeping the overall manicure elegant and readable.
Plan the placement
Gold foil, small decals, or hand-painted lines can all work, depending on your tools and comfort level. Leave breathing room around each motif; a little negative space helps the fine details stand out against the glossy black.
- Use a fine liner brush for thin constellation lines.
- Place the largest snowflake on an accent nail.
- Vary the size of tiny starbursts for a natural sky effect.
- Apply top coat gently over foil to avoid shifting it.
This design pairs especially well with simple jewelry and other understated winter details.
4. Black Nails with 3D Metallic Bows
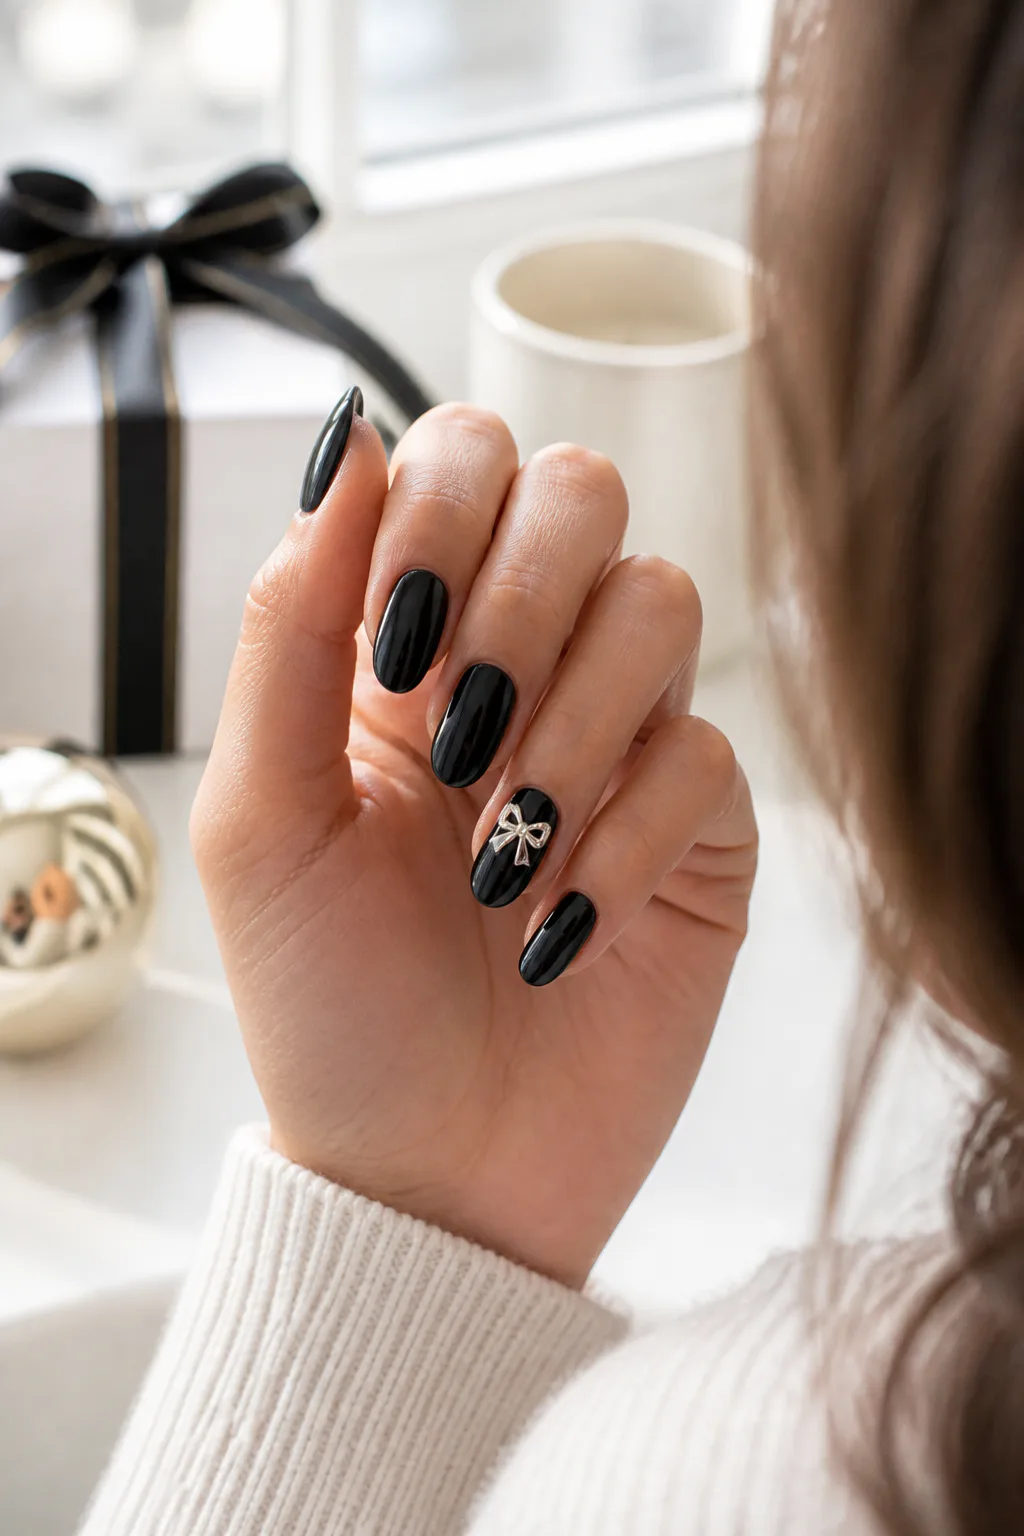
Best for: Dressy holiday parties
Skill level: Advanced (3D gel)
A raised silver or gold bow turns a deep black accent nail into a tiny holiday gift. The sculptural detail catches the light from different angles, while the surrounding obsidian polish keeps the look sleek and dramatic. It is a playful choice that still feels dressed up.
Because a three-dimensional bow has noticeable texture, one accent nail may be enough. Place it on the ring finger or another nail with space for the shape, and keep the remaining nails glossy black or add only a subtle metallic detail.
Keep the raised accent comfortable
Use a bow charm or sculpted nail-art material designed for manicures, and secure it firmly with an appropriate product. A lower-profile shape is often more practical for everyday wear than a tall, delicate ornament.
- Match the bow metal to your other jewelry or accents.
- Position it away from the very edge of the nail.
- Keep the surrounding nails smooth and simple.
- Ask a nail technician about secure placement for a raised charm.
The contrast between smooth black polish and a dimensional bow gives the set its festive impact.
5. Matte and Glossy Black Plaid
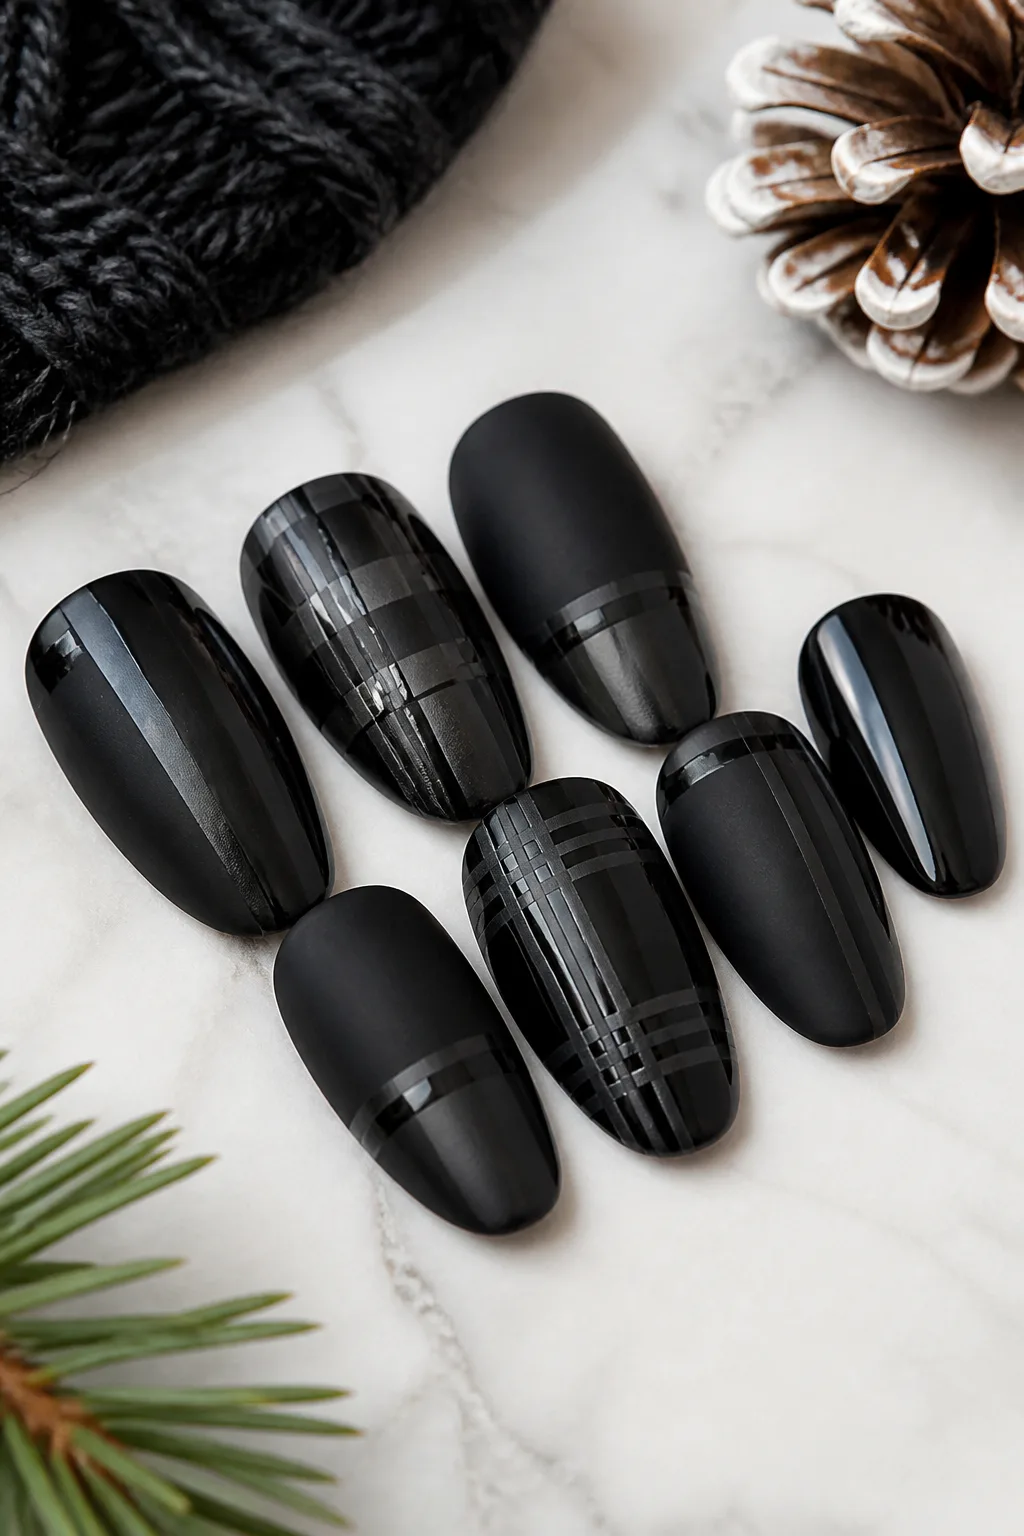
Best for: Subtle texture play
Skill level: Intermediate
Black-on-black plaid is subtle, graphic, and easy to wear beyond the holiday season. Pair a velvety matte base with glossy lines in a tartan-inspired grid, or reverse the finishes for a slightly different effect. The pattern becomes visible as it catches the light rather than relying on bright color.
A single feature nail keeps the manicure from feeling crowded. The other nails can alternate matte and glossy black, making the finish contrast part of the design even when the plaid detail is not front and center.
Build a clean plaid pattern
Let the base coat dry or cure fully before adding narrow stripes. Work with a fine striping brush or tape, and cross a few lines in different directions to suggest tartan without trying to reproduce a complicated fabric pattern.
- Choose one nail for the most detailed grid.
- Use thin, evenly spaced lines for a refined finish.
- Apply matte and glossy top coats only where intended.
- Allow each layer to set before adding the next.
This tonal design offers holiday texture with a particularly understated palette.
6. Grinch Accent on Matte Black Nails
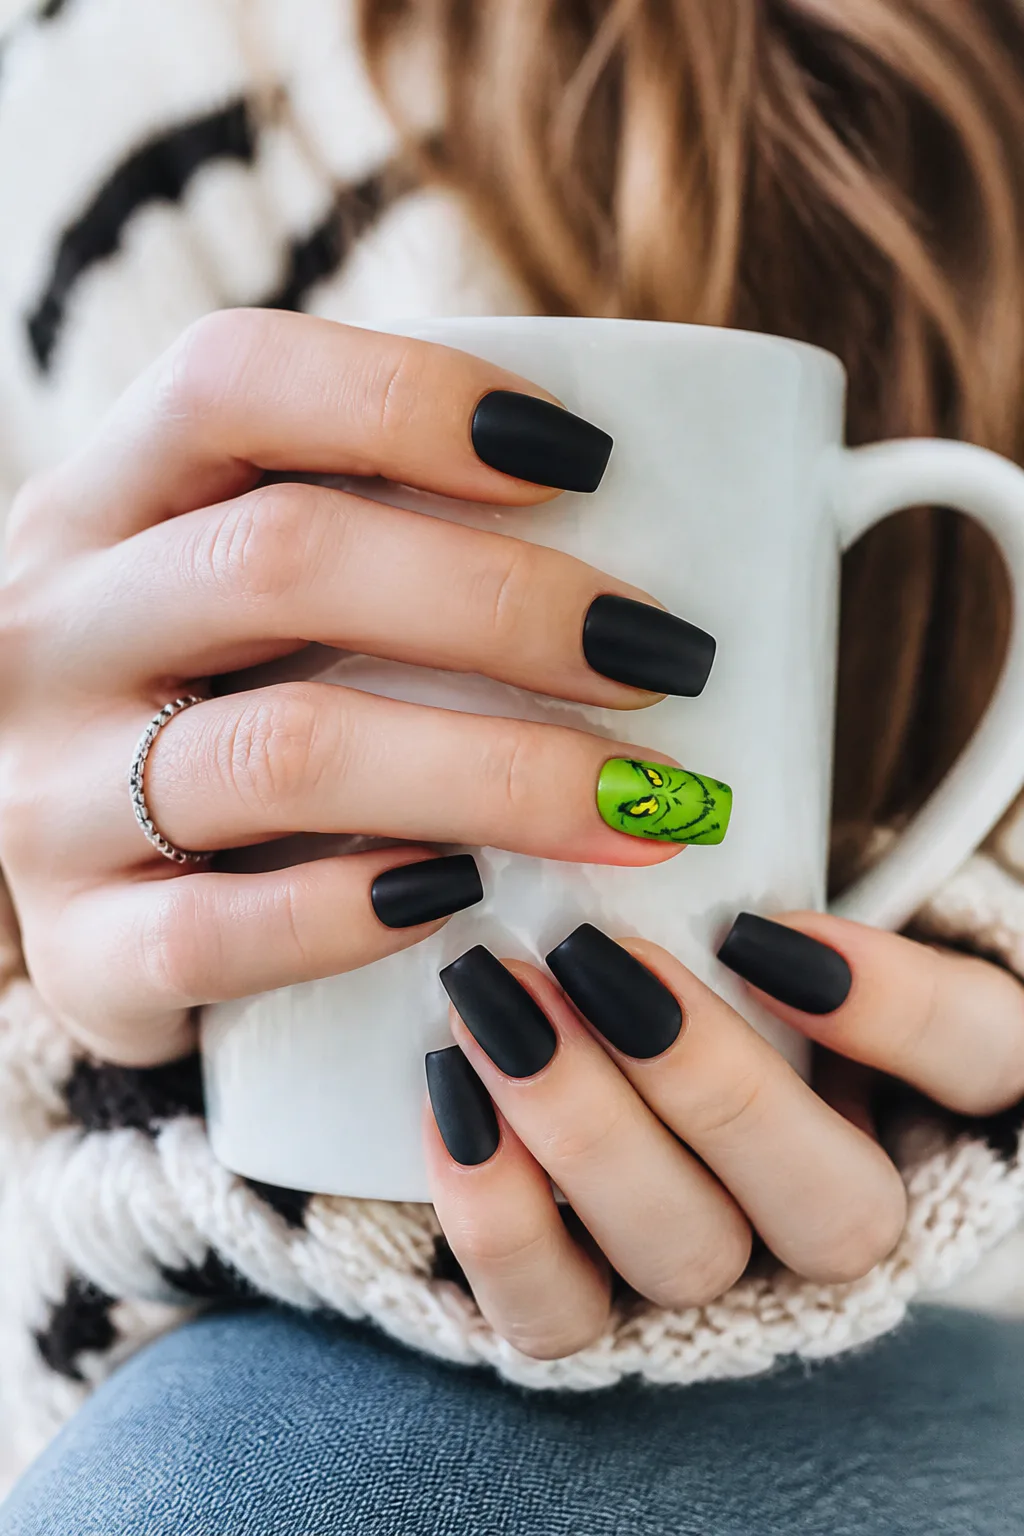
Best for: Fun, playful accent
Skill level: Intermediate
A bright lime-green Grinch-inspired accent gives a matte black manicure a cheeky holiday twist. The sharp contrast makes the green detail pop, while the dark, velvety nails around it keep the overall look stylish rather than cartoonish.
Keep the character minimal if you prefer a more wearable design: a small smirk, a tuft of green, or a tiny Santa hat can suggest the reference without filling the whole nail. One accent nail is usually enough to make the idea clear.
Balance the color and character
Paint the other nails in matte black and reserve glossy or bright color for the accent. If drawing a face feels challenging, use a decal or ask a nail artist to create the detail; small, clean features tend to read better than too many tiny lines.
- Use lime green as the main accent color.
- Choose a simple expression or single recognizable detail.
- Keep the artwork centered and scaled to the nail.
- Protect the design with a top coat suited to the finish.
The result is a playful focal point surrounded by a sophisticated matte base.
Photo: @glamournailbar on Instagram. Style shown: matte black nails with a green Grinch accent nail.
7. Crystal Christmas Ornaments on Black
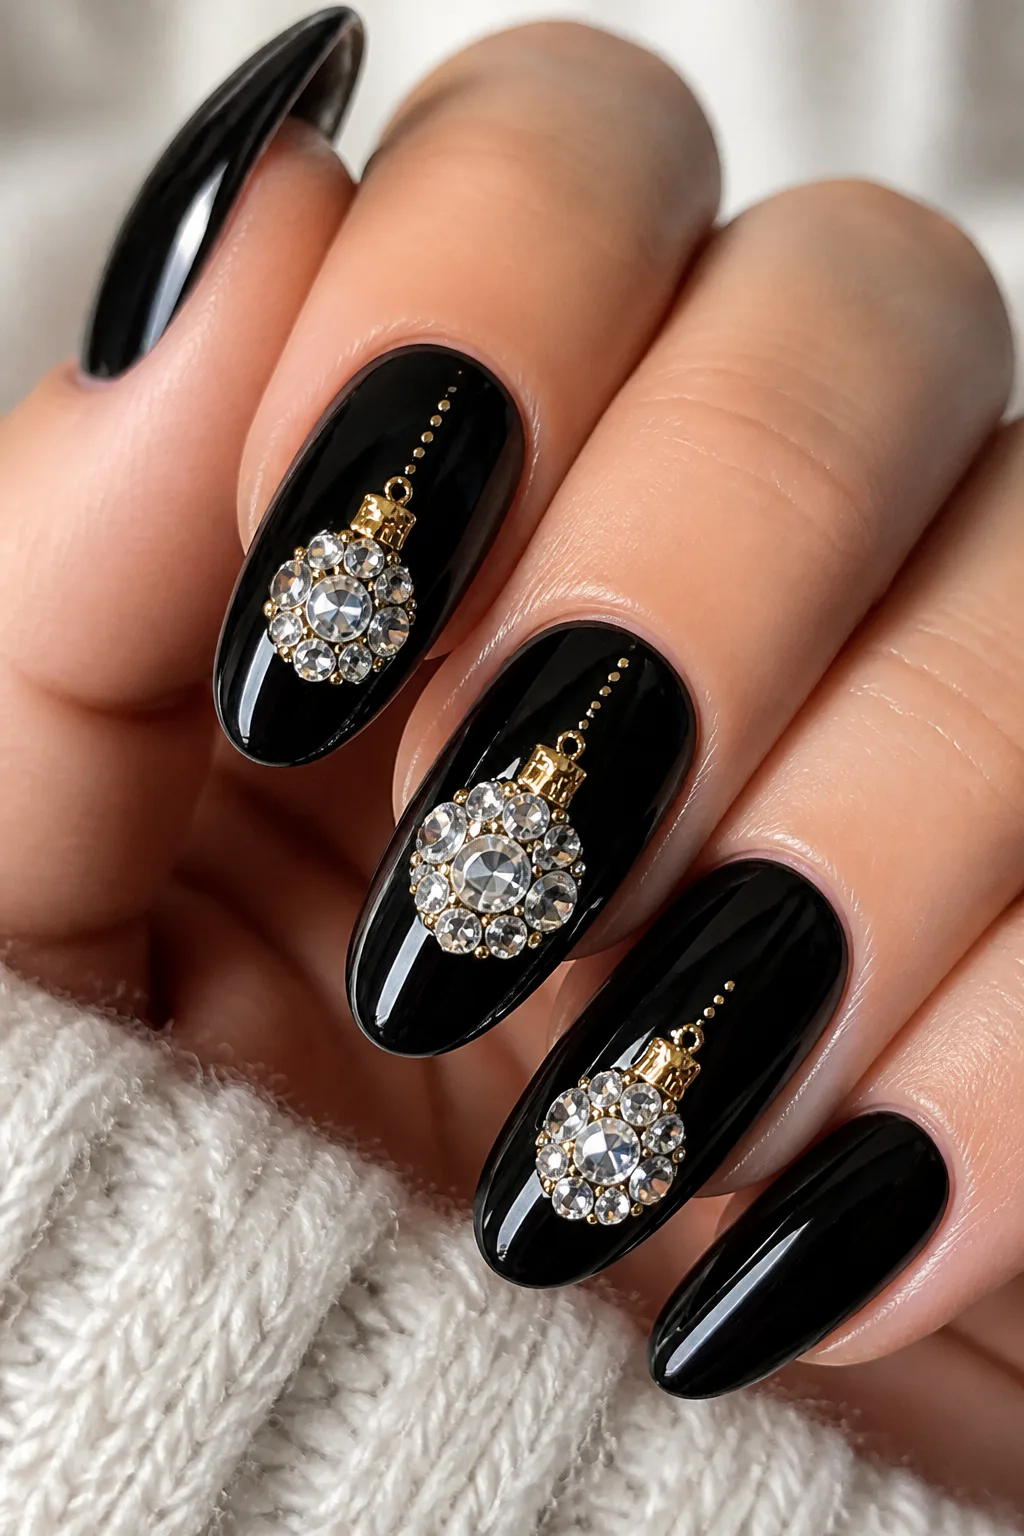
Best for: Sparkly statement nails
Skill level: Intermediate
Tiny rhinestones on glossy black polish can resemble glowing ornaments against a midnight backdrop. A small crystal cluster reflects the light beautifully, giving the manicure a festive sparkle while allowing the dark base to remain the star of the design.
Arrange the stones like baubles on a few accent nails, or create a small cluster near the cuticle for a more jewelry-inspired effect. The shine is strongest when the rest of the nail art stays simple, so avoid crowding the crystals with too many competing motifs.
Place crystals with care
Use nail-safe adhesive or a suitable gel product and a placement tool to position each stone. Press gently, then seal around the edges as directed; covering the entire face of a crystal can dull its shine, so follow the product guidance for your materials.
- Mix crystal sizes for a natural ornament cluster.
- Choose clear stones for a classic sparkle.
- Add a small metallic accent to suggest ornament caps.
- Keep embellishments away from spots that snag easily.
For a balanced set, pair the crystal nails with plain glossy black polish.
8. Black-to-Silver Glitter Ombré
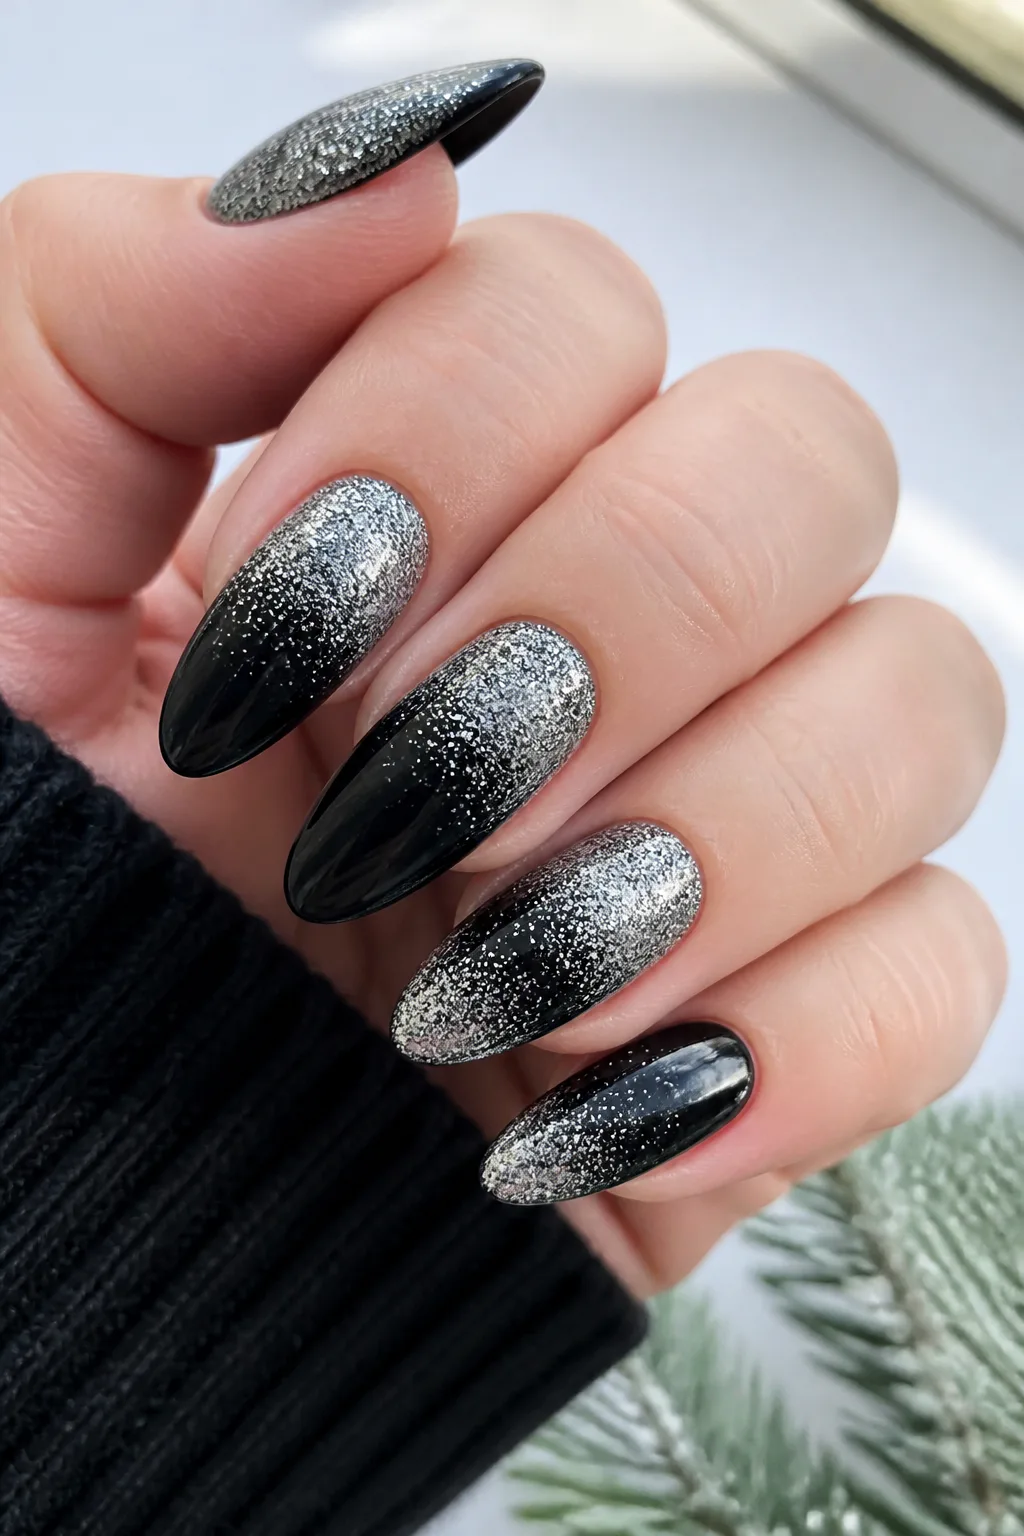
Best for: Low-effort sparkle
Skill level: Beginner
A silver glitter gradient creates the feeling of snow or frost gathering over a black manicure. The fade can begin at the cuticle and drift toward the tip, or start at the free edge for a classic glitter-tip effect. Either direction gives the dark base a bright, seasonal lift.
Fine glitter usually creates a softer transition, while larger particles make the gradient more twinkly and bold. This design works across different nail lengths, though longer nails offer more space for a gradual fade.
Blend the glitter gradually
Apply glitter in light layers, concentrating the most sparkle where you want the gradient to begin. Use a sponge or a detail brush to soften the edge, adding more product in stages rather than making one heavy stripe.
- Choose fine silver glitter for a delicate snowfall effect.
- Keep the black base smooth and opaque.
- Build coverage gradually to avoid a harsh border.
- Use a glossy top coat to smooth the glitter surface.
The finished fade feels festive while staying easy to coordinate with holiday outfits.
Video: @stellafairynail on TikTok. Style shown: black ombré fading to silver glitter on accent nails.
9. White Reindeer Silhouettes on Black

Best for: Whimsical festive art
Skill level: Intermediate
A crisp white reindeer or tree-line silhouette stands out beautifully against a black accent nail. The graphic contrast gives the manicure a wintry storybook feel, and the simple palette keeps it clean rather than overly colorful.
Choose one focal image, such as a reindeer in profile or a row of trees, and keep the surrounding nails solid black. This makes the art easier to see and gives the set a deliberate, gallery-like quality. Short nails can carry a small icon; longer nails allow room for a wider landscape.
Make the silhouette readable
Use a fine brush, stamping plate, or nail decal for a neat outline. Simplify the shapes instead of adding tiny details that may blur at a small scale, and let the white design dry fully before applying a protective top coat.
- Place the main silhouette on one feature nail.
- Use opaque white for clear contrast.
- Keep the image centered and scaled to the nail bed.
- Pair detailed art with plain black nails.
This is a lovely option for a quiet, graphic take on Christmas nail art.
10. Neon Christmas Lights on Black

Best for: Colorful party nails
Skill level: Intermediate
Delicate wire lines and tiny multicolored bulbs turn black polish into a playful nighttime backdrop. The dark canvas makes each bright bulb stand out, so even a small strand of lights can feel cheerful and instantly seasonal.
For a subtle version, paint a single winding wire across one or two accent nails. If you want a bolder look, add little bulbs in festive colors across several nails, but leave enough black space around them to keep the design crisp.
Draw a tiny strand of lights
Use a fine brush to create a loose, curved wire before adding small dots for bulbs. A slightly irregular line can feel more like a real strand draped across the nail, while consistent spacing keeps the design tidy.
- Choose a few bright colors rather than every shade.
- Make the wire thin so the bulbs remain the focus.
- Vary bulb placement to follow the curve naturally.
- Let each color dry before sealing the artwork.
It is a fun choice for anyone who likes holiday designs with a little extra personality.
11. Candy Cane Accent Nails
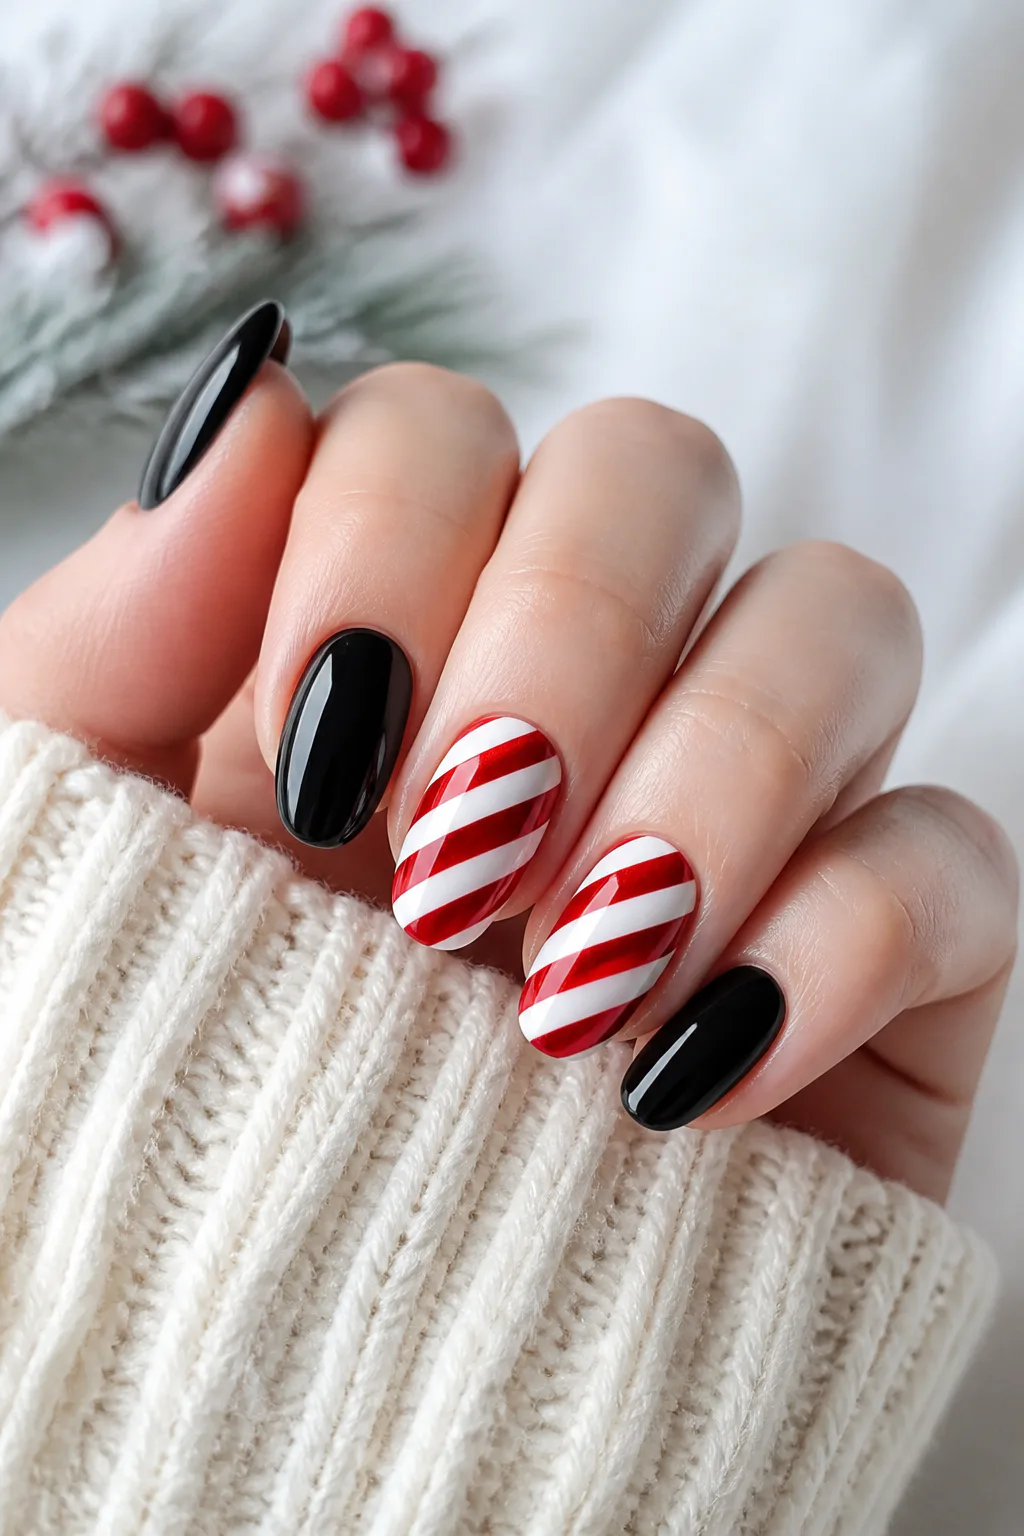
Best for: Classic motif with a moody twist
Skill level: Intermediate
Pairing high-gloss black nails with one or two candy-cane-striped accents creates a playful contrast between sleek and sweet. The striped nails introduce a familiar holiday motif, while the black polish keeps the full set from feeling overly traditional.
You can use classic red and white or choose black and white stripes for a more coordinated, graphic look. An accent nail gives the pattern room to stand out, and the remaining nails can stay solid black with a shiny finish.
Choose a stripe style
Thin diagonal stripes create a classic candy-cane effect, while wider bands look more modern and graphic. For a cleaner result, use striping tape or a fine brush and take time to keep the bands evenly spaced.
- Limit the striped design to one or two nails.
- Pick red and white for a traditional palette.
- Try black and white for a tonal, edgy version.
- Finish with a smooth glossy top coat.
The mix of simple black nails and cheerful stripes makes this design easy to adapt.
12. White Snowflakes on Matte Black

Best for: Wintry contrast
Skill level: Intermediate
White snowflakes look crisp and delicate over a deep matte black base. The contrast gives each flake definition, while the soft finish lends the manicure a frosted, winter-night mood. It is a festive look that does not depend on glitter or bright color.
Snowflake art can be as detailed or as minimal as you like. A few larger flakes on accent nails make the design easy to notice, while tiny scattered shapes create the feel of gentle snowfall across a full set.
Keep the flakes fine and balanced
Use a stamping plate, decal, or fine brush depending on your skill level. Start with a simple center and add slender branches, keeping the lines delicate so the pattern stays airy rather than turning into a solid white patch.
- Use opaque white for clear contrast.
- Vary the snowflake sizes across the set.
- Leave open space around larger designs.
- Choose a matte top coat compatible with the artwork.
For a subtle variation, add one tiny silver dot at the center of a snowflake.
Video: @nailsbydanesha on YouTube. Style shown: white snowflakes on black nails.
13. Black Nails with Gold Chrome Edges

Best for: Luxe metallic finish
Skill level: Intermediate
A reflective gold outline frames a solid black base like delicate metallic trim. The effect can be graphic and precise, with a fine border around each nail, or softer and more atmospheric as a gold perimeter aura. Either approach gives black polish a warm, dressed-up finish.
This design looks especially striking on neatly shaped nails, where the outline can follow the curve of the nail bed. Keep the center mostly plain black so the chrome edge remains the clear feature instead of competing with additional art.
Shape a clean metallic frame
Apply the black base evenly and let it set before adding the gold detail. A fine liner brush or chrome products intended for nail art can help create a controlled edge; work slowly around the perimeter and follow the product’s application directions.
- Choose a thin line for a minimal frame.
- Use a slightly irregular edge for a softer aura effect.
- Keep all nails similar in outline thickness.
- Seal the manicure without flooding the detail.
Gold edging is an elegant option when you want a festive manicure with no literal holiday icons.
14. Holographic Flakes in Black Jelly Polish

Best for: Easy shimmer with depth
Skill level: Beginner
Black jelly polish layered over holographic flakes creates a mysterious, glassy effect. As the flakes catch the light, hints of festive green, red, and gold seem to flicker beneath the dark surface, like tiny colored lights in a midnight sky.
This design offers more depth than a flat black manicure but can still feel understated, especially when the flakes are sparse. Use it on every nail for an all-over shimmer or keep the layered effect to a few accents beside plain black polish.
Layer for depth
Place flakes over a base layer, then apply a thin coat of black jelly polish to tint the effect without hiding it. Build slowly until the balance feels right; a lighter layer lets more color show, while additional coats create a moodier finish.
- Choose flakes that flash in several colors.
- Spread them unevenly for a natural scattered effect.
- Keep each jelly layer thin and even.
- Use a smoothing top coat if the surface feels textured.
The layered finish is a good fit for anyone who loves shimmer but wants a dark overall palette.
15. Black Tuxedo Nails with Pearls
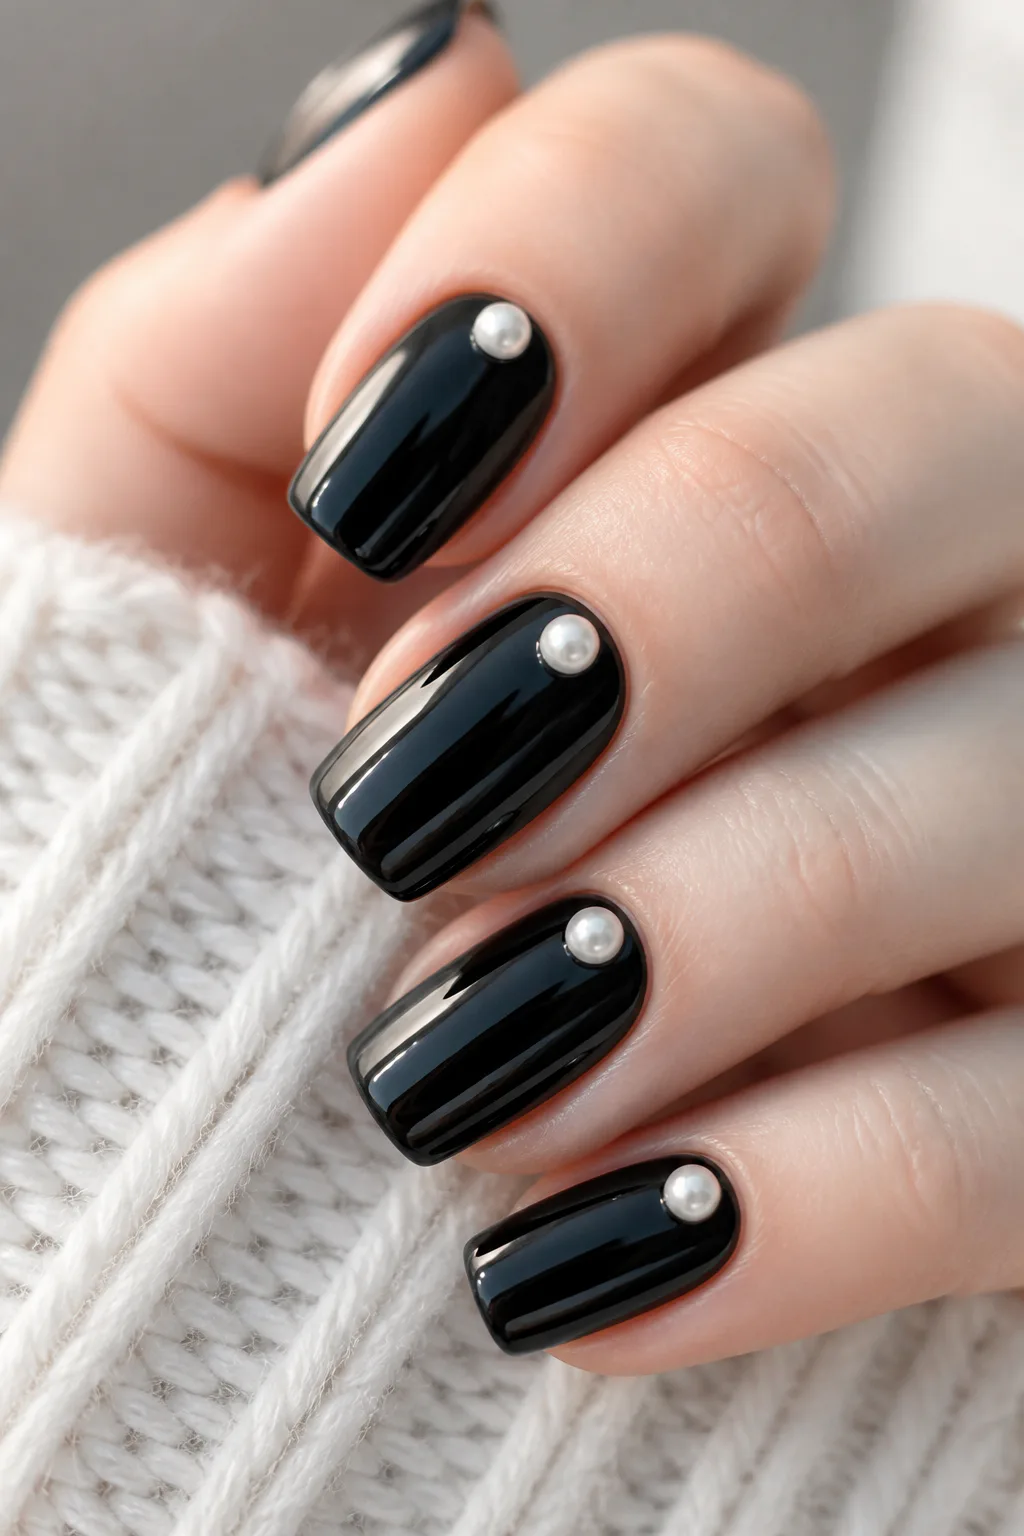
Best for: Formal, black-tie events
Skill level: Intermediate
Jet-black nails with tiny white beads or pearls near the cuticle evoke the polished details of a holiday gala outfit. The black-and-white contrast feels formal, while the small embellishments add a touch of softness and dimension.
Place a single pearl near the base of each nail for a minimalist look, or arrange a short cluster on one accent nail. Keep the rest of the design simple so the beads resemble intentional jewelry rather than scattered decoration.
Arrange the pearls neatly
Choose nail-safe beads or flat-backed pearls in a size that suits your nail length. Place them while the securing product is workable, checking that the arrangement sits comfortably and does not extend too far beyond the nail surface.
- Use one pearl per nail for a refined set.
- Cluster several beads on one accent nail.
- Position details near the cuticle for a tuxedo-button feel.
- Secure embellishments carefully to reduce snagging.
This look is especially fitting for a dressed-up celebration or winter evening event.
16. Black Nails with Ominous Santa Hats

Best for: Playful, cheeky sets
Skill level: Intermediate
Tiny red-and-white Santa hats perched at the corners of glossy black nails add a cheeky, slightly spooky twist to Christmas nail art. The familiar holiday shape feels unexpected against the dark base, giving the manicure humor without taking itself too seriously.
Use the hats on selected nails rather than covering every tip, and let the remaining nails stay glossy black. A small, clean silhouette is easier to read than an oversized illustration, especially on shorter nails with limited room for detail.
Keep the hat details simple
Paint a small red triangle or curved cap, then add a white brim and pom-pom. Decals or stamping can make the shapes more consistent, while hand-painted versions allow you to place each hat at a different angle.
- Place hats near the corner of a few nail tips.
- Use bright red and opaque white for contrast.
- Scale each hat to fit the available nail space.
- Keep the rest of the manicure free of competing art.
The playful detail makes a dark holiday set feel personal, festive, and a little mischievous.
Frequently Asked Questions
Are black nails appropriate for Christmas?
Yes. Black makes festive details like gold, silver, snowflakes and glitter stand out, giving a chic alternative to red and green.
What accents look best on black Christmas nails?
Gold and silver details, white snowflakes, pearls, holographic flakes and bright Christmas-light dots all contrast well with black.
Which black Christmas nail design is easiest?
A black-to-silver glitter ombré or holographic flakes in black jelly polish are forgiving and quick to do at home.
How do I keep black nails from looking too dark for the holidays?
Add one bright element, such as metallic chrome edges, a glitter accent nail or white snowflakes, to lift the set.
Final Thoughts
Black Christmas nails can be as subtle or as expressive as you want. Magnetic shimmer, tonal plaid, and metallic edging keep things sleek, while snowflakes, candy-cane stripes, and tiny Santa hats bring in a more recognizable holiday mood.
Choose a design that suits your nail length, preferred finish, and comfort with detail. You can also simplify any idea by using it on one accent nail and keeping the rest of the manicure black. A thoughtful balance of color, texture, and negative space is often all it takes to make a festive set feel polished.