14 Stunning Matte Christmas Nail Ideas
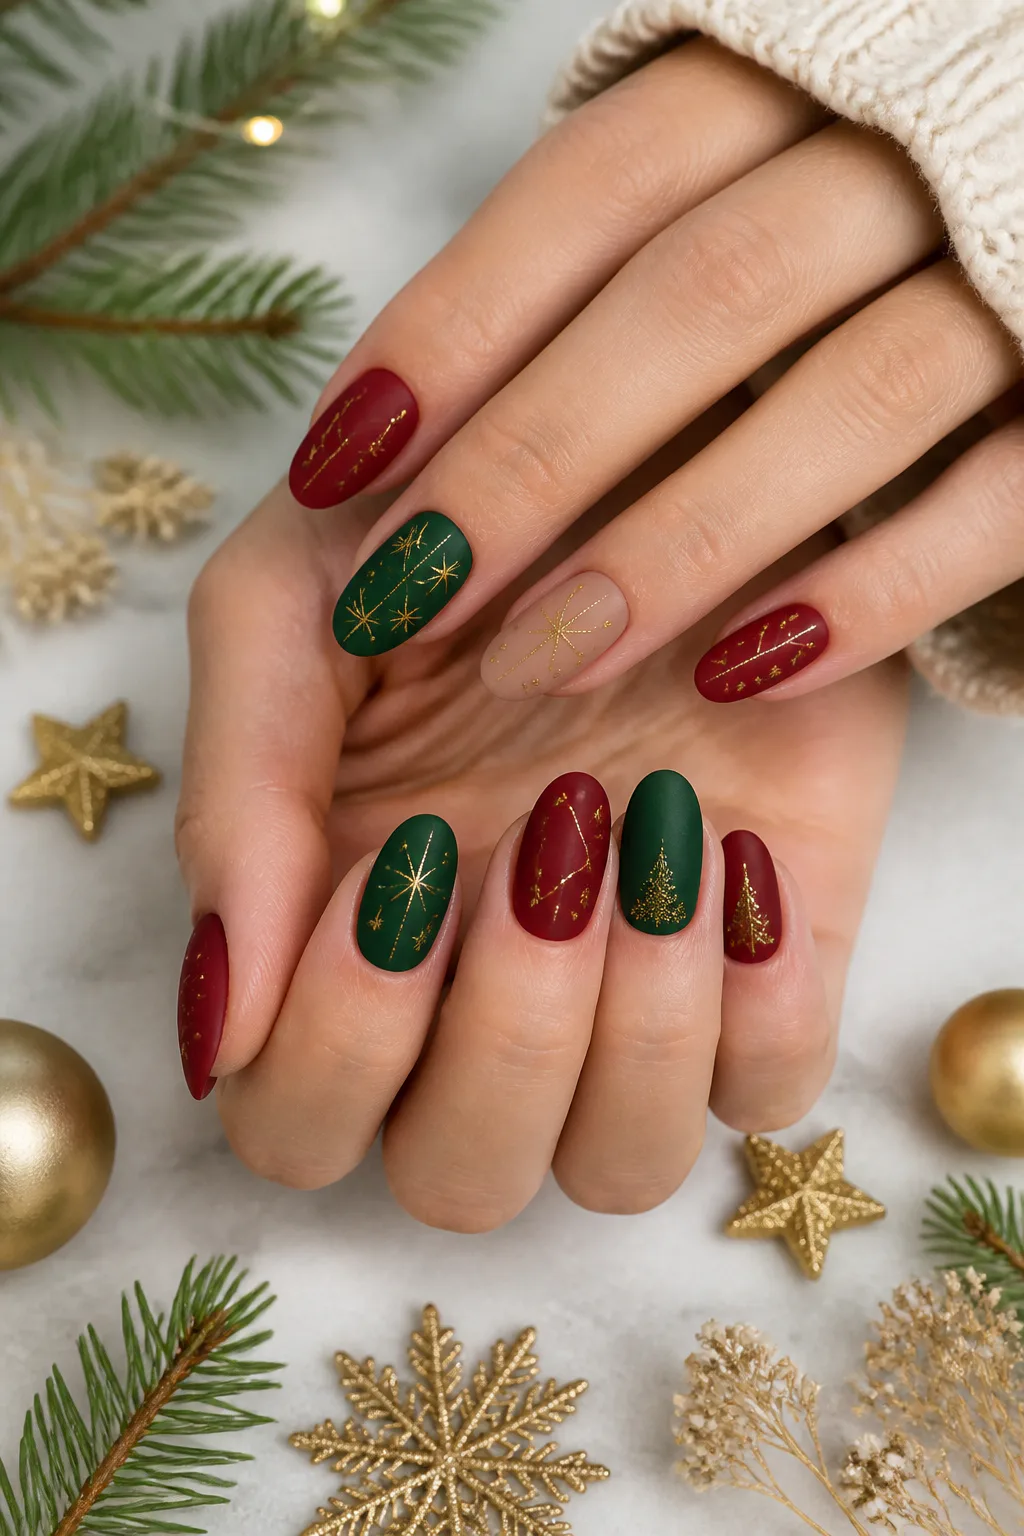
Matte Christmas nails bring a soft, velvety finish to classic holiday colors and detailed seasonal art. A matte topcoat can make crimson, pine green, burgundy, and even glittery accents feel a little more polished and unexpected.
These ideas range from simple color combinations to detailed designs, so there’s something here whether you prefer a minimal accent nail or a full set of festive patterns. Many can be adapted for short or long nails and done at home or brought along as inspiration for a salon appointment.
For an easy update, try a matte topcoat over a favorite holiday polish. If you’re adding artwork, gems, or raised details, keep the design focused on one or two nails so the finished manicure feels balanced and comfortable to wear.
1. Velvet Matte Crimson Christmas Nails

Rich crimson polish takes on a plush, almost fabric-like quality when finished with a matte topcoat. The saturated red feels unmistakably festive, but the soft finish gives it a more understated look than a traditional glossy manicure.
This design works beautifully as a solid-color set on short, rounded nails or as a statement shade on longer almond-shaped nails. Choose a deep, blue-toned crimson for a dramatic feel, or go with a brighter candy-apple red if you want your manicure to stand out.
How to pull it off
Apply smooth, even coats of red and let the color dry or cure fully before adding matte topcoat. Matte finishes can make surface marks more noticeable, so take a moment to tidy the nail edges and smooth any ridges before you begin.
- Use two thin coats of polish rather than one thick coat.
- Keep every nail the same shade for a clean, velvety effect.
- Add one tiny gold star if you want a subtle holiday accent.
The result is simple enough for everyday wear yet festive enough for a holiday gathering.
2. Pine Green Nails with Gold Constellations
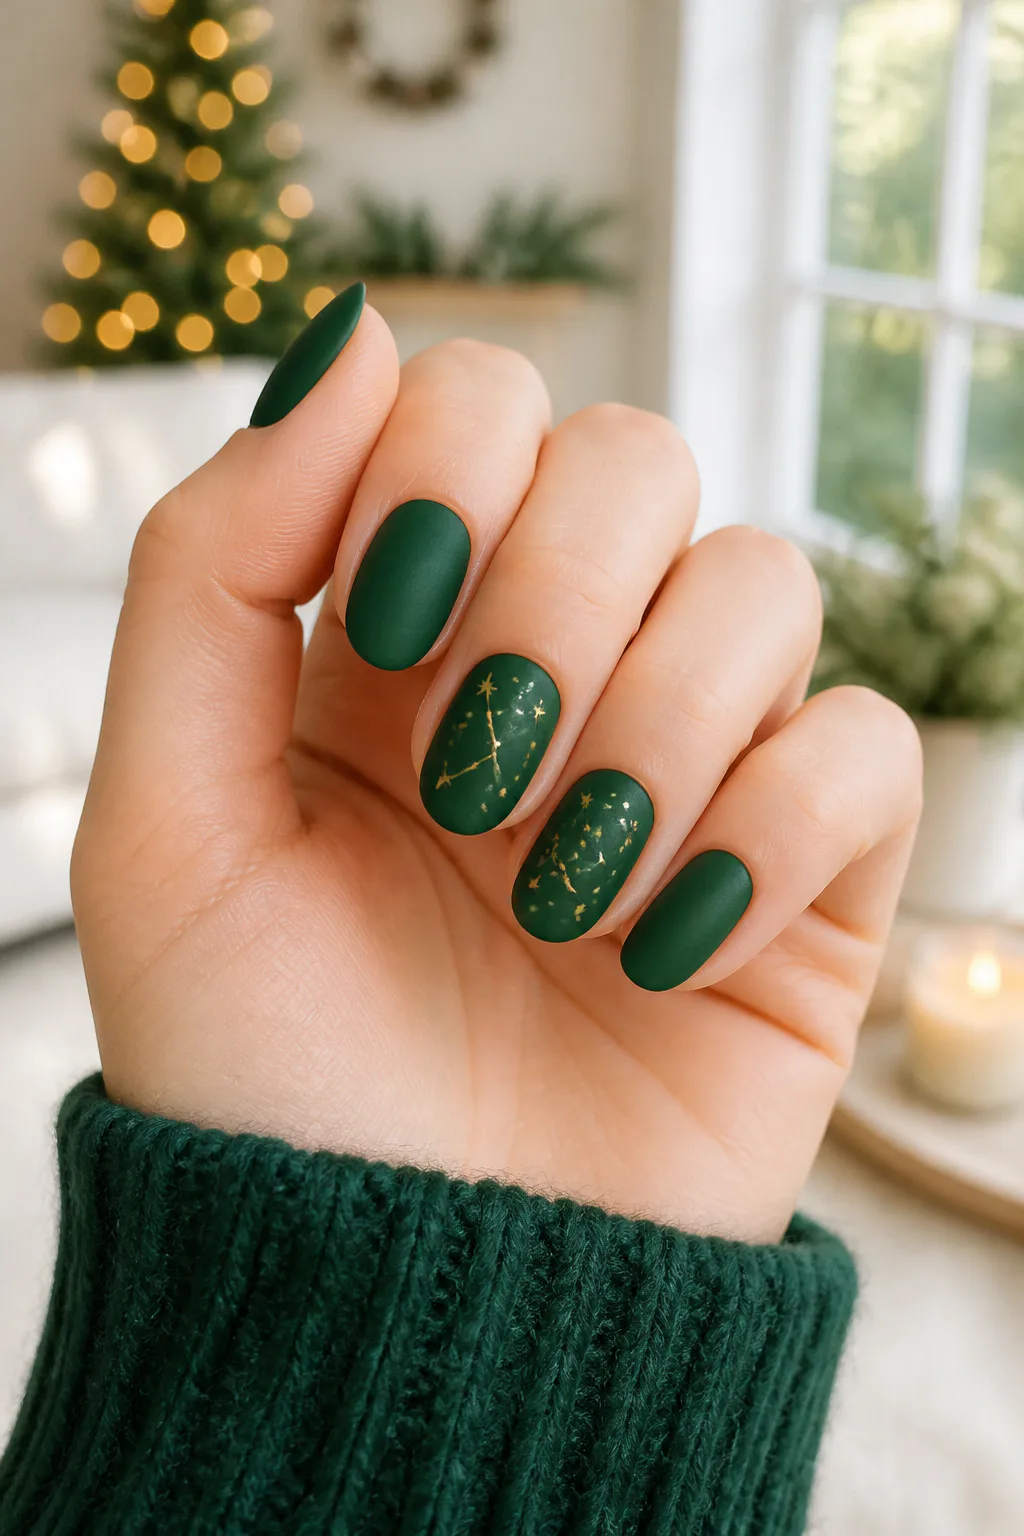
A deep pine-green base creates a moody backdrop for tiny gold stars, dots, or delicate constellation lines. The matte finish softens the dark color, while the metallic details bring just enough light to make the design feel special.
This idea suits anyone who likes holiday nails that feel elegant rather than overtly seasonal. Keep the artwork to one or two accent nails for a restrained look, or add small star clusters across the set if you want more detail. The design works well on both short and long nails.
Design tips
Paint the green base first and let it dry completely before placing the gold artwork. A fine nail-art brush or dotting tool helps create tidy points; if drawing lines feels tricky, a few separated dots can suggest a constellation without requiring intricate painting.
- Choose a dark, muted green so the gold stands out clearly.
- Place stars near the tip or along one side of an accent nail.
- Keep the gold pattern sparse for a modern, airy finish.
It’s a lovely way to bring a little celestial sparkle to a classic Christmas palette.
3. Muted Pink Nails with Holly Accents

Soft matte pink offers a gentle alternative to the usual red-and-green holiday manicure. Add a few forest-green leaves and tiny red berries, and the familiar holly motif feels fresh against the understated background.
This combination is especially charming if you want festive nail art that still works with everyday outfits. Use pink across most of the nails, then place holly on one or two accents. Alternatively, alternate pink and green nails for a little more color while keeping the overall design soft.
How to add the holly
Let the pink base dry before painting the leaves so the details stay crisp. Holly shapes can be simplified into two small pointed leaves and a cluster of dots; they don’t need to be perfectly botanical to read as seasonal.
- Pick a dusty or rosy pink instead of a very bright shade.
- Use a fine brush for the leaves and a dotting tool for berries.
- Leave plenty of open space around each accent.
The muted palette keeps the design sweet, polished, and easy to wear beyond one special occasion.
4. Matte Red and Green Color-Block Nails

Alternating matte red and hunter-green nails creates a bold holiday manicure with no complicated artwork. Each color gets its own space, letting the contrast do the work while the matte finish keeps the classic combination feeling current.
This approach is a good fit when you want a festive look that’s simple to create at home. You can alternate shades across every finger, or use green on most nails and reserve red for a few deliberate pops. Solid color also makes this design easy to refresh as the season goes on.
Choosing your color layout
For a crisp result, plan the order of the shades before you start painting. Rich, evenly pigmented colors help the manicure look intentional, while a consistent matte finish ties the contrasting nails together.
- Alternate red and green from thumb to pinky for a playful pattern.
- Try mostly green nails with red on the thumb and ring finger.
- Use thin coats and clean up around the cuticles for neat edges.
With no detailed accents to maintain, this is one of the easiest designs to wear throughout the holidays.
5. Matte Midnight Nails with White Snowflakes

Midnight blue or deep plum makes a dramatic base for crisp white snowflakes. The dark matte color gives the design a wintry, evening-ready mood, while the pale artwork stands out clearly against it.
Snowflakes can be as simple or detailed as you like. A single large motif on an accent nail feels graphic and modern, while small flakes scattered across several nails create a more playful snowfall effect. This design looks especially striking on longer nails, but a small white starburst works well on short nails too.
Creating clean snowflake details
Wait until the dark polish is dry before adding white art with a fine brush or nail-art pen. Start with a few intersecting lines, then add short branches to suggest a snowflake; keeping the shape simple helps the contrast stay sharp.
- Choose midnight blue for a classic winter-night effect.
- Try plum if you want a softer, slightly warmer alternative.
- Place the largest snowflake on one accent nail to avoid crowding.
The combination feels festive without relying on the traditional Christmas color pairing.
6. Icy Nude Nails with Silver Glitter
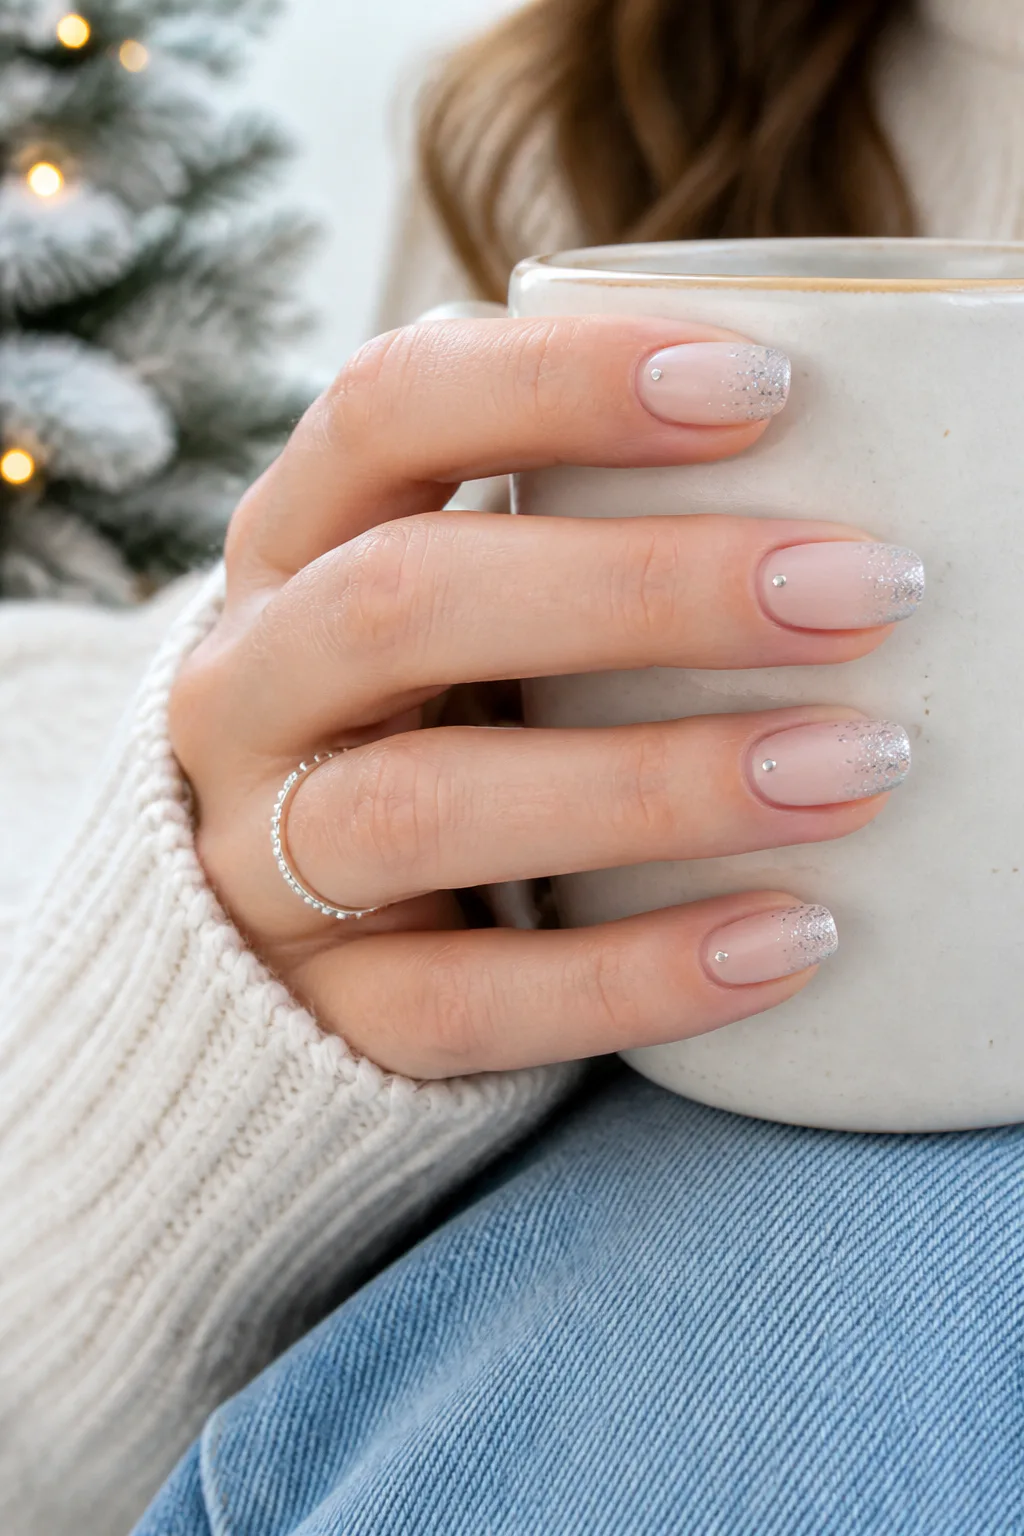
A matte nude base gives silver glitter a frosty, delicate setting. A fine gradient near the tips or a few small chrome-like drops near the cuticles add a hint of winter sparkle without covering the whole nail in shimmer.
This is a versatile option for anyone who wants holiday details that coordinate easily with different outfits. Choose a nude close to your natural nail tone for a subtle effect, or use a milky beige for a more visible base. The simple palette also makes this a lovely choice for a holiday event or a quieter everyday manicure.
Balancing matte and sparkle
Apply the matte finish to the nude base first, then add glitter or metallic details where you want the light to catch. Keeping the sparkle concentrated in one area makes the contrast feel intentional instead of busy.
- Blend fine silver glitter lightly toward the nail tips.
- Use a few small metallic dots near the cuticle for a minimal accent.
- Keep most of the nail surface matte to preserve the icy look.
The result is festive, understated, and easy to adapt to different nail lengths.
7. Matte Buffalo Plaid Christmas Nails

Buffalo plaid brings the cozy look of a winter flannel shirt to a holiday manicure. Red-and-black checks feel bold and traditional, while red-and-white checks create a lighter, brighter variation. A matte finish helps the pattern look soft and fabric-inspired.
Because plaid uses several intersecting lines, it’s often easiest to reserve the pattern for one or two accent nails. Solid red, black, or neutral nails can balance the detailed checks and make the manicure feel wearable rather than crowded.
Building a tidy check pattern
Let each stripe dry before layering the next color, especially if you’re painting the design by hand. The lines do not need to be perfectly uniform; consistent spacing and a clear contrast between shades are enough to make the pattern read as plaid.
- Use a red-and-black pairing for a classic buffalo-check effect.
- Choose red and white for a brighter, more playful design.
- Keep the checks on accent nails and leave the rest solid.
This manicure pairs especially well with cozy seasonal clothes and simple holiday accessories.
8. Taupe Nails with Reindeer Silhouettes
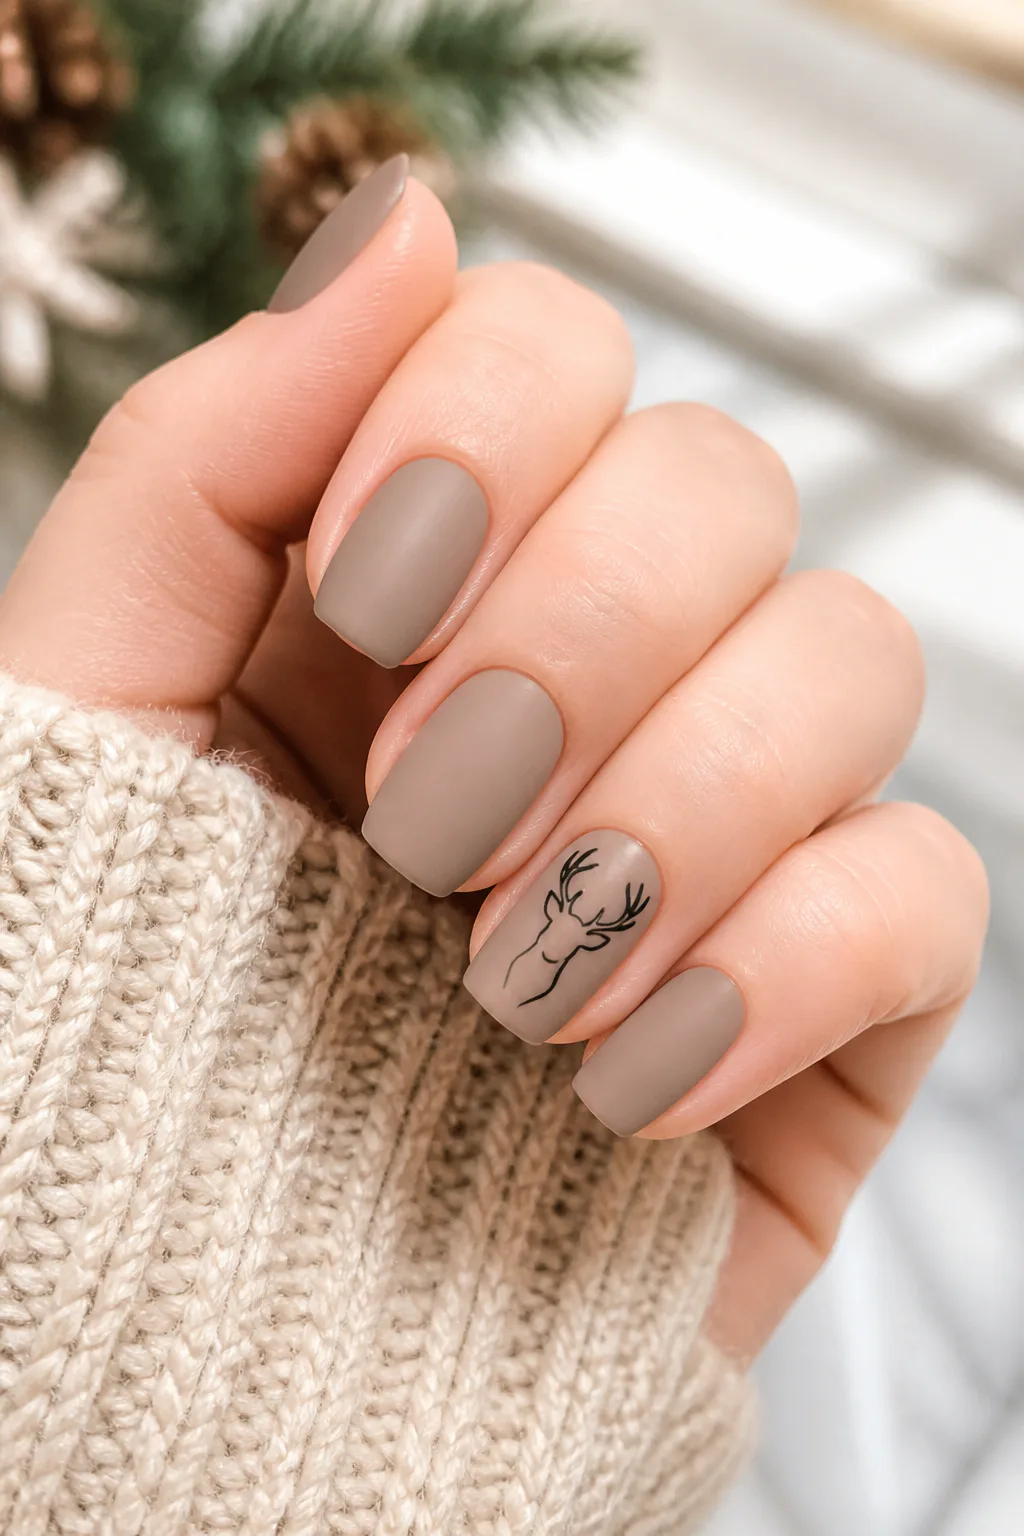
Soft taupe makes a calm, neutral background for a simple black reindeer outline. The matte surface keeps the base understated, giving the small silhouette room to stand out without turning the entire manicure into a busy illustration.
This design is a natural fit for minimalists who still want a recognizable holiday detail. Paint most nails in taupe and add the reindeer to one accent nail, such as the ring finger. A short, rounded nail can hold a simple head-and-antler outline, while longer nails leave more room for a full silhouette.
Keeping the motif simple
Use a fine brush or nail-art pen to draw the outline after the base coat is completely dry. If detailed drawing is outside your comfort zone, reduce the design to a small reindeer head or a few antler lines rather than trying to fill the whole nail.
- Pick a soft taupe or warm greige for a subtle neutral base.
- Keep the reindeer black and unfilled for a clean outline.
- Use one accent nail so the design remains the focal point.
The finished set feels seasonal while staying polished and easy to coordinate.
9. Matte Cable-Knit Sweater Nails
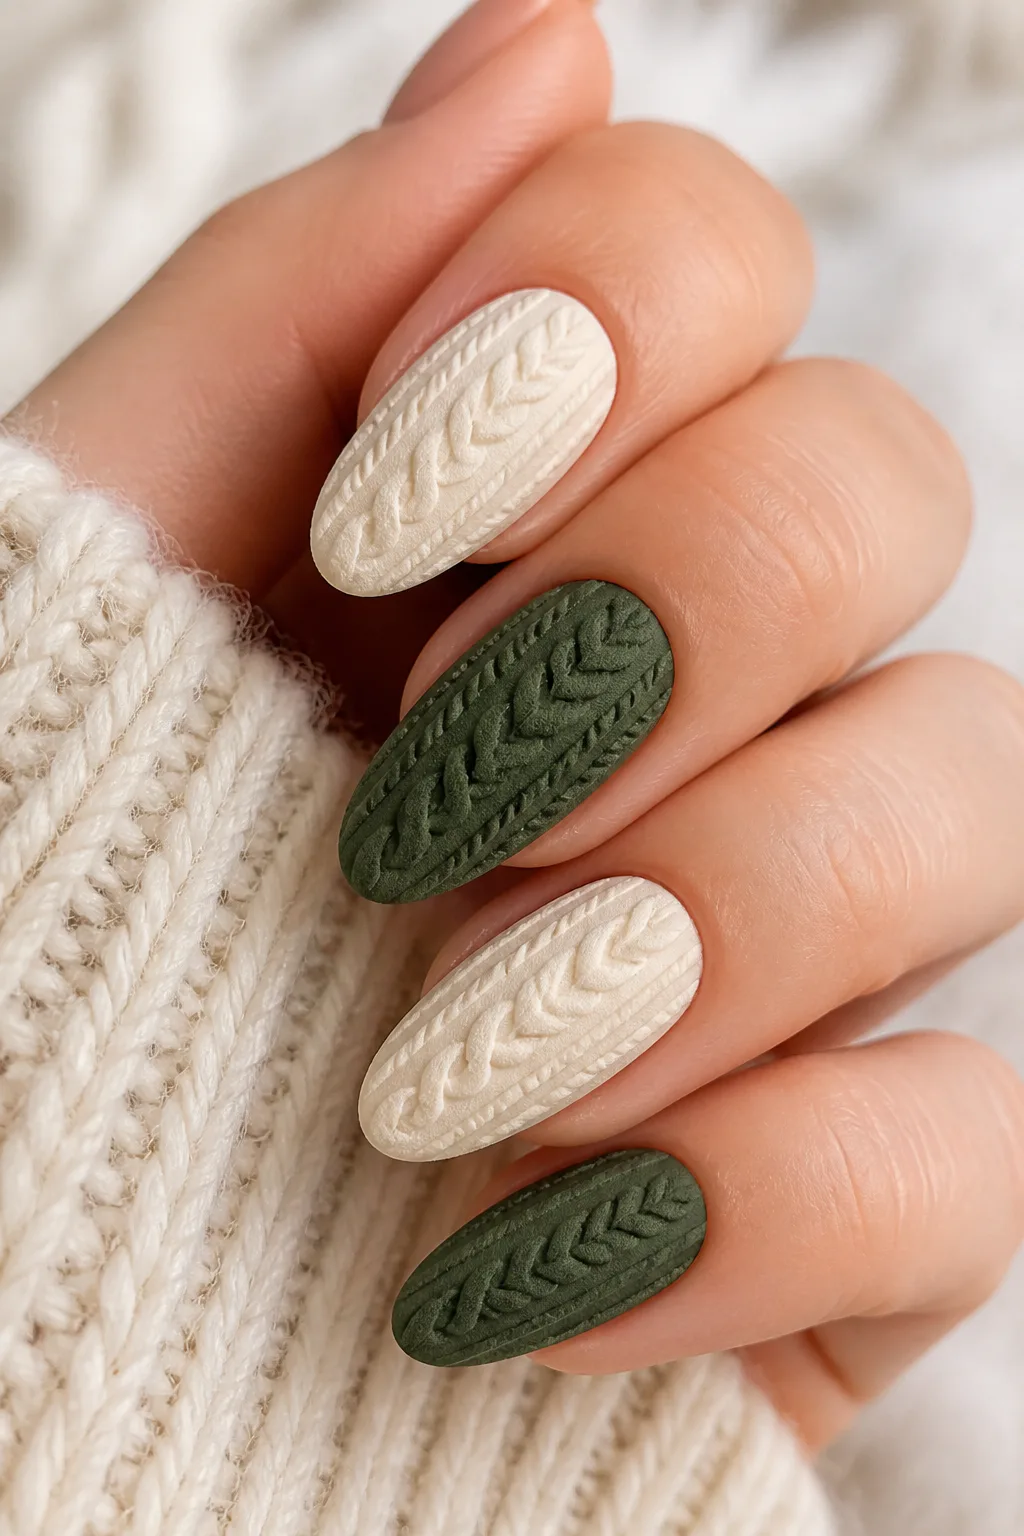
Cable-knit nails mimic the raised texture of a favorite winter sweater. Cream polish creates a cozy, snow-inspired look, while dark green gives the same pattern a richer holiday feel. A matte topcoat helps the raised lines look soft and tactile.
This detailed design makes a natural accent manicure: use the knit texture on one or two nails and keep the rest a matching solid shade. It can be done on a range of nail shapes, though a little extra length gives the pattern more room to show clearly.
Adding the sweater texture
Raised cable patterns are commonly created by painting or sculpting narrow lines of gel into loops and twists, then curing as directed. If you’re doing the design at home, work slowly and keep the raised lines neat; a simpler braided pattern can still suggest knitwear beautifully.
- Choose cream for a light, wintry look or dark green for holiday color.
- Keep textured artwork to accent nails for a balanced set.
- Seal with a matte finish to soften the overall effect.
The result adds a playful, cozy dimension to a manicure without needing extra colors.
10. Matte French Nails with Velvet Tips
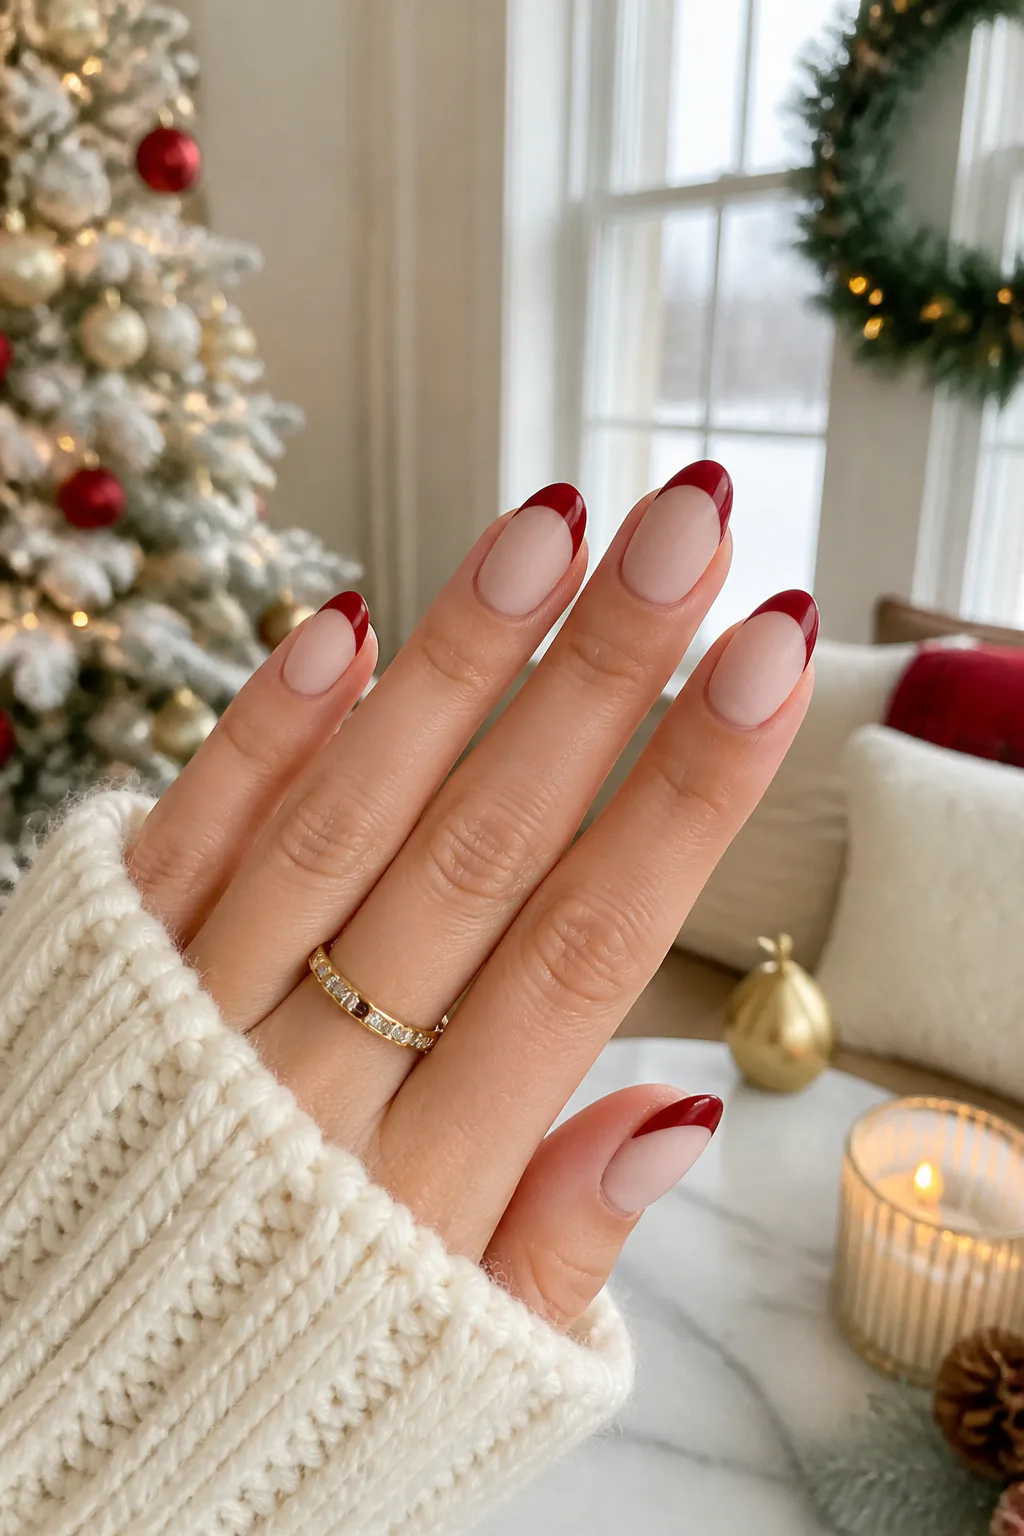
A matte nude or milky-white base paired with glossy red or emerald French tips creates a simple contrast in both color and finish. The glossy edge catches the light, while the matte base keeps the overall manicure soft and modern.
This look is a subtle way to bring holiday shades into a French manicure without committing to a full set of bright nails. It works on short nails with a slim, curved tip and on longer nails with a more pronounced smile line. Choose red for a classic feel or emerald for something a little less expected.
Getting the finish contrast
Apply the matte finish to the base and make sure it has dried before painting the colored tips with a glossy topcoat. A guide sticker or fine brush can help shape the French line, but a slightly rounded edge looks natural and forgiving.
- Use a nude shade close to your skin tone for a seamless base.
- Keep the colored tips narrow on shorter nails.
- Leave the red or emerald tips glossy for a clear texture contrast.
This design feels festive enough for a party but understated enough for everyday wear.
11. Matte Green Nails with Present Bows
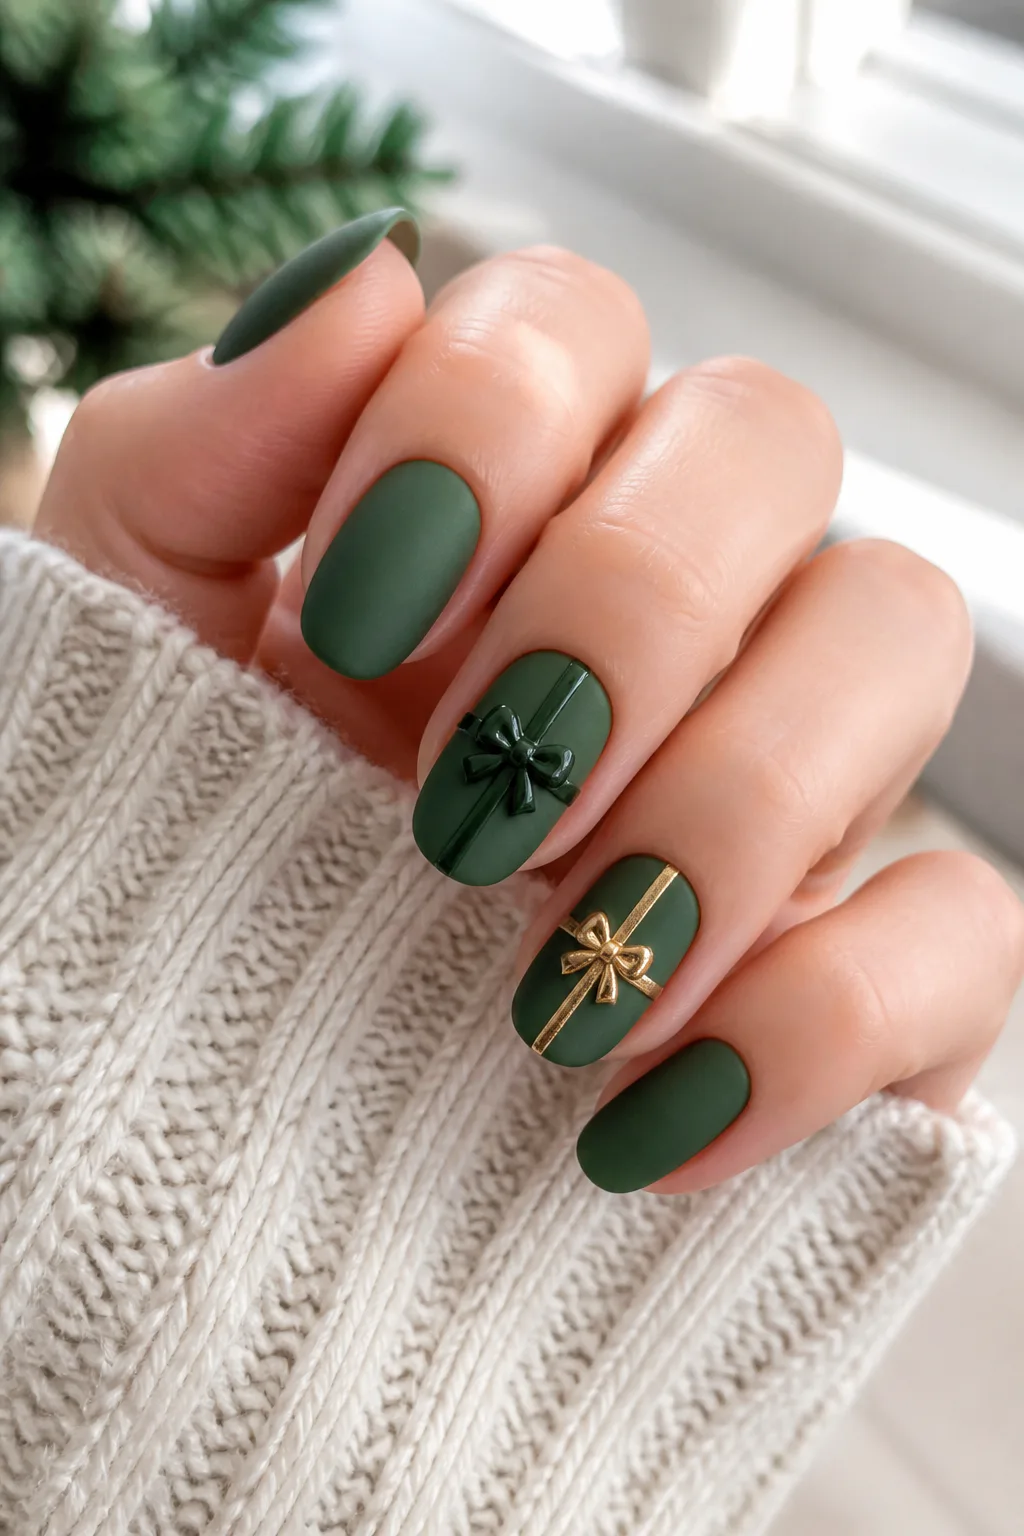
Matte green polish provides a rich background for a tiny present-inspired bow. A raised glossy gel ribbon adds dimension, while a metallic gold bow offers a simpler, brighter accent. Either choice brings a playful holiday detail to an otherwise sleek manicure.
Use green on every nail for a unified look, then place the bow on one accent nail to suggest a wrapped gift. If you prefer more variation, pair the design with a few solid red or neutral nails. Keeping the embellishment small helps it remain comfortable and lets the matte color stay central.
Choosing your bow detail
A thin brush can create a painted ribbon with two loops and trailing ends. For a raised look, build the ribbon with gel in narrow lines and follow the product’s curing instructions; a flat metallic bow detail is a simple alternative when you want less texture.
- Try a glossy ribbon for a noticeable matte-and-shine effect.
- Use gold for a more delicate, jewelry-like accent.
- Place the bow on one nail to keep the set balanced.
It’s a cheerful way to make a single manicure detail feel like a little holiday gift.
12. Matte Burgundy Nails with Tartan Accents
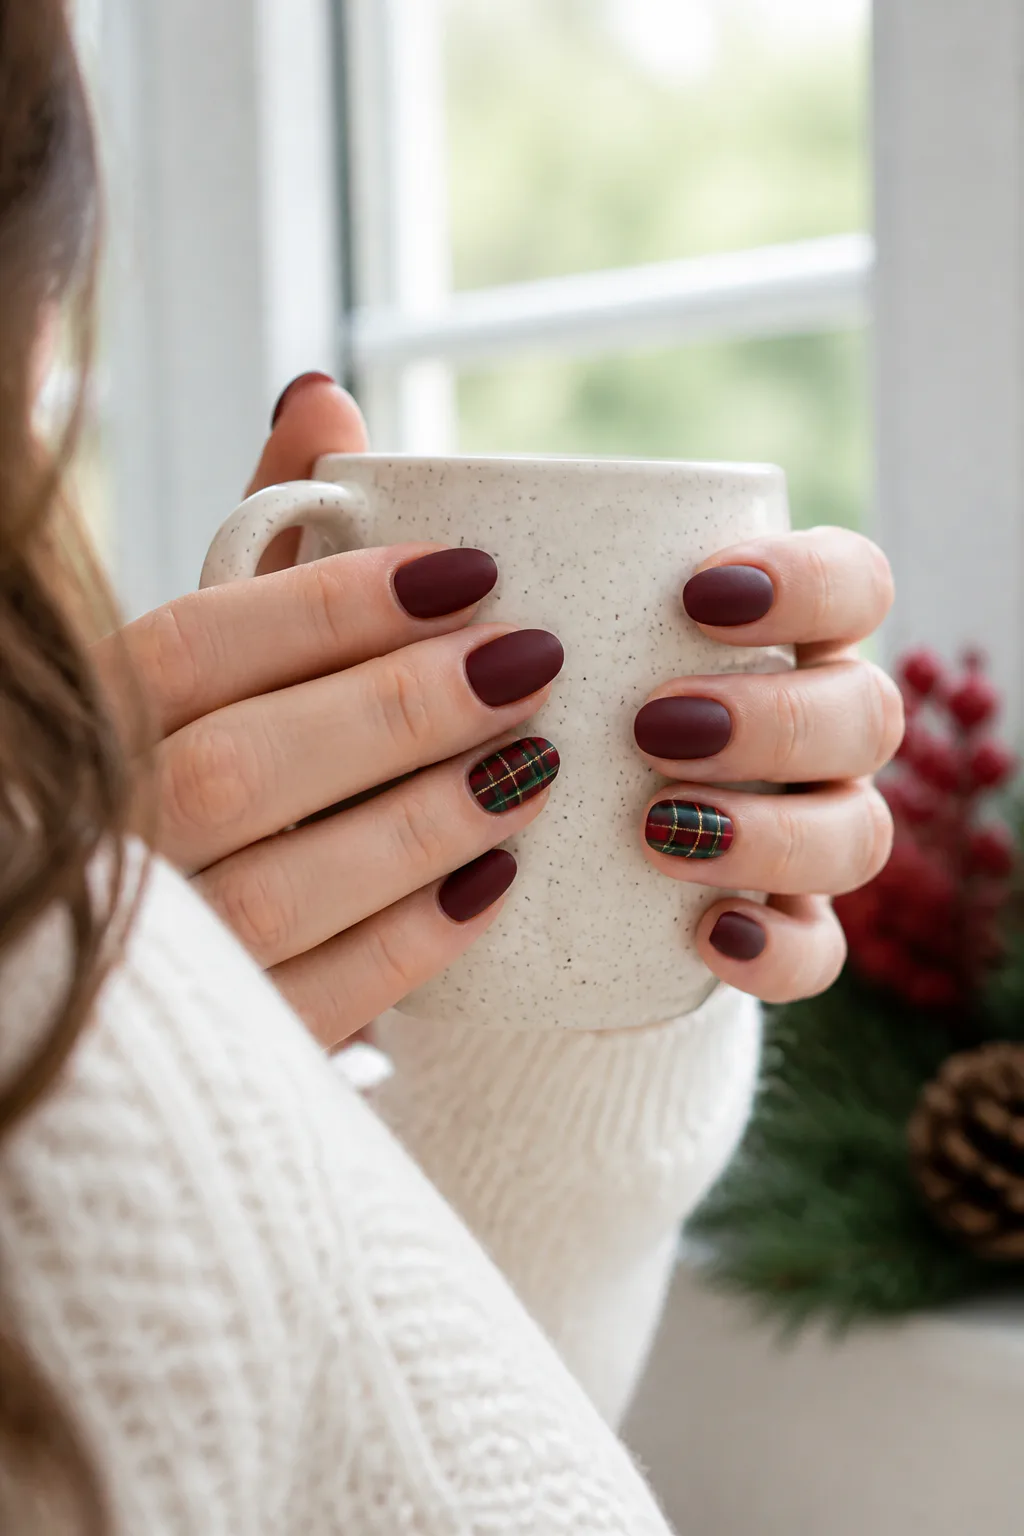
Photo: @claws.byciara on Instagram. Style shown: matte burgundy-red nails with white tartan plaid lines.
Solid matte burgundy nails feel rich and sophisticated, while a plaid accent brings in the familiar colors of the season. Fine lines of red, green, and gold create a tartan-inspired pattern that gives the manicure detail without overwhelming the deep base shade.
This design suits anyone who likes classic holiday colors with a slightly dressier mood. Keep most nails burgundy and reserve the plaid for one or two fingers, or alternate solid nails with patterned accents for more visual variety. The combination looks especially cohesive when the plaid includes a burgundy tone that echoes the solid polish.
Planning the plaid accents
Start with a light or neutral base on the accent nail so the colored lines remain visible. Add the stripes in layers, allowing each one to dry before crossing it with another; a few clean lines are often more effective than a crowded grid.
- Choose deep burgundy for the solid nails and plaid background.
- Add thin green and gold lines to suggest a tartan pattern.
- Keep the remaining nails plain to give the accents breathing room.
The mix of matte color and fine pattern feels festive but still refined.
13. Matte Black Nails with Gold Foil

Photo: @claudia_hrnandez on Instagram. Style shown: matte black nails with gold foil accents.
Matte black or deep espresso polish gives metallic gold foil a dramatic backdrop. Irregular flakes create a scattered, almost abstract accent, so the design feels glamorous without needing a precise pattern or a large amount of nail art.
You can apply foil to every nail for a bold statement or keep it to one or two accent nails for a quieter effect. Black creates the strongest contrast, while espresso brown gives the manicure a warmer, softer mood. Either base makes a striking choice for evening events and holiday celebrations.
Applying the foil thoughtfully
Place small pieces of foil over the prepared base and press them down gently before sealing as appropriate for your polish system. For a mixed-finish look, leave some areas of the foil especially reflective and keep the surrounding color matte, taking care not to bury the metallic details under too much product.
- Use scattered flakes instead of a solid sheet for a lighter look.
- Focus the foil near one edge or tip of an accent nail.
- Try espresso if you want a warmer alternative to black.
The metallic flashes bring holiday sparkle while the matte base keeps the design grounded.
14. Matte Emerald Nails with Rhinestone Cuticles

Photo: @auranailed_yyc on Instagram. Style shown: matte emerald nails with gold textured accents.
Matte emerald or ruby polish makes a saturated, polished base for a neat row of tiny clear rhinestones along the cuticle. The stones add a little light near the base of the nail, while the flat finish keeps the bold color from feeling overly shiny.
This is a lovely choice when you want a festive manicure with a touch of jewelry-like detail. You can place rhinestones on every nail for a more glamorous look or decorate just one or two fingers. Emerald feels classic and wintry, while ruby creates a warmer, more traditional holiday effect.
Keeping the embellishments secure
Apply the matte color first and position each stone carefully near the cuticle line. Use nail adhesive or a compatible gel method, and avoid placing embellishments so close to the skin that they feel uncomfortable. A small, even row usually looks cleaner than scattered stones.
- Choose clear stones to complement either emerald or ruby polish.
- Use the smallest stones that still show against the nail color.
- Decorate accent nails if you prefer a lighter, simpler set.
This design balances rich color with a delicate sparkle for a festive finishing touch.
Final Thoughts
Matte Christmas nails can be as simple as one velvety red shade or as detailed as snowy artwork, plaid accents, and tiny gems. The finish gives familiar holiday colors a softer look and makes it easy to mix matte surfaces with selective shine or metallic details.
Choose an idea that suits your nail length, comfort level, and plans for the season. Whether you paint a single accent nail or create a full festive set, a little color and texture can make your manicure feel special all winter long.