11 Stunning Red Valentine’s Day Nails Ideas
Red is a Valentine’s Day classic, but there are plenty of ways to make it feel personal rather than predictable. From a simple cherry-red gloss to tiny heart details and soft, dreamy gradients, these designs bring a little romance to your manicure without requiring every nail to look the same.
This collection includes ideas for short and long nails, minimal styles, and more eye-catching designs. Some are easy to adapt at home with a steady hand and a dotting tool, while others may be easier to ask for at the salon.
Use the ideas as inspiration, then adjust the colors, placement, and finish to suit your everyday style. Whether you want a subtle hint of Valentine’s Day or a manicure that fully embraces the holiday, there’s a red nail look here to try.
1. Wear Classic Cherry Red Gloss

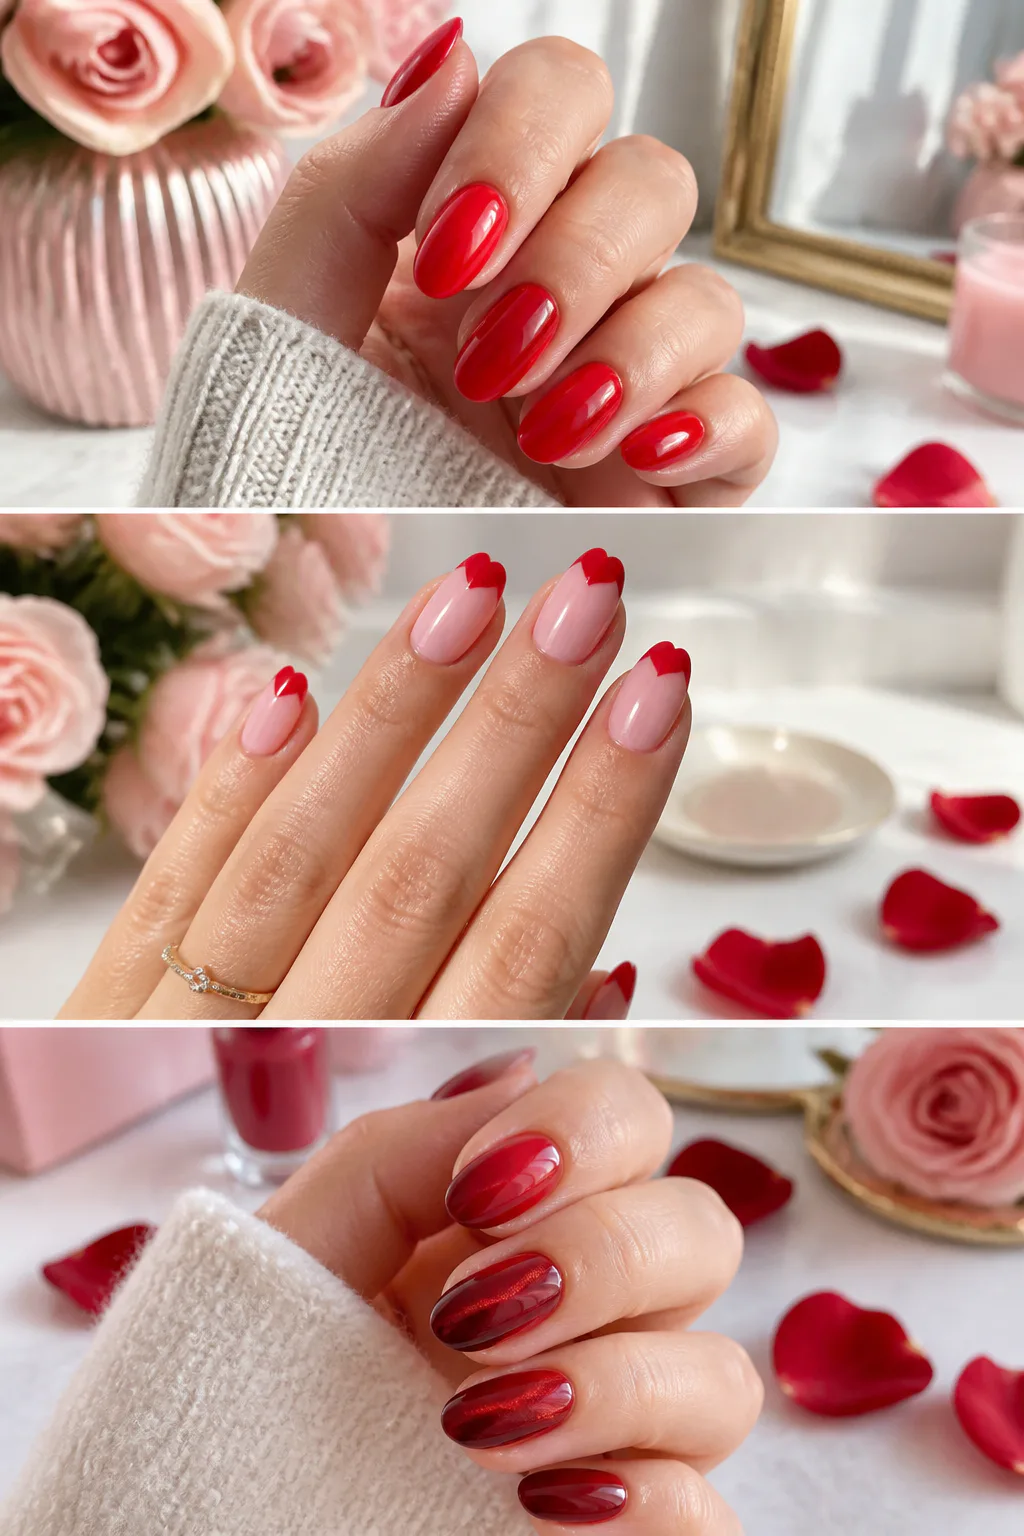
A glossy cherry-red manicure is a timeless choice when you want your nails to feel polished, bright, and unmistakably festive. The smooth, even color makes a statement without needing hearts, glitter, or extra details, so it works just as well for a date night as it does for everyday plans.
Short-to-medium almond nails give the shade a soft, romantic feel, while a square shape makes the look crisp and modern. Because this design relies on a clean finish, careful polish application and tidy cuticles make a noticeable difference.
How to keep the look polished
Start with a base coat and apply thin layers of cherry-red polish, allowing each coat to dry before adding the next. A glossy topcoat helps the color look smooth and gives the manicure its reflective finish.
- Choose almond for a softer silhouette or square for a clean, classic edge.
- Use a base coat to help prevent staining from saturated red polish.
- Apply color in thin, even coats to reduce streaks and uneven edges.
- Refresh the shine with a topcoat when the surface starts to look dull.
If you love a simple manicure, this look can stand on its own; it also makes a vivid base for a small accent detail on just one nail.
2. Add Tiny Hearts to Red French Tips

Red French tips offer a playful way to bring Valentine’s color to your manicure while leaving most of the nail natural. The bright edge gives the classic French shape a cheerful update, and a tiny heart adds a romantic detail without covering the whole nail in decoration.
Place a small red or white heart on one accent nail, such as the ring finger, to keep the design balanced. This combination suits a sheer nude or pale pink base and works on several nail lengths, though a little extra length gives the heart and tip more room to show.
Designing a neat accent
For crisp tips, follow the natural curve of each nail or use a guide to keep the line consistent. A dotting tool or fine brush can help shape a small heart; the simpler the motif, the easier it is to keep the overall look clean.
- Pair a red tip with a white heart for a clear contrast.
- Choose a sheer pink base for a soft, romantic finish.
- Keep the heart to one or two nails so it remains an accent.
- Seal the design with topcoat, taking care not to smudge fine details.
The result feels sweet and recognizable without being overly busy—ideal if you want a classic manicure with one charming Valentine’s touch.
3. Create Negative-Space Heart Cutouts
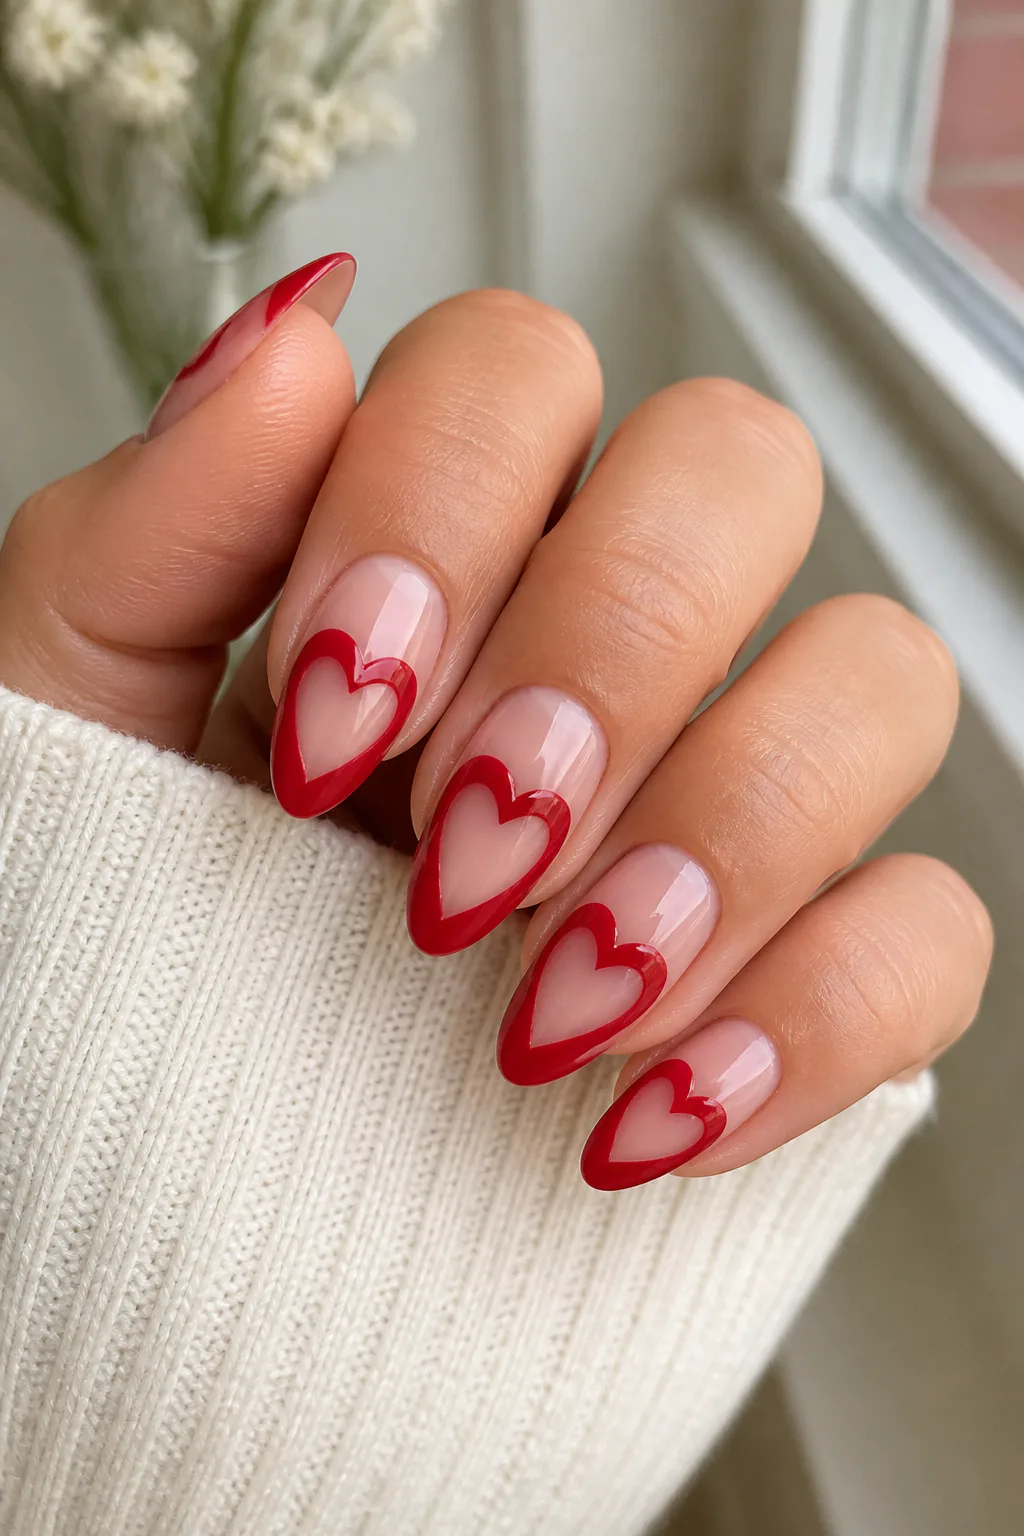
Negative-space heart nails use the natural-looking base as part of the design. Red polish frames a heart-shaped window, leaving the center clear or nude so the motif appears cut out of the color. The contrast makes the heart noticeable while keeping the manicure lighter than an all-over red design.
This look can be done on every nail for a coordinated set or reserved for a few accent nails alongside solid red. A sheer nude base makes the heart shape stand out softly, while a clear base can create a more minimal effect. It’s a good option if you like graphic details but want some breathing room in your manicure.
Making the heart shape clear
Plan the heart’s placement before painting the surrounding red area, especially if you want it centered. Nail guides or a fine detail brush can help create a defined outline; take your time around the curves so the open space reads as a heart.
- Use a nude or clear base to keep the open space visible.
- Make the heart large enough to recognize but small enough to leave a red border.
- Try the cutout on one or two nails if you prefer a quieter design.
- Let the red polish dry fully before applying a topcoat over the detail.
Because the negative space softens the bold red, this design feels both graphic and romantic.
4. Blend Cherry and Berry Ombré
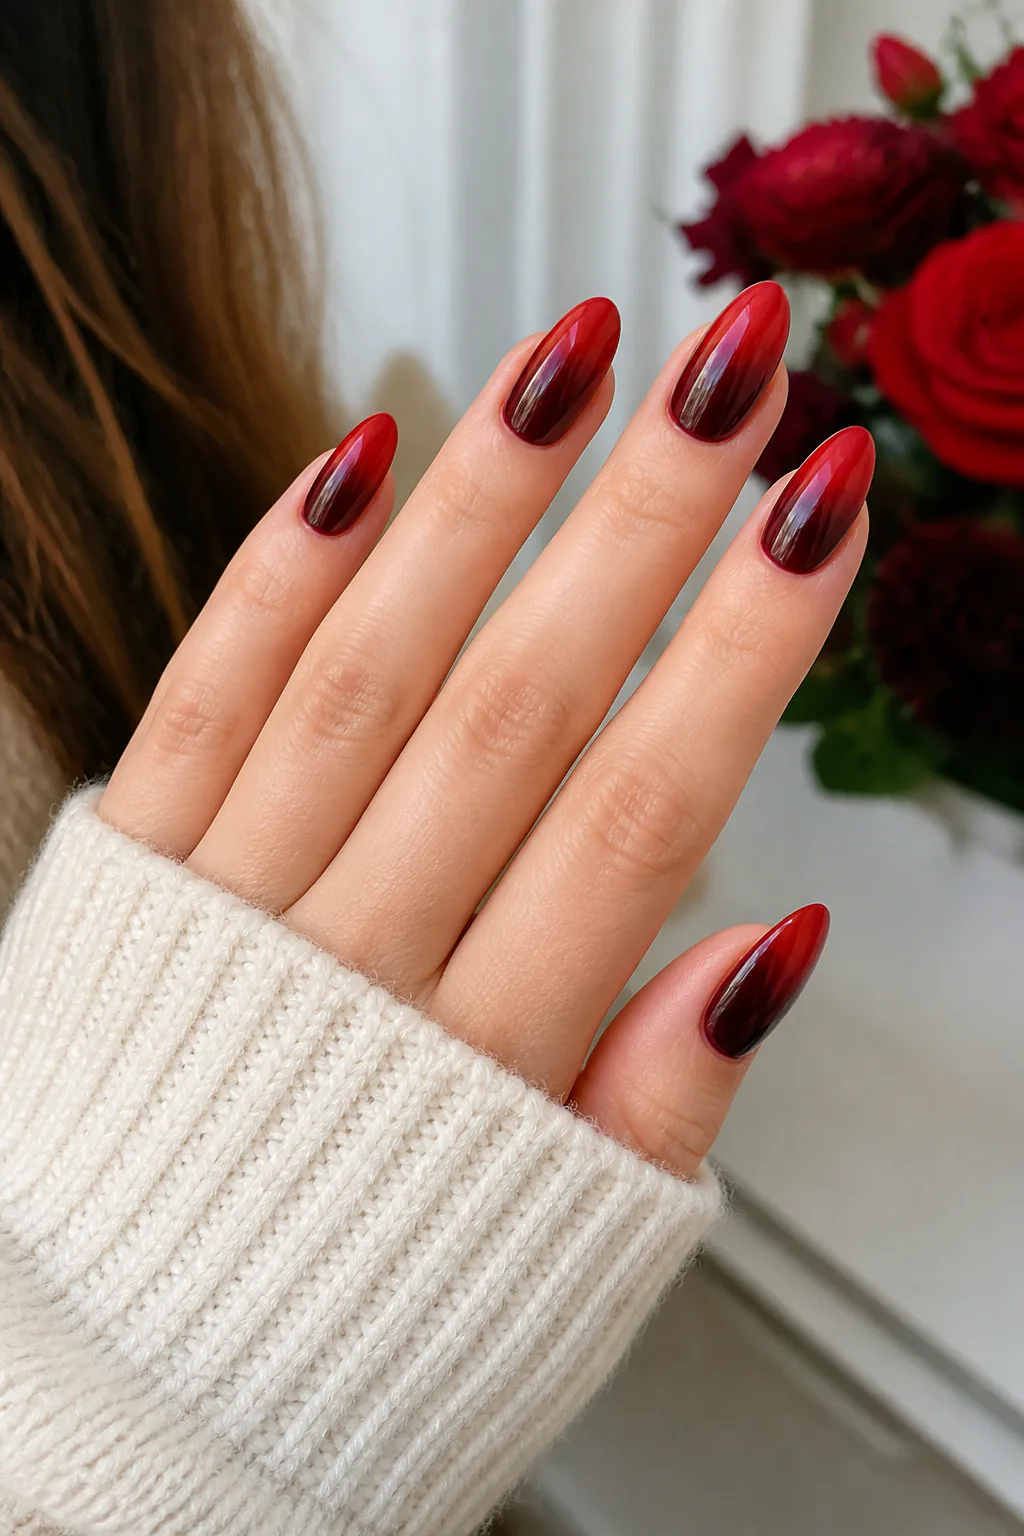
A cherry-and-berry ombré manicure moves from deep oxblood near the cuticle to bright crimson at the tips. The gradual shift gives red nails extra depth and makes the color feel dimensional, even without glitter or nail art. It’s a lovely choice if you want a dramatic look that still feels cohesive.
The darker base creates a rich, moody start, while the brighter tip keeps the finish lively and Valentine-ready. This gradient can suit many nail shapes, but a longer nail provides more room for the two shades to blend gradually. On shorter nails, a softer transition can help the effect look smooth rather than crowded.
Blending the shades
Use shades that are close enough to transition naturally, then blend their meeting point with a sponge or a careful brush technique. Several light passes tend to give more control than trying to create the full gradient in one layer.
- Choose a deep burgundy or oxblood for the cuticle area.
- Use a brighter cherry or crimson toward the tips.
- Build the fade gradually with light layers for a softer transition.
- Add a glossy topcoat to bring the two tones together visually.
The finished manicure offers the romance of red with a little extra depth, making it especially striking in evening light.
5. Try a Red Velvet Cat-Eye Finish
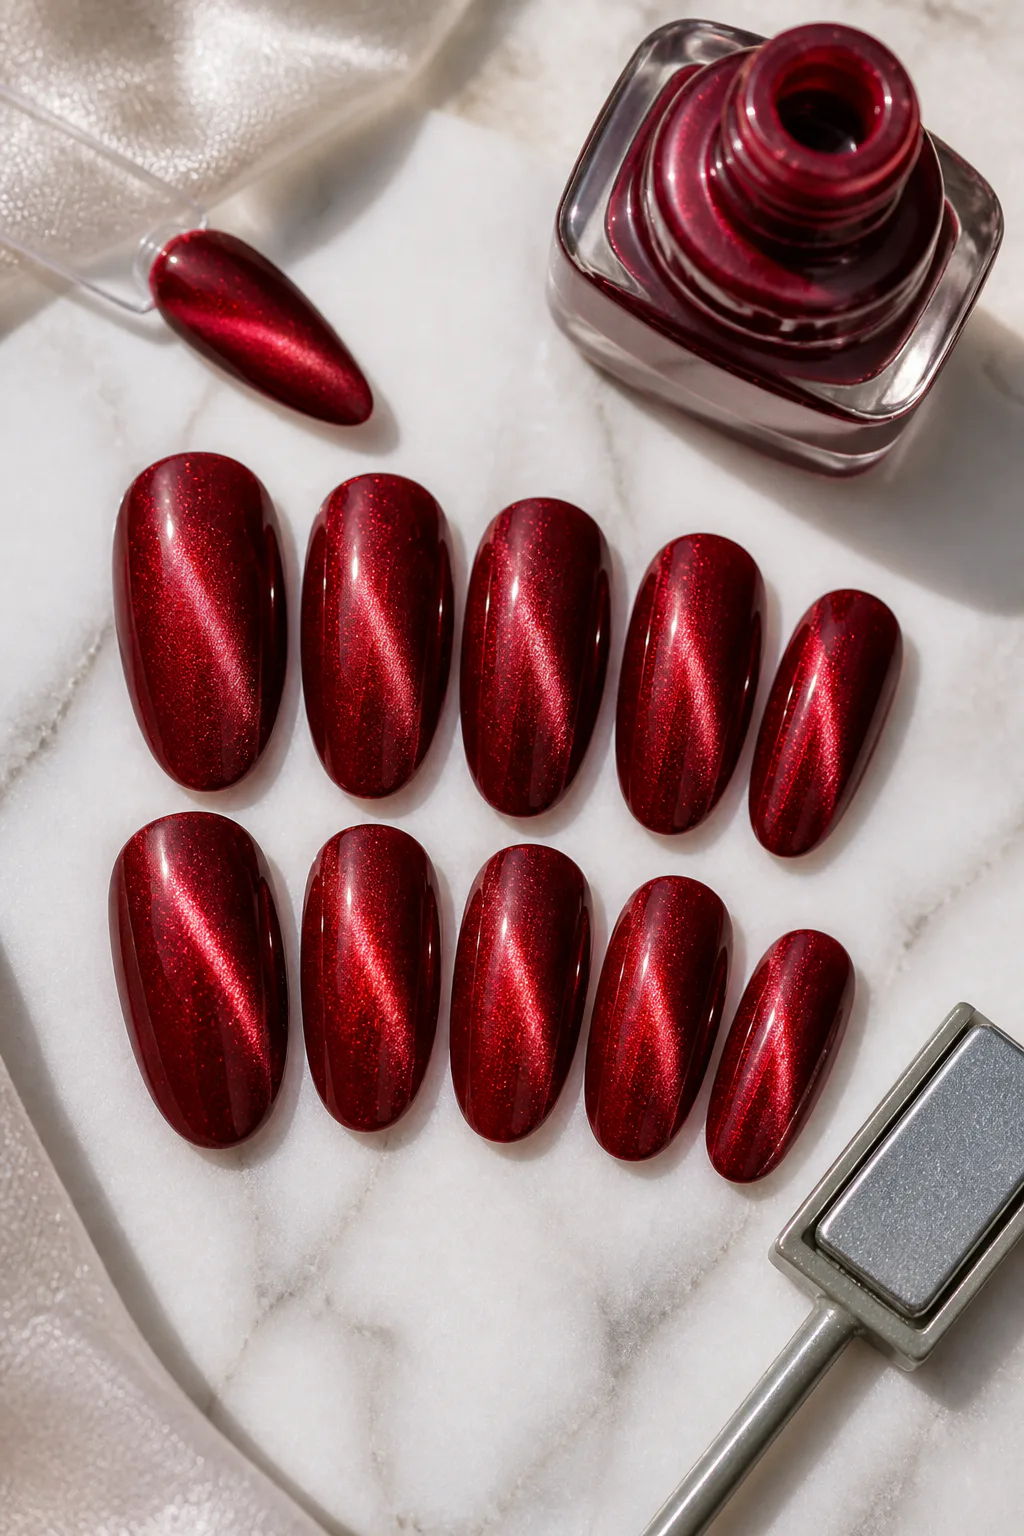
Red velvet cat-eye nails combine a saturated shade with a shifting magnetic shimmer. As the light moves across the nail, the reflective effect changes, creating the impression of soft, dimensional velvet. The finish adds interest without relying on drawn-on hearts or other overtly themed details.
This style is a natural fit for anyone who wants a bold manicure with a more luxe, textured look. It works beautifully as a full set, though a single cat-eye accent nail can add a touch of shimmer to otherwise classic red nails. Magnetic gel polish is usually used for this effect, so application and curing should follow the product’s directions.
Getting the dimensional effect
The magnetic pigment needs to be shaped while the gel is uncured, so work on one nail at a time and use a magnet as directed. Different magnet positions can change where the shimmer appears, giving you some control over the final pattern.
- Choose a deep or vivid red magnetic polish for a rich base.
- Hold the magnet near the nail without touching the wet product.
- Adjust the magnet placement to guide the reflective band.
- Finish and cure the gel according to its instructions.
The result is festive through color, but sophisticated enough to wear well beyond Valentine’s Day.
6. Accent Red Nails with Crystals
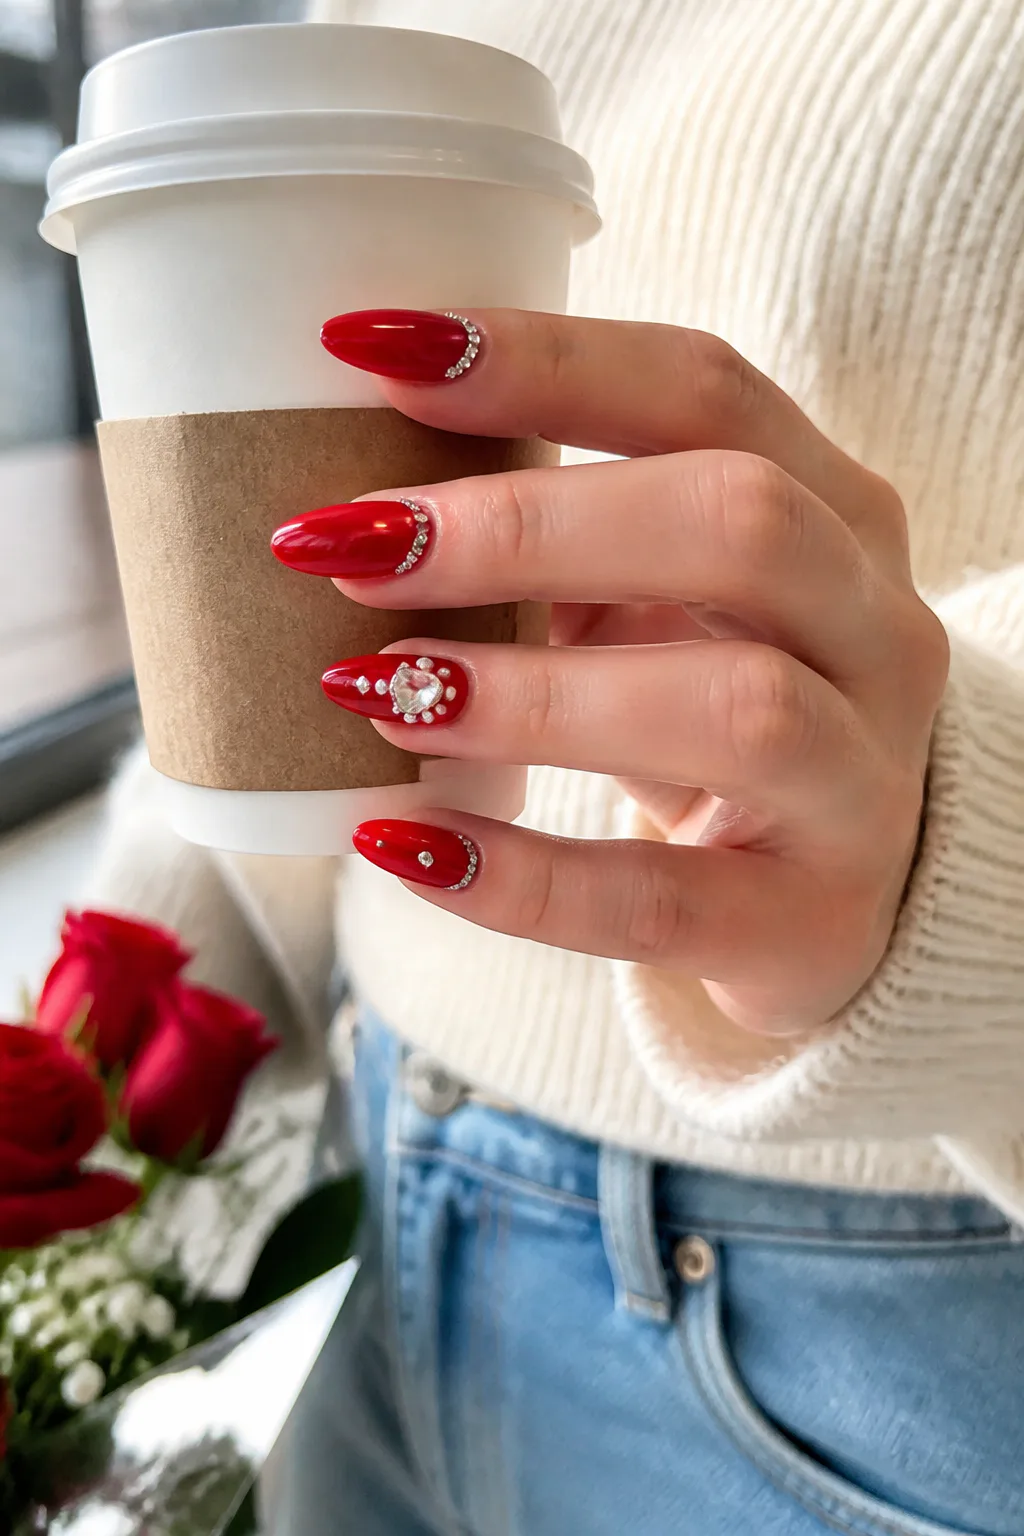
Rhinestones, mini pearls, and crystal hearts can turn glossy red nails into a more decorative Valentine’s manicure. A few carefully placed accents catch the light and add dimension, while the red base keeps the design tied to the holiday. The key is choosing a placement that feels intentional rather than scattering embellishments across every nail.
Try tracing part of the cuticle with tiny stones, or place a crystal heart near the tip of one accent nail. These details work especially well on a smooth, saturated red base, where the contrast between the glossy polish and raised decoration is easy to see. For a more understated set, keep most nails plain and decorate only one or two.
Placing embellishments neatly
Apply nail gems with suitable nail adhesive or the method recommended for your products, then press them gently into place. Keep embellishments away from areas where they may catch easily, and make sure the edges are secure before you finish the manicure.
- Use crystals along a small section of the cuticle for a delicate accent.
- Choose one crystal heart as the focal point on a single nail.
- Mix pearls and stones sparingly to avoid a crowded look.
- Seal around the embellishments without covering their sparkle.
A restrained arrangement gives the manicure a special-occasion feel while letting the red polish remain the star.
7. Paint Red Picnic Gingham Accents
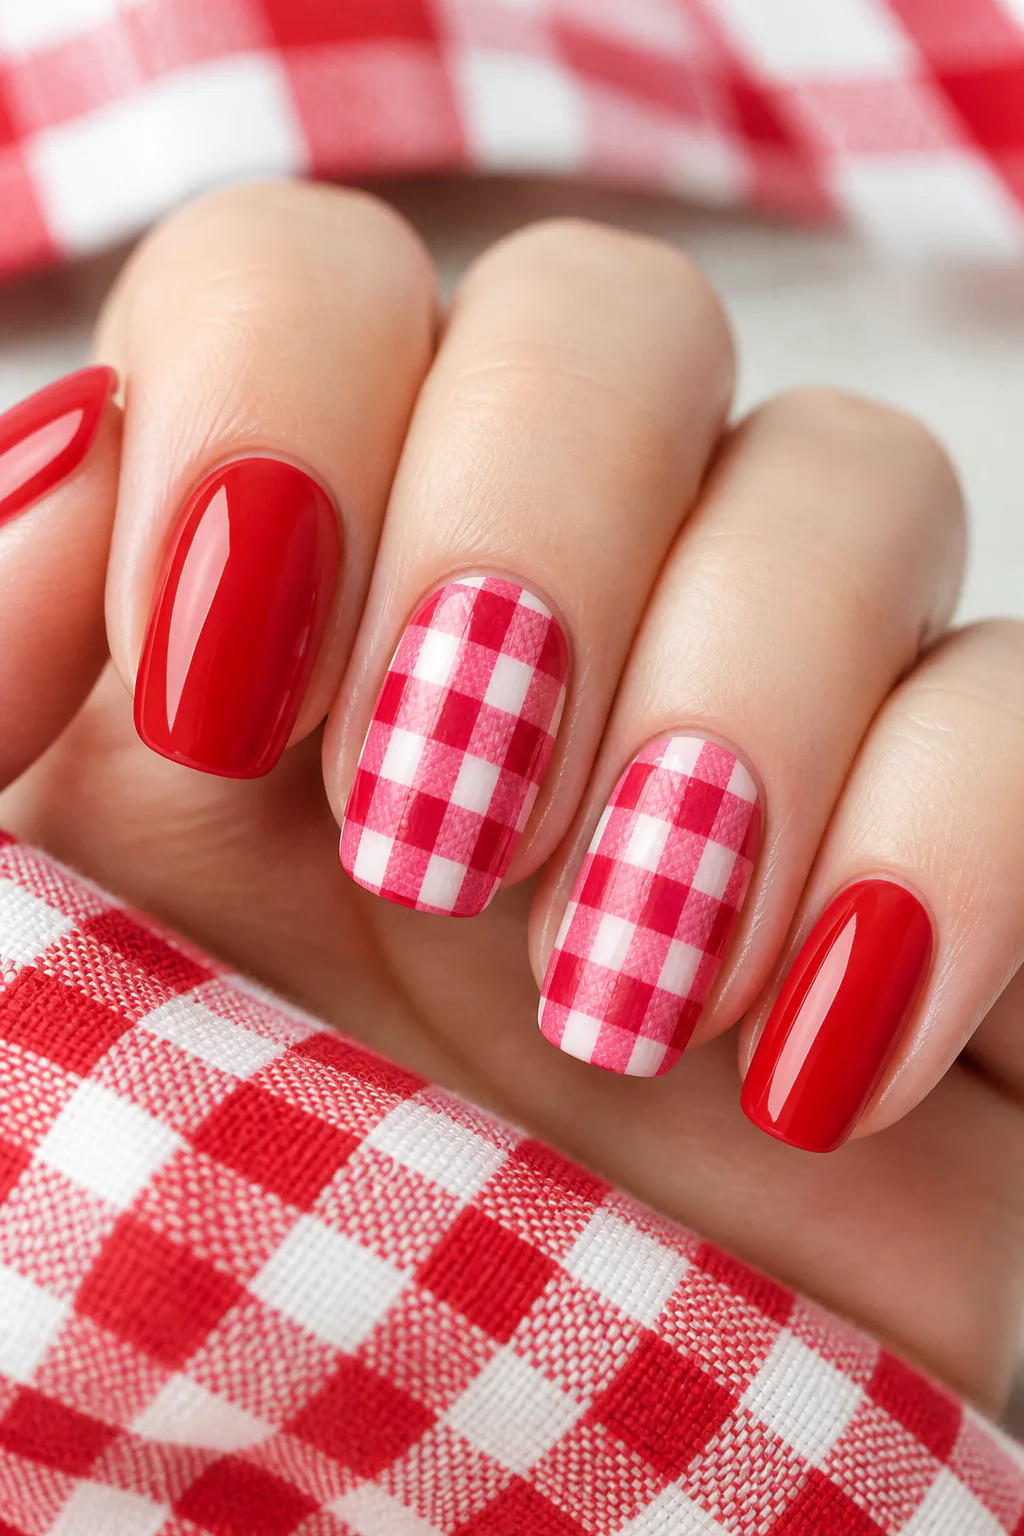
Red-and-white or red-and-pink gingham brings a cheerful, picnic-inspired twist to Valentine’s nails. The tiny checks feel sweet and nostalgic, while solid red nails keep the overall look grounded. Using the pattern on a couple of accent nails is an easy way to enjoy the detail without making the manicure feel too busy.
This design looks especially charming against a pale base that allows the checks to stand out. A fine brush helps create the narrow lines, though a nail-art pen or stamping tool may make the pattern easier to repeat. Because small checks take patience, you can simplify the look with broader stripes or a single patterned nail.
Building a tidy check pattern
Let the pale base dry completely before drawing the red lines. Add crossing lines at a steady spacing, then use small touches of the second color if you want a more layered, woven effect.
- Choose red and white for a crisp, classic picnic feel.
- Try red and pink for a softer, sweeter color combination.
- Keep gingham to one or two nails and paint the rest solid red.
- Use thin lines and a consistent grid for a neater finish.
The pattern adds personality to a red manicure and pairs nicely with simple outfits or cozy Valentine’s looks.
8. Make Red Aura Blush Nails
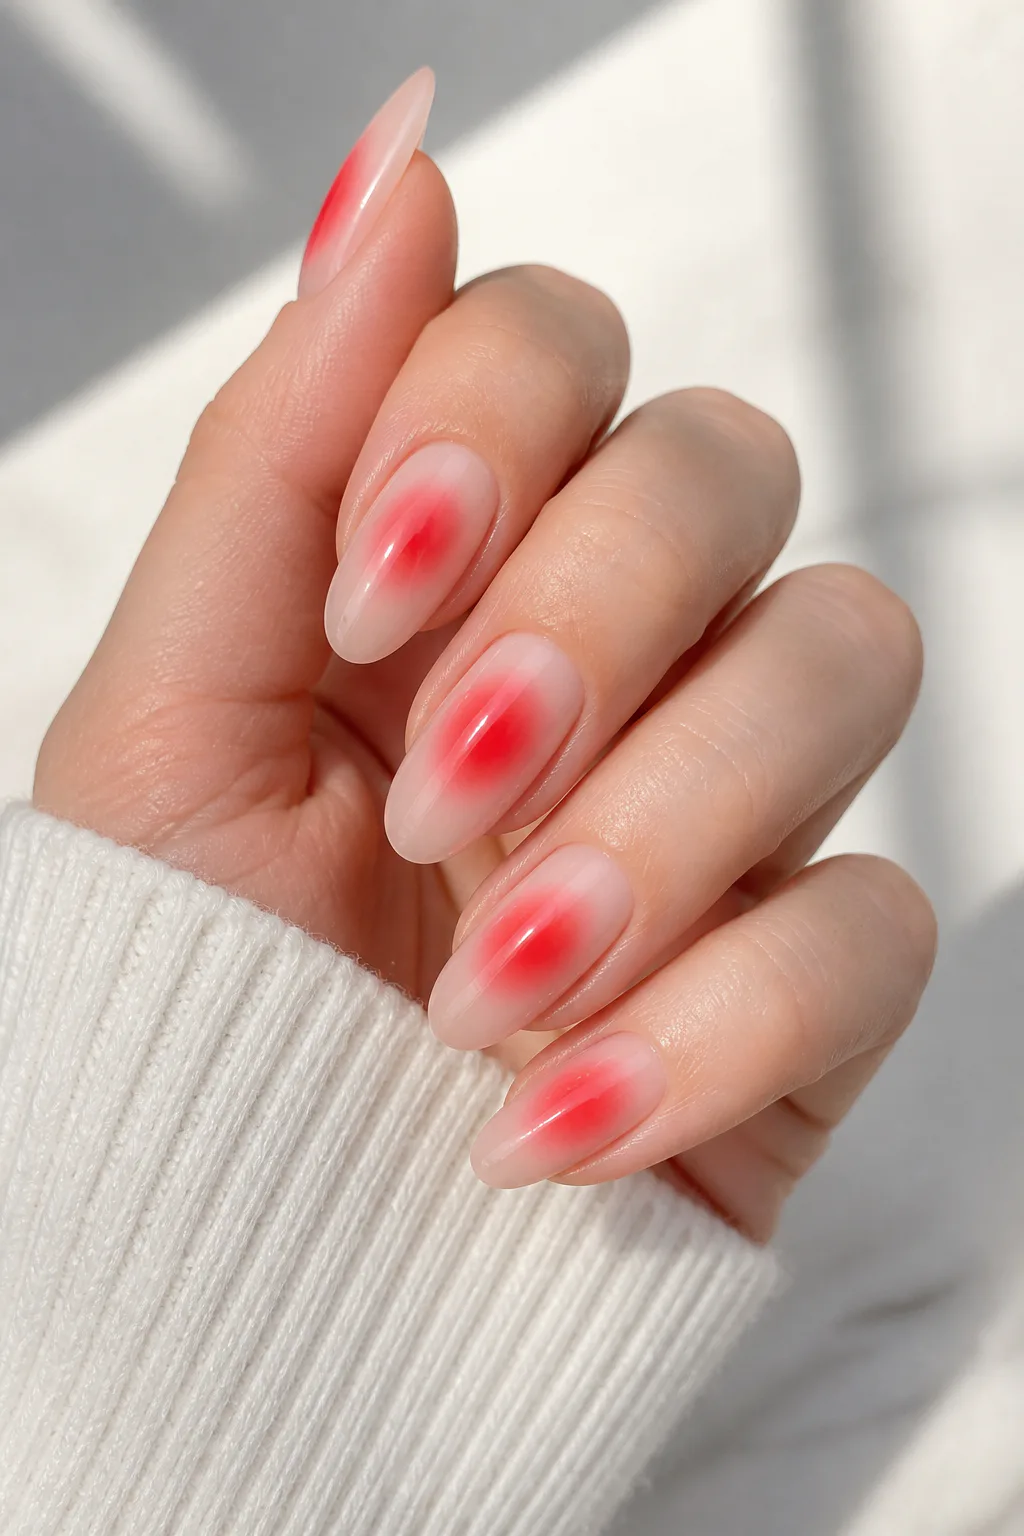
Red aura nails place a soft, glowing burst of color at the center of a sheer nude or milky pink base. Instead of a sharp edge, the red fades outward like a blush, creating a hazy, romantic effect. The result feels modern and delicate while still bringing a noticeable pop of Valentine’s color.
This design is a lovely middle ground between barely-there nails and a full red manicure. It can be worn across all nails for a coordinated look or used as a subtle accent alongside a sheer, glossy set. A softly diffused center suits both shorter and longer nails, though the gradient may be easier to show on a little extra length.
Creating a soft glow
Build the red gradually over the base, concentrating the strongest color near the center and blending its edges outward. An airbrush can create an especially smooth haze, but a sponge or soft blending tool can also help achieve a diffused effect.
- Start with a sheer nude or milky pink base.
- Place the deepest red at the center of each nail.
- Blend the color outward so there is no harsh border.
- Finish with a glossy topcoat to emphasize the soft glow.
Because the color is concentrated rather than solid, aura nails feel romantic without losing their airy, understated quality.
9. Draw Abstract Red Swirls
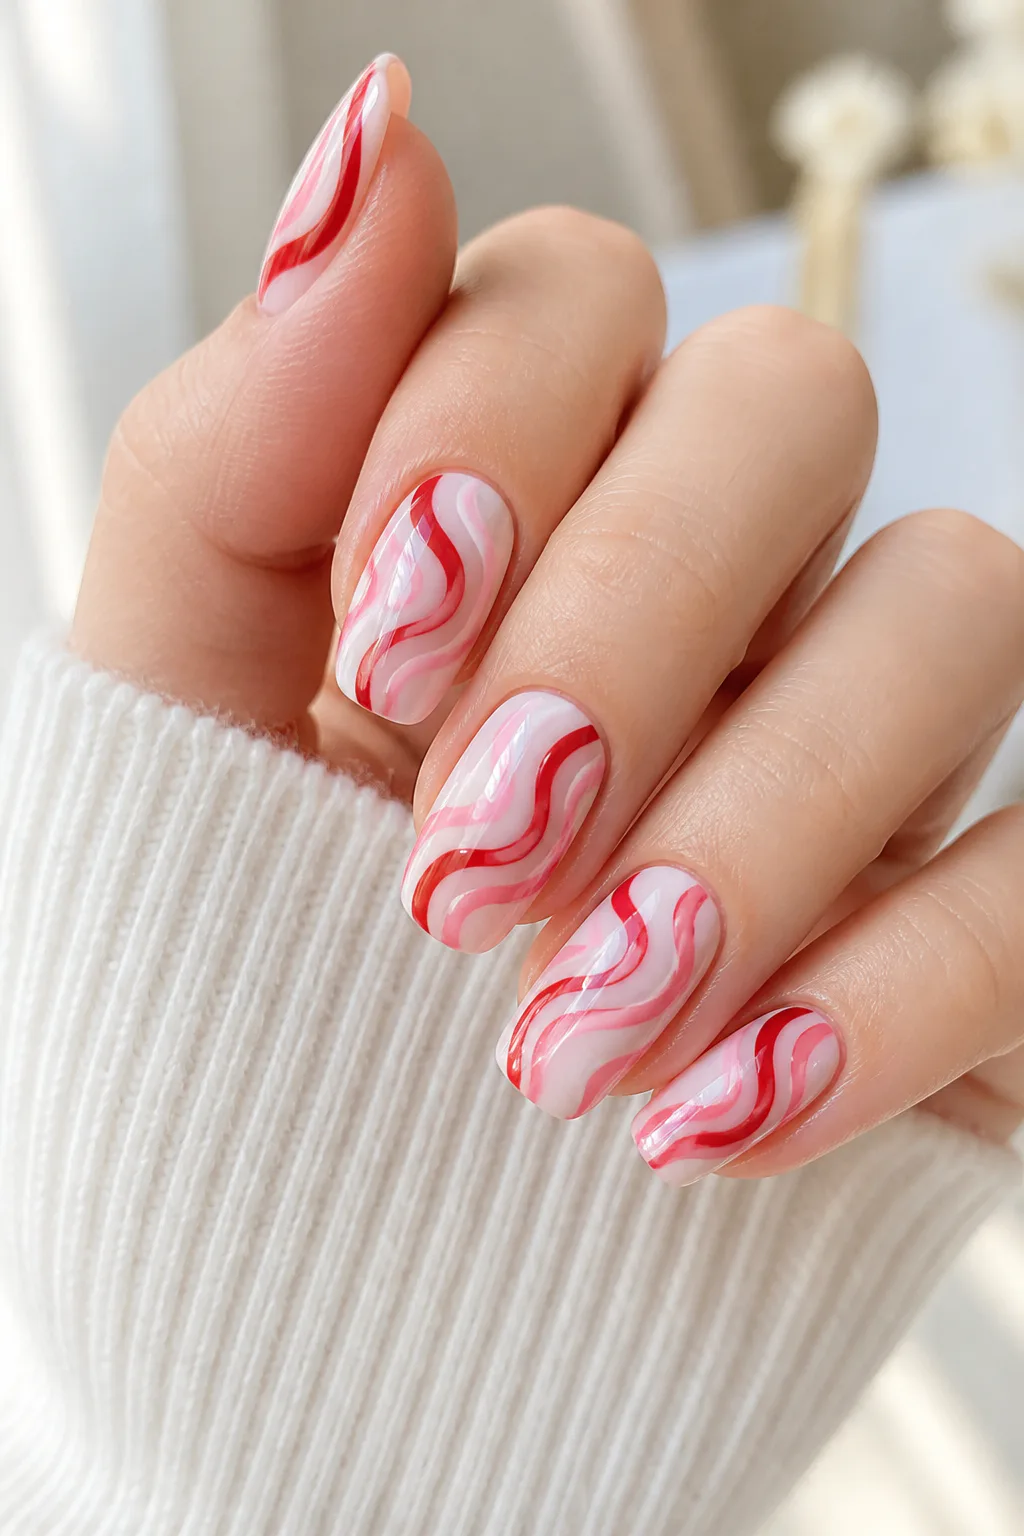
Abstract red swirls bring movement to a manicure without relying on traditional hearts. Wavy lines in cherry red and rose can be layered over a milky white or soft pink base for a playful, retro-inspired look. The curves make each nail feel like a tiny canvas, and the design can be as simple or expressive as you like.
Use the pattern across every nail for a bold set, or add swirls to only a few nails and leave the rest in a coordinating solid shade. A light base gives the red lines contrast, while a soft pink background makes the overall effect gentler. Since the lines don’t need to match exactly, small variations can add to the handmade feel.
Keeping the lines fluid
Work with a fine liner brush and move slowly, drawing longer curves rather than lots of short strokes. Let one color dry before adding another if you want the red and rose lines to stay distinct.
- Choose milky white for a crisp, high-contrast base.
- Use soft pink for a quieter, romantic background.
- Vary the curves from nail to nail for an organic look.
- Leave some open space so the design doesn’t become crowded.
The finished manicure feels artistic and festive, with enough flexibility to suit a minimalist or maximalist style.
10. Add Lipstick Kisses and XOXO
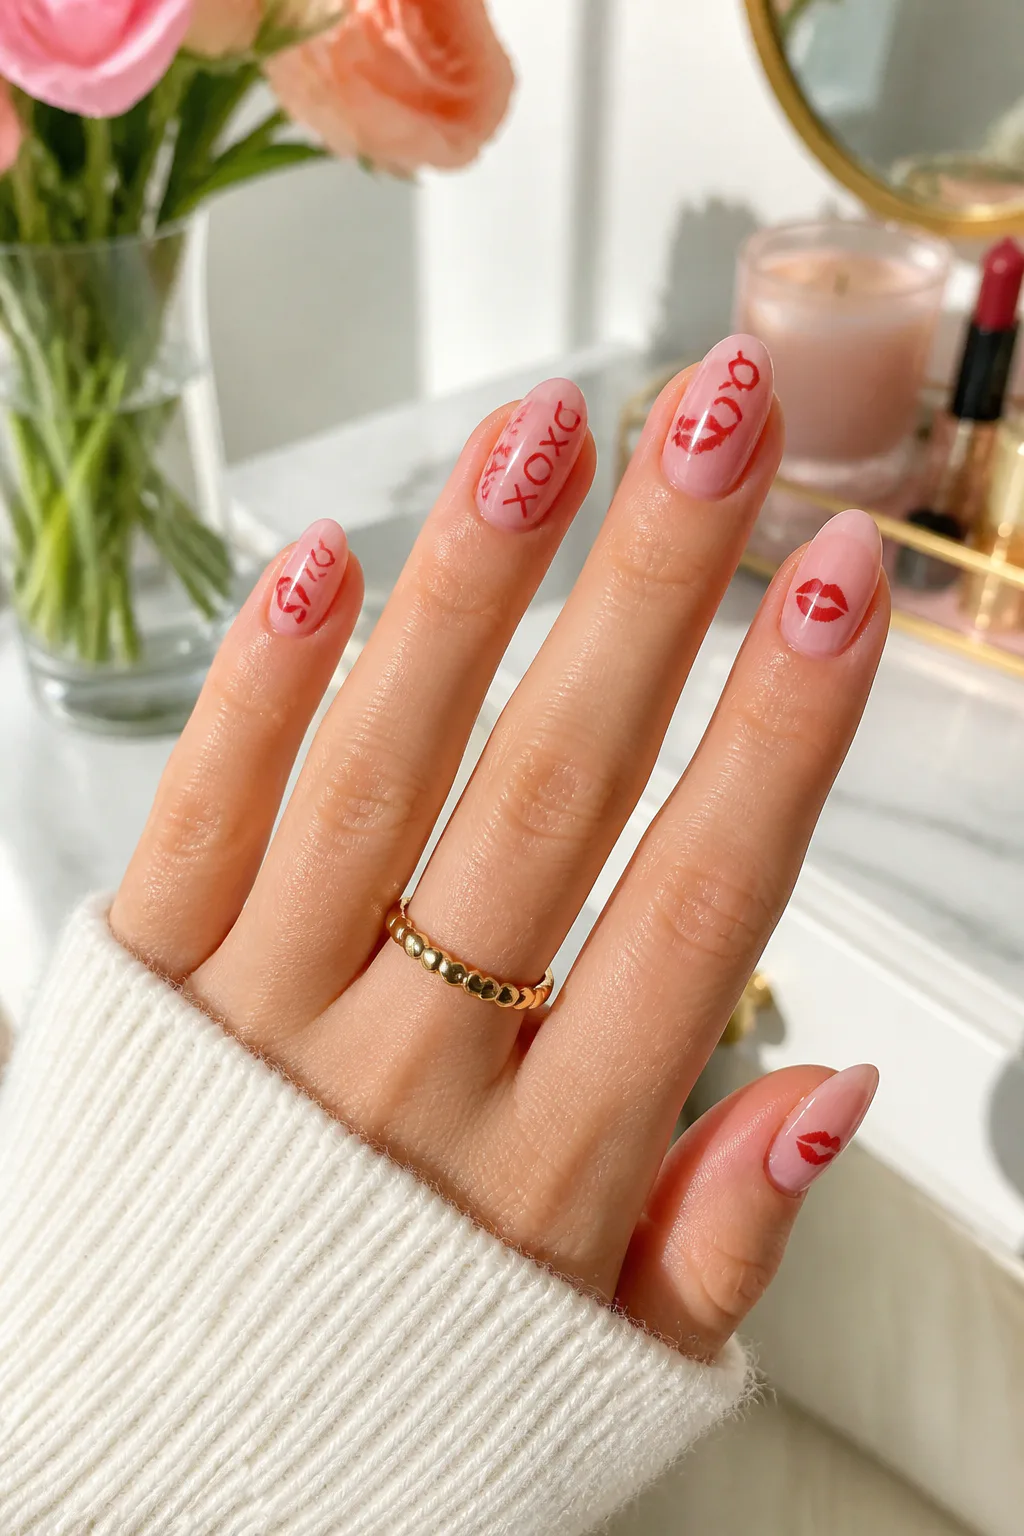
Tiny lipstick kisses, love lettering, and XOXO details make a sheer pink or nude manicure feel unmistakably playful. Against a translucent base, the red motifs stand out while leaving plenty of open space. This is a fun pick if you enjoy nail art with a lighthearted message rather than a more traditional romantic motif.
You can mix several designs across the set or choose one repeating detail for a more coordinated result. A kiss mark on one nail and small XOXO lettering on another gives the manicure a collected, personal feel. For lettering, keep the words short and the scale small enough to fit comfortably on the nail.
Making small motifs readable
Fine brushes, stamping tools, or nail decals can help with tiny shapes and letters. If you’re painting by hand, test the design on paper first and use a light touch; simple marks often look clearer than overly detailed ones.
- Use a sheer nude or pink base to keep the look airy.
- Place kiss marks or lettering on one or two accent nails.
- Choose short lettering such as “love” or “XOXO.”
- Let each detail dry before sealing it with topcoat.
These accents bring a playful note to your manicure and pair especially well with classic red nails on the remaining fingers.
11. Mix Matte and Glossy Red Finishes
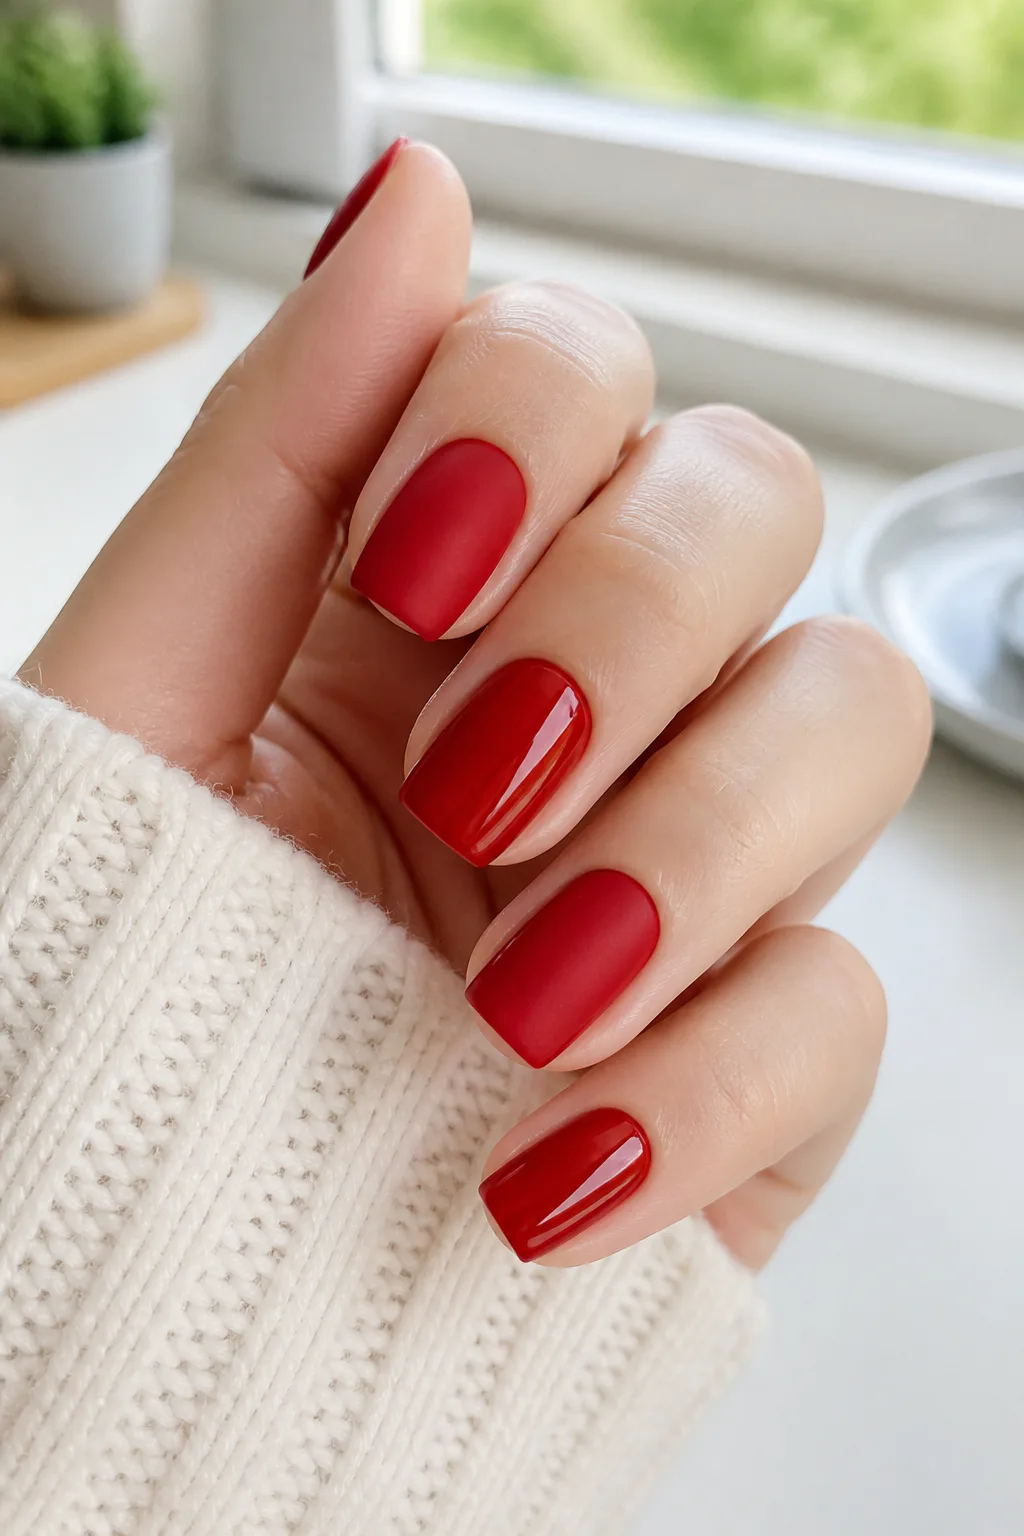
Combining matte and glossy topcoats gives a red manicure contrast without introducing another color. A velvety matte surface feels soft and modern, while a shiny finish reflects light and keeps the cherry-red shade vivid. Alternating finishes across the fingers creates a subtle pattern that is easy to notice up close.
You can also use the contrast within a single design, such as a matte red nail with glossy French tips. This approach keeps the palette simple but adds texture and detail. It suits anyone who loves classic red polish but wants a small twist that doesn’t rely on charms, lettering, or elaborate nail art.
Choosing where to place each finish
Apply a matte topcoat to fully dry color, and reserve gloss for the nails or details you want to stand out. If you’re combining finishes on one nail, use a clean guide or careful brushwork to keep the boundary between them tidy.
- Alternate matte and glossy finishes from finger to finger.
- Try glossy French tips over a matte red base.
- Use the same cherry-red shade throughout for a cohesive look.
- Apply each topcoat evenly and let the manicure dry thoroughly.
The finish contrast gives a familiar red manicure a fresh, tactile feel while keeping the overall design versatile.
Final Thoughts
Red Valentine’s Day nails can be as simple as a glossy cherry shade or as detailed as crystals, gingham, and tiny love notes. Choosing one main idea and keeping the other details restrained can help the manicure feel polished, whether you prefer a classic style or something more playful.
Use these designs as a starting point and adapt the colors, nail shape, and accents to suit you. A small heart, a soft aura fade, or a fresh topcoat finish can be all it takes to make your manicure feel special for the occasion.