16 Stunning Red Nails Ideas for Every Style
Red nails can feel classic, playful, dramatic, or softly romantic depending on the shade and details you choose. From a glossy cherry manicure to fine-line art and shimmering finishes, these ideas offer plenty of ways to make red feel personal.
Some designs suit short, everyday nails, while others make a statement on longer shapes or a few accent nails. Think about your preferred nail length, how much detail you enjoy, and whether you want a look that feels polished for weeks or easy to change.
Use these ideas as inspiration for your next salon appointment, press-on set, or DIY manicure. A steady hand helps with detailed art, but many designs can be simplified by adding decoration to just one or two nails.
1. Wear Glossy Cherry Red on Short Almond Nails
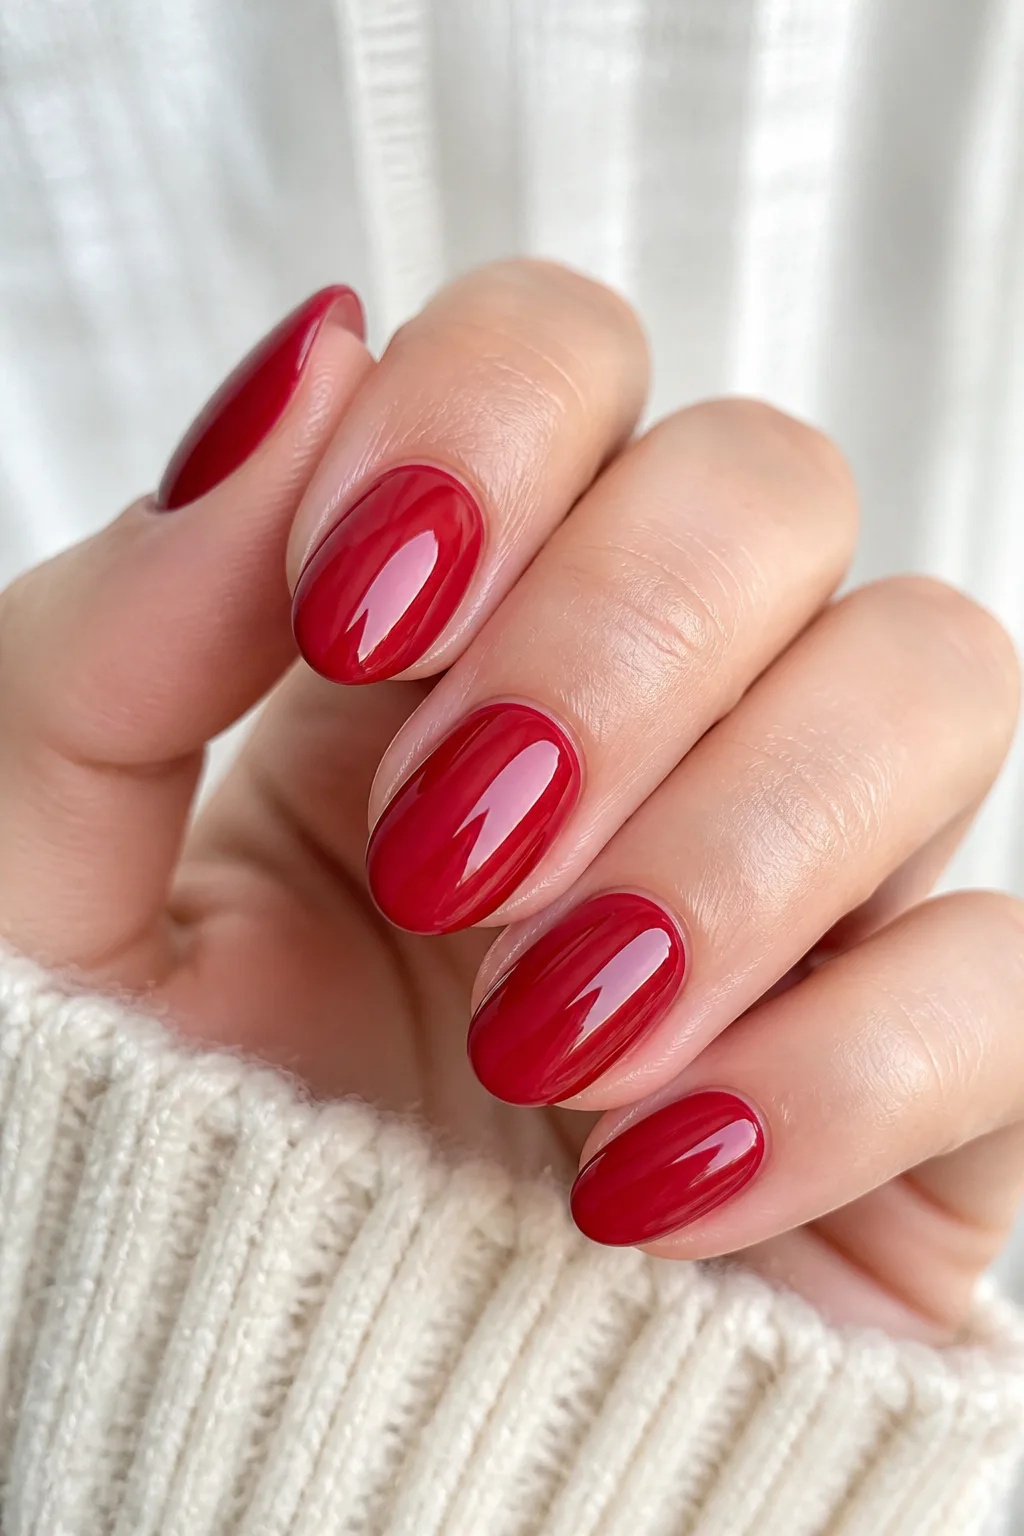
A glossy, blue-toned cherry red is a timeless choice when you want color that feels bold without needing extra nail art. On short almond or squoval nails, the shade looks neat and intentional, while the reflective finish gives the manicure a fresh, polished appearance.
This design works especially well for everyday wear because it pairs easily with casual outfits, work clothes, and evening looks. Keeping the nails short also lets the vivid color take center stage without feeling overly dramatic.
How to pull it off
Ask for a smooth, even application and a high-shine top coat. A little care with shaping makes a difference: gently tapered sides can create an almond effect, while softly rounded corners give a squoval shape a practical finish.
- Choose a cool or blue-based red for classic cherry color.
- Keep the length short to medium for an easy-to-wear look.
- Apply thin coats so the color looks smooth rather than heavy.
- Refresh the shine with a glossy top coat when needed.
It is a simple red manicure that still feels considered, making it an easy starting point if you are trying a brighter shade for the first time.
2. Scatter Tiny Cherries Over a Milky Base

Tiny cherries turn a sheer nude or milky white manicure into something playful while keeping the overall look light. The small motifs can be scattered across every nail or limited to a couple of accent nails for a quieter take on fruit-inspired nail art.
A translucent base leaves plenty of breathing room around each design, which helps the cherries stand out without making the manicure feel crowded. This style works nicely on short rounded nails as well as longer oval shapes, and it suits spring and summer outfits particularly well.
Design tips
For a recognizable cherry motif, keep the fruit shapes rounded and the stems fine. A nail artist can hand-paint the details, while stickers or decals offer a convenient option for a home manicure.
- Use a milky pink or soft white base for a gentle contrast.
- Vary the placement so the cherries look scattered, not stamped in a row.
- Add slim green stems with a fine brush or leave them off for a minimal version.
- Seal the art with a clear top coat to smooth the surface.
The result feels cheerful and detailed, but the sheer background keeps the red accents wearable.
3. Add Ultra-Thin Red Micro-French Tips

Micro-French tips offer a refined way to wear red without covering the whole nail. A delicate crimson line traces the edge of a glossy nude or transparent base, creating a crisp detail that feels modern and understated.
This design is especially suited to short nails, where a very fine tip adds definition without taking up too much space. On longer nails, the line can be slightly more visible while still keeping the overall manicure clean and minimal.
How to get a clean line
The key is a smooth base and a narrow, consistent curve along each free edge. If you are doing the manicure yourself, let the base dry fully before adding color, and use a fine nail-art brush or French-tip guide to help steady your hand.
- Pick a sheer pink, beige, or clear base for a natural effect.
- Keep the red line thin for a true micro-French look.
- Match the curve to your nail shape rather than forcing a straight line.
- Finish with a glossy top coat to unify the layers.
It is a subtle option for anyone who wants a red detail that still feels polished and versatile.
4. Try a Deep Oxblood Burgundy Manicure
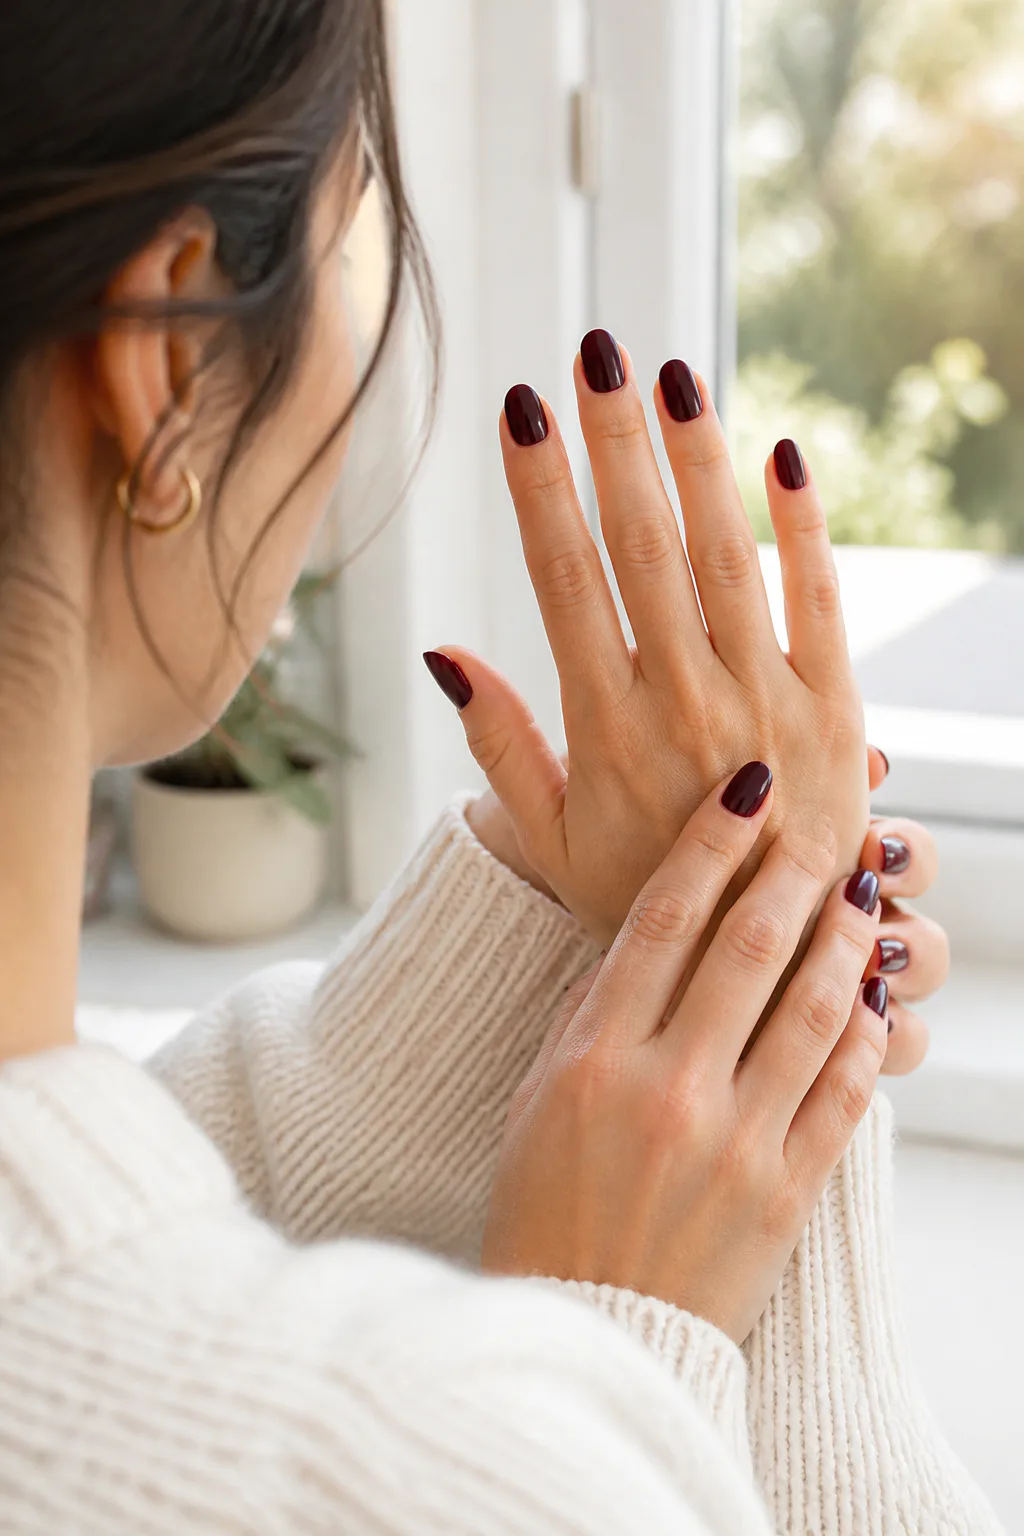
Oxblood burgundy gives red nails a moody, dramatic edge. The shade can look nearly black in dim indoor light, then reveal its rich red undertone in brighter settings, making it a strong choice when you want depth instead of a vivid cherry finish.
This manicure suits short, squared nails as well as longer almond or coffin shapes. It feels particularly at home in autumn and winter, but its polished, almost jewel-like quality can work year-round when paired with simple clothing or understated accessories.
Choosing the right finish
A glossy top coat emphasizes the dark color and gives it a sleek, lacquered look. If you prefer a softer effect, ask for a satin finish, but keep the polish application smooth so the deep shade looks rich rather than patchy.
- Try a nearly black burgundy for maximum drama.
- Choose a redder wine tone if you want the color to read clearly as burgundy.
- Keep nail art minimal to let the shade remain the focus.
- Use thin, even layers for a deep, consistent finish.
Oxblood is an easy way to make a classic red manicure feel more atmospheric and dressed up.
5. Create a Red Velvet Cat-Eye Effect

Magnetic red polish creates a shifting highlight that gives nails the plush, dimensional look of velvet. The finish changes as your hands move, so the red can appear bright and luminous from one angle and deeper from another.
This effect works on many nail lengths, though a medium or long shape gives the light-catching pattern more room to show. It can be worn across every nail for a bold, coordinated set or used on a few accents alongside a solid red manicure.
What to ask for
Cat-eye polish contains magnetic particles that are moved into a design while the polish is wet. Your nail artist can guide the particles into a soft central glow, diagonal band, or more spread-out velvet effect before curing or sealing the color.
- Choose a rich red magnetic polish for a plush, saturated look.
- Use a darker base when you want the shimmer to feel more dramatic.
- Ask for a diffused glow rather than a sharp stripe for a velvet finish.
- Keep extra decorations simple so the shifting effect stays visible.
It is a striking choice when you want texture and movement without adding raised embellishments.
6. Finish Red Nails with Chrome Glaze

A chrome glaze adds a sleek, reflective layer to a classic red manicure. Depending on the powder or pigment used, the result can lean pearly red, silvery, or subtly iridescent, giving the nails a futuristic sheen without changing the underlying color completely.
This finish can look particularly striking on almond and coffin shapes, where the reflective surface catches light across a larger area. It also works on shorter nails if you prefer a more compact version of the trend, especially with a softer pearlescent glow.
How to make the finish shine
Chrome effects are usually applied over a smooth, cured base and sealed carefully. Ask your nail artist whether the final result will be more metallic or glazed, and bring a reference if you have a particular balance of red and silver in mind.
- Start with a classic red base for a saturated finish.
- Choose a pearly red glaze for a subtle, tonal sheen.
- Try silver chrome over red for a brighter, more futuristic effect.
- Keep the nail surface smooth so reflections look even.
The glossy overlay makes familiar red polish feel fresh while keeping the design sleek and uncluttered.
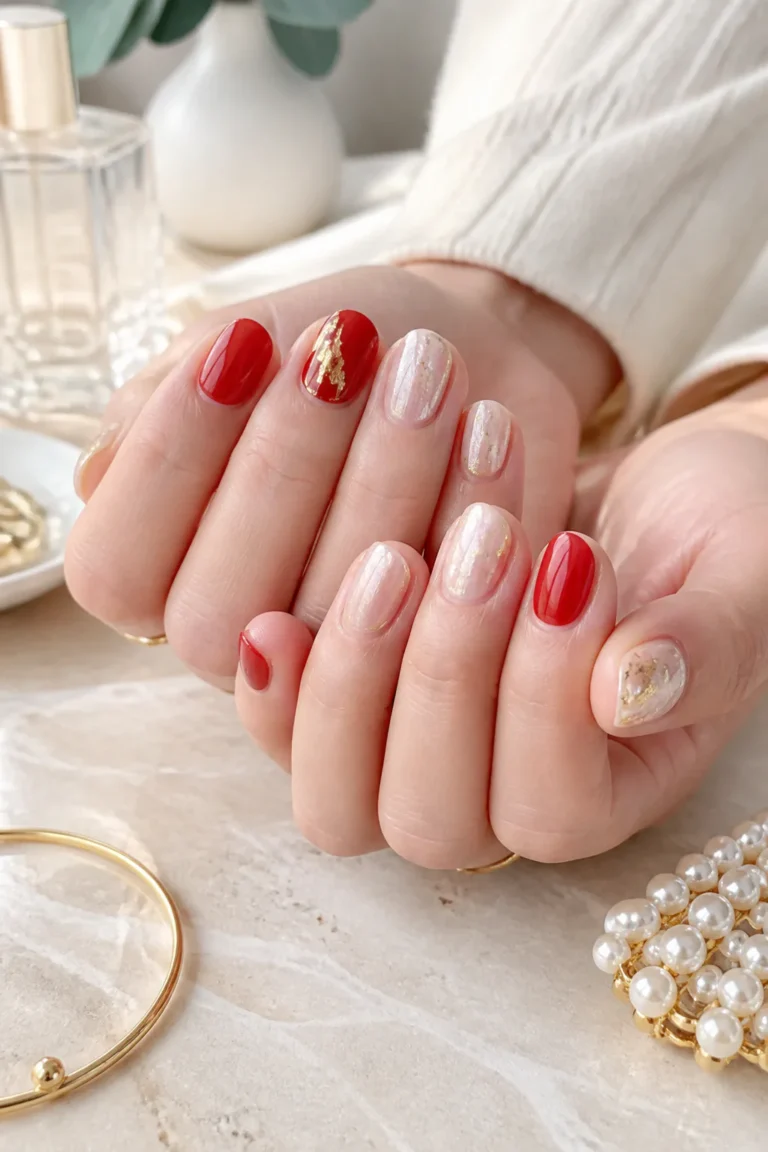
7. Decorate Red Nails with Gold Foil

Gold foil brings warmth and an ornamental touch to a solid red manicure. Irregular flecks look like tiny pieces of leaf scattered across the polish, while fine metallic striping creates a neater, more graphic accent.
The contrast works across a range of reds, from bright cherry to deep burgundy. You can decorate every nail for a rich, embellished finish or reserve the gold for one or two accent nails to keep the set balanced and easy to wear.
Placement ideas
Gold foil is most effective when its placement feels deliberate rather than overly dense. A nail artist can press small pieces into a tacky layer, or use metallic striping for precise lines along the sidewall, tip, or center of the nail.
- Use scattered foil flecks for an organic, textured look.
- Place one larger accent near the tip or cuticle instead of covering the whole nail.
- Pair bright red with warm gold for a festive combination.
- Choose fine metallic lines if you prefer crisp, minimal decoration.
The gold details catch the light beautifully, while the red base keeps the manicure cohesive.
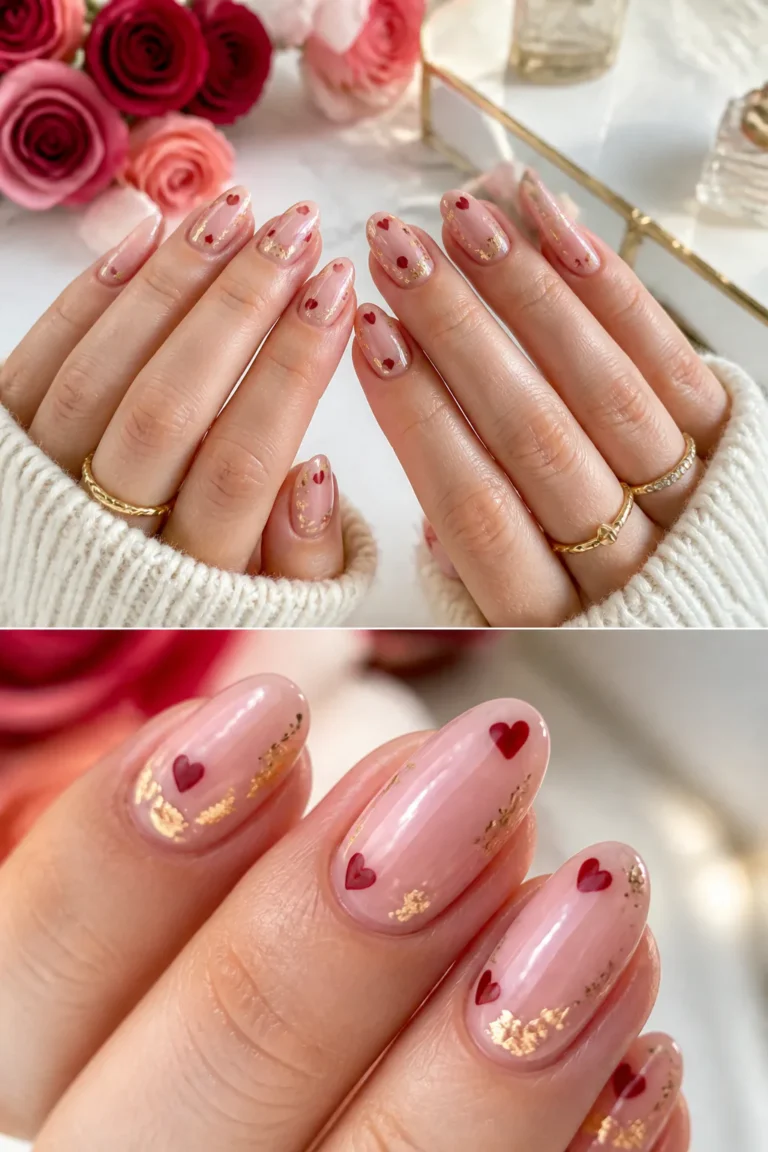
8. Draw Ruby Hearts in Negative Space

Ruby-red hearts stand out beautifully against clear or nude nails. Leaving much of the nail bare creates negative space around the design, so even a bold heart outline feels light rather than overly sweet or busy.
You can place one heart on each nail, vary the placement across the set, or use the motif on a few accent nails. Half-filled or geometric hearts add a contemporary touch, while a simple outline gives the manicure a softer, more delicate feel.
Making the art wearable
A sheer base helps the hearts remain the focus while giving the nails a neat, finished appearance. For precise shapes, work with a fine brush or ask a nail artist to draw the outline; a small decal can also be a helpful shortcut for DIY designs.
- Use a clear or milky nude base to preserve the negative space.
- Keep the hearts small for a subtle accent.
- Try half-filled shapes for a graphic, modern look.
- Place motifs near the tips or sides for an off-center composition.
This design is a charming choice when you want a romantic detail without a full red manicure.
9. Pair Matte Crimson with Glossy French Tips
A matte crimson nail with glossy red French tips plays with finish instead of adding a second color. The tonal contrast creates a subtle design that becomes more noticeable as light moves across the nails.
This look works well on medium-length nails, where the tip has enough space to make the contrast clear, but it can be adapted for shorter nails with a narrow, curved edge. Its single-color palette keeps the effect sophisticated rather than overly decorative.
Creating the contrast
Start with an even crimson manicure and apply a matte top coat to the nail body. Once it is dry, paint the French tips in glossy red, taking care to keep the boundary clean and the curves consistent across the set.
- Choose the same red for both finishes to emphasize texture.
- Make the tip fine for a discreet effect or wider for more contrast.
- Use a curved guide or fine brush to define the French edge.
- Keep the matte surface clean so it retains its soft appearance.
The result is a modern, tactile manicure that feels special while staying within a classic red palette.
10. Layer Red Tortoiseshell Nail Art

Red tortoiseshell nail art uses translucent layers of red and black to create depth and irregular patches. It reimagines the familiar tortoiseshell pattern with a warmer, more dramatic palette that looks especially striking over a glossy finish.
The pattern has plenty of visual movement, so it can be used on every nail for a bold set or limited to a couple of accents beside solid red polish. Longer nails provide generous space for the layered shapes, but shorter nails can carry a simplified version with fewer patches.
Building the layered effect
The art depends on seeing color through color rather than covering the nail with opaque blocks. A nail artist can add translucent red and dark accents in uneven layers, leaving portions of the base visible to create the characteristic depth.
- Use a clear or sheer reddish base to keep the design dimensional.
- Place dark patches irregularly instead of making a repeated grid.
- Pair patterned nails with plain crimson accents for balance.
- Finish with gloss to bring out the layered color.
This is a distinctive option for anyone who likes rich, glossy nail art with a little edge.
11. Add Checkerboard Red-and-White Tips

Red-and-white checkerboard tips bring a playful graphic detail to a manicure. Keeping the pattern near the free edge makes it feel like a French tip with a twist, while a few full accent nails can make the design bolder and more eye-catching.
The pattern suits medium or longer nails, where the small squares have room to read clearly. On shorter nails, use a simplified checkerboard on just one or two nails, or choose fewer, slightly larger squares for a cleaner result.
Keeping the pattern crisp
Even spacing is what makes checkerboard art look intentional. A nail artist can paint the squares by hand, while striping tape or decals may help create sharper edges for a home manicure. A smooth clear top coat helps even out the finished design.
- Use a pale base or a bare nail to define the tip area.
- Keep the squares small and consistent for a classic checkerboard.
- Limit the pattern to accent nails if you want a quieter look.
- Pair patterned tips with solid red nails for a coordinated set.
It is a cheerful way to bring color and pattern together without making every nail equally busy.
12. Split Nails Between Cherry Red and Hot Pink

Cherry red and hot pink make a vivid color-blocking combination that feels energetic and modern. The two shades can sit side by side in clean vertical halves or meet along a diagonal line for a more dynamic effect.
This design works on short or long nails, though a longer shape offers more room for the color division to show. You can repeat the split across every nail for a coordinated look or alternate solid red and pink nails to make the pairing feel more relaxed.
Choosing a layout
A crisp dividing line gives the manicure a graphic finish, so careful placement matters. If you are painting at home, let the first color dry before masking the edge for the second; a nail artist can also vary the direction of the split to add movement.
- Use cherry red and bright pink for high contrast.
- Try vertical halves for a balanced, straightforward design.
- Choose diagonal color blocking for a more playful shape.
- Alternate solid-color nails if you prefer less pattern.
For a cohesive result, repeat both shades throughout the set rather than introducing extra colors.
13. Embellish Deep Red Nails with Pearls
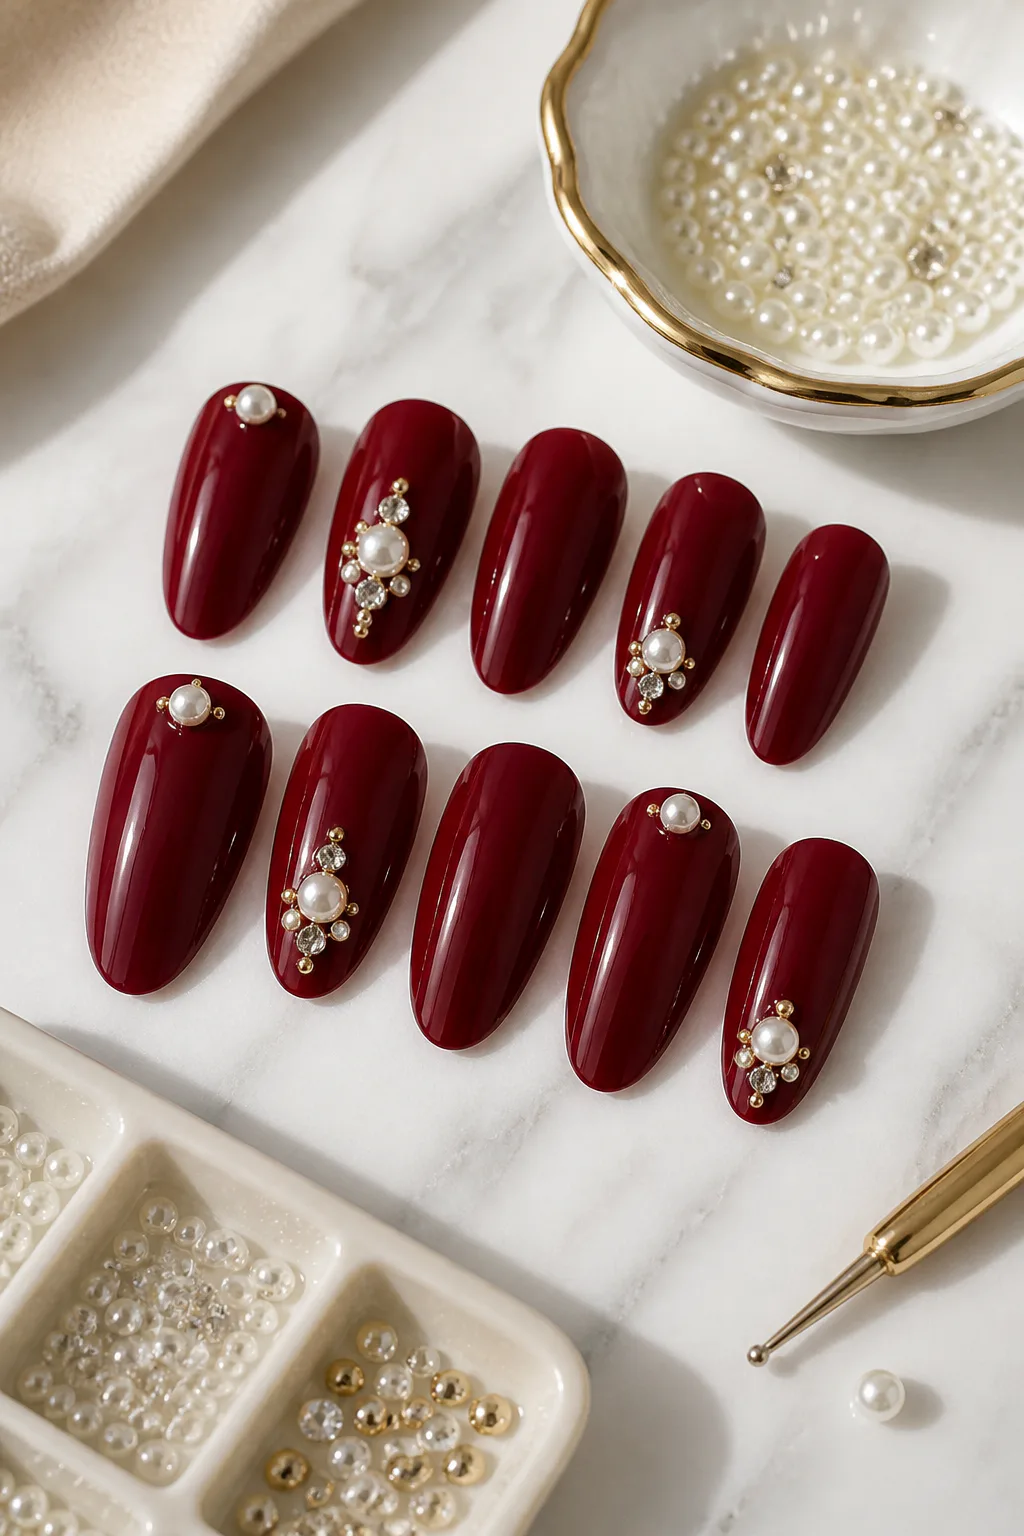
Tiny white pearls or delicate crystals create a dressy contrast against deep red polish. The combination feels elegant and dimensional, especially when the decorations are placed sparingly over a rich, glossy base.
This style works well for special occasions or whenever you want a manicure with a jewelry-like finish. It can be worn on long nails for more decoration space or adapted to shorter nails with a single pearl or crystal near the cuticle.
Balancing the embellishments
Raised details can catch on clothing or hair, so thoughtful placement helps keep the manicure practical. Ask your nail artist to secure each piece carefully, and consider using fewer accents if you use your hands frequently or prefer a smoother surface.
- Choose deep red or burgundy as a rich background.
- Place one small pearl near the cuticle for a subtle accent.
- Use crystals sparingly to add a pinpoint of sparkle.
- Keep some nails plain to balance the dimensional details.
The contrast between glossy red and soft white embellishments makes this a refined alternative to all-over glitter.
14. Fade Red Glitter Across the Nails
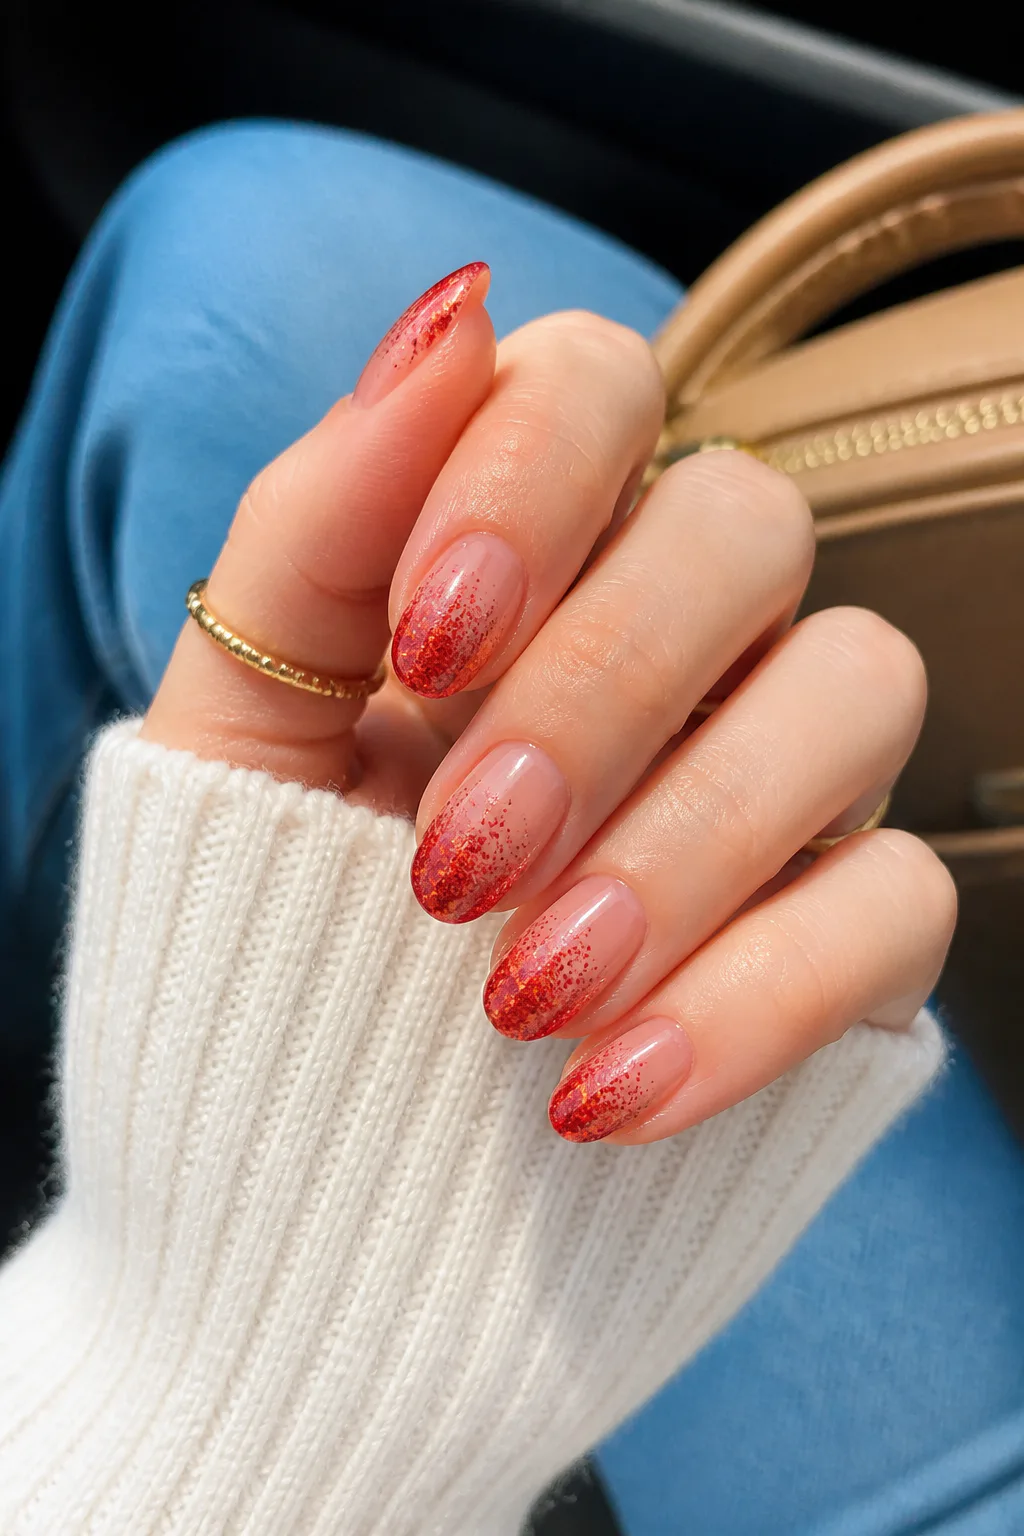
A red glitter fade brings sparkle to a manicure without covering the entire nail in shimmer. The glitter can concentrate at the tips and fade toward the center, or rise from the cuticles for a slightly unexpected direction.
A sheer nude or matching red base helps the gradient blend smoothly. This design suits most nail shapes, and the amount of glitter can be adjusted to feel either understated and scattered or richly sparkling for a festive look.
Creating a soft gradient
For a gradual fade, apply glitter in light layers and build up the concentration at one end of the nail. A sponge can help distribute loose glitter polish, while a detail brush is useful for keeping the densest shimmer close to the tip or cuticle.
- Start with a sheer neutral base for a delicate transition.
- Concentrate glitter at the tips for a classic fade.
- Reverse the gradient and begin near the cuticles for a fresh variation.
- Seal the surface with top coat to smooth the sparkle.
The gradient makes red glitter feel lighter and more wearable than a fully coated finish.
15. Paint Berry Swirls Over Milky White

Flowing berry-red ribbons over a milky white base create a soft, artistic manicure. The pale background keeps the design airy, while the crimson or strawberry-red lines add movement and a noticeable pop of color.
Swirls can be painted in fine, delicate curves or wider bands that take up more of the nail. The design looks lovely across a full set, but it can also be paired with plain milky nails to create a calmer mix of pattern and negative space.
Choosing the swirl pattern
Organic lines do not need to match perfectly from nail to nail. Vary the direction and thickness slightly to keep the set fluid, and use a thin brush for controlled curves. A glossy top coat can make the milky base and red accents look smooth and unified.
- Choose a sheer milky white base rather than an opaque stark white.
- Use berry red for a richer contrast or strawberry red for a softer feel.
- Leave open areas so the nail does not look crowded.
- Pair swirl accents with solid-color nails for a balanced set.
This design offers a graceful way to combine red with a softer, lighter manicure.
16. Draw Red Flames Over a Neutral Base
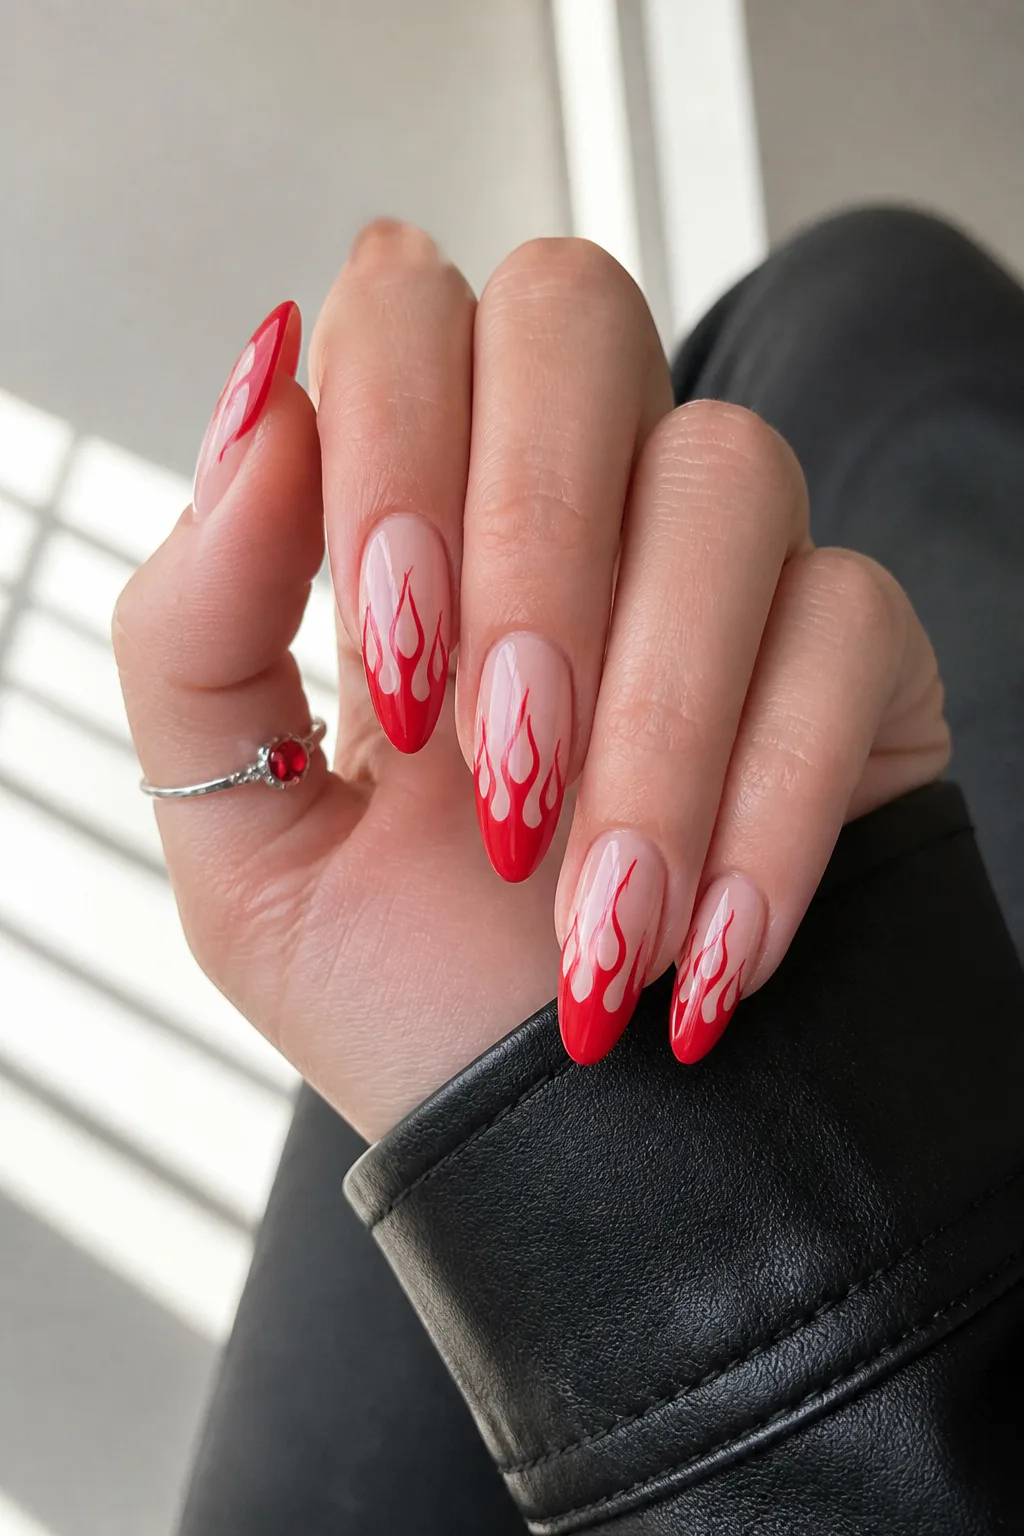
Sleek red flames bring an editorial edge to a manicure, especially when the shapes rise from the tips or curl upward from the cuticles. A neutral base keeps the flame outlines distinct, while a black background makes the red appear bolder and more dramatic.
The design works best when the flame shapes have room to stretch, so it can be especially striking on medium or long nails. For shorter nails, a simplified flame on one or two accent nails preserves the idea without crowding the smaller surface.
Making flame art feel balanced
Long, tapered curves help the flames look fluid instead of chunky. Ask for fine outlines or partially filled shapes if you prefer a lighter effect, and consider keeping the other nails solid or sheer so the artwork remains the focus.
- Use a neutral base for a crisp, wearable contrast.
- Choose black underneath for a bolder, high-impact look.
- Place the flames at the tips for a fire-tip effect.
- Keep the curves sleek and vary their height slightly.
It is a confident finish for anyone who wants red nails with a graphic, statement-making detail.
Final Thoughts
Red nails can be as simple as glossy cherry polish or as detailed as layered tortoiseshell, chrome glaze, and hand-painted flames. Choosing a shade, finish, and nail shape that suit your everyday style is a good way to make even a dramatic design feel like your own.
If you are unsure where to begin, try one accent detail with a classic red base, or bring a few favorite ideas to your nail appointment and ask how they might work with your preferred length. The best manicure is the one that feels comfortable to wear and makes you happy every time you catch a glimpse of it.