12 Stunning French Tip Nails Ideas
French tip nails have a way of looking polished while still leaving plenty of room for personal style. The classic pale base and clean tip are a flexible starting point, whether you love barely-there details or want a manicure with more color and contrast.
These 12 ideas refresh the familiar look with delicate lines, soft gradients, playful shades, and dramatic finishes. Each design keeps the recognizable French tip shape while adding a detail that makes it feel current and individual.
There are options for short natural nails, longer shapes, understated everyday manicures, and bolder statement looks. Use the ideas as inspiration for your next salon appointment, or adapt the simpler designs at home with a steady hand and a few favorite polish colors.
1. Try Ultra-Thin Micro French Tips

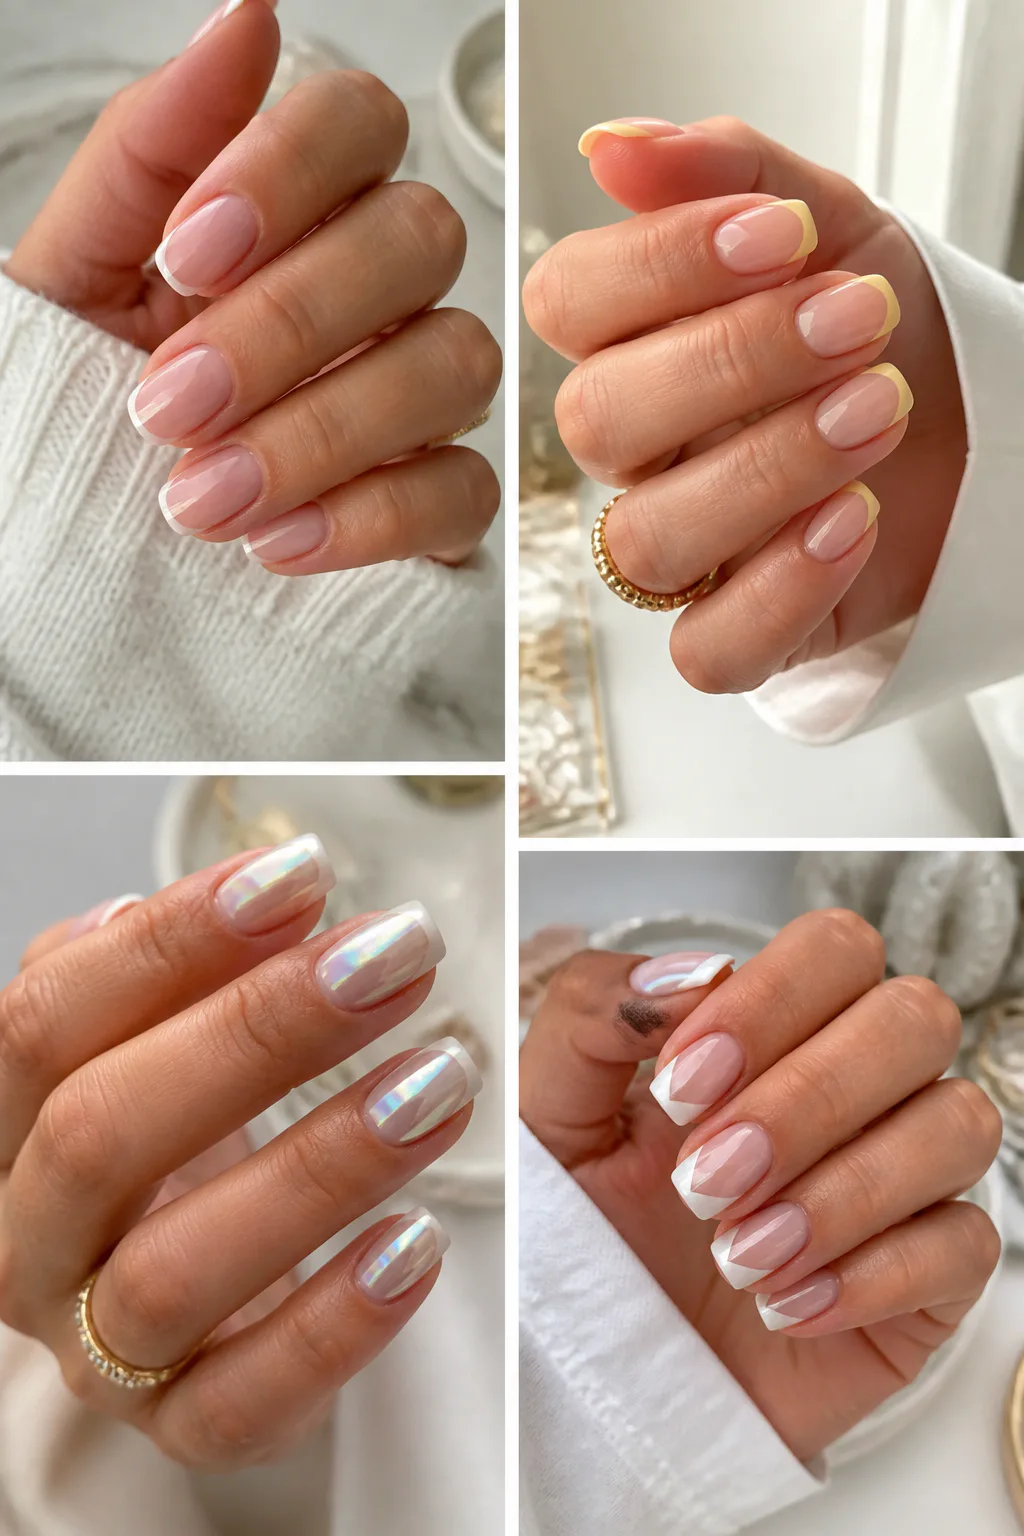
Micro French tips put a delicate line right along the nail edge, giving the classic manicure a lighter, more modern feel. Because the tip stays narrow, the design works especially well on short natural nails, where a wide band of polish can take up too much visual space.
A sheer pink, beige, or milky base keeps the manicure fresh and understated. Choose crisp white for a timeless finish, or use a subtle color when you want a little personality without losing the clean look.
How to keep the line delicate
Start with a smooth base and let it dry before painting the tip. A fine liner brush can help create a narrow stripe that follows your nail shape rather than looking too thick or uneven.
- Try a square or almond shape for a neat, balanced edge.
- Choose a sheer neutral base to keep the look airy.
- Use one thin coat of tip color and tidy the edge with a small brush.
The result feels refined enough for everyday wear and pairs easily with both minimal outfits and more dressed-up looks.
View this post on Instagram
Video: @betina_goldstein on Instagram. Shade shown: Oribe Royal Blush base with Chanel Le Vernis Blanc Écume tips.
2. Add a Glazed Chrome French Finish

A glazed chrome French manicure combines a familiar white tip with a soft, pearly sheen. The effect catches the light without changing the overall shape of the design, making it a lovely choice if you want something luminous rather than dramatically colorful.
Begin with a sheer milky-pink or neutral base, then add clean white tips. A fine layer of pearlescent chrome over the finished polish brings the pieces together with a smooth, glazed appearance that looks especially pretty in daylight.
Build a soft, even glow
Keep the base translucent so the manicure still feels light. Chrome can amplify ridges or uneven polish, so smooth nail preparation and neat application matter more than adding extra layers of shine.
- Use a milky base for a softer, romantic effect.
- Keep the white tips crisp to preserve the French contrast.
- Ask for a pearly finish if you want glow without a strong metallic look.
This finish suits weddings, celebrations, and ordinary days when you want a classic manicure with a little extra light.
View this post on Instagram
Video: @kineticsnailsglobal on Instagram. Style shown: glazed chrome French tips with a pearly sheen.
3. Draw a Double-Line French Tip

Double-line French tips add a second slim stripe beside the traditional tip, creating definition without covering much of the nail. The lines can be close together for a tidy, graphic look or spaced slightly apart to leave a sliver of negative space between them.
White paired with gold or silver is an easy combination, but two shades from the same color family can feel softer and more playful. The design is most visible on nails with enough free edge to show the parallel lines clearly.
Keep the stripes balanced
Paint the main tip first, then add the second line with a fine brush once the first has dried. Aim for a consistent curve across the nails; small variations can make the manicure look intentionally hand-drawn, but clear spacing helps it feel polished.
- Pair white with fine gold for a warm accent.
- Choose silver for a cooler, modern contrast.
- Keep both lines narrow so the design stays light.
It is a simple way to make a neutral manicure feel more detailed without adding charms or larger decorations.
4. Sweep French Tips Down One Side
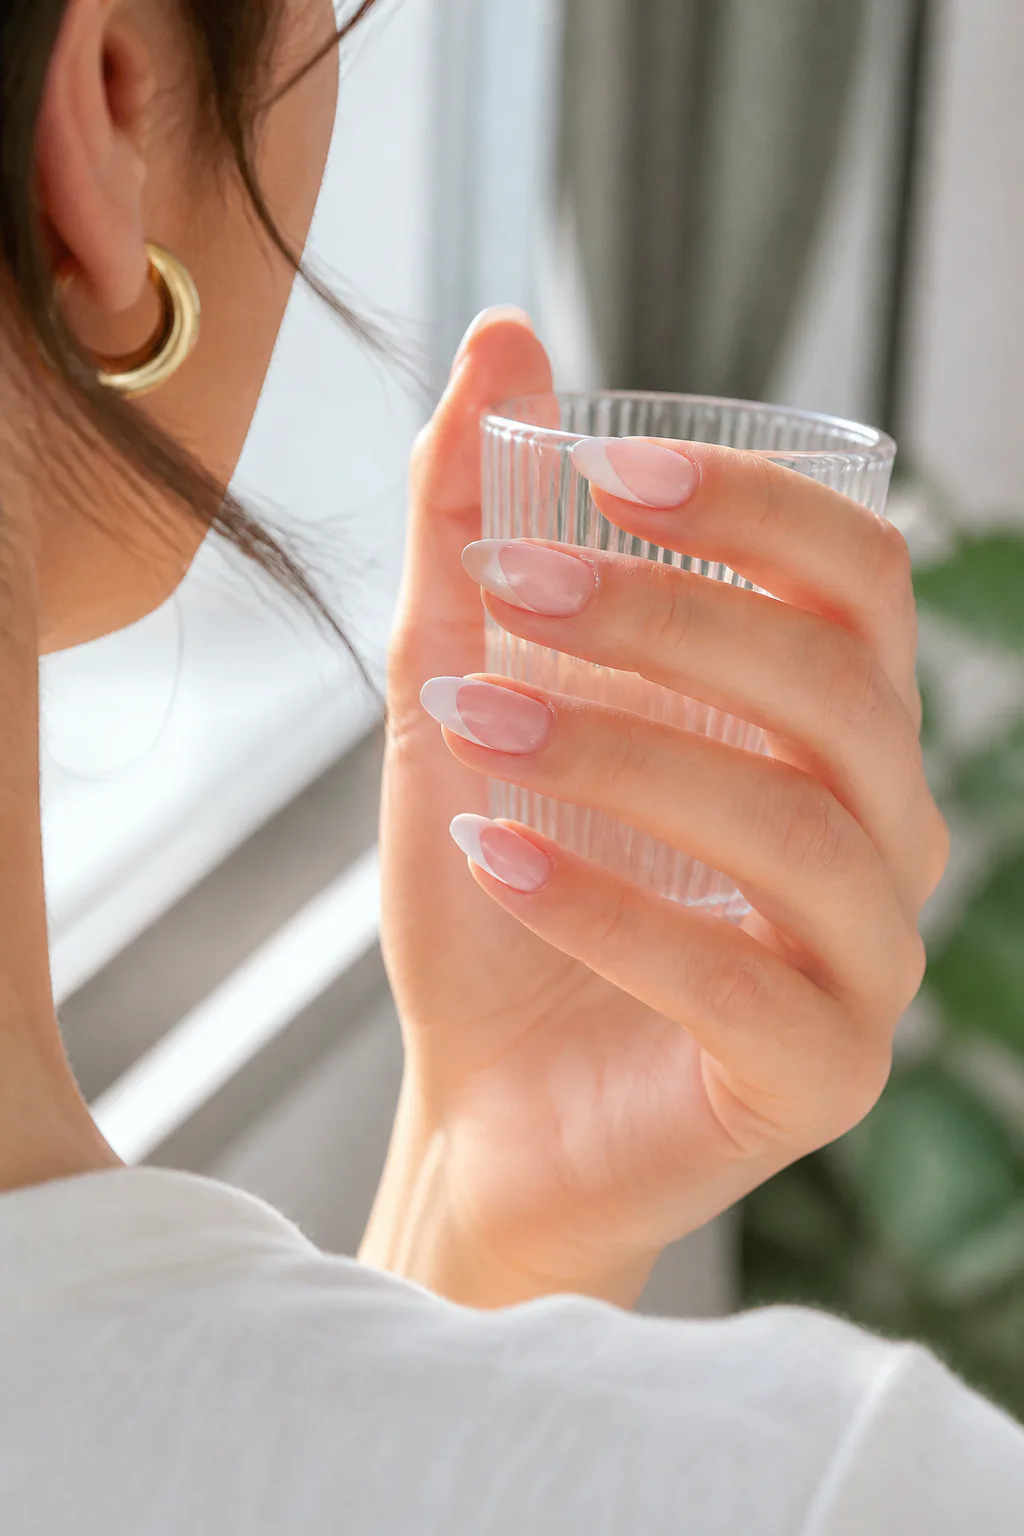
A side-sweeping French tip replaces the usual centered smile line with a line that travels diagonally down one side of the nail. This asymmetrical shape creates a fresh, graphic effect and leaves more of the nail uncovered, so the negative space becomes part of the design.
The look can feel subtle with a sheer base and a fine white sweep, or more striking when the tip color is bold. It works on a range of nail lengths, though a little extra length gives the diagonal line room to curve gracefully.
Make the sweep feel intentional
Choose one side of each nail and keep the direction consistent across the hand. A curved line can soften the design, while a sharper diagonal gives it a more angular, fashion-forward finish.
- Use a fine liner brush to guide the curve from the edge toward the tip.
- Leave a generous area of base color visible for contrast.
- Try white for a minimal look or a vivid shade for more impact.
The off-center detail gives a familiar French manicure a distinctive update without making it feel busy.
5. Paint Tips Pastel Butter Yellow

Butter-yellow French tips bring a soft, cheerful note to a classic manicure. This pale shade feels sunny without the intensity of a bright neon, making it an easy way to add color while keeping the overall look polished and wearable.
Pair the yellow with a sheer pink, beige, or milky base to let the tips stand out gently. A rounded smile line keeps the manicure close to its traditional roots, while a sharper edge can make the pastel feel more contemporary.
Choose a flattering yellow
Look for a creamy pastel rather than a very transparent yellow if you want the tips to read clearly. Two thin coats usually create a more even finish than one thick layer, especially when the polish is pale.
- Use a neutral base to keep the color soft and balanced.
- Match the tip width to your nail length and shape.
- Finish with a glossy top coat for a smooth, fresh appearance.
These tips bring a hint of warmth to spring and summer outfits, but their gentle tone can brighten a manicure in any season.
6. Outline French Tips in Metallic

Fine metallic outlines add a jewelry-like detail to French tips without changing the manicure’s basic palette. Gold or silver can trace the edge of a white tip, frame a colored tip, or create a floating outline that sits just below the nail’s free edge.
Because the line itself is the feature, the design looks best when the rest of the nail stays relatively simple. A sheer base gives the metallic detail room to shine, while a soft neutral tip keeps the manicure elegant rather than overly ornate.
Use metallic polish with a light hand
A striping brush makes it easier to draw a fine, even contour. If you are outlining a tip, let the base color dry fully first so the metallic polish does not drag or mix into it.
- Choose gold for a warm accent or silver for a cooler finish.
- Keep the outline thin so it frames rather than overwhelms the tip.
- Try a floating line for a more open, modern interpretation.
This detail works beautifully when you want a manicure that feels special but still has a clean, uncluttered shape.
7. Blend Tips into a Baby Boomer Fade
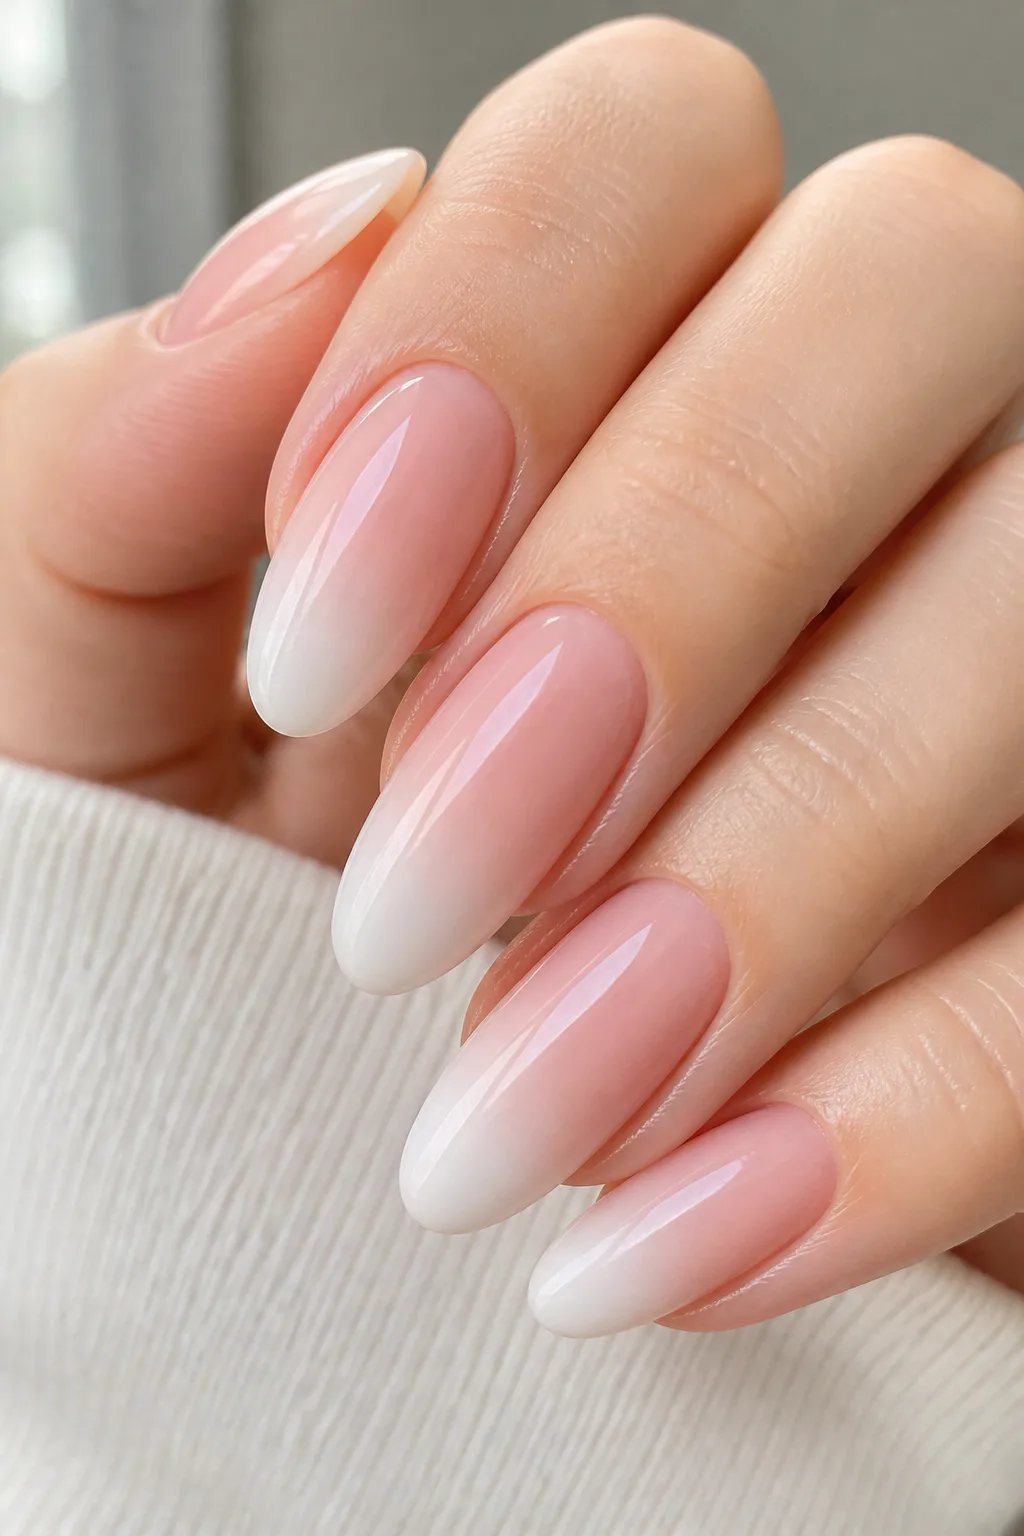
A baby boomer French manicure softens the boundary between the nude or pink base and the white tip. Instead of a distinct smile line, the colors blend into one another, creating a gentle gradient that feels polished and romantic.
The diffused finish is a good choice if you like the idea of French tips but prefer less contrast. It can flatter short or long nails and works with almond, oval, and square shapes, as long as the fade has room to look smooth.
Keep the gradient seamless
At home, a sponge or soft blending brush can help feather the white into the base color. Apply thin layers and build the transition gradually; harsh bands are harder to soften once the polish has dried.
- Start with a sheer pink or nude shade that suits your skin tone.
- Blend a soft white from the edge inward.
- Use a glossy top coat to unify the layers and smooth the finish.
The result has the neatness of a French manicure with a softer, almost airbrushed effect.
View this post on Instagram
Video: @nails.by.hiba.16 on Instagram. Style shown: classic baby boomer fade nails.
8. Shape Tips into a Geometric V

V-shaped French tips trade the traditional curved smile line for two angled strokes that meet in a point. The sharper outline brings a graphic quality to the manicure and draws the eye along the length of the nail, making the overall shape feel elongated.
A white V over a sheer base keeps the design crisp and classic, while a colored or metallic tip makes the geometry more noticeable. The shape is particularly striking on almond or square nails, but the angle can be adjusted to suit your preferred length.
Make a clean, even point
Mark the center of the tip lightly in your mind before painting each diagonal side. Keeping the V at a similar height across the nails helps the manicure feel cohesive, even if the angles vary slightly with each nail’s shape.
- Use a fine brush to draw each side of the V.
- Keep the point centered for a balanced finish.
- Try a shallow angle for a softer look or a deeper V for drama.
This design gives a simple base color a bold outline while remaining tidy and easy to coordinate.
9. Use Jelly Red or Berry Tips
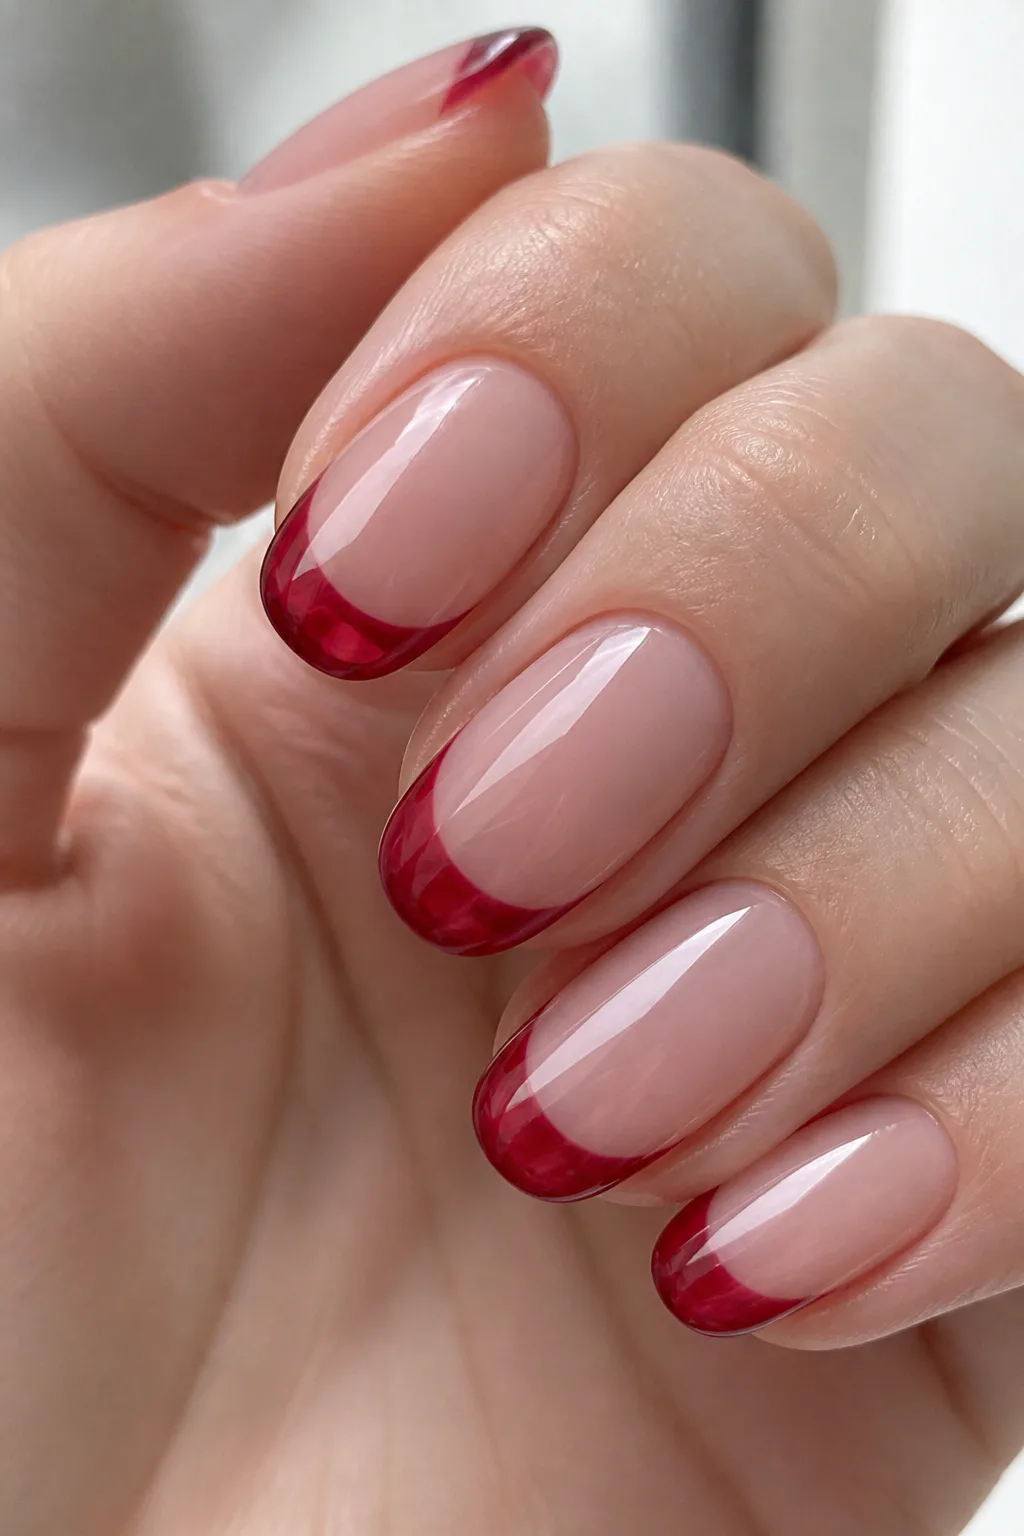
Jelly red or berry French tips add a translucent wash of color that looks glossy and almost stained-glass-like. Unlike an opaque tip, a jelly finish lets some light pass through, giving the manicure depth while keeping the overall design fresh.
Apply the sheer shade over a clear or milky base, depending on how much contrast you want. A milky base makes the color feel softer and more defined, while a clear base creates a lighter, more glassy effect.
Layer for the right translucency
Jelly polishes can be built up gradually, so begin with a thin coat and check the color before adding another. Keep the tip shape neat and use a glossy top coat to emphasize the juicy finish.
- Choose cherry red for a bright, classic accent.
- Try berry or wine tones for a deeper, moodier look.
- Use a sheer neutral base to keep the color balanced.
The translucent color adds personality without the heaviness of a fully opaque dark manicure.
10. Paint Tortoiseshell French Tips

Tortoiseshell French tips bring rich amber and deep brown tones to the edge of the nail. The mottled pattern feels warm and dimensional, turning the tip into the manicure’s focal point while a neutral base keeps the overall look grounded.
This design works especially well when the pattern is confined to the free edge rather than covering the entire nail. That placement lets the colors show clearly while preserving the clean, balanced structure of a French manicure.
Create depth with layered tones
Use translucent amber as a starting point, then add irregular patches of darker brown and black. Let some of the lighter shade remain visible between the marks so the pattern has depth instead of reading as a solid dark block.
- Keep the base sheer beige or pink for contrast.
- Vary the size and placement of the dark patches.
- Finish with a glossy top coat to bring out the layered effect.
The warm pattern is a striking choice for cooler-weather outfits, but its neutral palette makes it easy to wear throughout the year.
View this post on Instagram
Video: @nailssbyyfridaa on Instagram. Style shown: tortoiseshell French tips.
11. Mix Colors with Skittle French Tips
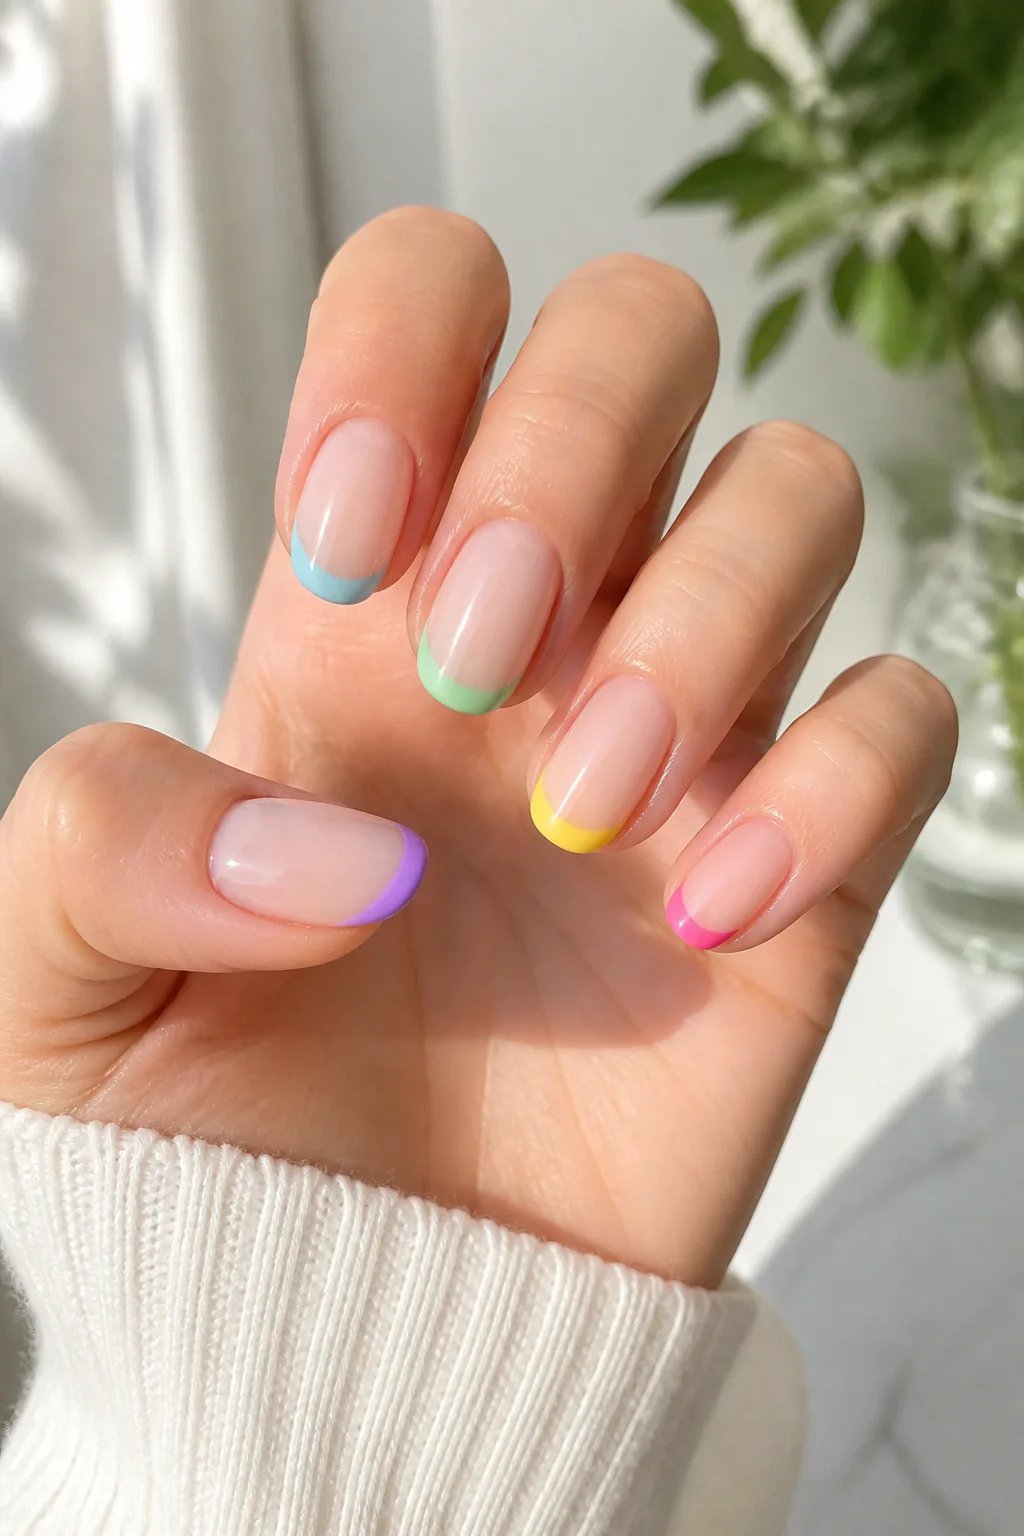
Skittle French tips give each nail a different tip color while keeping the same neat French shape across the hand. The coordinated structure makes a rainbow palette feel intentional, whether you choose soft pastels or a lively mix of brighter shades.
You can arrange the colors in a familiar spectrum or select a few tones that share a similar mood. A sheer neutral base helps the different tips stand out without competing with one another, and consistent tip width keeps the manicure looking unified.
Plan the palette before painting
Lay out the colors in order before applying polish so you can see how they work together. Repeating a color on both hands or using shades from one palette can make the manicure feel cohesive rather than random.
- Choose pastels for a soft, gentle rainbow.
- Use neon or saturated shades for a bolder look.
- Keep the base and tip shapes consistent on every nail.
This playful design is easy to personalize and gives a classic manicure a cheerful, expressive twist.
12. Go Dark with Noir French Tips

Noir French tips pair a clean, sheer base with deep black or vampy cherry-red edges. The contrast feels dramatic, but the familiar French shape keeps the manicure polished and wearable rather than heavy.
Black tips create a crisp, graphic finish, while dark cherry or wine shades bring a softer, moody richness. Both options look striking against a milky pink or neutral base, and the effect can be tailored to short nails with a slim tip or longer nails with a more pronounced curve.
Balance the dark color
Keep the base natural-looking so the deep shade remains the main statement. A glossy finish gives noir tips a sleek appearance, while a precise outline helps dark polish look intentional and clean.
- Choose black for a sharp, modern contrast.
- Try cherry or burgundy for a warmer, vampy mood.
- Adjust tip width to suit your nail length and shape.
This is an easy way to shift French tips from delicate to bold while keeping the manicure’s classic structure.
Final Thoughts
French tip nails can be delicate, glossy, colorful, geometric, or dark while still keeping the clean outline that makes the style so versatile. A small change in tip shape, color, or finish can give the manicure an entirely different mood.
Use your nail length and personal style as a starting point, then adapt the details to suit the look you want. Whether you choose a barely-there micro tip or a bold tortoiseshell design, the best French manicure is one that feels like you.