16 Stunning Blue Nails Ideas
Blue nails can feel moody, polished, playful, or softly romantic depending on the shade and finish. From inky magnetic polish to airy pastel designs, this color offers plenty of room to find a manicure that feels personal without losing its versatility.
These 16 blue nail ideas cover a mix of textures, patterns, and levels of detail. Some are easy to adapt for a simple at-home manicure, while others—with raised accents or intricate art—may be better suited to a nail artist.
Use the designs as a starting point and adjust the shade, nail length, or accent details to suit your style. A single statement nail can make a detailed look more wearable, while repeating the design across every nail creates a bolder finish.
1. Midnight Navy Velvet Cat-Eye Nails

Deep navy cat-eye nails bring together a dramatic color and a finish that seems to move as your hands catch the light. Magnetic gel polish creates a soft, shifting band or velvet-like glow, giving dark blue a little more dimension than a flat glossy manicure.
This design works especially well on medium or long nails, where there is room for the magnetic effect to show. It can also look striking on shorter nails if you keep the shape simple and let the finish do the work. The inky shade suits evening plans but feels polished enough for everyday wear.
How to pull it off
Apply a dark navy base, then use magnetic cat-eye gel according to the product instructions. Hold the magnet over each nail before curing, adjusting its position to create a soft central glow or a more defined streak.
- Choose a velvet effect for a diffuse, softly luminous finish.
- Try a diagonal magnetic line for sharper movement.
- Keep nail art minimal so the reflective surface stays in focus.
A glossy topcoat helps intensify the depth, while a matte finish can make the velvet effect feel more subdued.
2. Cobalt Blue French Tip Manicure

A cobalt French manicure gives a familiar shape a confident pop of color. The sheer nude base keeps the look light and clean, while vivid blue tips make the design feel modern without covering the whole nail in a bright shade.
This style is easy to tailor to different nail lengths and shapes. A thin cobalt line feels delicate on short, rounded nails, while a thicker tip makes more of a statement on longer almond or square nails. It is a cheerful option when you want blue nails that still have the tidy feel of a classic manicure.
Design tips
Start with a sheer pink or beige base that complements your skin tone. Let it dry fully before painting the tips, or use French tip guides to help keep the curve even across each nail.
- Use a fine brush for narrow, crisp tips.
- Match the tip shape to your natural nail line for a softer look.
- Add a glossy topcoat to smooth the transition between colors.
- Try a single cobalt accent nail if you prefer a quieter set.
The contrast of a translucent base and saturated tips keeps this manicure bright but still versatile.
3. Tiffany Blue Nails with 3D Bows

Robin’s-egg blue creates a sweet, instantly recognizable backdrop for a maximalist manicure. Add dimensional bows, pearls, or rhinestones, and the result feels playful and dressed up—especially when the embellishments are concentrated on just a few nails.
Because the color and raised details are both eye-catching, this design benefits from a little balance. A solid blue base across most nails can make one or two decorated accents stand out without making the whole set feel crowded. It suits special occasions, celebrations, or anyone who enjoys expressive nail art.
Balance the embellishments
Apply an even blue base and let it dry or cure before placing any decorations. For a coordinated look, choose one main accent, such as a bow, and use pearls or small rhinestones sparingly around it.
- Place larger bows on one or two accent nails.
- Use tiny pearls near the cuticle for a lighter detail.
- Keep embellishments away from the nail edges where they may catch.
- Ask a nail artist about secure placement for raised pieces.
A glossy finish ties the color and decorations together, while simpler neighboring nails give the 3D details space to shine.
4. Ocean Quartz Sapphire Cat-Eye Nails
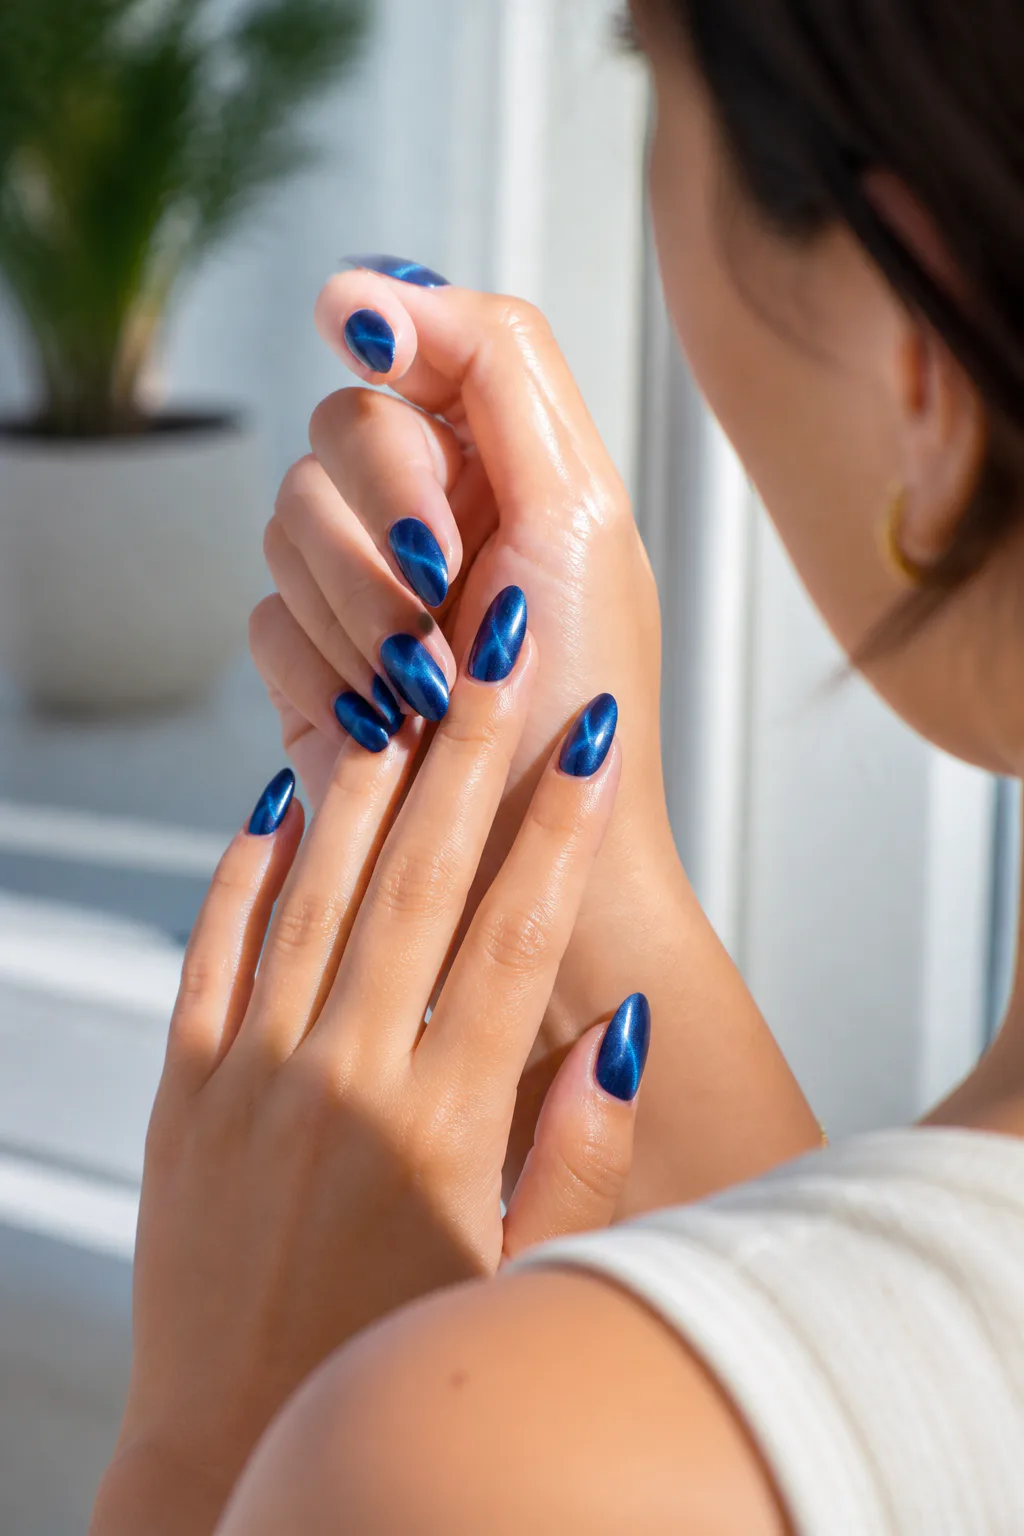
Sapphire and azure cat-eye polish can create the impression of water shifting over a deep blue surface. The magnetic shimmer gives each nail a changing highlight, so the manicure can look different as your hands move between light and shadow.
This ocean-inspired look is richer and more layered than a single navy shade. It works beautifully as a full set, but the effect can also be paired with a plain sapphire nail or two for a more varied design. Longer nails show off the movement especially well, though a compact magnetic highlight can still look lovely on shorter nails.
Creating the water-like effect
Use a deep sapphire base, then layer on cat-eye gel in a slightly brighter blue. Before curing, guide the magnetic shimmer into a curve or central glow, keeping the placement varied enough to feel fluid rather than perfectly uniform.
- Blend sapphire and azure tones for added depth.
- Angle the magnetic highlight differently on each nail.
- Choose a glossy topcoat to emphasize the watery shine.
The result is a jewel-toned manicure that feels dramatic without relying on extra decorations.
5. Baby Blue Glazed Chrome Nails

Baby blue glazed chrome nails pair a soft pastel base with a reflective silver or pearlescent sheen. The color remains gentle, but the chrome shifts in the light and gives the manicure a smooth, polished finish that feels a little more special than ordinary pastel polish.
This design is a good choice if you want a bright shade without a strong contrast or detailed pattern. It looks fresh on short, rounded nails and sleek on longer shapes, making it adaptable to different personal styles. The pearly effect can lean cool and icy, while a softer sheen gives the blue a delicate glow.
Build a smooth glazed finish
Begin with an even baby blue base and make sure the surface is smooth before applying chrome. If you are using gel products, follow their curing instructions and apply the appropriate layer for the chrome powder to adhere properly.
- Pick silver chrome for a crisp, cool-toned shine.
- Choose pearlescent powder for a softer glow.
- Use thin, even coats to avoid a lumpy finish.
- Seal the edges so the reflective layer wears neatly.
With little or no nail art, the glazed surface stays the main feature.
6. Midnight Blue Constellation Nail Art
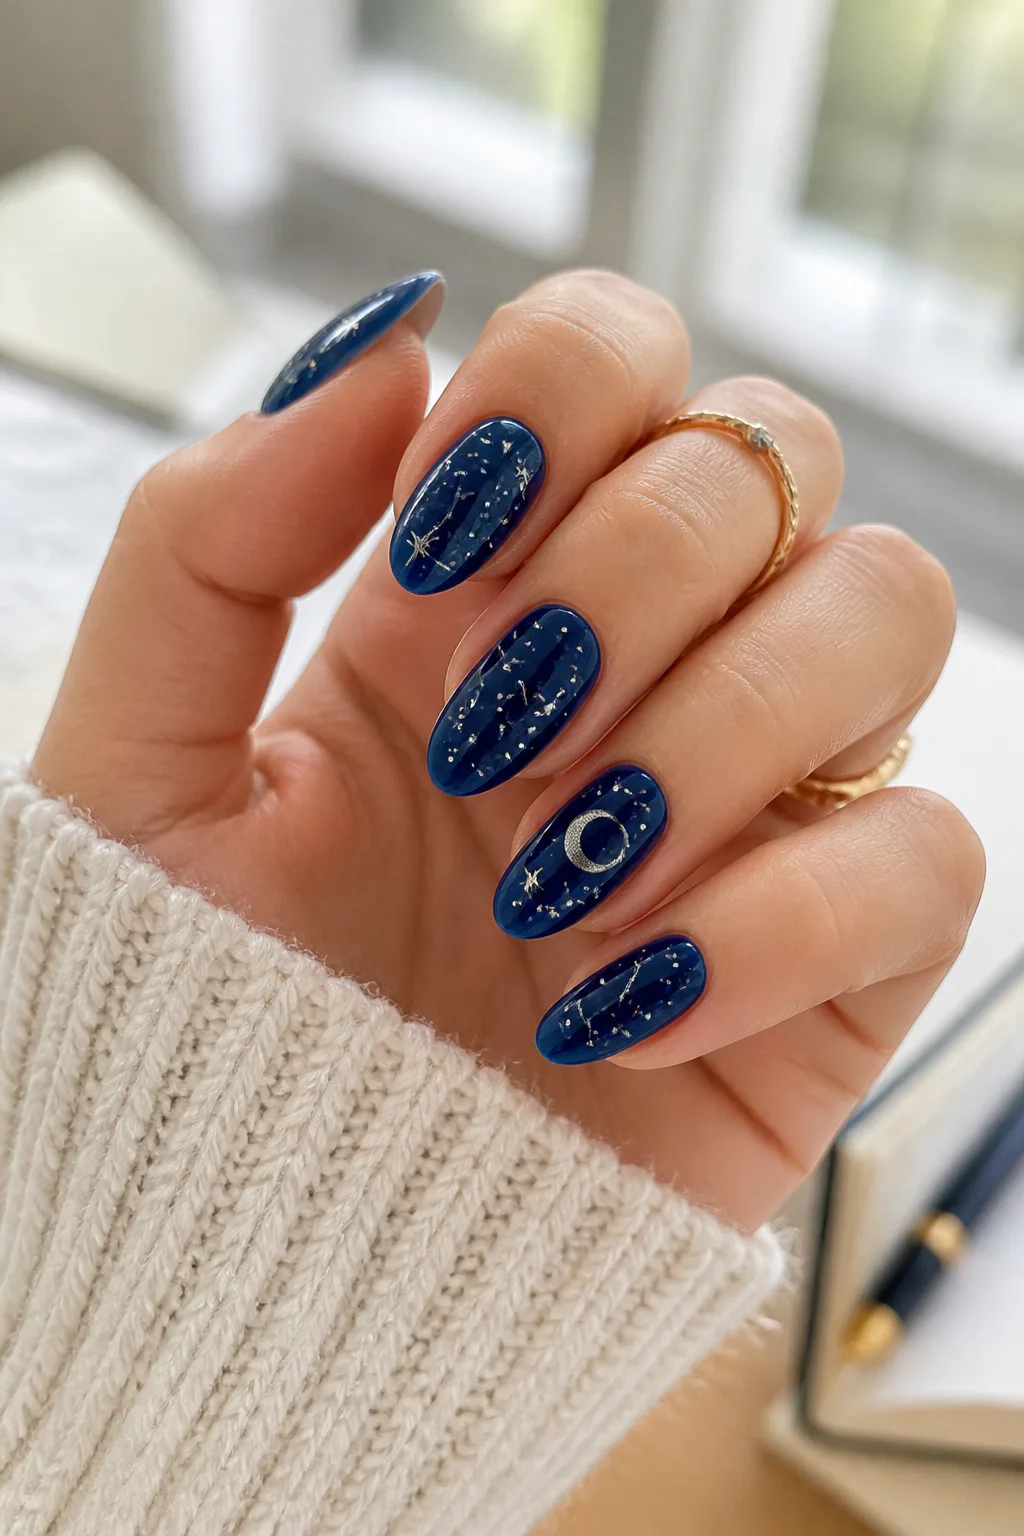
Midnight blue makes a beautiful night-sky canvas for tiny silver stars, crescent moons, and delicate constellation lines. The dark background brings out the lighter details, while the small scale keeps the design charming rather than overly busy.
You can decorate every nail with a different sky-inspired motif or keep most nails solid and reserve the celestial art for one or two accents. Fine details are easiest to see on longer nails, but a small star or moon can also fit neatly on a shorter nail. This is a thoughtful choice for anyone drawn to subtle, storybook-style art.
Keep the stars crisp
Use a fine nail-art brush or dotting tool to create the smallest marks. Let the dark base dry completely before adding silver or white details, and vary the placement so the design feels like a scattered sky.
- Combine tiny dots with a few larger stars.
- Add a crescent moon to one accent nail.
- Keep constellation lines thin and simple.
- Use silver for a cool, luminous contrast.
A glossy topcoat protects the artwork and adds a subtle night-sky sheen.
7. Retro Blue Swirl Nails
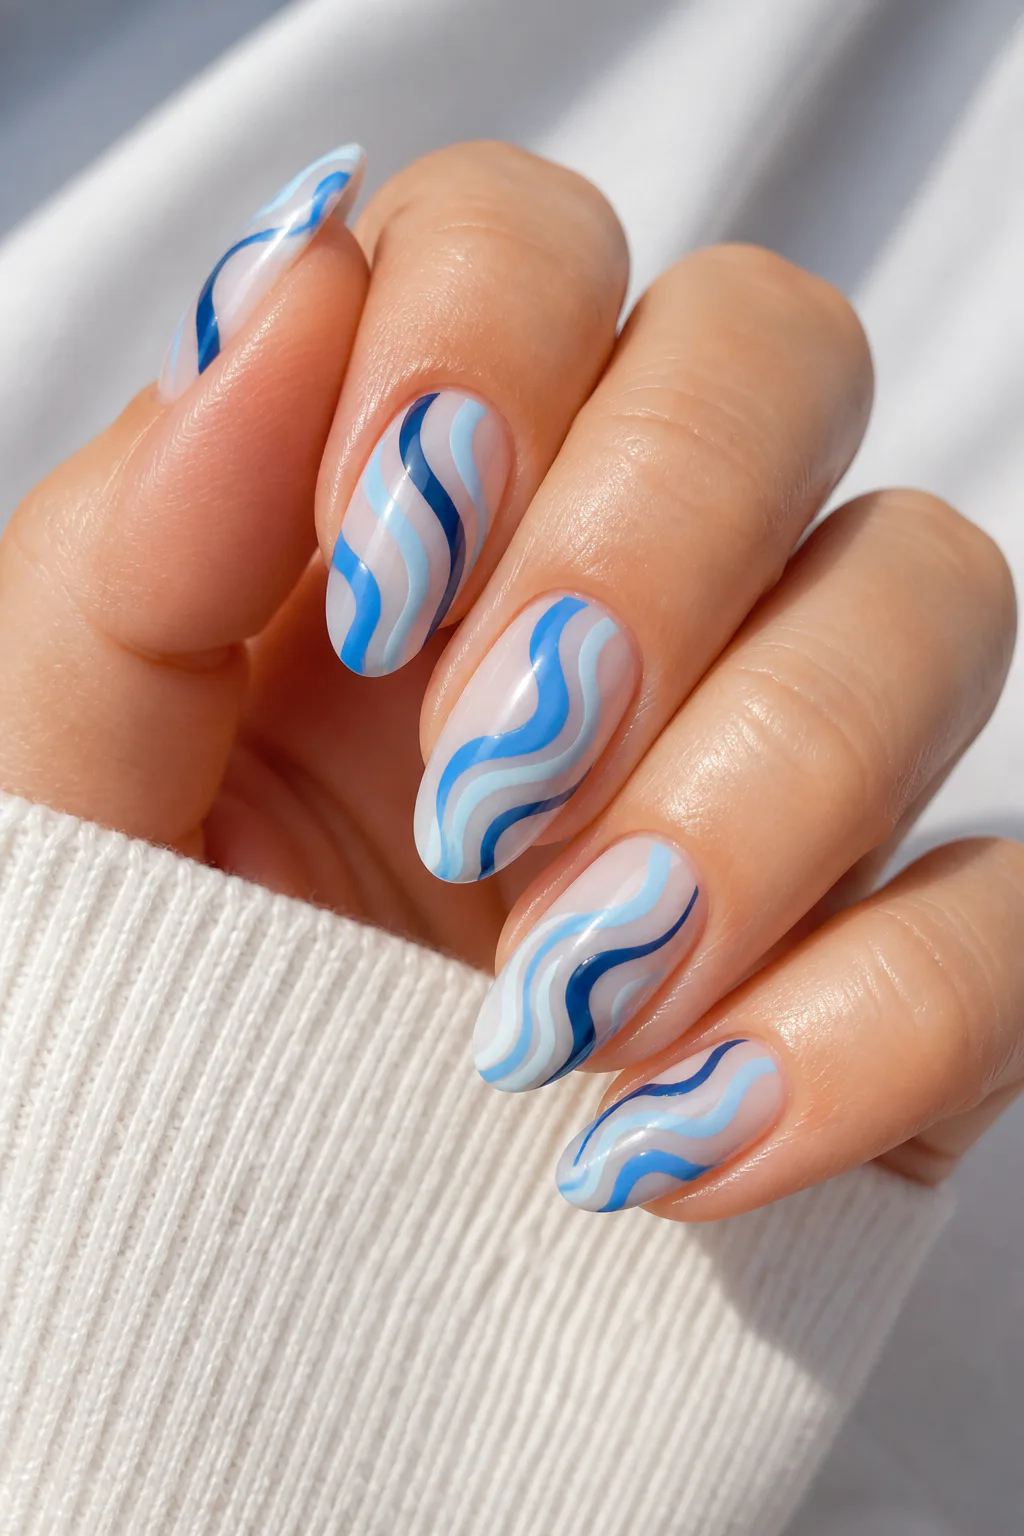
Retro blue swirls bring a playful, graphic feel to a manicure. Curving bands of cornflower, sky, and royal blue stand out against a milky white or clear base, creating movement without relying on glitter or raised decorations.
The design can be as restrained or as colorful as you like. A few narrow waves on a sheer base feel airy, while bolder, thicker curves make the set more expressive. Because the lines do not need to match perfectly, this is also a forgiving idea for anyone practicing nail art at home.
Make the curves flow
Choose two or three blue shades that are distinct but work well together. Paint each wave with a fine brush, keeping the lines smooth and allowing some of the pale base to remain visible between them.
- Use a milky white base for a soft, retro look.
- Try a clear base when you want the nail to feel lighter.
- Vary the swirl placement from nail to nail.
- Keep the color palette consistent for a cohesive set.
Glossy polish enhances the curves and gives the finished design a clean, polished look.
8. Matte Blue Denim Nails
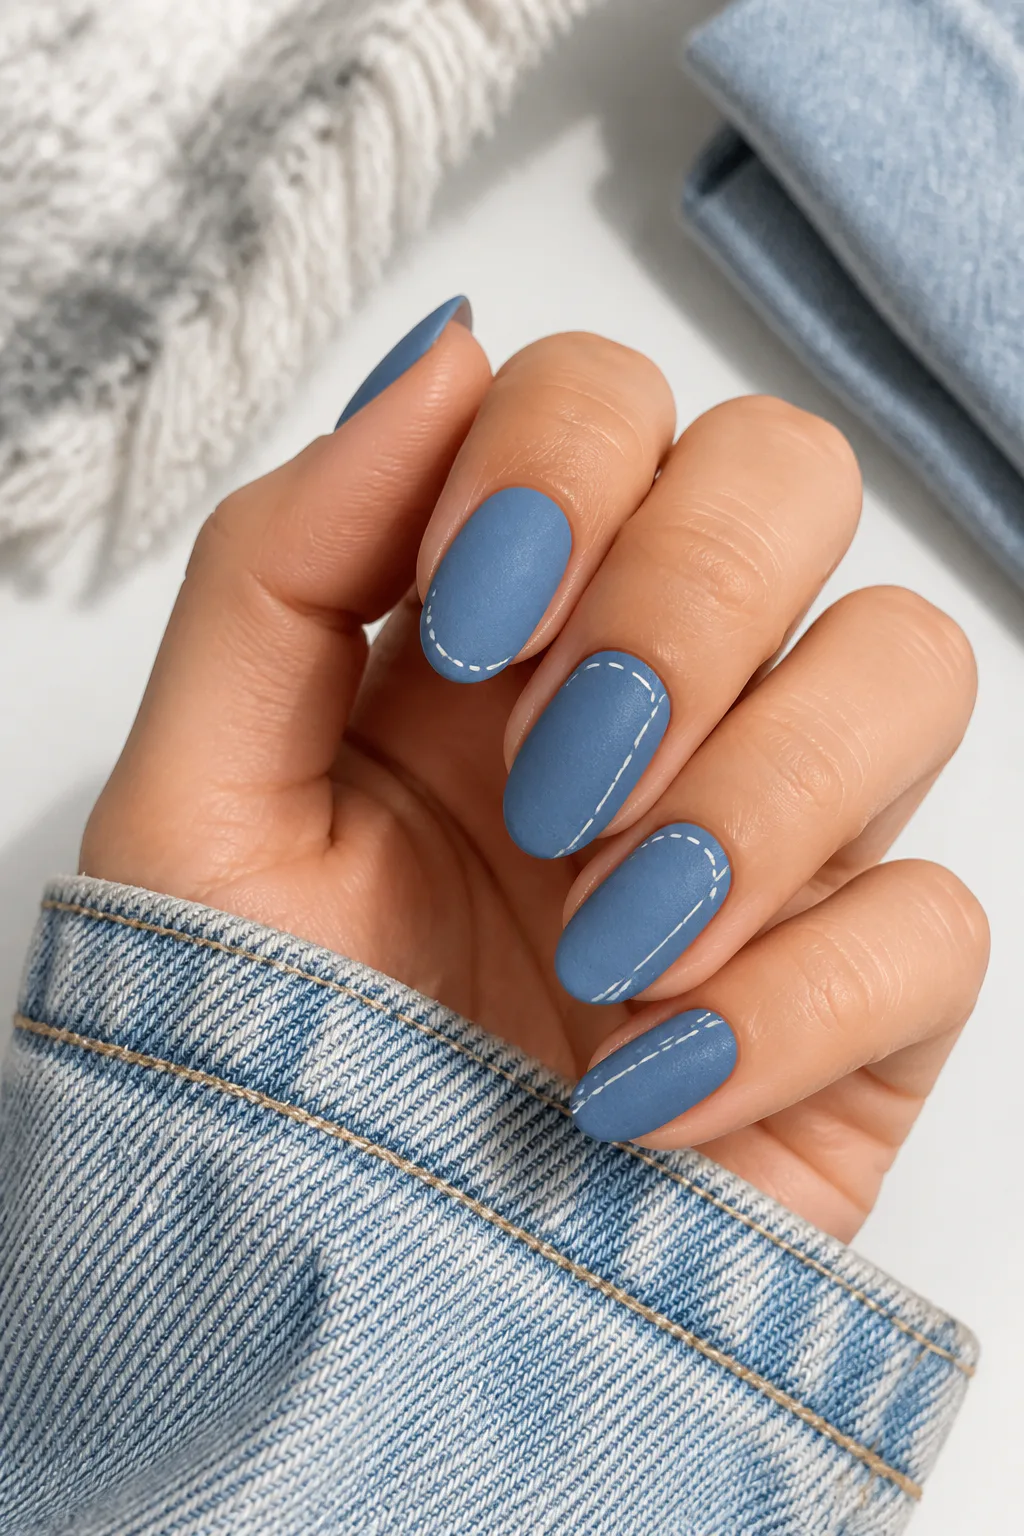
Dusty blue polish with a matte topcoat has a soft, fabric-like quality that makes this manicure feel relaxed and distinctive. Add a few fine lines to suggest denim stitching, and the familiar texture becomes a playful detail rather than a literal costume effect.
This muted blue is easy to wear because it is less vivid than cobalt or electric blue. It suits everyday outfits and can look especially cohesive with casual, textured clothing. Keep the stitching subtle for a refined finish, or add more visible seam-like accents if you want the denim reference to be unmistakable.
Bring out the texture
Apply dusty blue polish in smooth coats and let it dry thoroughly before adding any fine details. A matte topcoat creates the velvety surface; thin pale blue or off-white lines can then mimic stitching without taking over the design.
- Use short dashed lines for a topstitch effect.
- Place details near the nail edge or along one side.
- Try a glossy stitch against the matte base for contrast.
Leaving some nails plain keeps the texture-inspired art understated and wearable.
9. Teal to Sky Blue Ombré Nails
A teal-to-sky-blue ombré manicure blends a deep, cool starting shade into a brighter blue. The smooth transition gives the nails a fresh gradient effect that can suggest water, a clear horizon, or a shift from shade into sunlight.
You can place the gradient vertically from cuticle to tip or blend it across the nail from one side to the other. The first option gives longer nails a more elongated appearance, while a horizontal fade feels a little more graphic. Either way, the contrast between teal and cyan or sky blue makes the design feel lively.
Blend the shades smoothly
Use a makeup sponge or a nail-art brush to soften the meeting point between the colors. Work with thin layers and build the gradient gradually, allowing each layer to settle before adding more polish.
- Choose a deep teal and a bright cyan for strong contrast.
- Use sky blue for a softer, lighter transition.
- Repeat the blending in thin layers rather than one thick coat.
- Finish with gloss to make the color shift look seamless.
The gradient is the focus, so extra art is usually unnecessary.
10. Periwinkle Nails with Tiny Dots

Pastel periwinkle is a gentle blue-violet shade that feels soft and cheerful on its own. Tiny dots or miniature floral buds near the cuticle add a delicate focal point while leaving plenty of the base color visible.
This design is a lovely option if you prefer small details over bold patterns. It works on short nails as well as longer shapes, and the decoration can be repeated across every nail or limited to a few accents. A restrained palette keeps the manicure calm and easy to pair with everyday outfits.
Place the details with care
Apply an even coat of periwinkle and let it dry before using a dotting tool or fine brush. Keep the motifs small and close to the cuticle, leaving enough clear space around each detail so it does not disappear into the base.
- Use white dots for a clean, crisp contrast.
- Try tiny navy dots for a slightly stronger accent.
- Turn a few dots into small floral buds with fine petals.
- Decorate only accent nails for an even simpler set.
A glossy topcoat makes the pastel shade look smooth and helps protect the fine artwork.
11. Electric Blue Flame Accent Nails
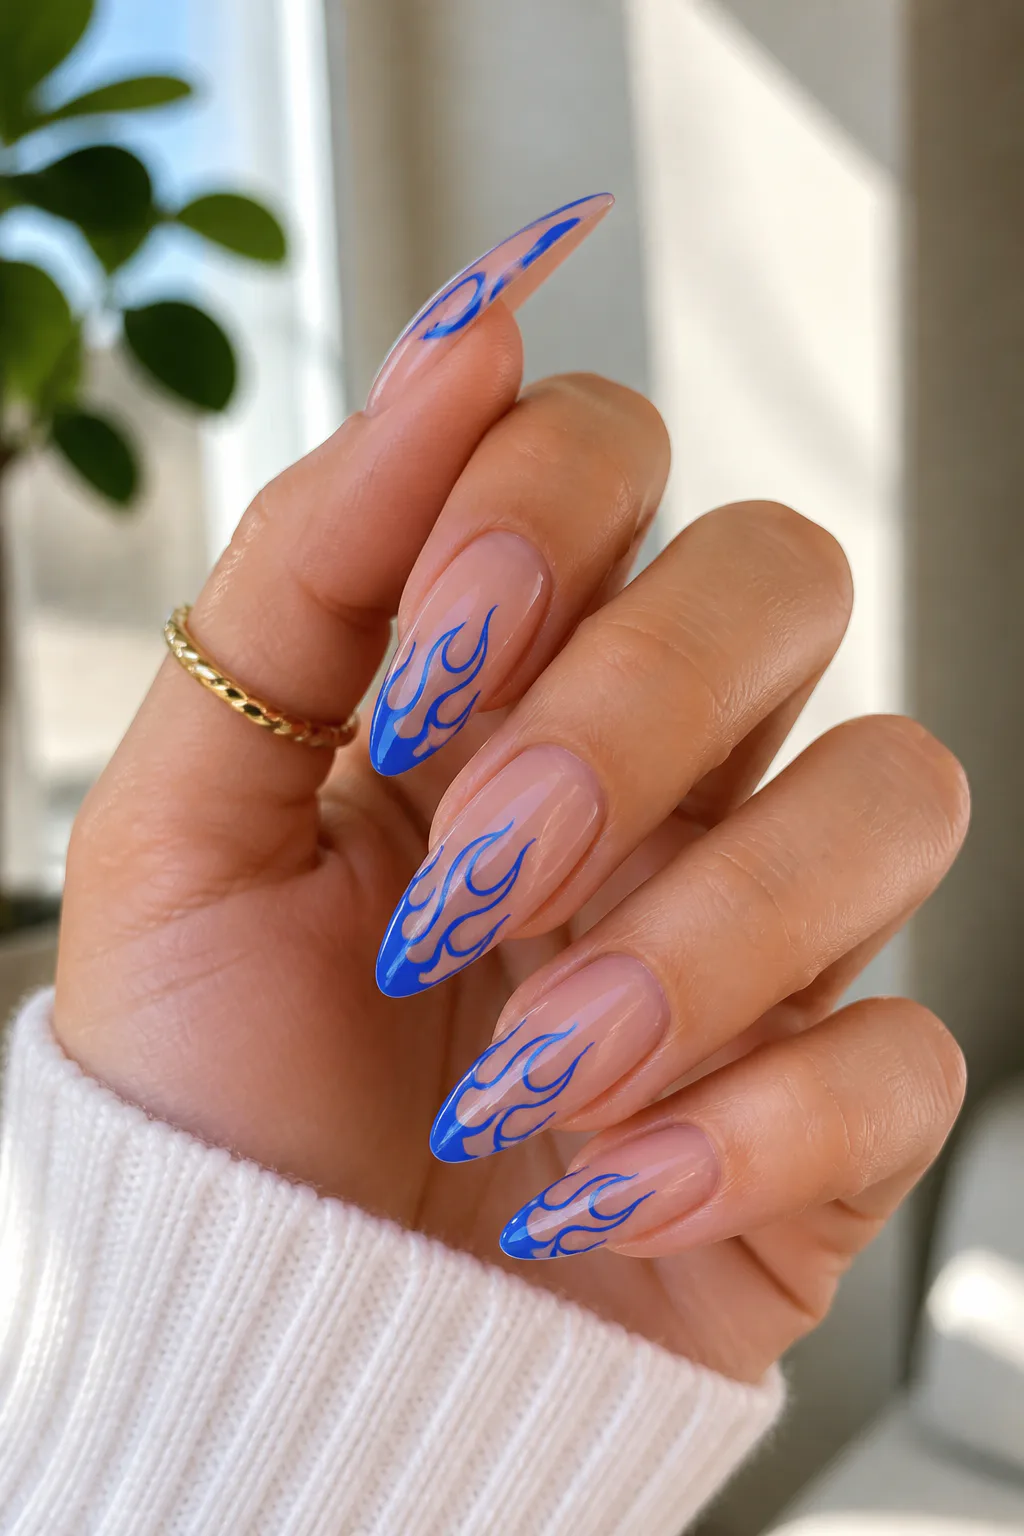
Electric blue flame outlines bring a bold, graphic edge to an otherwise neutral manicure. Against a nude or sheer base, the vivid curves stand out clearly while leaving much of the natural-looking nail visible.
This design is especially effective on longer nails, where the flame shape has room to stretch toward the tip. On shorter nails, simplify the outline into a small curved accent rather than trying to fit in too many points. Keeping the flame art to one or two nails can make the bright color feel easier to wear.
Shape a sharp flame
Choose a nude base that looks natural against your skin tone, then use a fine brush to paint the flame outline in electric blue. Plan the curve before adding polish, and keep the edges clean so the motif reads clearly.
- Use a single flame accent on each hand for balance.
- Leave the outline open or add a second line for emphasis.
- Pair the art with plain nude nails to avoid visual clutter.
- Choose a glossy finish to make the blue pop.
The contrast gives the manicure a striking look without covering every nail in color.
12. Navy and Teal Blue Tortoiseshell Nails

This cool-toned take on tortoiseshell swaps the usual warm amber palette for layered navy and teal. Translucent patches overlap to create a mottled, glossy pattern with depth, making the design feel artistic while still drawing on a familiar print.
The layered effect works best when the base remains visible between irregular patches. You can use the pattern on every nail for a dramatic set or pair a few tortoiseshell accents with solid navy nails. The latter makes the pattern easier to wear and gives each mottled nail more room to stand out.
Layer the patches
Start with a sheer or translucent blue base, then add uneven shapes in navy and teal. Let some layers overlap and keep others separate so the pattern has variation rather than reading as a uniform set of spots.
- Use different patch sizes for a natural, irregular look.
- Keep some areas sheer to show the layered depth.
- Pair patterned nails with solid blue accents.
- Finish with a glossy topcoat to bring out the pattern.
The mix of deep and bright blues gives this print a polished, modern mood.
13. Blue Water Bubble 3D Nails
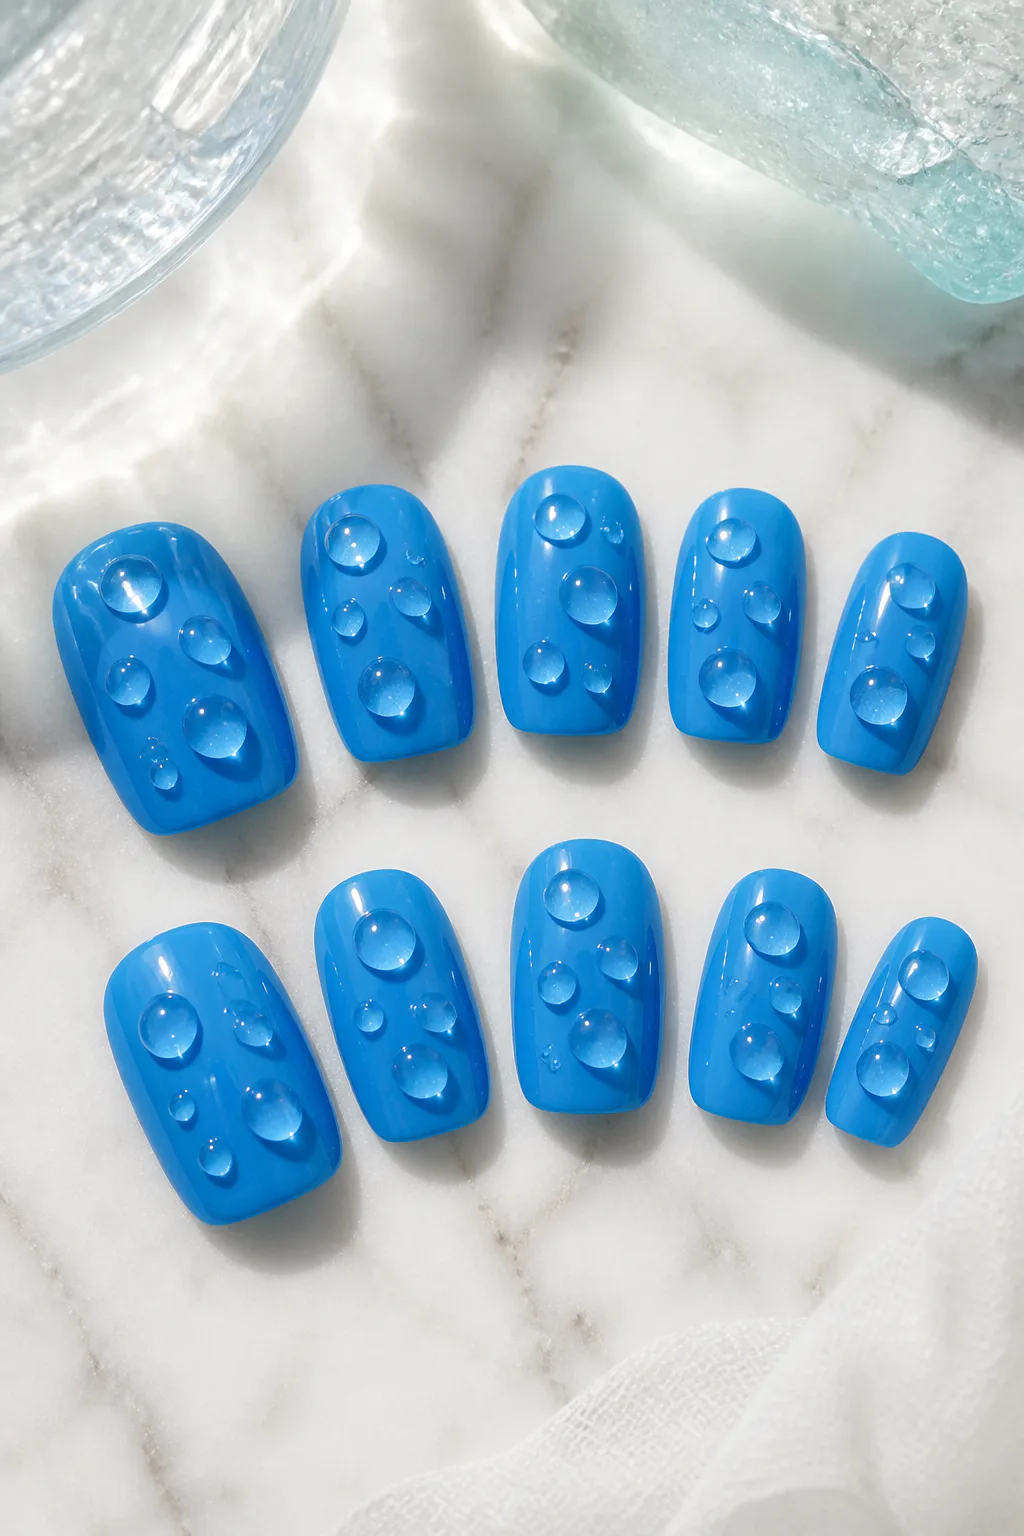
Clear gel droplets over vibrant blue polish create the look of water bubbles or fresh condensation. The raised, glossy shapes catch the light differently from the flat base, adding playful dimension without requiring a complicated color palette.
This effect is most striking when the droplets vary in size and placement. A few bubbles on each nail can feel balanced, while a denser cluster makes the manicure more dramatic. Since raised details can catch on fabric or hair, consider keeping the droplets smaller and more restrained if you want a practical everyday set.
Arrange the droplets
Apply and cure the blue base as directed, then use clear builder gel or a suitable nail-art product to form raised drops. A nail artist can help place and seal dimensional details, especially if you are unfamiliar with working safely with gel.
- Mix small and medium droplets for a natural effect.
- Leave open space between bubbles to keep them distinct.
- Use a vibrant blue base to make clear drops easy to see.
- Keep the raised design away from the free edge.
The contrast between flat color and glossy texture gives the manicure its water-inspired appeal.
14. Blue and White Micro-Check Nails
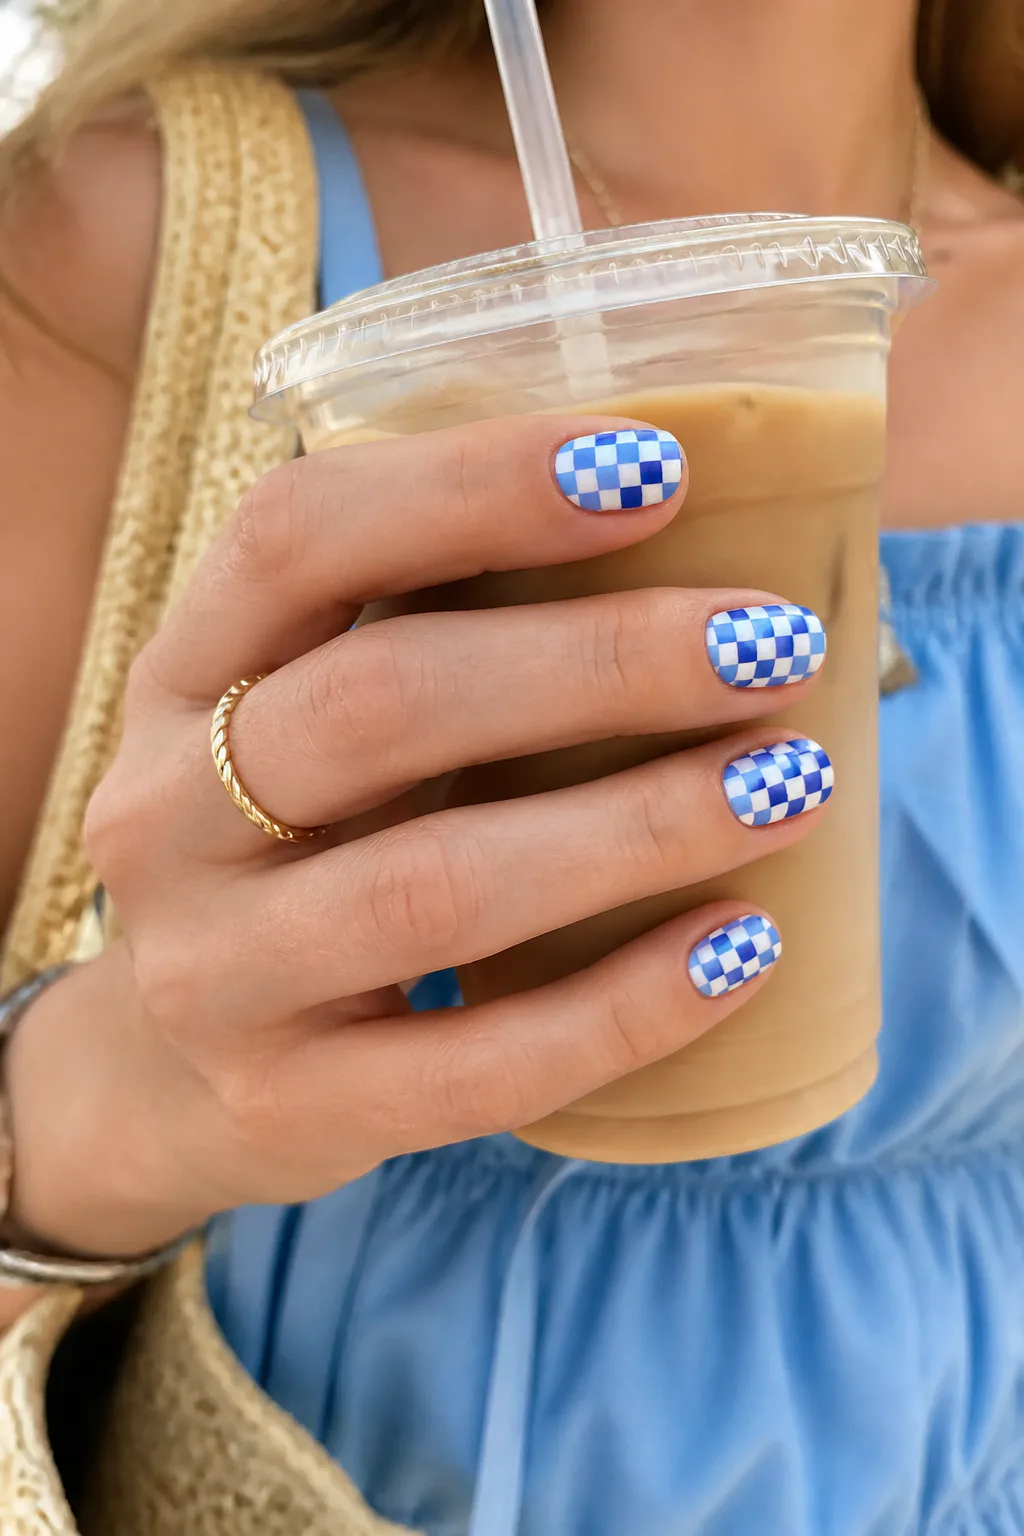
A small-scale check pattern combines royal blue, baby blue, and crisp white for a graphic manicure that feels tidy and playful. The fine grid keeps the color blocks organized, while alternating light and dark squares prevent the pattern from feeling flat.
Micro-checks can cover every nail or appear as accent art alongside a simpler blue polish. Because a precise grid takes patience, this design may be easiest with a nail-art brush, stamping tool, or help from a professional. On shorter nails, use a very small pattern so each nail does not look overcrowded.
Keep the grid neat
Apply a light base first, then add narrow, evenly spaced lines to map out the squares. Fill selected blocks with blue shades, leaving crisp white areas between them to preserve the checkerboard effect.
- Combine royal blue with baby blue for clear contrast.
- Use fine lines so the pattern stays delicate.
- Try one checked accent nail if a full set feels too busy.
- Seal the finished design with a smooth topcoat.
The small scale makes this pattern feel detailed yet still coordinated with a simple outfit.
15. Blue Holographic Glitter Nails
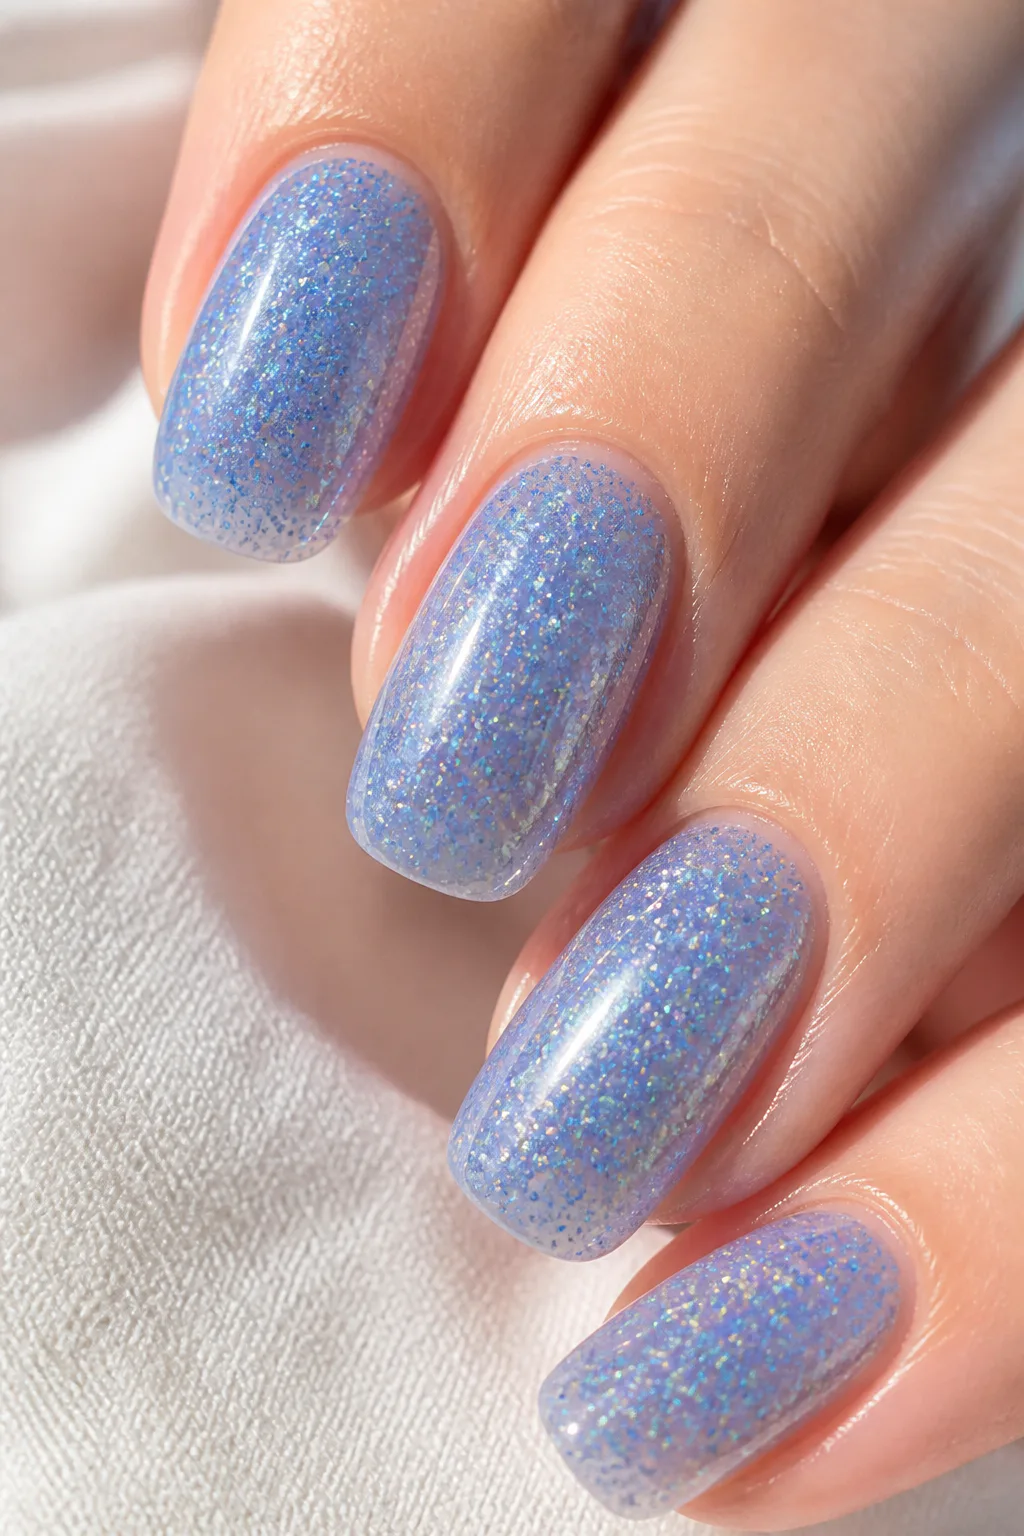
Fine blue and silver holographic glitter gives a manicure a rainbow-like sparkle that shifts as it catches the light. Layered over a sheer blue jelly base, the glitter looks bright and dimensional while the translucent color keeps the overall effect from feeling too heavy.
This design can be built up for full coverage or kept more delicate with a scattered sparkle. A sheer finish suits everyday wear, while dense glitter makes a fun choice for parties or special occasions. It also pairs well with plain blue nails if you want to reserve the most shine for a few accents.
Choose your glitter coverage
Apply the jelly polish in thin coats, then add fine glitter gradually until you reach the level of sparkle you like. A smooth topcoat helps seal the surface and reduces the rough feel that glitter can sometimes leave behind.
- Use fine-milled glitter for an even, reflective finish.
- Keep the base sheer to show a hint of natural nail.
- Build coverage slowly instead of applying a thick layer.
- Try glitter accents over a solid blue base on other nails.
The holographic shift adds energy while the blue jelly layer keeps the set cohesive.
16. Negative-Space Blue Geometric Nails

Negative-space geometric nails combine bare sections of the nail with clean blocks of pastel blue and navy. Diagonal lines and color blocking create an architectural look, while the unpainted areas keep the design feeling open rather than dense.
This is a versatile option because the shapes can be adjusted to suit your nail length. A single diagonal stripe works well on short nails, while longer nails can accommodate several intersecting blocks. The mix of a soft blue and a dark navy creates contrast without introducing extra colors.
Plan the color blocks
Begin with a clear or sheer base, then map out the sections you want to paint. Use striping tape or a fine brush to make crisp boundaries, allowing each color to dry before adding the next so the geometric edges stay sharp.
- Combine pastel blue with navy for clear contrast.
- Leave a narrow bare strip between color blocks.
- Use diagonal shapes to create a sense of movement.
- Keep the design to two shades for a clean finish.
The untouched areas are part of the design, so resist the urge to fill every open space.
Final Thoughts
Blue nails can be as subtle as a periwinkle base with tiny dots or as dramatic as midnight cat-eye polish and dimensional accents. Choosing a shade and finish that suit your routine is a simple way to make any of these ideas feel like your own.
For an easy starting point, try a blue French tip, a glossy pastel, or one accent nail with a pattern. If you are drawn to more intricate textures or raised details, bring a reference to your nail artist and adapt the design to your preferred length and shape.