16 Stunning Milky White Nail Ideas for a Soft, Chic Manicure
Milky white nails offer the softness of a neutral manicure with more depth than an opaque white polish. Their sheer, creamy finish can look understated and natural, or become a pretty backdrop for chrome, metallic details, pearls, and delicate art.
The ideas below range from low-key everyday manicures to more decorative looks for a special occasion. You’ll also find options for different nail lengths and shapes, so you can choose a design that feels comfortable as well as beautiful.
Use these styles as inspiration to discuss with your nail technician, or adapt the simpler details at home. Small choices—like how sheer the base is, where an accent sits, and whether the finish is glossy or matte—can make the same milky shade feel entirely different.
1. Classic Sheer Milky White Nails
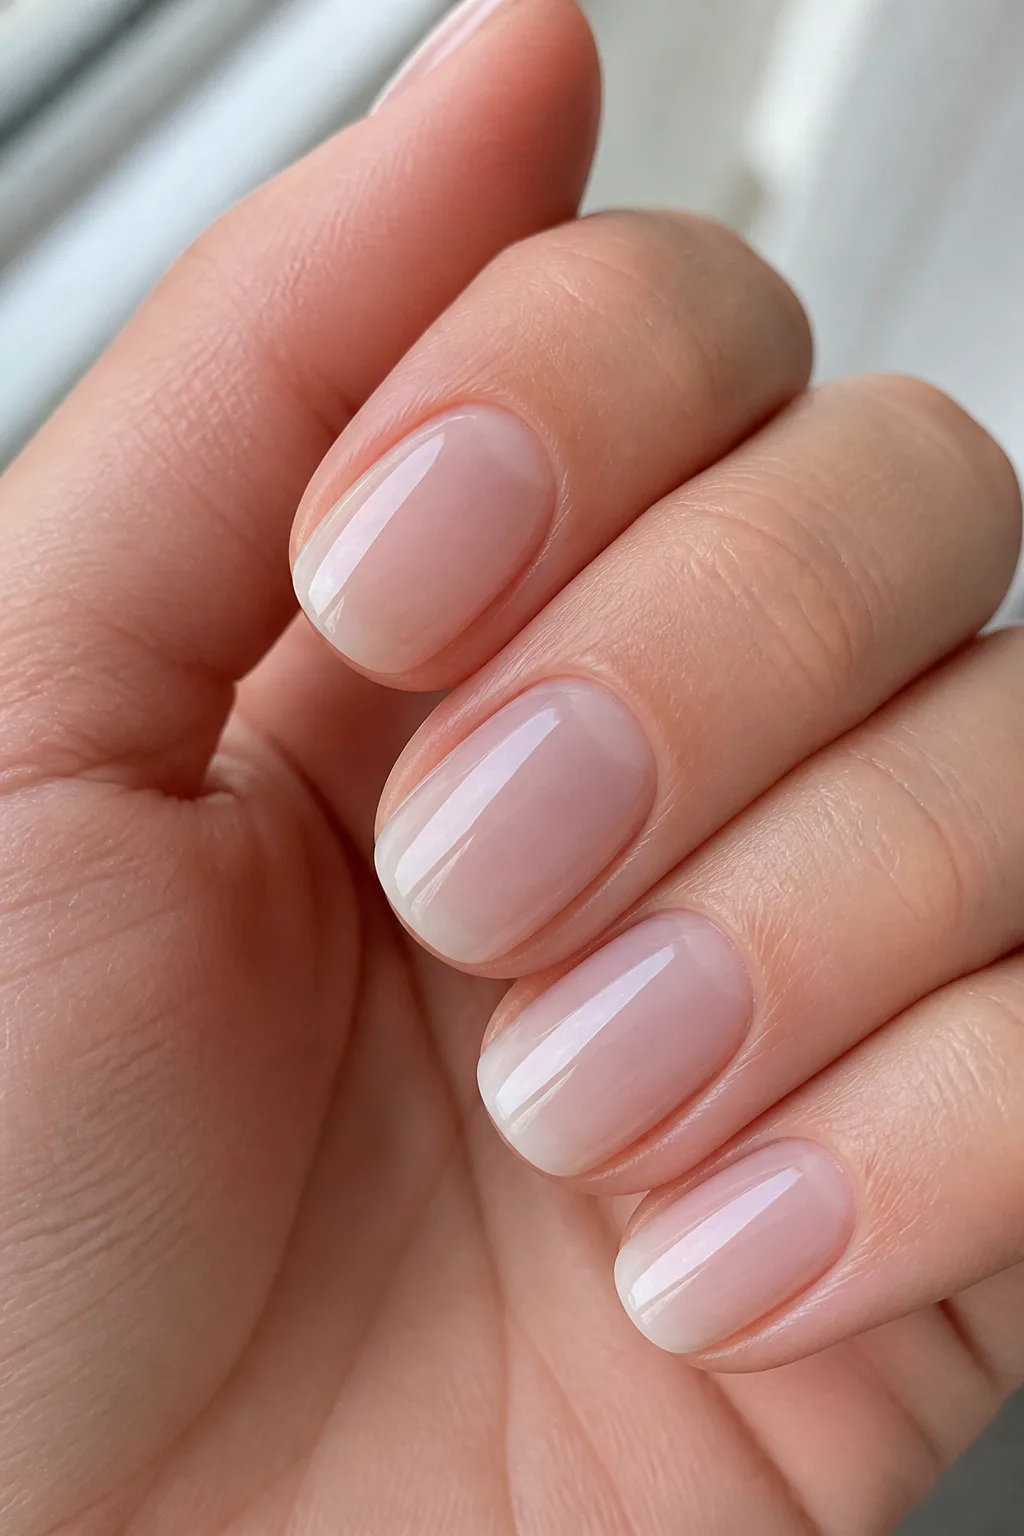
A classic sheer milky manicure is a softly translucent take on white polish. Rather than covering the nail completely, a few thin layers let a hint of the natural nail show through, creating a clean, gentle finish that looks polished without feeling stark.
This is an especially versatile choice for everyday wear because it suits many nail lengths and shapes. The creamy tone can also make a simple manicure feel a little more considered than clear polish while still pairing easily with workwear, casual outfits, and dressier looks.
How to get the soft, natural finish
Ask for a sheer milky shade and build the color gradually instead of applying one thick coat. Thin layers help keep the finish even, while a glossy topcoat brings out the smooth, fresh look.
- Choose one or two sheer coats for a barely-there effect.
- Add another thin layer if you prefer more coverage.
- Keep the shape simple to let the color stay the focus.
The result is an easy foundation for future nail art, or a complete look on its own.
2. Glazed Donut Milky White Nails

Glazed donut nails combine a translucent milky base with a fine pearlescent chrome finish. The color stays soft, but the reflective layer catches the light and gives the manicure a glossy, almost luminous quality.
This design works well when you want a neutral manicure with a little more presence than plain polish. It looks especially striking on smooth, evenly shaped nails, though the soft color keeps the overall effect from feeling too bold or overly metallic.
How to get the glazed effect
Start with a sheer milky base, then have a nail technician apply pearlescent chrome powder over the cured surface and seal it. The chrome should add a delicate sheen rather than read as a solid silver coating.
- Keep the base translucent for a soft, layered look.
- Ask for pearl-toned chrome rather than a strongly colored metallic.
- Use a glossy topcoat to preserve the reflective finish.
It’s an elegant option for events, but subtle enough to wear beyond a special occasion.
Video: @leramarta.nails on Instagram. Style shown: milky chrome over a sheer milky base.
3. Milky White French Tips

Milky white French tips soften the familiar French manicure with a translucent, creamy base. A crisp white tip creates a classic contrast, while a very thin line gives the design a lighter, more modern feel.
The look suits short and long nails alike, and it can be adjusted to match your preferred level of definition. A narrow tip works beautifully when you want something understated; a slightly wider smile line makes the French detail more noticeable without changing the overall clean effect.
Choosing your tip style
Ask your nail technician to shape the tip to follow your natural nail edge, especially if you prefer a refined result. A milky base also helps the white detail blend smoothly into the manicure rather than appear too stark.
- Choose micro-thin tips for a delicate, minimal finish.
- Pick brighter white for a more defined French line.
- Match the tip curve to your nail shape for a balanced look.
This is a lovely middle ground between a plain neutral manicure and detailed nail art.
4. Reverse French Milky Nails

A reverse French manicure places its accent at the base of the nail, following the curve near the cuticle. Against a sheer milky body, a slim crescent in white, silver, or gold adds a small detail that feels intentional without covering the soft base.
Because the accent sits close to the cuticle, the design can look especially graceful on neatly shaped nails. A metallic curve brings a little shine, while a white crescent keeps the effect quiet and tonal. Either version can be worn across every nail or reserved for a few fingers.
Keep the crescent delicate
A fine, even line is usually the key to keeping this look balanced. Ask for the curve to echo the natural half-moon area rather than form a thick band, and choose an accent color that works with your jewelry or outfit.
- Use silver for a cool, crisp accent.
- Try gold for a warmer, dressier detail.
- Keep the rest of the nail sheer and glossy.
The result is a subtle twist on French styling that still feels easy to wear.
5. Milky White Baby Boomer Ombré

Baby boomer ombré blends a nude-pink nail bed into a diffused milky white tip. Instead of a distinct French line, the two shades melt together gradually, creating a soft gradient with a polished, seamless appearance.
This style is a lovely choice when you want the brightness of white tips but prefer a gentler transition. It works across many nail shapes and can feel especially elegant on medium or longer nails, where there is more room for the fade to develop.
Ask for a blended transition
The defining feature is a smooth gradient, so the pink and white should meet without a visible stripe. A nail technician can adjust the balance to make the tips more pronounced or keep the blend very subtle.
- Choose a nude-pink close to your preferred natural tone.
- Keep the white tip diffused rather than sharply outlined.
- Finish with gloss to emphasize the smooth fade.
It’s a refined option for celebrations, photos, or anyone who loves a softly finished French-inspired manicure.
Photo: @718beautybar on Instagram. Style shown: soft pink-to-white baby boomer ombré.
6. Milky Nails with Gold Foil Flecks

Small, irregular pieces of gold foil bring a warm accent to a sheer milky base. The foil catches the light in a more relaxed way than a perfectly drawn metallic line, so the finished manicure feels decorative but not overly formal.
Scattered flecks work well on a few accent nails or across all ten nails when the pieces stay delicate. The milky polish gives the gold room to stand out, while its translucent quality keeps the overall look light and easy to pair with different outfits.
Place the foil with intention
Foil is most appealing when it looks artfully scattered rather than crowded. Ask for a few small pieces, sealed smoothly beneath the topcoat so the surface feels even and the design stays comfortable.
- Use one or two accent nails for a restrained effect.
- Choose irregular flakes instead of a solid gold patch.
- Keep the base sheer so the detail remains airy.
This style brings a hint of warmth to a neutral manicure without taking away its soft, milky character.
Video: @nailzby.cruz on Instagram. Style shown: gold foil nail art on a milky white base.
7. Short Square Milky White Nails
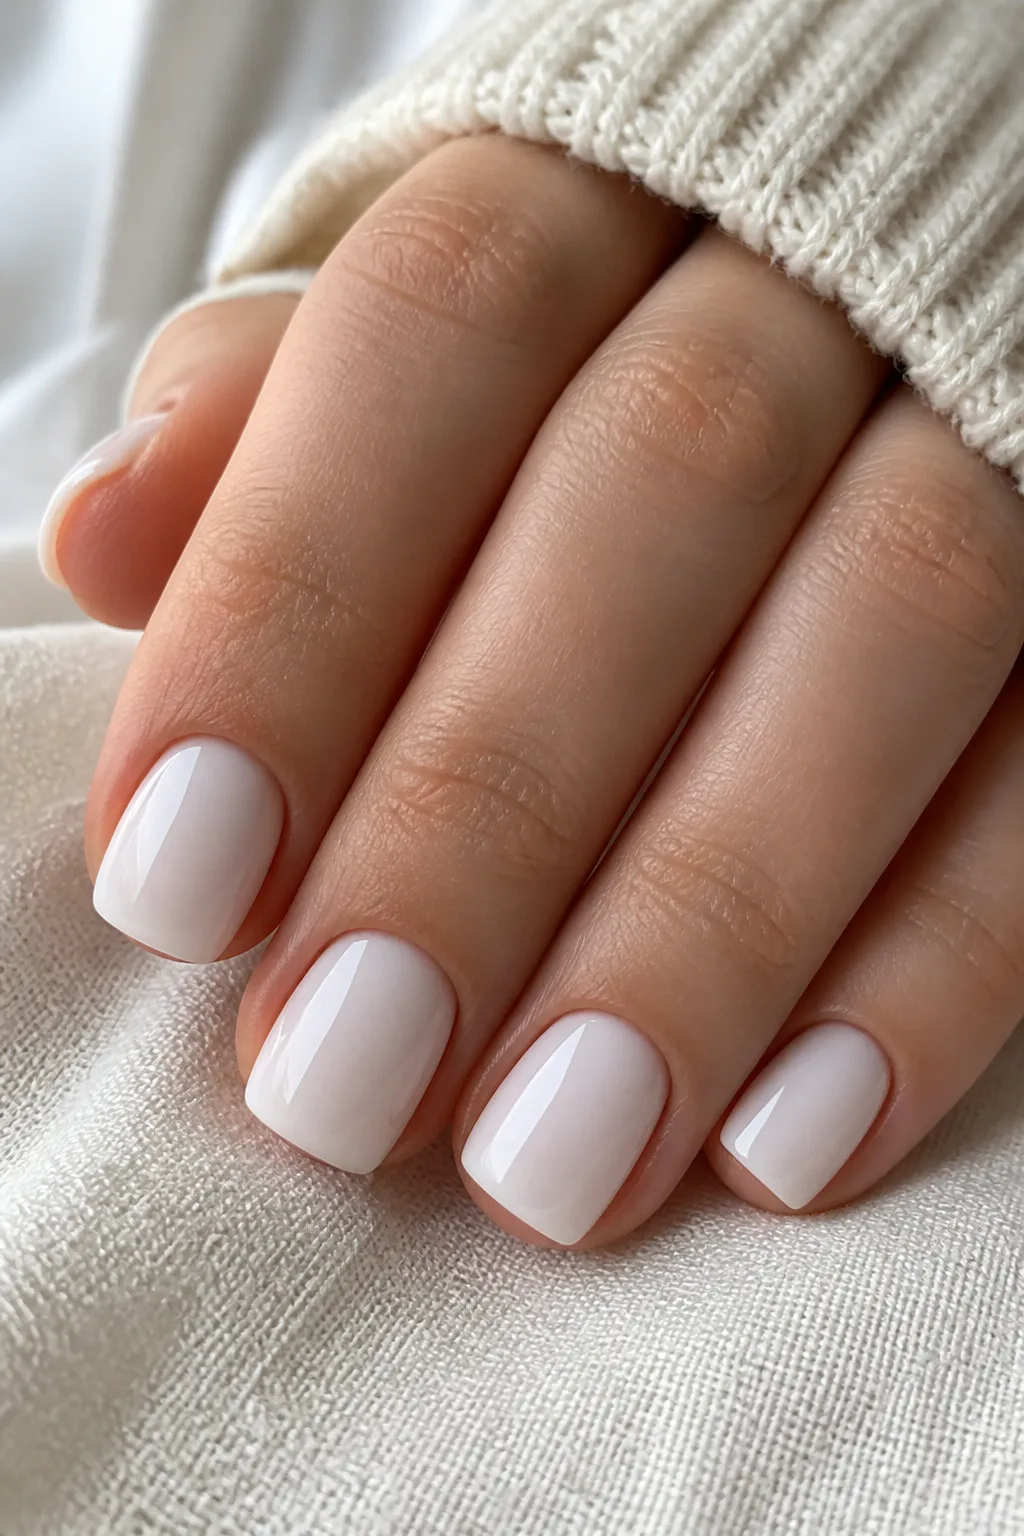
Short square nails paired with a milky white overlay create a neat, tidy manicure. The compact length keeps the look practical, while the creamy polish adds a smooth finish that feels more distinctive than bare nails or a standard opaque white.
This combination is a natural fit for anyone who prefers low-maintenance nail length or uses their hands often. The square edge gives the manicure a clean outline, and the soft white shade helps the shape look polished without needing extra art or embellishment.
Make a short shape feel finished
Ask for a square edge with softly smoothed corners to keep the silhouette comfortable. A sheer or semi-opaque milky coat can suit short nails particularly well, since it adds a little color without making the manicure feel heavy.
- Keep the length even across all nails.
- Soften sharp corners slightly for everyday comfort.
- Choose a glossy topcoat for a clean, fresh appearance.
Simple and versatile, this version is an easy way to wear milky white nails every day.
8. Long Coffin Milky White Nails

Long coffin nails create a dramatic canvas for a smooth, semi-opaque milky finish. The shape tapers toward a flat tip, giving the manicure a defined silhouette, while the creamy color keeps the overall effect softer than a bright, solid white.
This design makes a statement through length and shape alone, so it does not need elaborate decoration. It can be a lovely choice for a special event or for anyone who enjoys a more glamorous manicure, though the longer shape may feel less practical for some daily routines.
Balance length with a clean finish
Ask your nail technician to make the sides and tips look even from nail to nail. A smooth, semi-opaque coat helps emphasize the coffin shape without adding visual clutter, and a glossy finish highlights the neat surface.
- Choose a length that feels manageable for your routine.
- Keep the color smooth and even across the set.
- Skip extra accents if you want the shape to stand out.
The result is a confident, polished look with a soft color palette.
9. Milky Nails with Pearl Accents
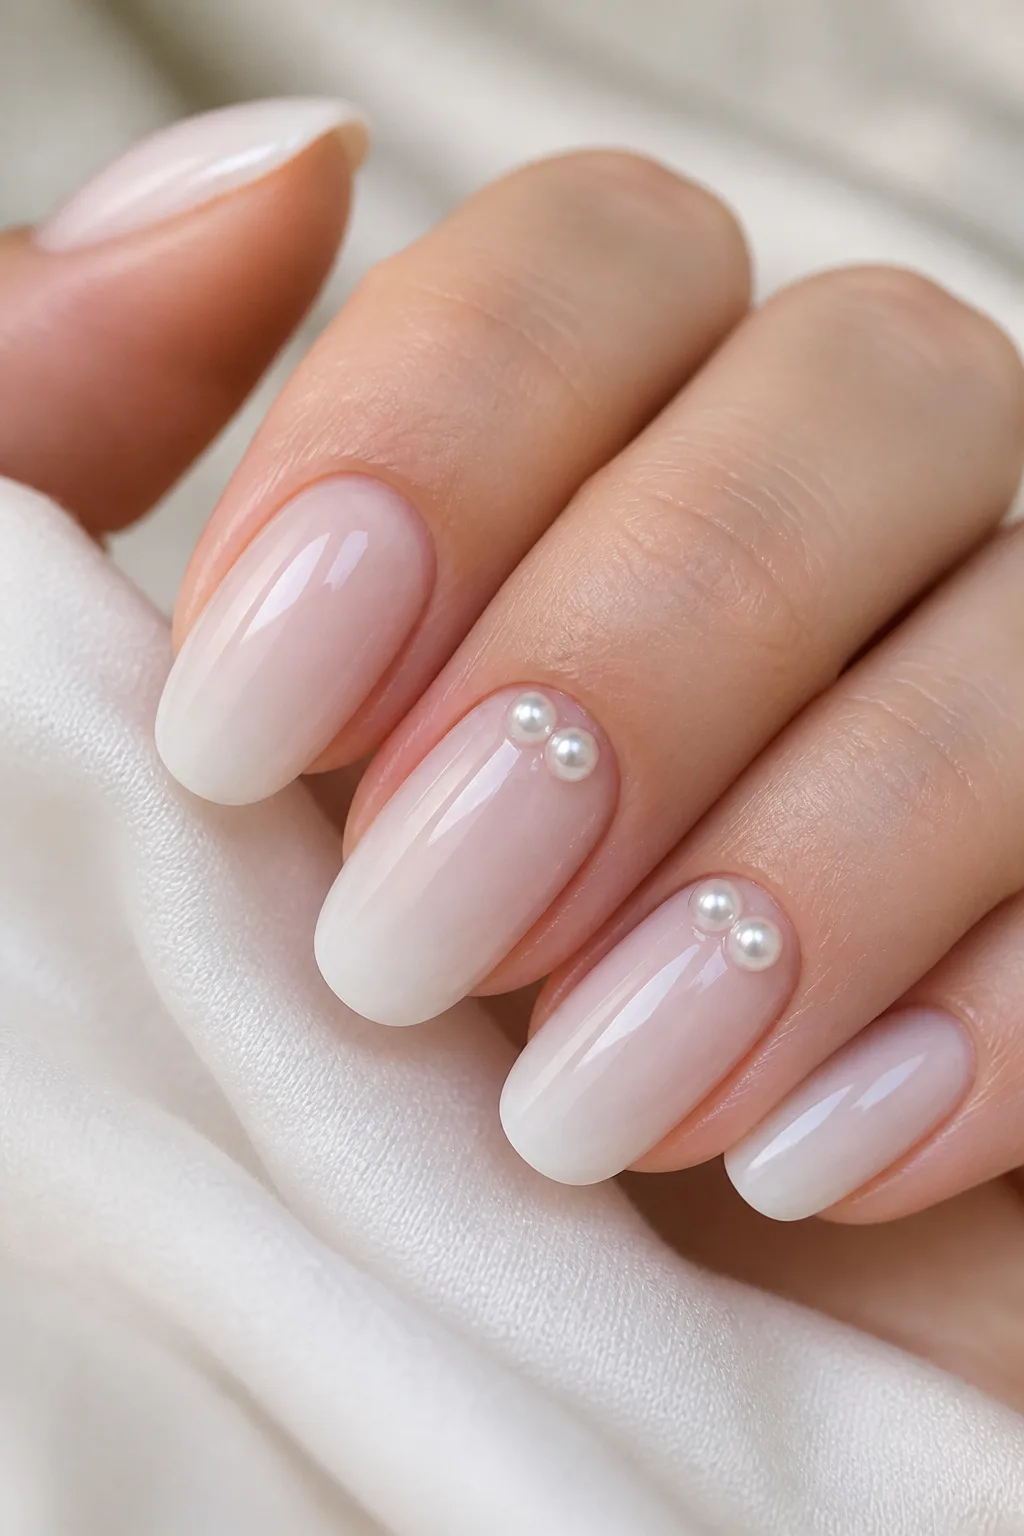
Tiny flat-backed pearls add a delicate, dimensional touch to a milky manicure. Placed near the cuticle on one or two accent nails, they create a subtle focal point without covering the creamy base or competing with the rest of the set.
This design is especially fitting when you want a feminine detail for a celebration, but it can stay understated if the pearls are small and sparingly placed. Against a translucent background, the embellishments feel light and elegant rather than ornate.
Keep embellishments comfortable
Positioning matters: a small pearl near the base of the nail is easier to appreciate when it is placed neatly and secured well. Ask for a smooth seal around the embellishment, while avoiding an oversized cluster that may snag or feel bulky.
- Choose tiny pearls for a delicate finish.
- Place them on one or two nails rather than every finger.
- Keep the remaining nails simple and glossy.
A few pearl accents can make a classic milky manicure feel occasion-ready while preserving its softness.
10. Milky Nails with Dainty Florals

Micro daisies or cherry blossoms bring a sweet, airy detail to a translucent milk-colored base. Their small scale lets the creamy polish remain visible, while the floral shapes add a touch of color and personality without turning the manicure into a busy pattern.
This style suits spring-inspired looks, garden celebrations, or anyone who enjoys delicate nail art. Florals can be placed on one or two accent nails for a quiet effect, or repeated sparingly across the set for a more coordinated design.
Let the flowers stay petite
Ask for fine, simple petals and small centers so the art remains in proportion to the nail. Hand-painted details can be customized in soft colors, while a clear or milky topcoat helps tie the design together.
- Try tiny daisies for a cheerful, classic motif.
- Choose cherry blossoms for a softer, romantic look.
- Limit floral art to accent nails if you prefer minimal detail.
The translucent base gives the flowers room to stand out while keeping the overall manicure light.
Photo: @nailart.bysha on Instagram. Style shown: delicate daisy art on a milky white base.
11. Milky White Nails with Chrome Swirls

Flowing chrome lines create a modern contrast against the soft finish of milky white nails. Silver swirls can be drawn flat for a fine, graphic effect or built up slightly for a more dimensional accent, giving the manicure an abstract, polished feel.
This design works best when the metallic lines have space to move across the nail. A few sweeping curves can be enough to transform a simple base, making the style a good choice when you want nail art that feels expressive without relying on multiple colors.
Choose a line style
Ask for the swirls to vary gently in direction and placement, rather than repeating the exact same design on every nail. Keeping the base sheer and the artwork fine helps preserve the contrast between the creamy polish and reflective detail.
- Use silver chrome for a cool, sleek accent.
- Try flat line art for a lighter, more minimal finish.
- Place swirls on a few nails to give the design breathing room.
The result is an eye-catching manicure that still keeps milky white as its main feature.
Video: @thegelroom.mu on Instagram. Style shown: frosted chrome swirls on a milky white base.
12. Matte Milky White Nails

A matte topcoat gives milky white polish a velvety, cashmere-like surface. Without the usual glossy reflection, the creamy color looks softer and more muted, creating a fresh alternative to the familiar shiny milk manicure.
This finish works well on its own when you want a minimalist look, and it can also make small details feel more noticeable by contrast. A clean nail shape helps the texture stand out, whether you choose a short square, rounded, or longer silhouette.
Care for the soft finish
Ask for an even matte topcoat over a smooth base, since any unevenness can be more apparent without shine. If you want added detail, consider keeping it simple so the manicure’s velvety texture remains the focus.
- Use a milky shade with the amount of coverage you prefer.
- Keep the surface smooth before applying the matte finish.
- Add a small glossy accent only if you want subtle contrast.
Matte milky nails offer a cozy, understated change from a high-shine manicure.
13. Milky Nails with Rhinestone Cuticles

A fine row of micro-crystals tracing the cuticle adds sparkle to a soft milky manicure. The stones sit at the base of the nail, leaving most of the creamy surface clear and creating a delicate frame rather than an all-over glitter effect.
This detail feels especially suited to weddings, parties, or other dressier occasions, but a restrained placement can still look refined. The contrast between the gentle polish and tiny points of light gives the design its charm without overwhelming the nail.
Keep the sparkle fine and secure
Ask for small crystals placed in a neat curve that follows the nail’s natural base. A carefully sealed edge helps the embellishments sit smoothly, while limiting the design to a few accent nails keeps the manicure balanced.
- Choose micro-crystals rather than large stones.
- Trace the cuticle with a slim, even row.
- Use accent nails for a more understated result.
This is a graceful way to add a little occasion-ready shimmer to milky white polish.
14. Glossy Tapered Square Milky Nails

A tapered square shape narrows gently toward the tip while keeping a softly squared edge. Paired with an ultra-glossy milky finish, it creates a modern silhouette that feels clean and defined without the sharpness of a hard-edged square.
The polish can be sheer for a natural look or built up to a smooth, more opaque milk tone. Since both the shape and finish are simple, this design suits anyone who wants a refined manicure with no embellishments to maintain.
Shape for a soft, balanced edge
Ask your nail technician to taper the sides gradually and soften the corners, keeping the shape consistent across the set. A glossy topcoat will emphasize the smooth surface and make the creamy color look freshly finished.
- Choose a length that shows the taper without feeling cumbersome.
- Keep the tips softly squared, not sharply angular.
- Pick sheer or semi-opaque coverage to suit your preference.
This understated shape-and-color pairing feels polished enough for both daily wear and special plans.
15. Milky Nails with Celestial Accents
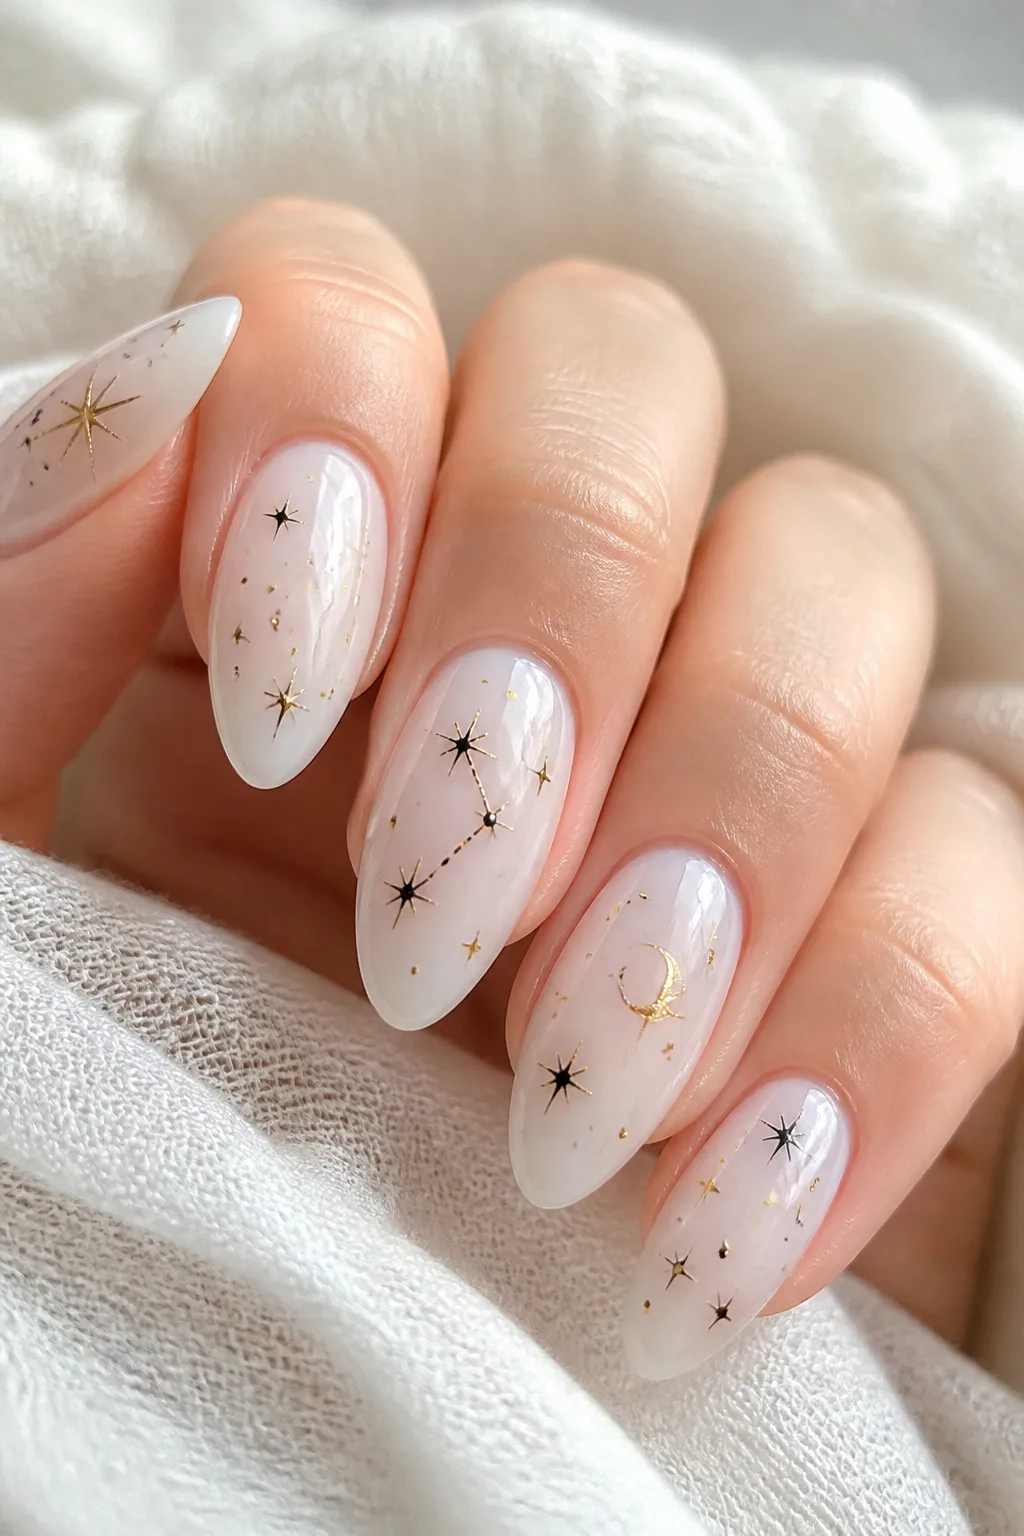
Fine stars and tiny dots give a milky manicure a delicate celestial theme. Gold details bring a warm, twinkling quality, while black linework creates a crisp contrast against the translucent white base.
The design can be as minimal as one small star on an accent nail or as expressive as a few scattered motifs across the set. Keeping the shapes fine and the spacing open helps the manicure feel airy instead of crowded, so the soft base remains part of the design.
Space out the stars and dots
Ask for a light hand with the artwork and choose a metallic or dark detail that suits your preferred mood. A glossy finish can make gold sparkle, while a simpler topcoat keeps fine black accents looking clean.
- Choose gold for a warm, delicate glimmer.
- Use black for a sharper, graphic contrast.
- Mix a few small stars with dots for visual rhythm.
These tiny details turn a neutral manicure into something quietly whimsical.
16. Double French Milky White Tips

Double French tips add two slim parallel lines along the edge of a milky manicure. One line can be white and the other metallic silver, creating a layered detail that is more distinctive than a single French tip while still keeping the design light.
The narrow lines let the translucent base remain visible, so this look feels crisp rather than heavy. It can suit a range of nail lengths, although a little extra space at the tip makes the parallel detail easier to see and keep balanced.
Keep both lines fine and even
Ask your technician to follow the shape of the nail tip with both lines, leaving a small, consistent gap between them. The white gives the design its classic French reference, while silver adds a subtle reflective finish.
- Use white and silver for a clean, polished pairing.
- Keep both lines ultra-thin for a delicate effect.
- Match the curves to your natural nail shape.
This manicure is a lovely way to add detail while keeping the overall look refined and wearable.
Final Thoughts
Milky white nails can be as simple as a sheer, glossy coat or as detailed as a design with chrome, tiny florals, pearls, or metallic accents. The soft base makes it easy to experiment while keeping the manicure cohesive, whether you prefer a natural finish or something more expressive.
Choose a nail shape and length that suit your routine, then decide how much coverage and decoration you want. A small adjustment—like a finer French tip, a matte finish, or one accent nail—can make the look feel personal while keeping the gentle appeal of milky white nails.