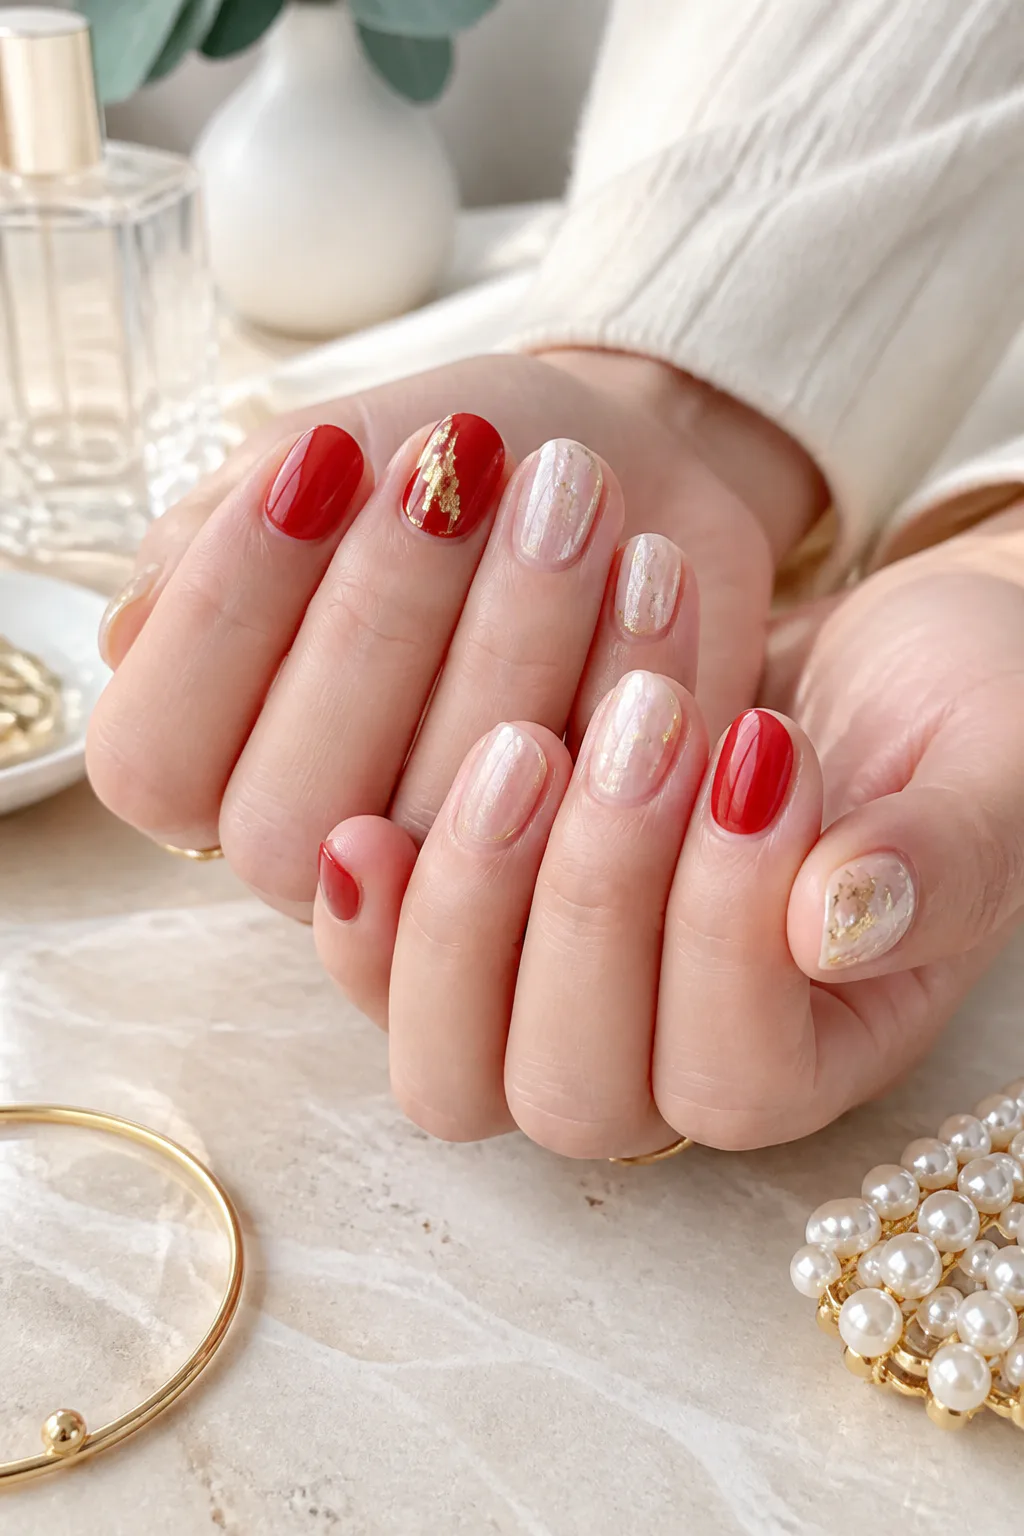
16 Stunning Short Nails Ideas
Short nails can look just as polished and expressive as longer manicures. Their compact shape works beautifully with clean color, delicate details, and small-scale designs that feel intentional rather than crowded.
These 16 ideas range from sheer, barely-there finishes to rich shades and playful nail art. Whether you prefer a salon manicure or enjoy painting your nails at home, you’ll find options that can be adapted to your preferred shape and skill level.
Use the designs as inspiration, not strict rules: switch a color, decorate only a few nails, or keep the whole set simple. The best short-nail look is one that suits your routine and still feels like you.
1. Milky White Nails with a Pearl Glaze

A sheer milky-white base gives short nails a soft, luminous finish without making them look stark. A light pearl or chrome glaze catches the light subtly, so the manicure feels special while remaining neutral enough for everyday wear.
This look suits rounded, squoval, and short square nails. The translucent layers let a little natural nail show through, helping the finish feel delicate instead of heavy. It’s a lovely choice when you want a clean manicure with a hint of glow.
How to get the soft glow
Start with neatly shaped nails and apply thin coats so the white stays sheer. Once the base is dry, use a small amount of pearl powder or choose a pearly topcoat, then seal the edges with a glossy topcoat.
- Choose a milky shade rather than opaque white for a softer effect.
- Keep the pearl finish subtle so the manicure stays wearable.
- Apply polish in thin layers to avoid a thick look on short nails.
The result pairs easily with casual outfits and dressier occasions alike.
2. Short Nails with Micro French Tips
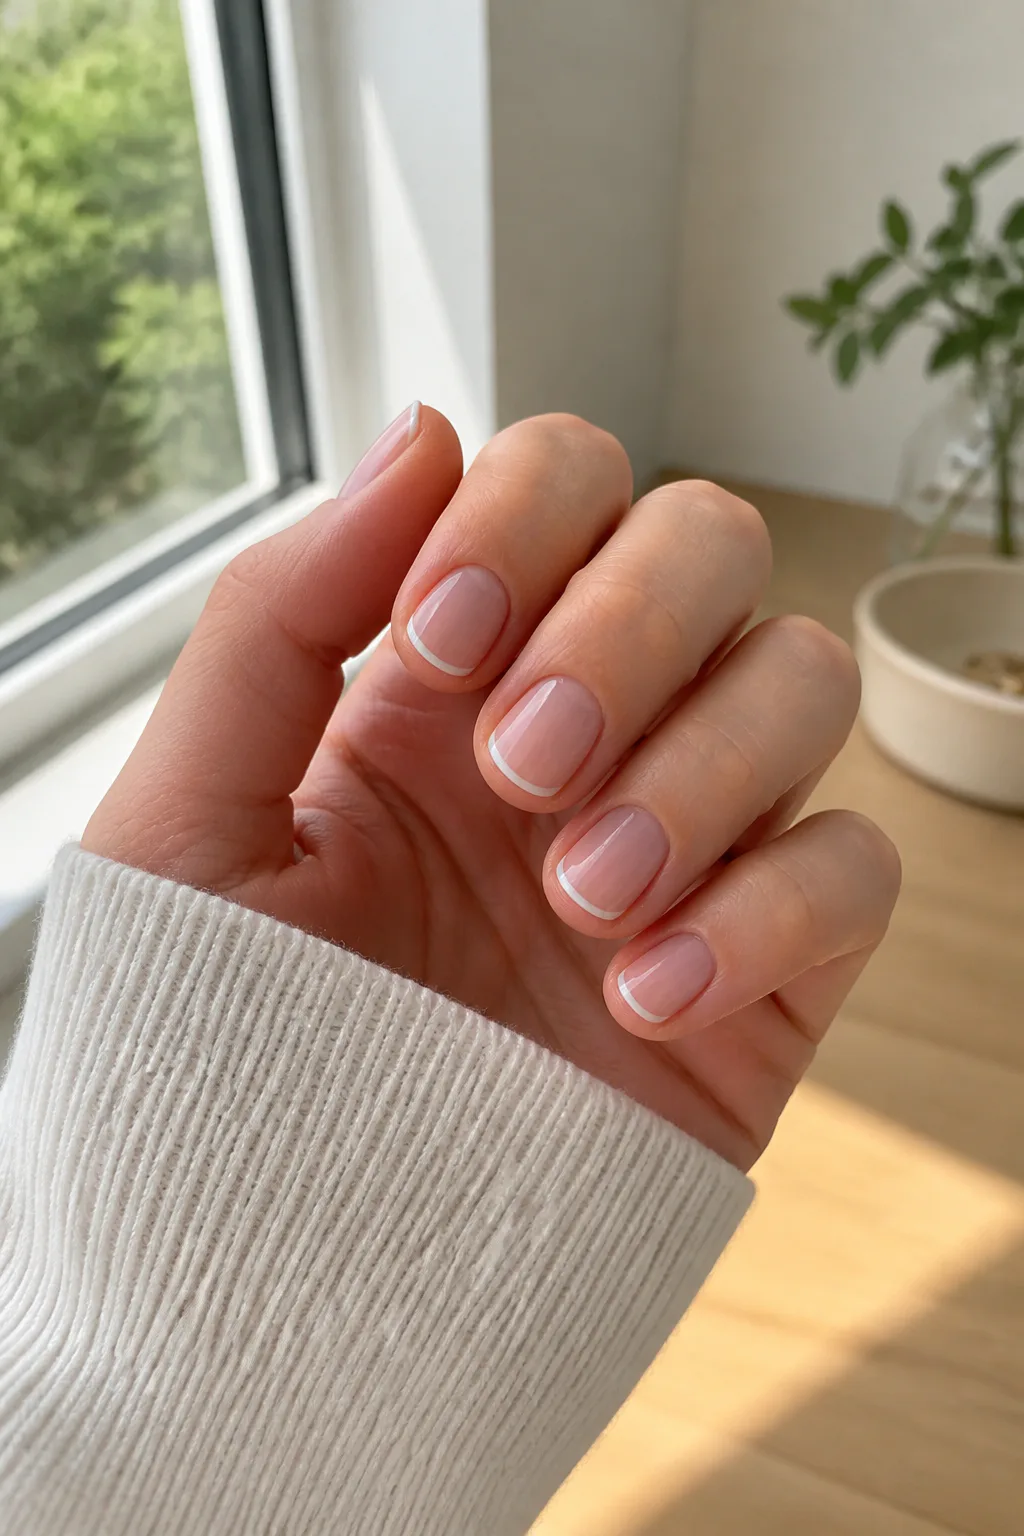
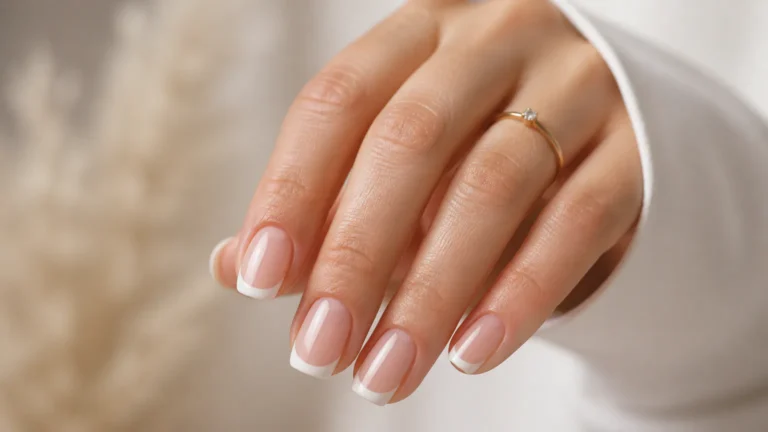
A micro French manicure keeps the familiar contrast of a French tip but scales it down to suit a short nail. The narrow line follows the free edge, adding definition without taking up much of the nail plate.
Classic white feels crisp and timeless, while a colored tip makes the design more playful. Because the line is so fine, this style looks tidy on short oval, round, or square shapes and doesn’t need extra art to feel finished.
Make the tip look precise
Use a sheer nude or pale pink base, then paint a very thin line along each nail’s edge. A fine liner brush can help, but striping polish or carefully placed polish on the nail edge can work too. Let the base dry before adding the tips.
- Try white for a clean, classic finish.
- Choose one bright shade for a subtle pop of color.
- Keep the line narrow and consistent across the set.
A glossy topcoat brings the base and tips together and helps the manicure look smooth.
3. Soft Blush Pink Gloss Nails

Translucent blush pink gives short nails a fresh, cared-for appearance with very little fuss. The sheer color adds a hint of warmth while allowing the natural nail to show through, making it a good choice when you want polish that still feels understated.
This manicure works especially well with rounded or squoval nails, though any short shape can wear it. Its simple finish suits school, work, and weekends, and it can also provide a polished base for rings or other accessories without competing for attention.
Keep the finish neat
Shape the nails evenly and gently smooth any rough edges before applying color. One coat creates a barely-there tint; a second coat deepens the blush while keeping it translucent. Finish with a glossy topcoat for a smooth, light-catching surface.
- Select a pink that complements your natural nail tone.
- Use thin coats to avoid streaks near the cuticle.
- Clean up the edges with a small brush for a crisp outline.
It’s an easy, versatile option when you want your manicure to look polished rather than decorative.
4. Golden Hour Champagne Chrome Nails
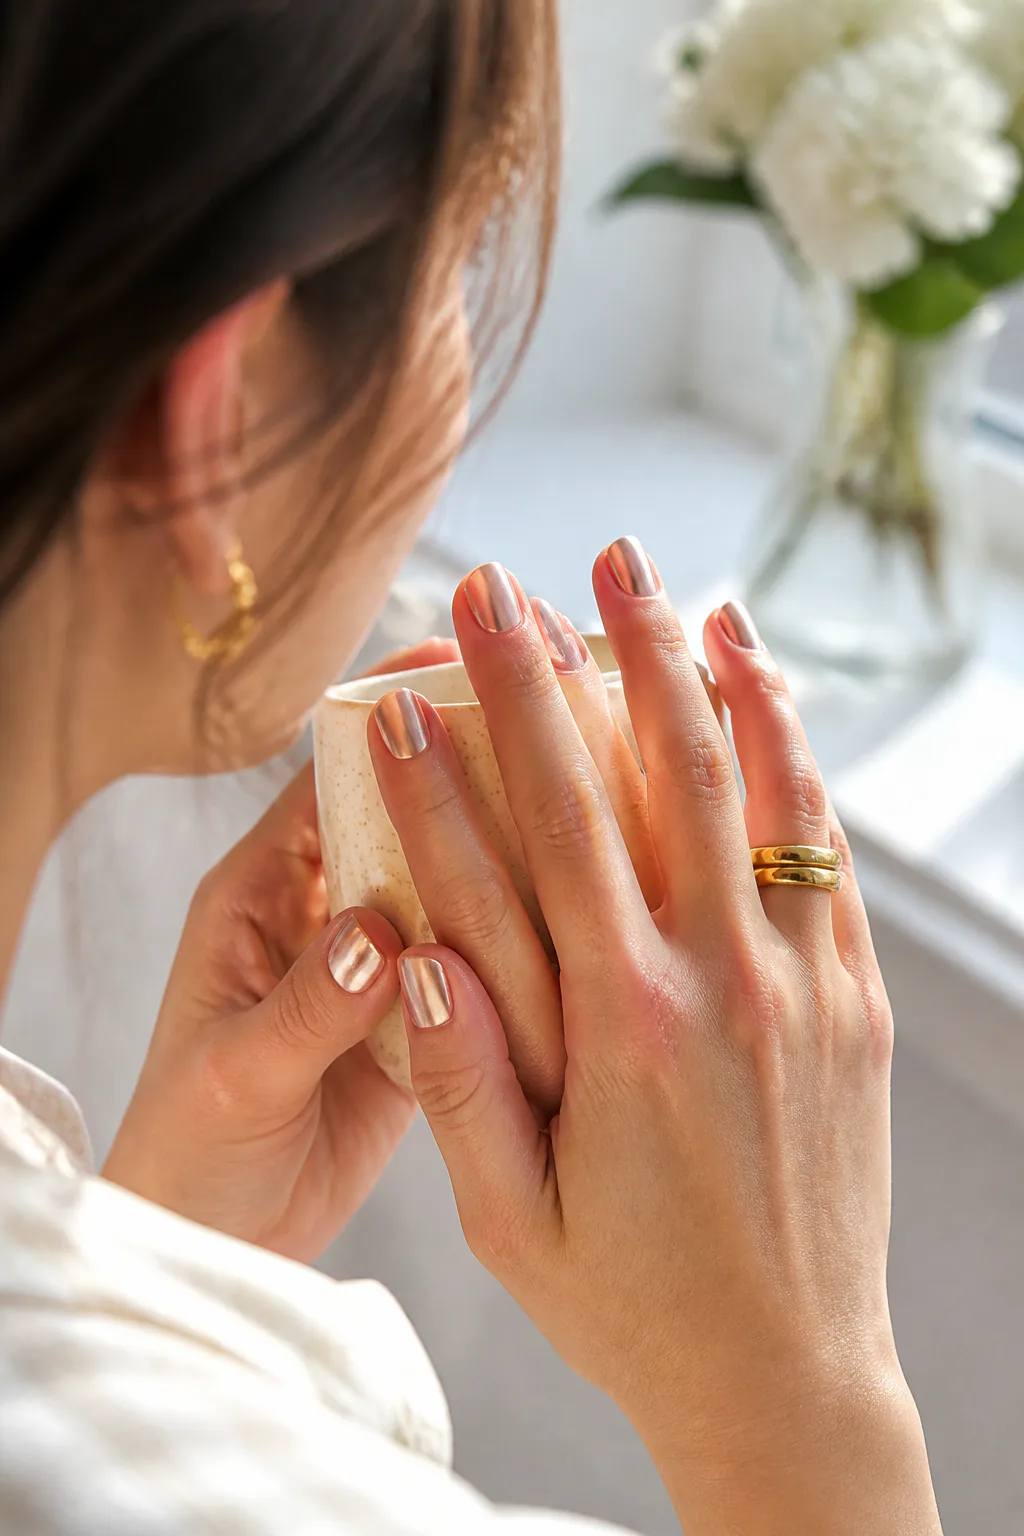
Champagne chrome gives short nails a warm metallic sheen that feels softer than a bright silver mirror finish. Buffed over a nude or neutral base, it creates a golden-hour glow that shifts gently as your hands move.
The neutral foundation helps the metallic detail feel elegant rather than overpowering. This design can cover every nail for a coordinated look or be used on a few nails when you prefer a quieter accent. It works across short shapes, including square and rounded tips.
Choose a balanced shine
Apply a smooth neutral base and let it dry or cure according to the product instructions. Add chrome powder or a chrome-effect topcoat in a thin layer, then seal the manicure as directed. Even coverage matters, since reflective finishes can emphasize uneven patches.
- Pick champagne for a soft, golden effect.
- Try bronze tones for a deeper, warmer finish.
- Use a neutral base that lets the metallic layer stand out.
The result brings a little shine to short nails while staying easy to pair with everyday colors.
5. Tortoiseshell Accent Nails with Gold Foil

Tortoiseshell art combines translucent amber with irregular dark-brown patches to create a layered, glossy pattern. On short nails, the pattern looks especially chic when kept to one or two accent nails, leaving the rest of the manicure simple.
A warm nude, brown, or amber base can tie the accent nails into the full set. Tiny touches of gold foil add a little sparkle, but the design can look rich without them. Because the patches are irregular, the pattern doesn’t need to look perfectly identical from nail to nail.
Build the layered pattern
Start with an amber-toned base, then dab on a few uneven brown shapes. Add another translucent layer if you want extra depth, and place a small piece of foil while the surface is tacky. A glossy topcoat helps the different elements look unified.
- Keep the patches varied in size and shape.
- Use the pattern on accent nails to avoid a busy set.
- Add foil sparingly so it doesn’t hide the tortoiseshell effect.
Pair the accents with a simple solid shade for a warm, balanced manicure.
6. Abstract Negative Space Short Nails

Negative-space nail art leaves parts of the natural nail bare while adding organic lines or waves of color. The open areas keep the design airy, which is especially useful on short nails where a fully covered, detailed pattern can feel crowded.
Choose one or two shades, such as olive green or cherry red, and let the curves move across the nail in a relaxed way. Each nail can have a slightly different arrangement, so the set feels artistic without needing exact repetition.
Plan the open areas
Begin with clean nails and decide where you want the bare sections to show. Paint a few flowing shapes with a fine brush, leaving clear space between them. If you prefer a neater boundary, use nail tape or a stencil and remove it before the polish fully dries.
- Limit the palette to keep the design cohesive.
- Use fine lines or narrow waves rather than large blocks.
- Try the design on an accent nail first if you’re painting at home.
A clear topcoat can protect the art while preserving the simple, open feel.
7. Glossy Cherry Red Short Nails
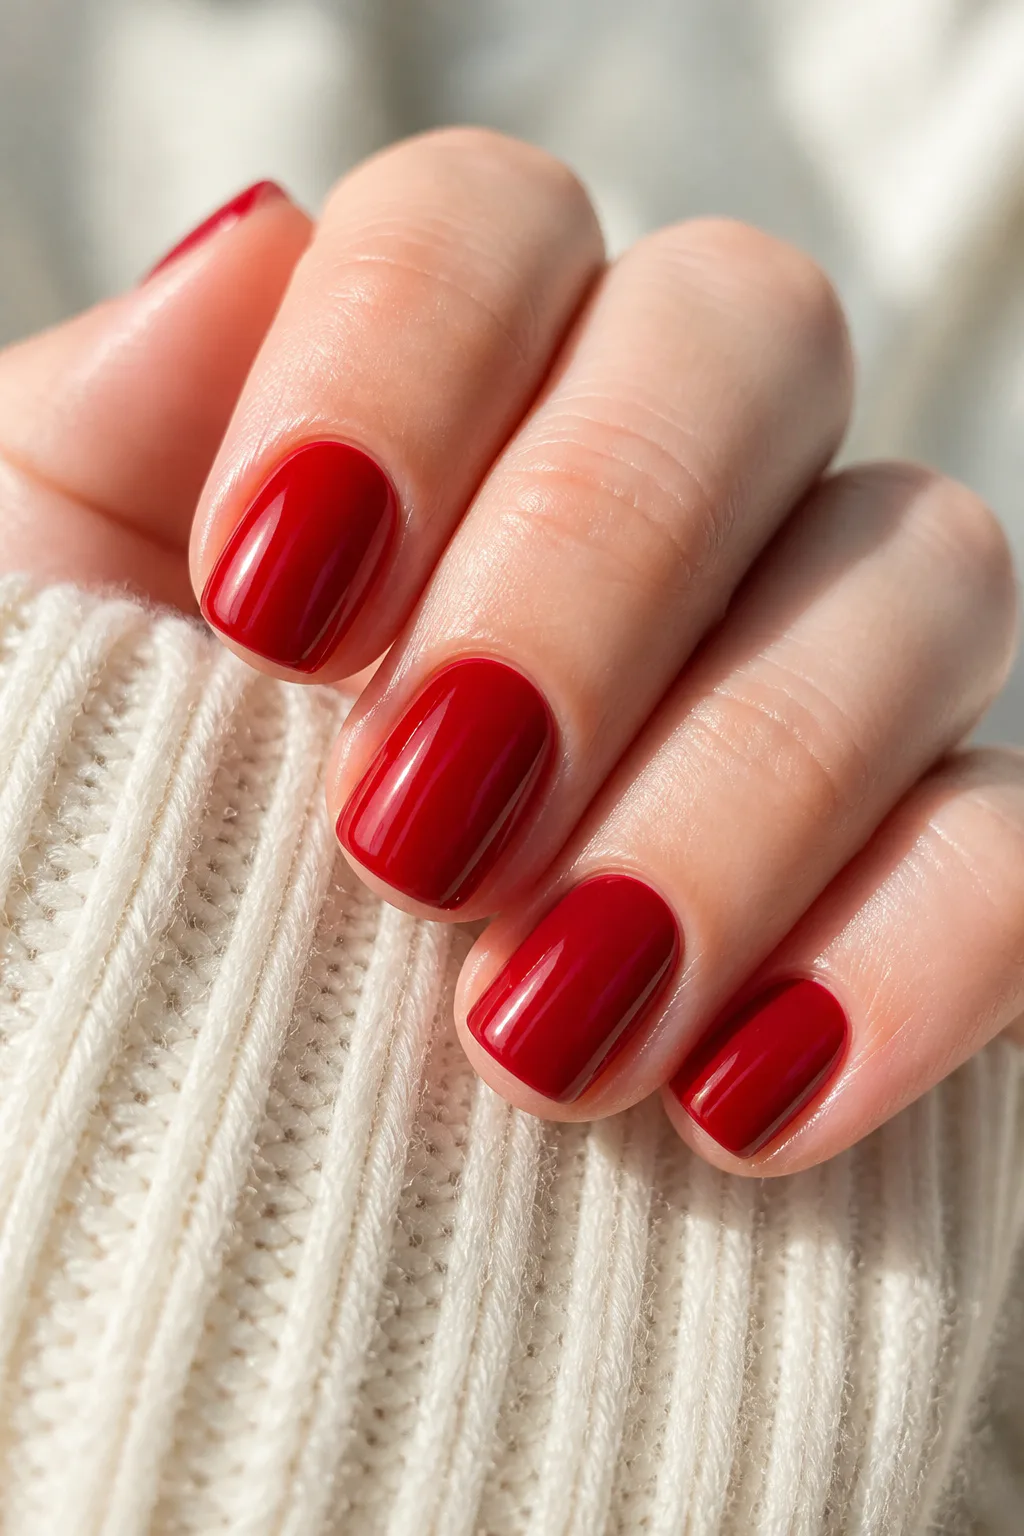
Cherry red brings a confident pop of color to short nails without needing extra length or decoration. A high-shine finish makes the shade look vivid and polished, while the compact nail shape keeps the overall effect crisp.
This classic color works on its own, so it’s a good choice when you want a statement manicure that is still straightforward to create. Rounded or squoval edges soften the look, while a short square shape gives the red a sharper, graphic feel.
Make the color look smooth
Apply a base coat to help create an even surface, then layer on two thin coats of red. Take care around the cuticle and avoid flooding the sidewalls; strong color makes uneven edges more noticeable. Finish with a glossy topcoat for that glassy shine.
- Choose a true crimson for a classic cherry-red look.
- Use thin coats to build even, saturated color.
- Refresh the topcoat when you want to revive the shine.
When the color is this striking, simple, carefully finished nails are all you need.
8. Mismatched Pastel French Tips
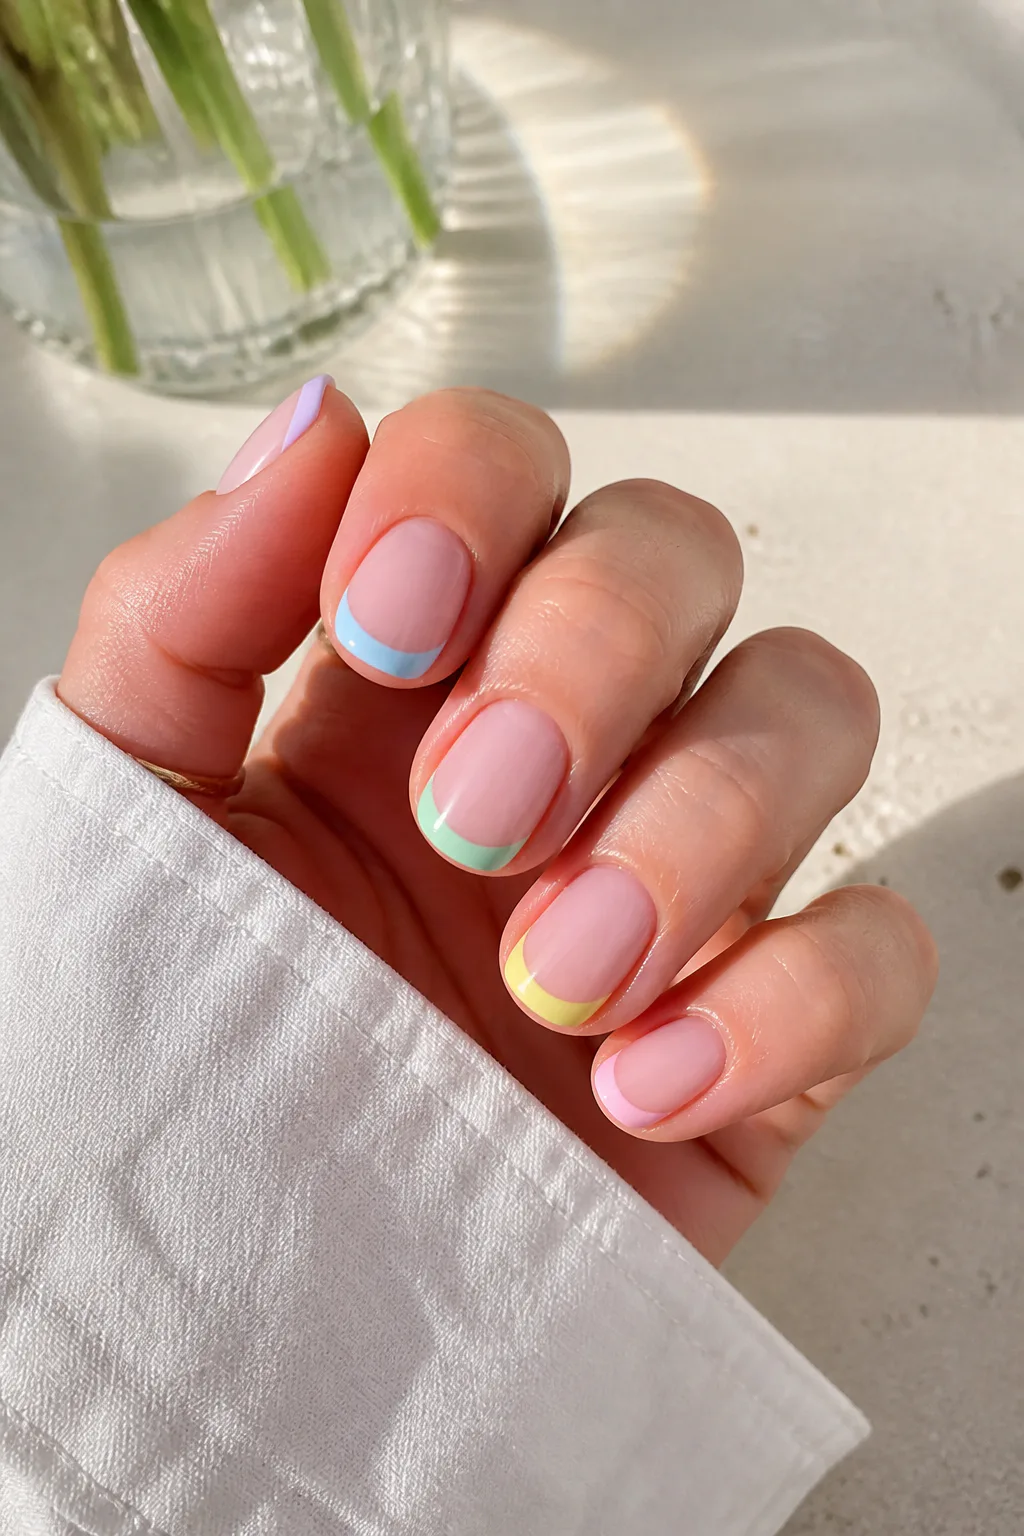
Mismatched pastel tips bring a playful twist to a classic French manicure. Each nail gets a different soft color—such as lilac, baby blue, sage, or buttercup yellow—while the sheer or nude base keeps the set looking light and coordinated.
The thin tips are well suited to short nails because they add color without covering much of the nail. You can use several pastels for a rainbow effect or repeat a smaller selection for a more subtle pattern. The design feels cheerful without requiring elaborate nail art.
Keep the colors in harmony
Choose shades with a similar softness so one tip doesn’t overpower the others. Apply a neutral base, let it dry, and paint a narrow line along each free edge. A fine brush makes it easier to adjust the curve to each nail’s shape.
- Try lilac, baby blue, sage, and pale yellow.
- Keep tip thickness consistent across the set.
- Use a sheer base to make the pastels stand out gently.
A glossy finish helps the different shades feel like one thoughtfully planned manicure.
9. Tiny Polka Dots on Nude Nails

Miniature dots add a bit of personality to a nude manicure while preserving a clean, simple base. On short nails, a few small dots feel delicate and graphic rather than overwhelming, making this an approachable design for nail-art beginners.
Black dots create crisp contrast, white dots keep the look soft, and red dots add a playful accent. You can place them evenly for a tidy pattern or vary their positions for a looser, more casual feel. The design also works well on just one or two nails.
Place the dots carefully
Apply a smooth nude base and let it dry fully before adding the pattern. Use a dotting tool, the tip of a fine brush, or another small tool to make consistent marks. Practice on paper first if you want to test the size and spacing.
- Choose a dot color that contrasts clearly with the base.
- Use a few dots per nail to keep the pattern airy.
- Repeat a simple arrangement for a neat, coordinated set.
Seal the design with a clear topcoat, taking care not to drag the dots while they’re wet.
10. Single Pearl or Gem Accent Nails
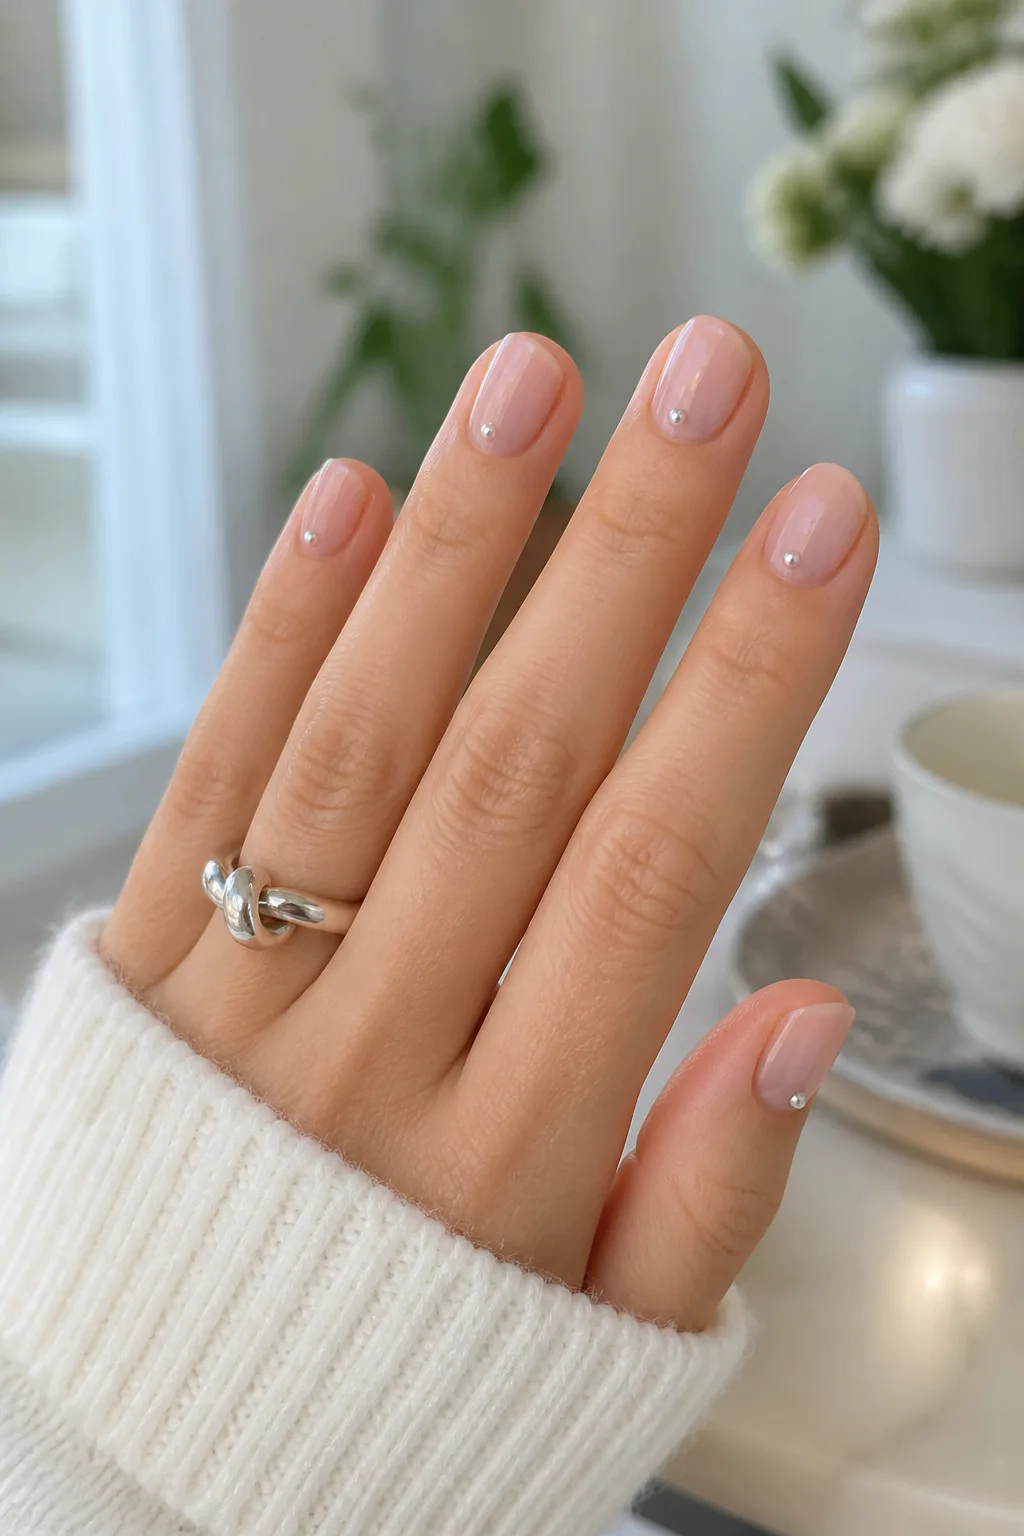
A single tiny pearl or rhinestone near the cuticle creates a minimal accent that catches the eye without covering the nail. The detail is small enough for short nails and works especially well over a sheer pink, nude, or milky base.
You can place one embellishment on every nail for a coordinated look or reserve it for a few accent fingers. A pearl feels soft and classic, while a clear rhinestone adds a brighter flash. Keeping the rest of the manicure simple lets the little detail stand out.
Secure the embellishment
Apply your base color and allow it to dry or cure. Place the pearl or gem close to the cuticle but leave a little space around the skin, then secure it with nail glue or a product made for nail art. Finish according to the adhesive or polish instructions.
- Choose a small embellishment that suits the nail’s scale.
- Place it near the cuticle for a neat, balanced accent.
- Avoid putting the gem too close to the skin or sidewall.
This detail is a simple way to make a neutral manicure feel special.
11. Checkered Micro-Print Short Nails
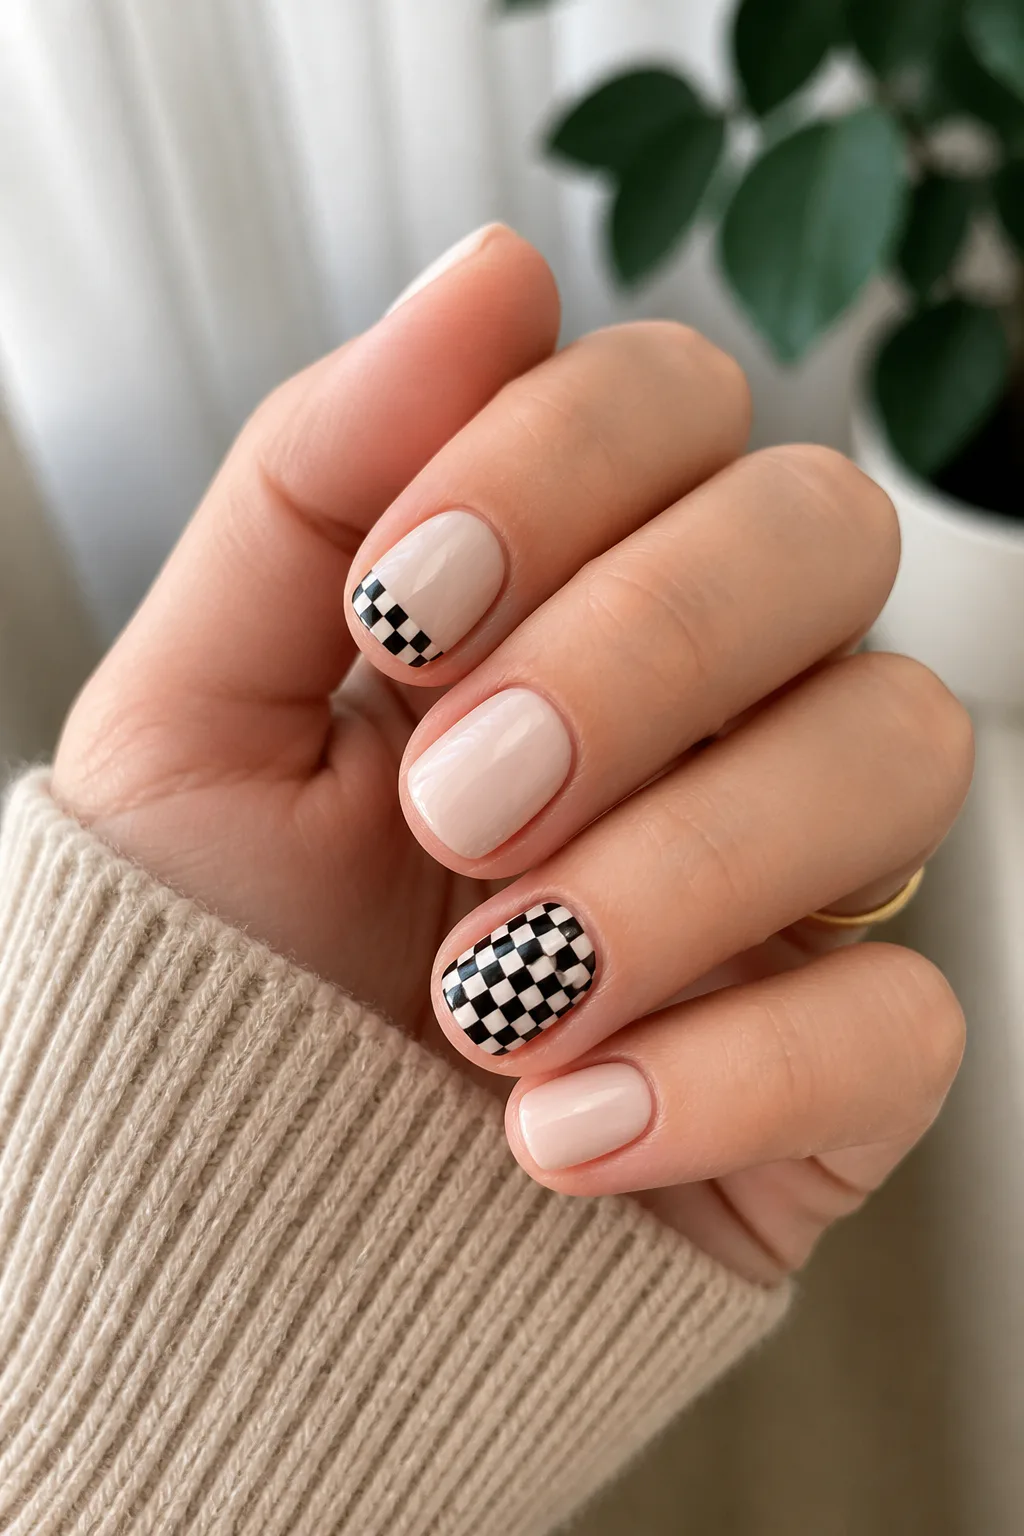
A miniature checkerboard pattern brings a retro feel to short nails. The small squares keep the print in proportion, whether you use it on one accent nail or paint a narrow checkerboard band across each tip.
Black and white is a graphic classic, but softer colors can make the look more playful. Since the pattern has plenty of visual detail, pairing it with solid nails helps the manicure feel balanced and gives the print room to stand out.
Keep the pattern small
Begin with a smooth base in one of your chosen colors. Use a fine brush to create a few narrow rows and columns, then fill alternating squares. If hand-painting a full checkerboard feels tricky, try placing the pattern on one nail or limiting it to the tips.
- Choose contrasting shades for a clear checkerboard effect.
- Use an accent nail if you want a less busy manicure.
- Keep squares small and lines as even as possible.
A clear topcoat smooths the surface and helps the finished print look cohesive.
12. Moody Espresso Brown Short Nails
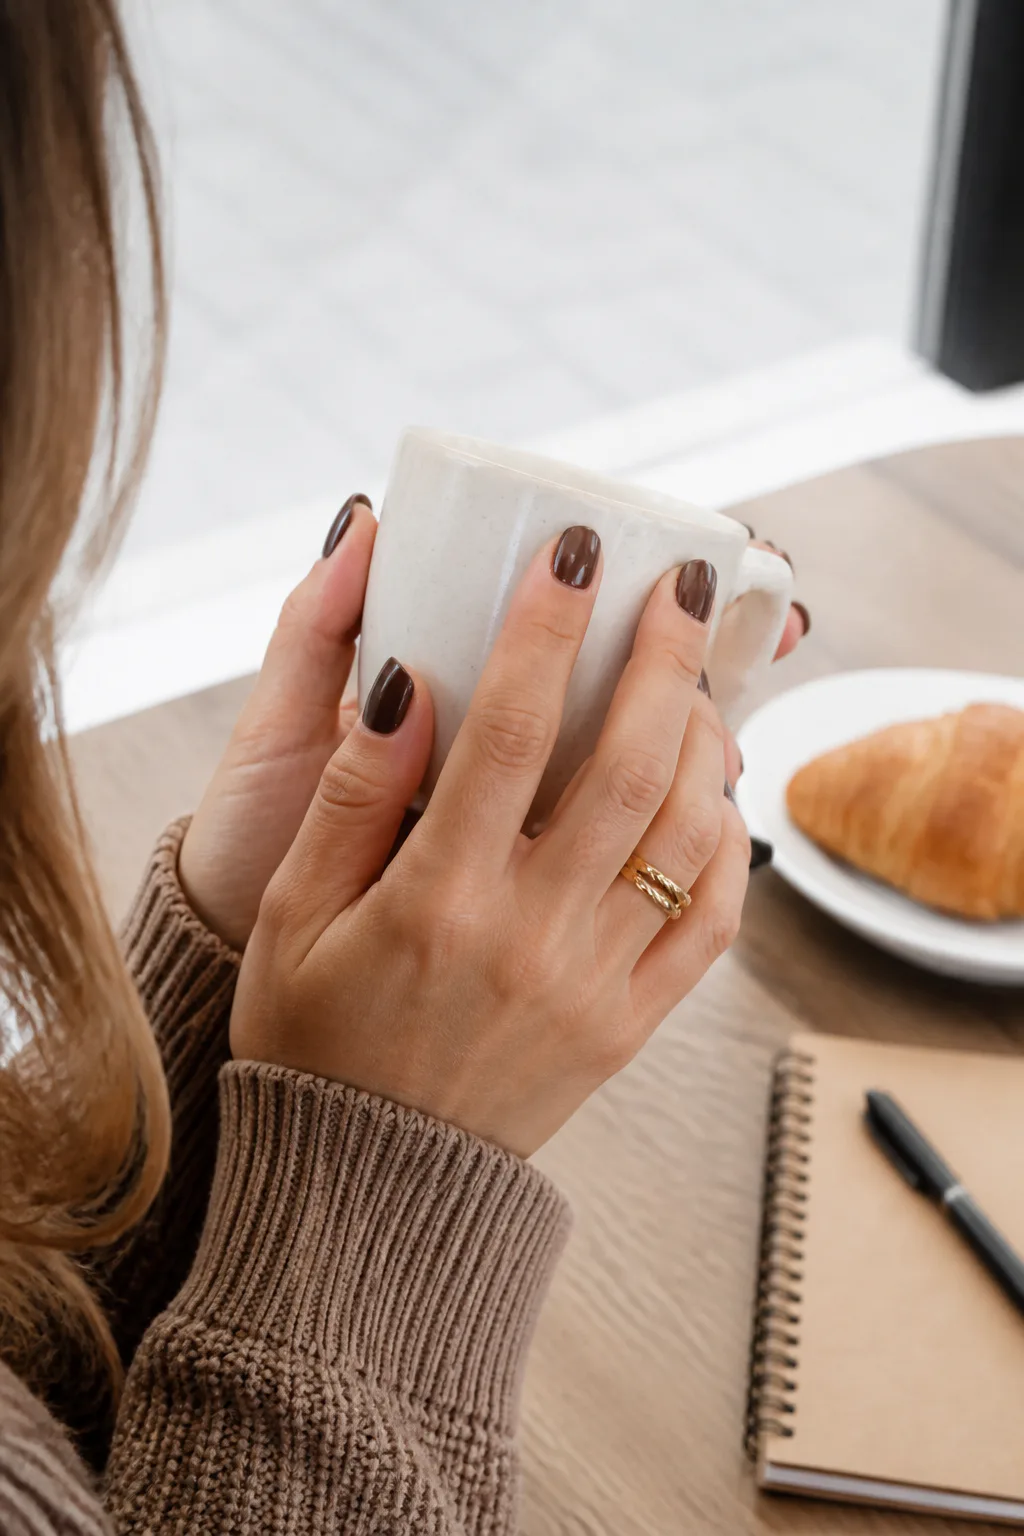
Espresso brown offers the depth of a dark manicure with a warmer, softer feel than black. On short nails, rich chocolate polish looks sleek and intentional, making it an easy choice for cooler seasons or whenever you want a grounded, neutral shade.
The color works beautifully as a full set without any extra art. A glossy finish brings out its richness, while a more muted finish makes the look feel understated. Short square, oval, and squoval shapes all pair well with this versatile shade.
Get an even, rich finish
Use a base coat to help the polish apply smoothly, then add thin layers until the color looks deep and consistent. Dark shades can show streaks or gaps, so take your time near the edges. A topcoat adds shine and helps protect the manicure.
- Choose a chocolate tone for warmth and depth.
- Apply polish carefully along the sidewalls.
- Pair it with minimal art or wear it as a solid color.
Espresso nails are an effortless alternative when black feels too stark.
13. Metallic Constellation Nail Art
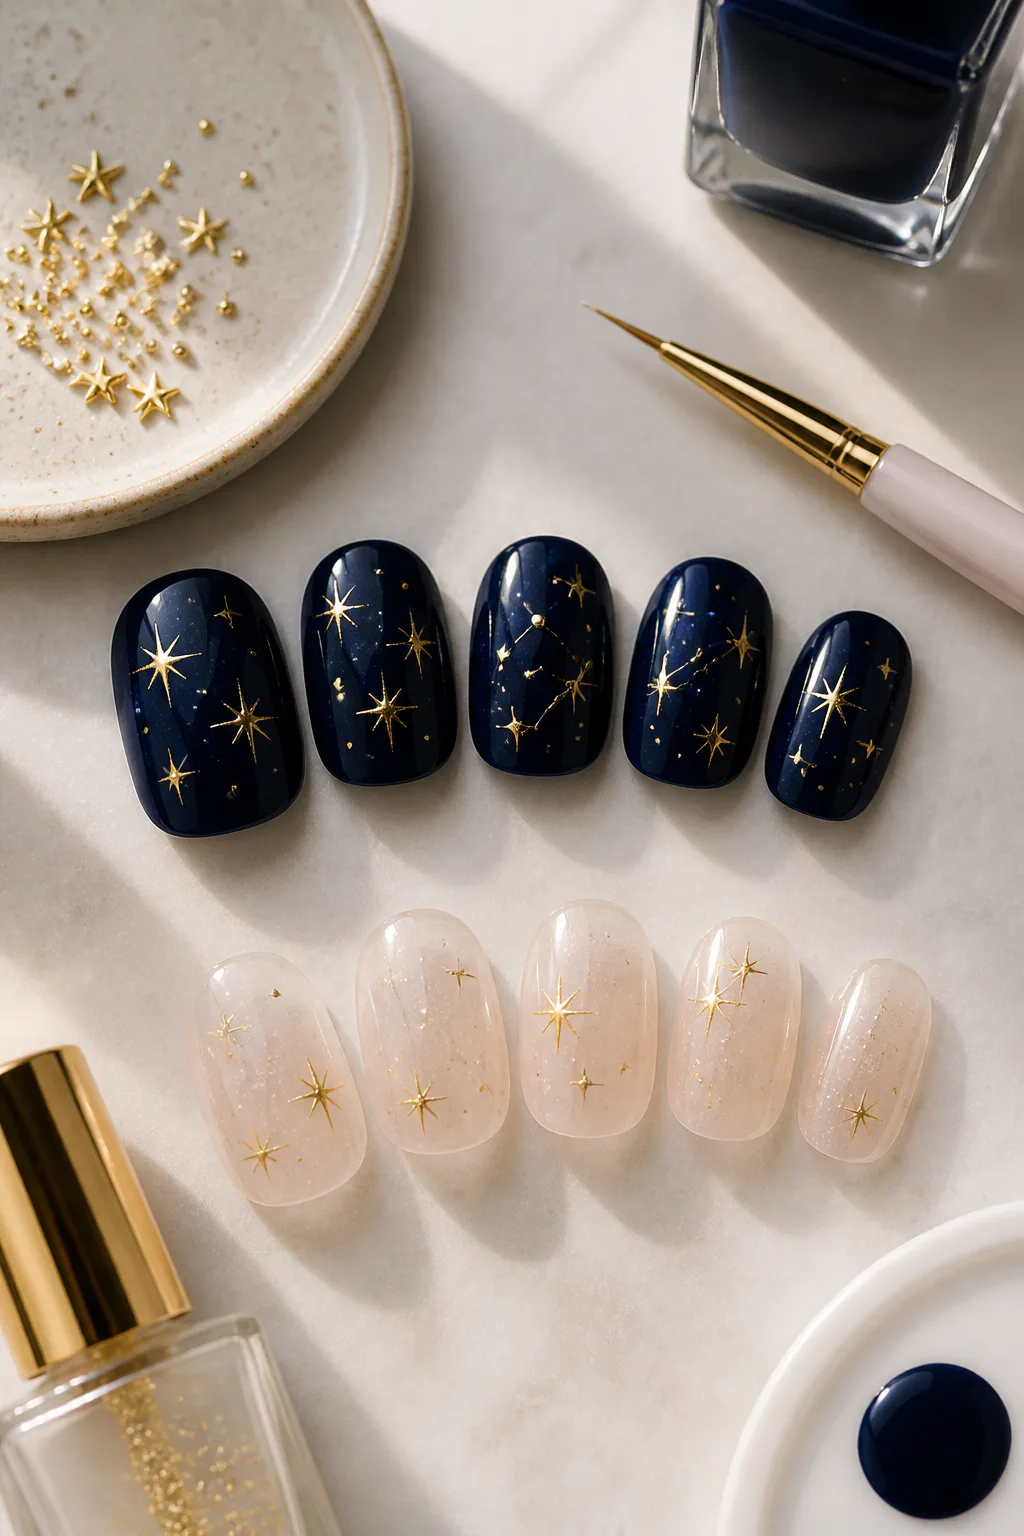
Tiny gold stars or dots scattered across the nails create a delicate constellation effect. A midnight-blue base gives the design a night-sky mood, while a sheer base makes it feel lighter and more subtle.
Short nails can carry this look beautifully when the celestial details stay small and spaced out. The pattern doesn’t need to form a precise constellation; a few starbursts and dots across each nail can suggest the same sparkling theme without crowding the surface.
Map out a light pattern
Apply your chosen base color and let it dry before adding metallic details with a fine brush or dotting tool. Vary the placement slightly from nail to nail, and leave plenty of negative space around each mark. This helps the gold details remain distinct.
- Use midnight blue for a dramatic sky-inspired base.
- Choose sheer polish for a softer, barely-there look.
- Mix small dots with a few tiny starbursts.
A glossy topcoat completes the manicure and gives the gold details a gentle gleam.
14. Mini Bow Art on Short Nails
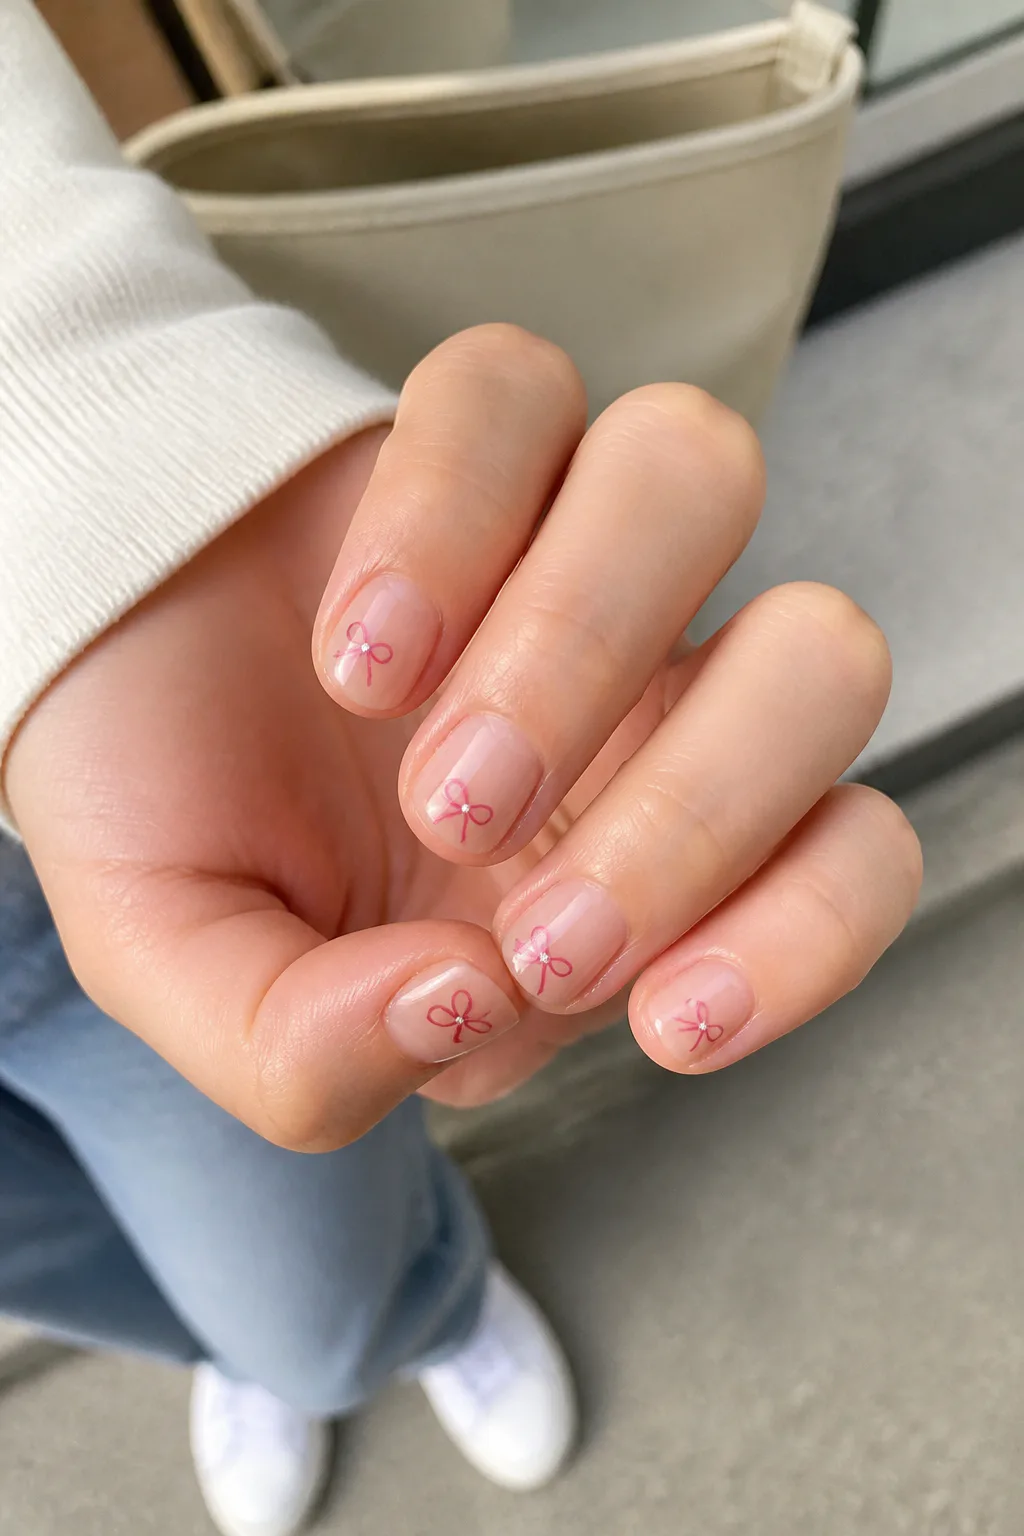
Delicate little bows add a sweet, decorative touch without needing long nails. A tiny ribbon shape can sit in the center or near one corner of the nail, leaving enough open space for the design to feel light and neat.
Mini bows look especially charming over sheer pink, nude, or pale polish. You can paint them on one or two accent nails or repeat them across the set for a more coordinated look. Keeping the lines fine helps the artwork stay in proportion to short nails.
Paint a simple ribbon shape
Start with a smooth base and use a fine liner brush to create two small loops and a short center knot. Add slim tails if you want the bow to read clearly, but avoid making the design too large. If you’re new to nail art, practice the shape on paper first.
- Choose a contrasting color so the bow is easy to see.
- Place the design at the center or near a corner.
- Use one or two accent nails for a more understated effect.
Seal the finished artwork gently with topcoat to help preserve its fine lines.
15. Velvet Cat-Eye Shimmer Nails

Magnetic cat-eye gel creates a shifting band of shimmer that gives short nails a plush, multidimensional look. As the light moves, the reflective effect changes, making a single shade feel more intricate without adding raised decorations or a busy pattern.
This finish works across many colors, from deep jewel tones to softer neutrals. On short nails, the shimmer itself provides plenty of interest, so a solid cat-eye color across the set can feel polished and complete.
Shape the shimmer before curing
Apply the magnetic gel according to its instructions, then hold the magnet near the nail to guide the reflective particles into the desired pattern. The shimmer can form a stripe or a softer, more dispersed glow. Follow the product’s curing directions to set the effect.
- Choose a shade that suits the mood you want.
- Work one nail at a time so the magnetic effect stays defined.
- Keep the rest of the design simple to showcase the shimmer.
The finish gives a short manicure noticeable depth while keeping the overall design clean.
16. Matte Forest Green Short Nails

Deep forest green feels botanical and moody, offering a rich alternative to the usual dark neutrals. A matte topcoat softens the color into a velvety finish that looks modern and distinctive on short nails.
This design works well as a solid manicure because the shade and texture provide plenty of character on their own. Rounded edges can make it feel softer, while a short square shape gives it a clean, contemporary outline. The matte effect also makes the color feel less glossy and more understated.
Finish with a velvety topcoat
Apply a base coat, then build the green shade with thin, even layers. Once the color is dry or cured, add a matte topcoat according to its instructions. Try to keep the final layer smooth, since the matte finish makes the overall surface especially noticeable.
- Choose a deep green with a muted botanical tone.
- Apply the matte topcoat evenly over each nail.
- Keep nail art minimal so the texture remains the focus.
It’s a striking but wearable way to bring a little color into a simple manicure.
Final Thoughts
Short nails offer plenty of room for personal style, from the quiet glow of milky polish to bold cherry red, rich espresso, and playful miniature art. Thin lines, small accents, and thoughtfully chosen finishes can make a manicure feel polished without relying on extra length.
Choose an idea that fits your routine, then adjust the colors or placement to make it your own. Whether you try one accent nail or commit to a full set, a little care with shaping and application can make short nails feel beautifully finished.