13 Stunning Heart Nails Ideas
Heart nails can feel playful, polished, romantic, or a little edgy depending on the colors and details you choose. From tiny red accents on a sheer base to chrome charms and pastel patterns, these ideas make the heart motif easy to tailor to your style.
Some designs work beautifully on short nails, while others benefit from extra room for patterns or raised details. Think about your preferred nail shape, how much upkeep you want, and whether you’d rather paint a simple design at home or bring a reference to your nail artist.
Use these 13 heart nail ideas as inspiration for your next set. Each one includes practical ways to adapt the look, balance its details, and make it feel wearable beyond a special occasion.
1. Glossy Red Hearts on Sheer Nude
Crisp cherry-red hearts over a milky pink or sheer nude base are a timeless way to wear heart nails. The translucent background keeps the manicure light, while the saturated red gives each tiny motif a clean, eye-catching finish.
This design suits nearly any nail length and shape, from short rounded nails to long almond tips. You can place one heart on each nail for a coordinated look or keep the art to a few accent nails for an especially subtle result.
How to pull it off
Start with a smooth, sheer base and let it dry fully before adding the hearts. A dotting tool or the rounded end of a fine brush can help create two lobes; draw the pointed base with a detail brush, then fill and refine the shape.
- Choose cherry red for a classic contrast or a softer red for a delicate effect.
- Keep hearts small and similar in size for a tidy, balanced set.
- Space motifs away from the sidewalls so they stay distinct.
- Finish with a glossy topcoat to smooth and protect the design.
2. Red Heart French Tips
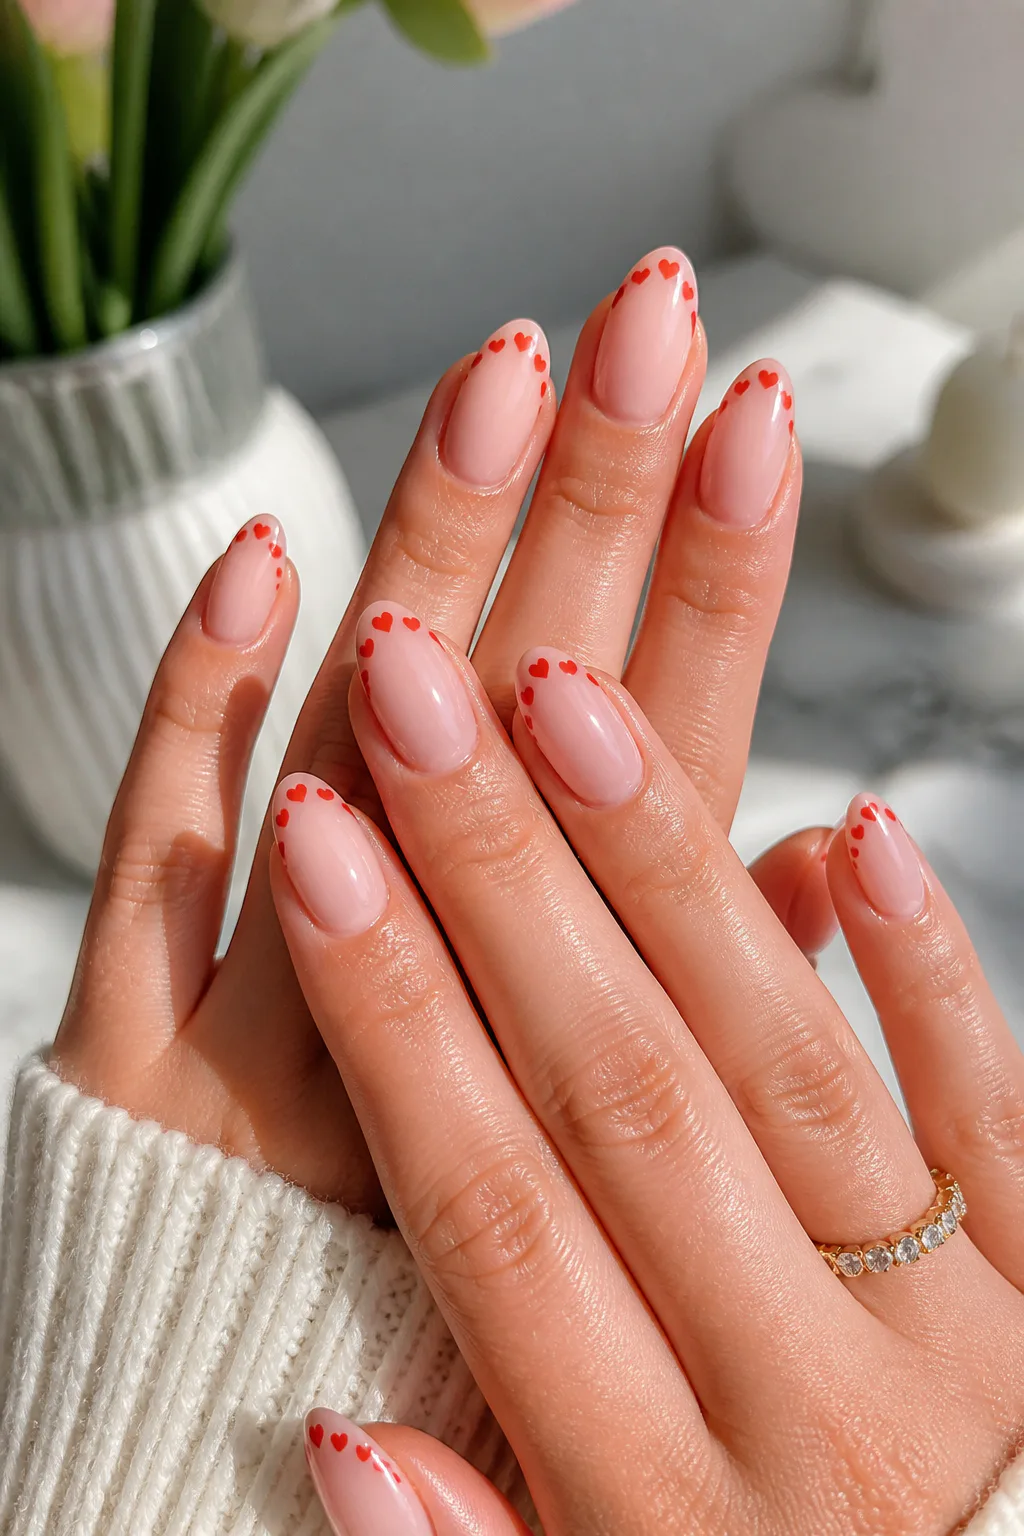
For a playful twist on a French manicure, trace the tip area with a row of tiny red hearts instead of a solid white smile line. The repeating motif creates a decorative edge while leaving most of the nail clean and understated.
Almond and oval shapes naturally echo the curve of a French tip, making them especially suited to this look. On shorter nails, use fewer hearts or scale them down so the pattern follows the nail’s edge without crowding the base.
Design tips
Map the smile line first, then place the hearts along its curve at even intervals. A sheer pink or nude base helps the red details stand out, and a fine brush makes it easier to keep the tips delicate rather than bulky.
- Use a consistent heart size across each nail.
- Follow the natural curve of the free edge for a polished finish.
- Try a single heart at the center of each tip for a simpler version.
- Ask your nail artist to keep the red line thin if you want a subtle effect.
The result feels like a French manicure with a sweet, graphic detail—easy to dress up or wear every day.
3. Chrome Nails with Puffed Silver Hearts

A glazed chrome base paired with raised silver heart charms brings shine and dimension to a heart manicure. The reflective finish catches the light, while the puffy hearts add a sculptural accent that feels more like jewelry than painted nail art.
Because both the base and embellishments are eye-catching, this design often works best with a few statement nails rather than a charm on every finger. Ring fingers make a natural focal point, while a neutral chrome across the remaining nails keeps the set cohesive.
Things to consider
Raised embellishments can catch on clothing or hair, so placement and secure application matter. A salon artist can attach charms with suitable nail adhesive or builder gel and seal around the edges without covering the metallic surface.
- Choose a pearly, silver, or neutral glazed base for a coordinated look.
- Use one or two accent nails to keep the design comfortable.
- Place charms near the center of the nail, away from the cuticle and sidewalls.
- Ask for a smooth, secure finish around each charm.
This is a lovely option when you want heart nails with a bold, dimensional finish.
4. Y2K Checkerboard and Pixel Hearts

Pastel checkerboard patterns and playful pixel-style hearts bring a nostalgic Y2K feel to a manicure. The mix of small squares and chunky hearts gives the nails an energetic, hand-drawn character that feels less formal than classic heart art.
Pink and sage green make a soft pairing, but you can adjust the palette to suit your wardrobe. Checkerboard works well on one or two nails, while the remaining nails can feature puffy hearts, tiny graphic marks, or a simple pastel base to give the design room to breathe.
How to balance the pattern
Because checkerboard lines and pixel hearts both have strong shapes, keep the color palette limited and repeat a few shades throughout the set. A fine liner brush or nail-art stickers can help create more even squares, especially on smaller nails.
- Alternate patterned nails with simpler heart accent nails.
- Use two main pastel shades plus a neutral background.
- Keep checkerboard squares small on short nails.
- Try a bold, blocky heart for a playful nod to early digital graphics.
The finished set feels fun and expressive without needing every nail to carry the same pattern.
5. Black Nails with Cherry Hearts
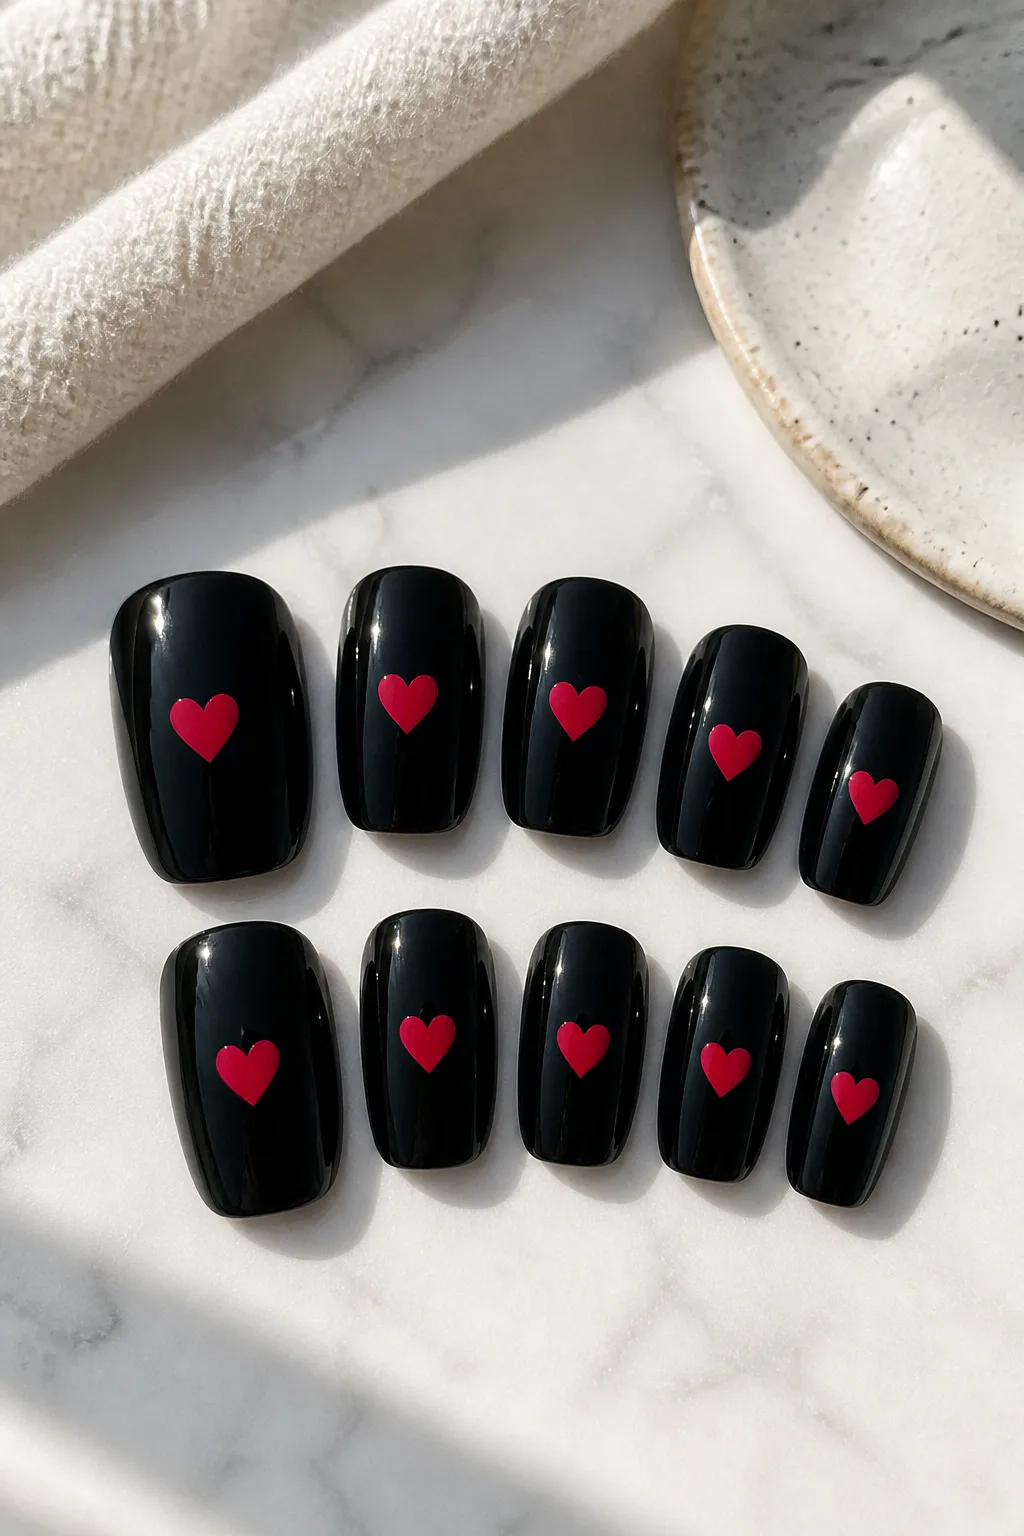
Bright cherry-red or hot-pink hearts stand out sharply against jet-black or deep espresso polish. This high-contrast pairing gives a familiar romantic motif a moodier edge, making it a good fit if you like dark manicures but still want a small pop of color.
Keep the hearts tiny for a subtle detail or make one or two larger motifs the focus. A glossy black base brings out the richness of the color, while a matte finish can make the hearts feel even brighter by contrast.
Ways to style it
Plan the placement before painting so the hearts look intentional rather than scattered at random. On short nails, one small heart near the center or cuticle is often enough; longer nails offer more room for multiple motifs or a tiny repeating pattern.
- Pair black with cherry red for a classic graphic contrast.
- Choose hot pink for a brighter, more playful version.
- Use accent hearts on a few nails if a full set feels too bold.
- Apply a glossy topcoat to deepen the dark base and seal the art.
This design is an easy way to make heart nails feel dramatic while keeping the artwork simple.
6. Tortoiseshell Nails with Gold Hearts

Tortoiseshell print brings warm amber, brown, and dark caramel tones to a manicure, while small gold hearts add a polished decorative touch. Pairing the print with solid nude or warm-toned nails keeps the set balanced and lets each detail stand out.
Rather than placing tortoiseshell on every nail, use it as an accent on one or two fingers. The remaining nails can carry a sheer beige base, a soft amber shade, or a metallic gold heart for a coordinated look that feels warm instead of busy.
How to create a cohesive set
Tortoiseshell art is built from layered translucent patches, so the colors look richer when they overlap rather than forming a uniform pattern. A nail artist can create the effect with thin layers; at home, decals can be a practical alternative to hand-painting.
- Choose warm nude, caramel, or amber shades to echo the print.
- Place gold hearts on solid-color nails for clear contrast.
- Keep metallic details small so they complement the tortoiseshell.
- Repeat one color across the set to connect the different designs.
The combination is especially suited to anyone who wants a heart manicure with a cozy, refined feel.
7. Milky White Nails with Pastel Hearts

A milky-white base makes tiny pastel hearts feel airy and cheerful. Mint, butter yellow, lavender, and baby blue add color without overwhelming the clean background, so the design can feel sweet while staying light and wearable.
Scatter the hearts across each nail for a confetti-like effect, or place one or two motifs on select fingers for a calmer finish. The translucent quality of a milky polish softens the overall look and pairs nicely with both short natural nails and longer shapes.
Tips for an even finish
Use a very small brush or dotting tool to keep the hearts neat, and vary the colors while keeping their size consistent. If you’re painting the design yourself, work one shade at a time and allow each color to dry before adding a topcoat.
- Choose three or four pastel shades that look harmonious together.
- Leave visible white space between motifs so the design stays fresh.
- Use fewer hearts on short nails to avoid a crowded effect.
- Apply a glossy topcoat for a smooth, glassy finish.
This is a versatile choice for anyone who wants colorful heart nails with a soft, understated base.
8. Airbrushed Aura Heart Nails
Aura nails use a diffused wash of color to create a soft glow, often centered on the nail. Layering a crisp heart over a pink or red aura adds a clear focal point to the hazy background, blending dreamy color with graphic detail.
The heart can be white for a bright, clean contrast or a deeper red for a tonal effect. This design works on a range of nail lengths, though a little extra surface area can make the gradient and heart easier to see together.
How to build the look
The gradient should be soft-edged rather than sharply divided, so the aura and heart feel connected. A nail artist can airbrush the color, while a sponge can help create a similar diffused effect at home; add the heart only once the gradient is dry.
- Use a pale neutral base to help the aura glow show through.
- Choose a pink or red center that contrasts with the heart outline.
- Keep the heart crisp and simple over the softer background.
- Repeat the aura shade across the set for a coordinated finish.
The contrast between blurred color and sharp linework gives this manicure its distinctive, modern look.
9. Negative-Space Outline Hearts
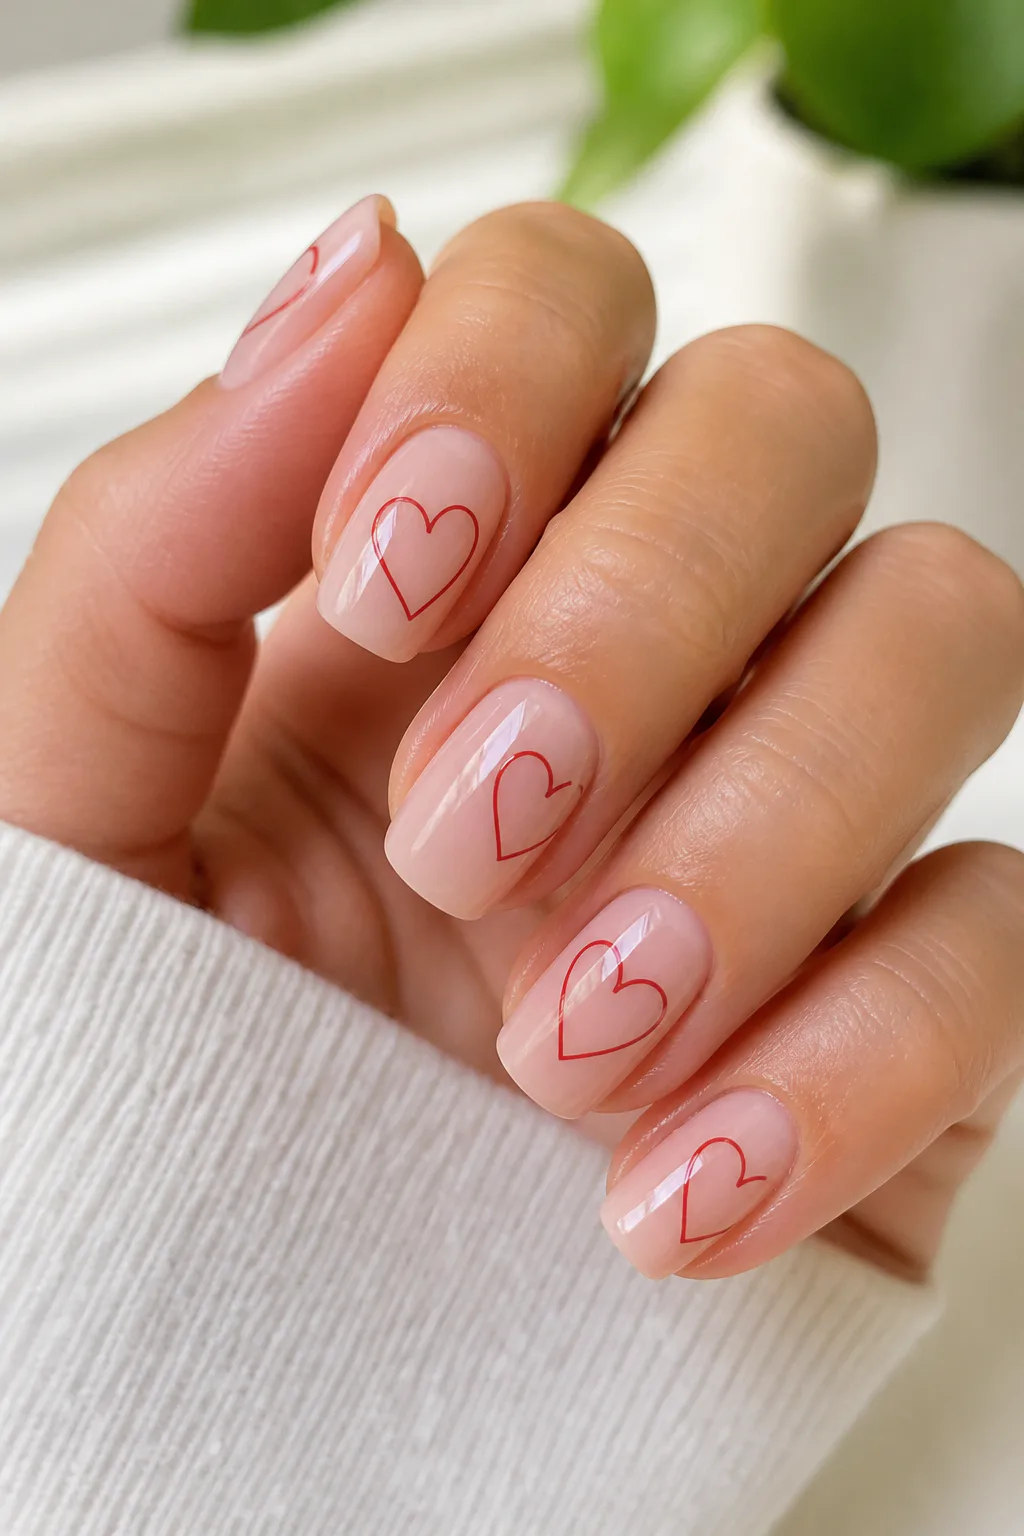
Negative-space heart nails leave much of the nail bare or sheer and use delicate outlines to define the motif. The open background keeps the design light, while the drawn heart adds a romantic detail without covering the whole nail in color.
Try a single outline on each nail or vary the placement for a more relaxed, hand-drawn feel. Sheer pink, clear polish, or a natural-looking base all work well, making this an especially adaptable idea for shorter nails and understated styles.
Keep the lines clean
A fine liner brush is useful for creating a smooth outline, especially around the heart’s curves and pointed base. If symmetry is important to you, ask your nail artist to sketch the shape first; slightly imperfect lines can also give the manicure a charming handmade quality.
- Choose a contrasting polish such as red, white, or black.
- Keep outlines thin so the open space remains the focus.
- Place hearts at the center, near the tip, or along one side.
- Use a sheer base coat to even the nail without hiding it.
This pared-back approach makes the heart motif feel subtle, graphic, and easy to wear.
10. Cow Print Tips with Pink Hearts

Cow-print French tips combine a playful animal pattern with a classic nail shape, and baby-pink hearts add a soft counterpoint. Choose brown and white for a warm, natural palette or black and white for a sharper, more graphic look.
Keeping the print at the tips leaves the nail bed relatively simple and helps the pattern feel intentional. Pink hearts can sit on a plain accent nail or appear as tiny details near the patterned edge, depending on how much contrast you want.
Make the mix feel balanced
Cow-print spots look most natural when they vary in shape and size rather than forming a regular pattern. If painting them at home, use a fine brush to add irregular dark patches over a light base, then leave enough open space for the pink heart accent.
- Pick one cow-print palette and repeat it across the tips.
- Use one or two pink hearts rather than adding them everywhere.
- Keep the tip pattern narrow on shorter nails.
- Choose a sheer nude base to connect the design to a French manicure.
The contrast makes this a fun choice when you want a manicure that feels sweet but not overly delicate.
11. Pastel Gingham and Sweetheart Nails
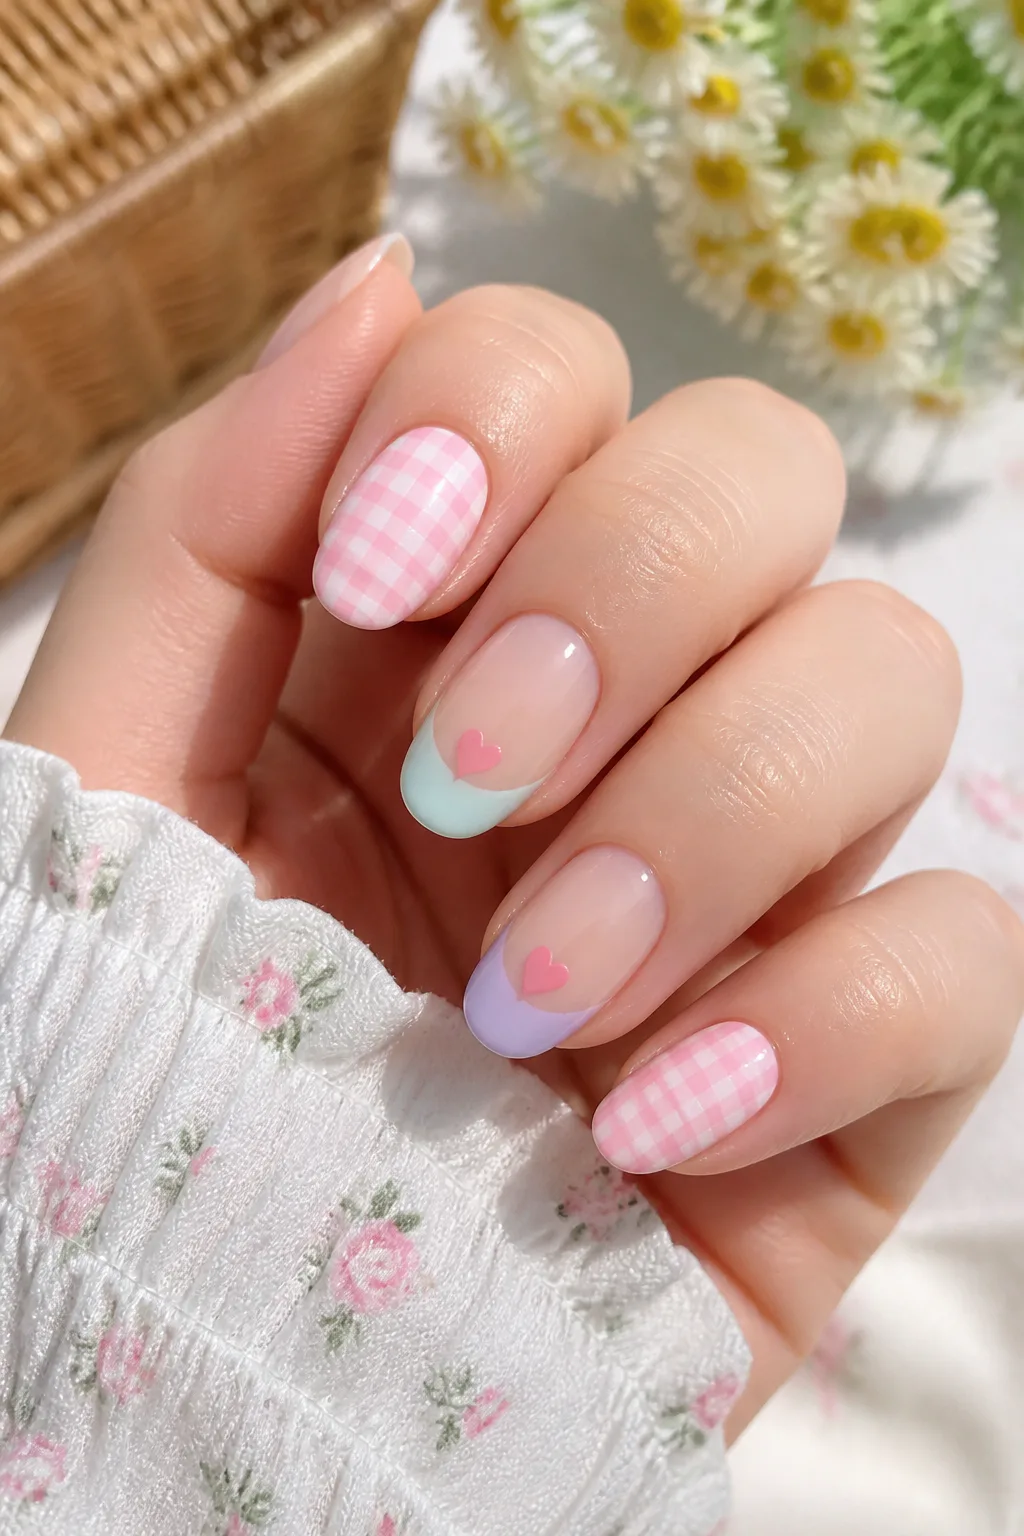
Pink-and-white gingham brings a soft, picnic-inspired pattern to a manicure, while pastel tips with a single heart give the set a coordinated finish. Alternating the two designs creates variety without making every nail compete for attention.
This look suits a gentle palette of pink, lilac, mint, or pale blue. Gingham can cover one or two nails, while the others carry a solid pastel tip or a simple heart accent over a sheer base. The result feels charming and orderly.
Plan the pattern
Gingham is made from crossing lines, so even spacing helps it read clearly. If you’re doing the manicure yourself, keep the grid simple and use a light base; a stamping plate or nail decals can make the checks more consistent.
- Repeat one pastel shade across both the checks and tips.
- Place a single heart at the center of each pastel tip.
- Use gingham on accent nails to keep the pattern from feeling busy.
- Choose a glossy topcoat to smooth the layered design.
The mix of tidy checks and simple hearts gives this set a sweet, coordinated look.
12. Coquette Bows and Double-Line Hearts

Tiny ribbon bows and stacked heart outlines bring a delicate, coquette-inspired feel to a manicure. The doubled lines give the hearts a little extra detail, while the bow motif adds a decorative accent without relying on bold color or large patterns.
A sheer pink, milky nude, or pale blush base helps the fine artwork remain visible. You can place bows and hearts on alternating nails, or keep both details to a couple of accent fingers for a lighter, more minimal version.
Keep the details delicate
Use a fine liner brush for the double outlines and a small dotting tool or brush for the bow loops. Allow the first lines to dry before adding the second outline, and avoid placing too many motifs close together, especially on shorter nails.
- Choose a soft base color that complements the line-art shade.
- Vary the bow and heart placement across the set.
- Keep the outlines thin to preserve the airy effect.
- Seal the design with a high-shine topcoat for a smooth finish.
The result feels romantic and detailed while remaining light enough for everyday wear.
13. Rhinestone Micro-Heart Nails

Clusters of tiny crystals or 3D rhinestones can be arranged into heart shapes near the cuticle, creating a sparkling accent that resembles delicate jewelry. A sheer, nude, or milky base helps the gems stand out without competing with the shine.
Because raised embellishments add texture, a little restraint usually makes the design more comfortable and wearable. One or two jeweled accent nails can provide plenty of sparkle, while the rest of the set stays simple with a coordinating glossy polish.
Placement and wear
Ask your nail artist to secure each stone carefully and smooth the product around its base. Keeping the cluster away from the cuticle edge can help prevent irritation, and a simpler placement may be easier to maintain if you use your hands frequently.
- Choose small crystals so the heart shape stays delicate.
- Use a neutral base to keep the set looking cohesive.
- Place gems on accent nails rather than every finger.
- Avoid picking at or pulling on the stones as they grow out.
This idea is a pretty choice for a special occasion or whenever you want your heart nails to catch the light.
Final Thoughts
Heart nails can be as subtle as a tiny red motif on sheer nude polish or as expressive as chrome charms, gingham, and rhinestones. Choosing a color palette and deciding how much of the nail to decorate are simple ways to make any of these ideas feel like your own.
Before your next manicure, consider your nail length, shape, and everyday routine. Save the designs you like, then adapt the details with your nail artist or try a simpler version at home—the best set is one that feels fun to wear.