14 Stunning 1980s Nails Ideas for a Bold Retro Manicure
1980s nails are all about confident color, graphic shapes, and playful details that don’t take themselves too seriously. From neon French tips to tiny cassette illustrations, these retro manicure ideas bring the era’s energetic style into a modern look.
This collection includes options for different moods and skill levels, whether you want one bright accent nail or a full set of maximalist patterns. Some designs rely on simple color blocking, while others use fine lines, gradients, or miniature art.
Use these ideas as inspiration for a DIY manicure or as a reference to take to your nail artist. You can adapt the colors, patterns, and placement to suit short natural nails, extensions, or anything in between.
1. Neon French Tips
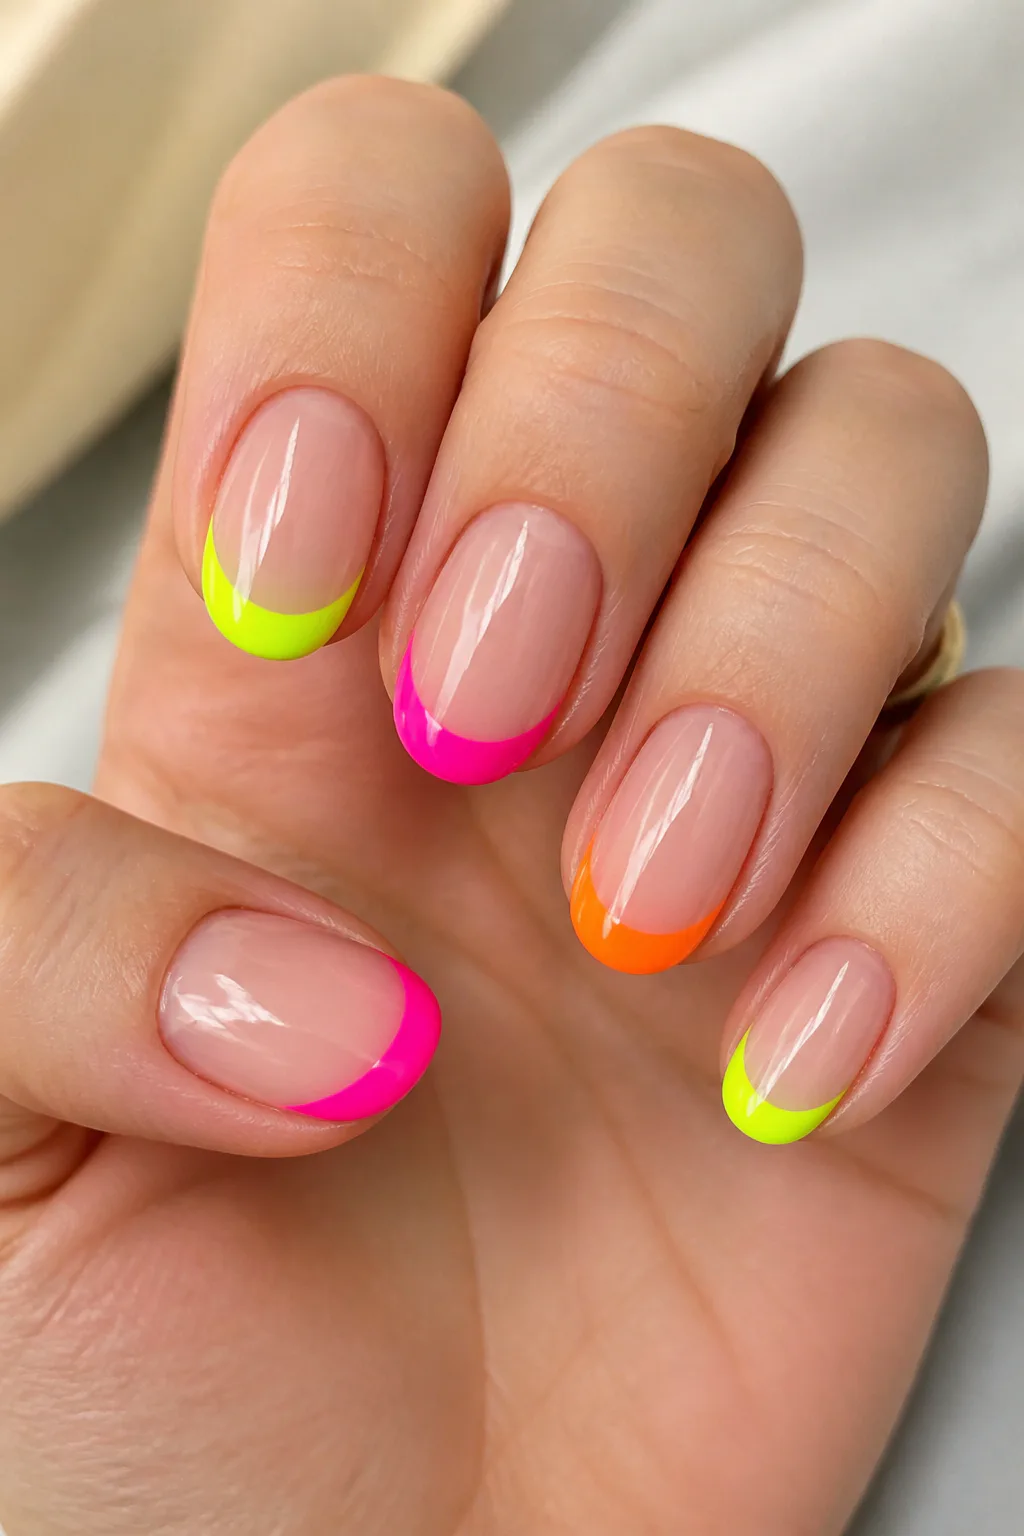
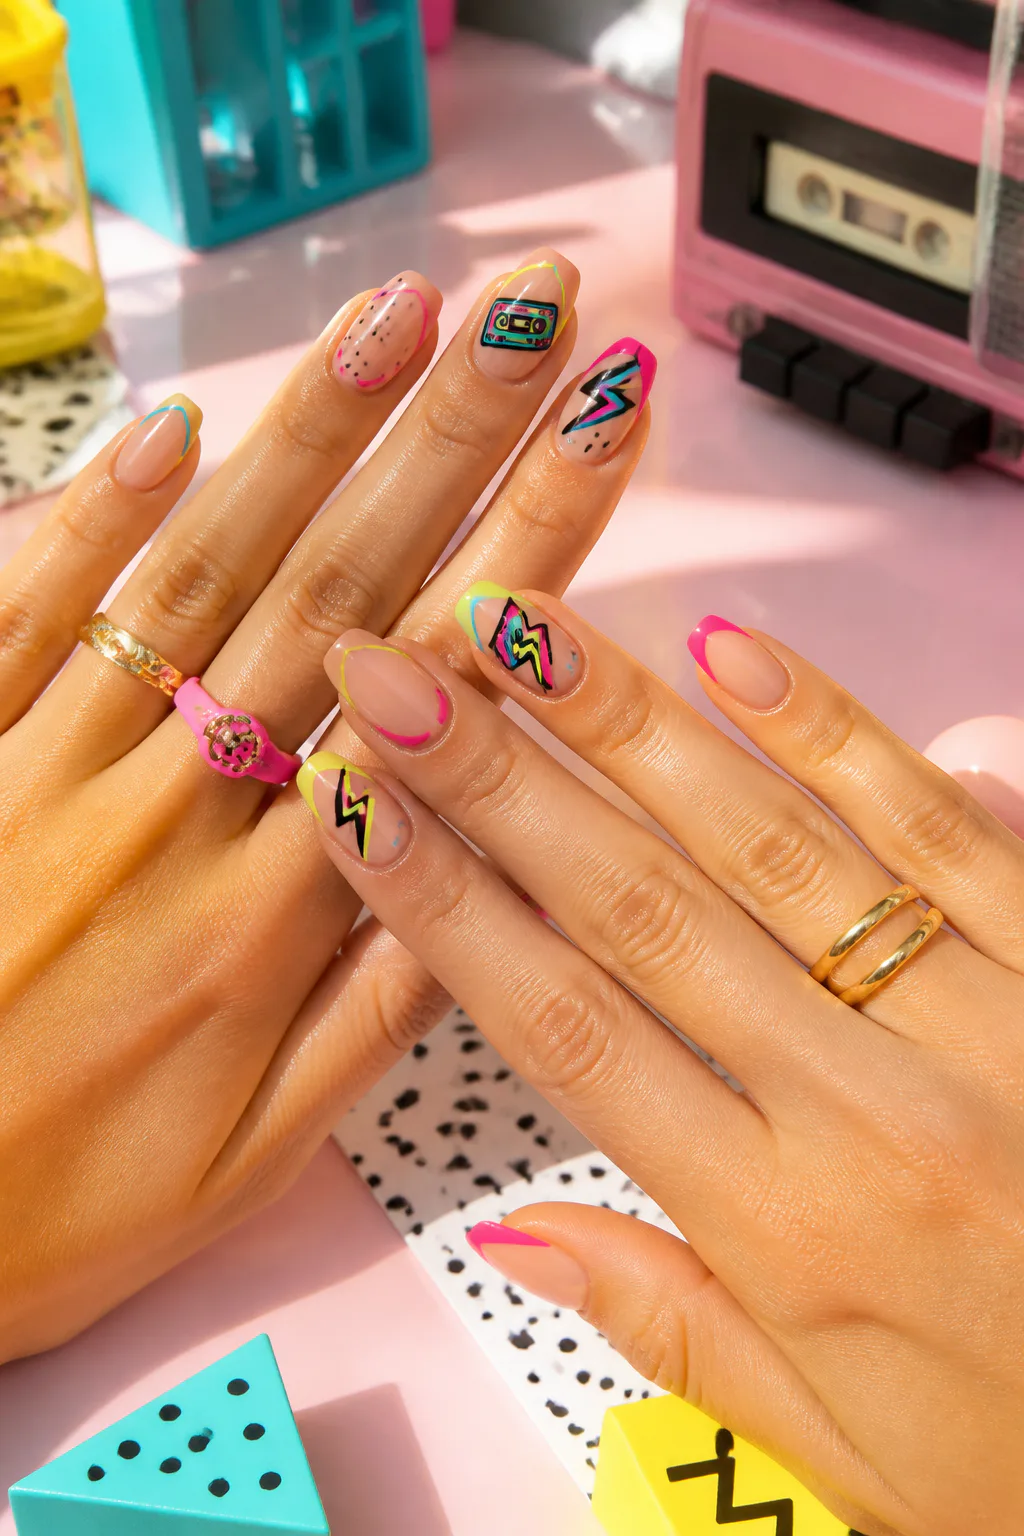
Give the classic French manicure an unmistakably retro twist by swapping the usual white tips for electric lime, hot pink, or tangerine. A sheer nude or soft pink base keeps the look familiar, while the saturated edge adds the playful color that makes 1980s nails feel so lively.
This design works especially well when you want a bright manicure that still leaves plenty of breathing room. Try a single neon shade across every nail for a clean finish, or use a different color on each tip for a more exuberant, color-blocked effect.
How to pull it off
Start with a smooth, neutral base and let it dry fully before shaping the tips. A fine brush or French-tip guide can help create a crisp curve, though a deliberately angled or wavy tip feels more graphic and relaxed.
- Pair lime tips with a milky nude base for sharp contrast.
- Choose pink or orange for a warmer, playful take.
- Keep the tips narrow on short nails, or make them bolder on longer shapes.
A glossy top coat pulls the colors together and makes the simple design feel polished rather than understated.
2. Lisa Frank Rainbow Nails
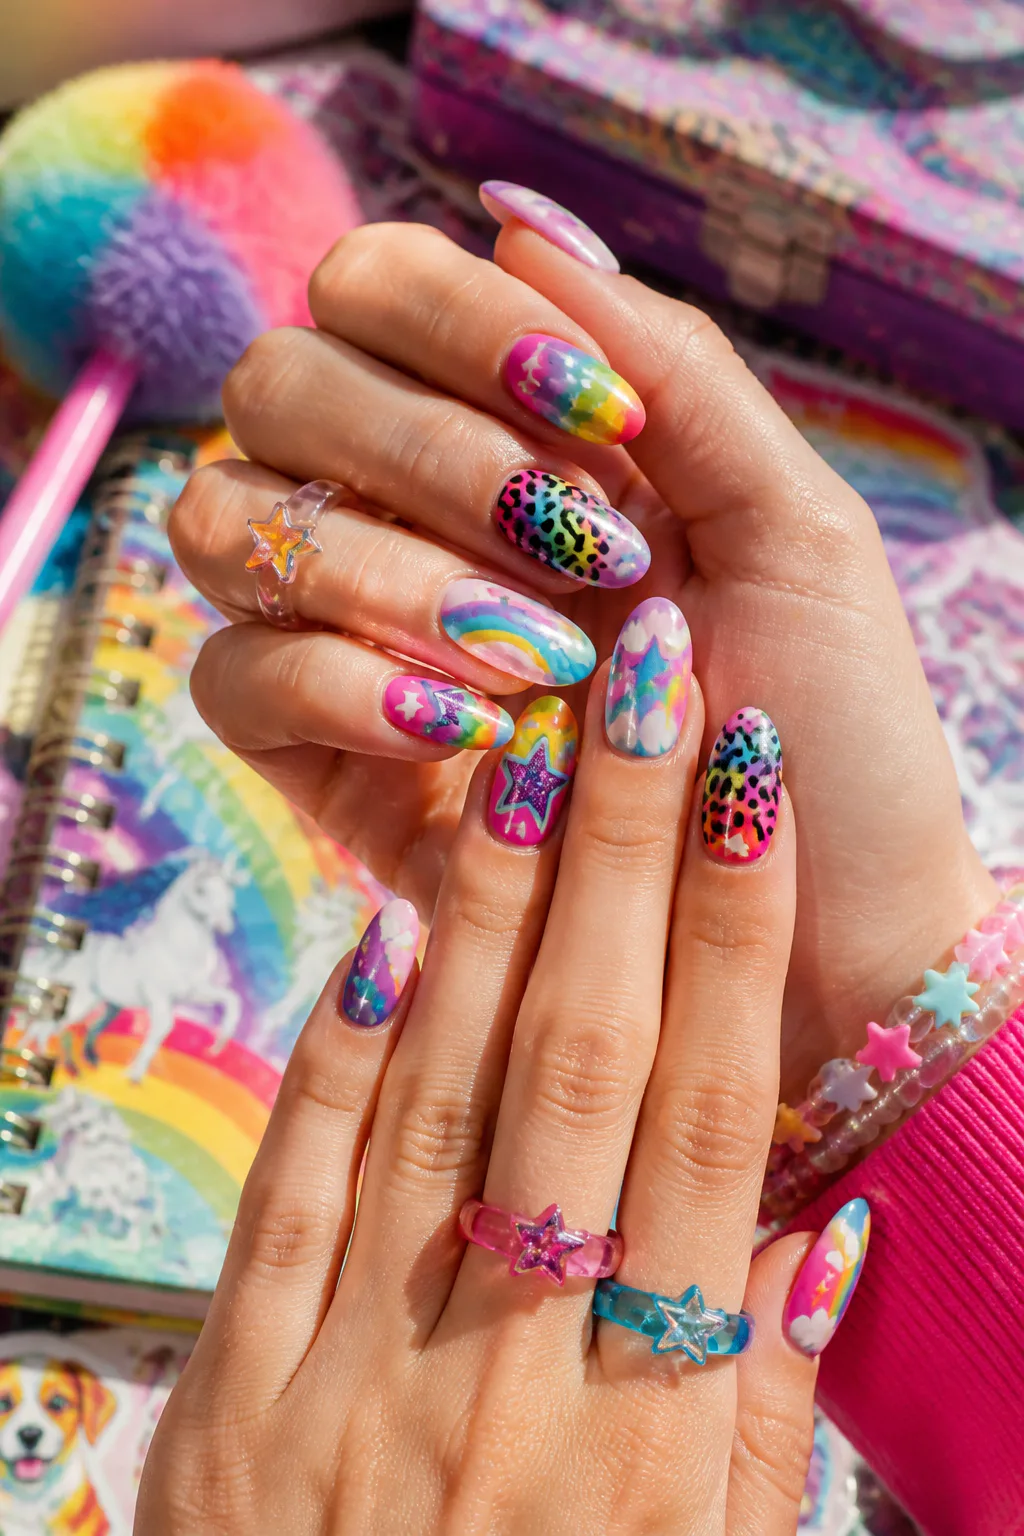
For a manicure that leans into the most whimsical side of the decade, combine vivid rainbow color with cheerful little details. Saturated gradients, tiny stars, fluffy clouds, and animal-print accents can all share the same set, giving each nail its own colorful personality.
The trick is to use a repeated palette so the designs feel connected, even when the motifs vary. A rainbow fade can anchor the look, while one or two accent nails carry the extra details. This idea suits anyone who wants a joyful, maximalist manicure that feels like a tiny collection of stickers.
Design tips
Build the color first, then add small decorations once the base is dry. Fine brushes or dotting tools help with simple stars and dots; decals are another option when detailed hand painting feels tricky.
- Blend adjacent rainbow shades for a soft gradient.
- Use white clouds or stars to create contrast over saturated color.
- Limit animal print to an accent nail so the set stays readable.
Keep the colors bright and the details playful, rather than trying to make every nail identical.
3. Memphis Design Geometric Nails
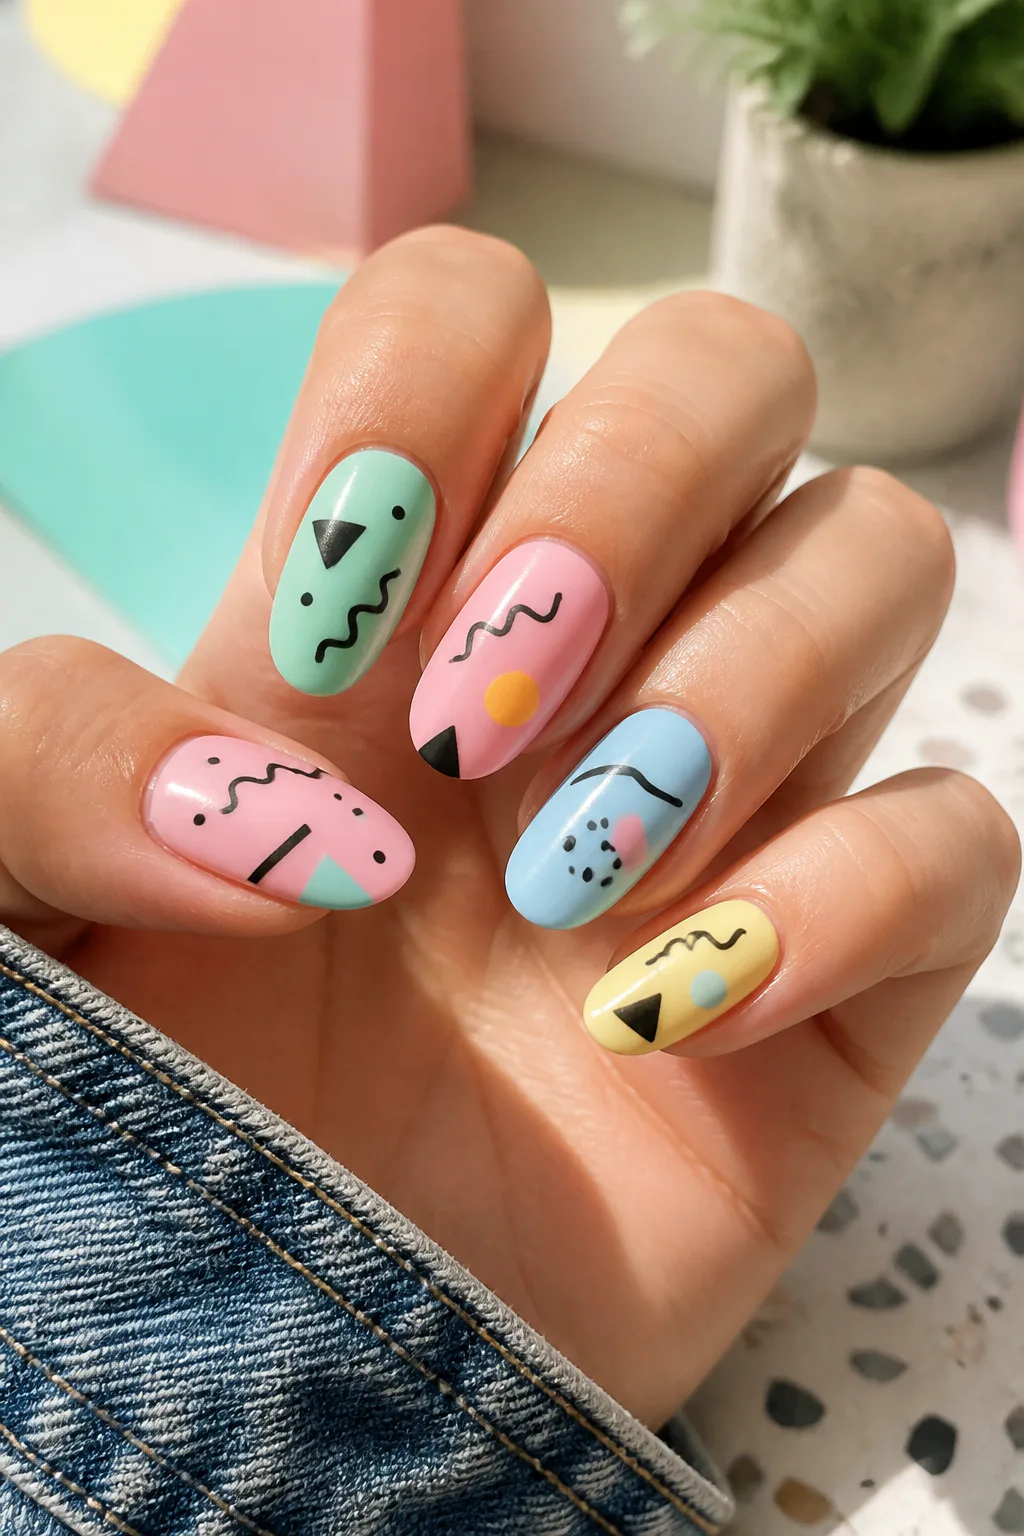
Memphis-inspired nails bring graphic, artful energy to a manicure through pastel backgrounds and scattered shapes. Think soft pink, mint, or pale blue paired with black squiggles, triangles, and dots. The mix of tidy geometry and loose marks creates a playful pattern that feels retro without depending on neon.
This design can be especially effective when you want color and personality but prefer a slightly softer palette. Use the shapes across every nail for a coordinated pattern, or vary their placement so the set looks like a collection of small abstract compositions.
How to pull it off
Choose two or three background shades, then add a few contrasting motifs rather than filling every open space. A fine liner brush works for squiggles, while a dotting tool or the tip of a toothpick can make dots and small triangles.
- Try a different pastel base on each nail.
- Use black lines to make the shapes stand out clearly.
- Leave some open space so the pattern doesn’t feel crowded.
A glossy finish emphasizes the colors, while a matte top coat gives the design a more graphic, printed look.
4. Hot Pink and Silver Sparkle
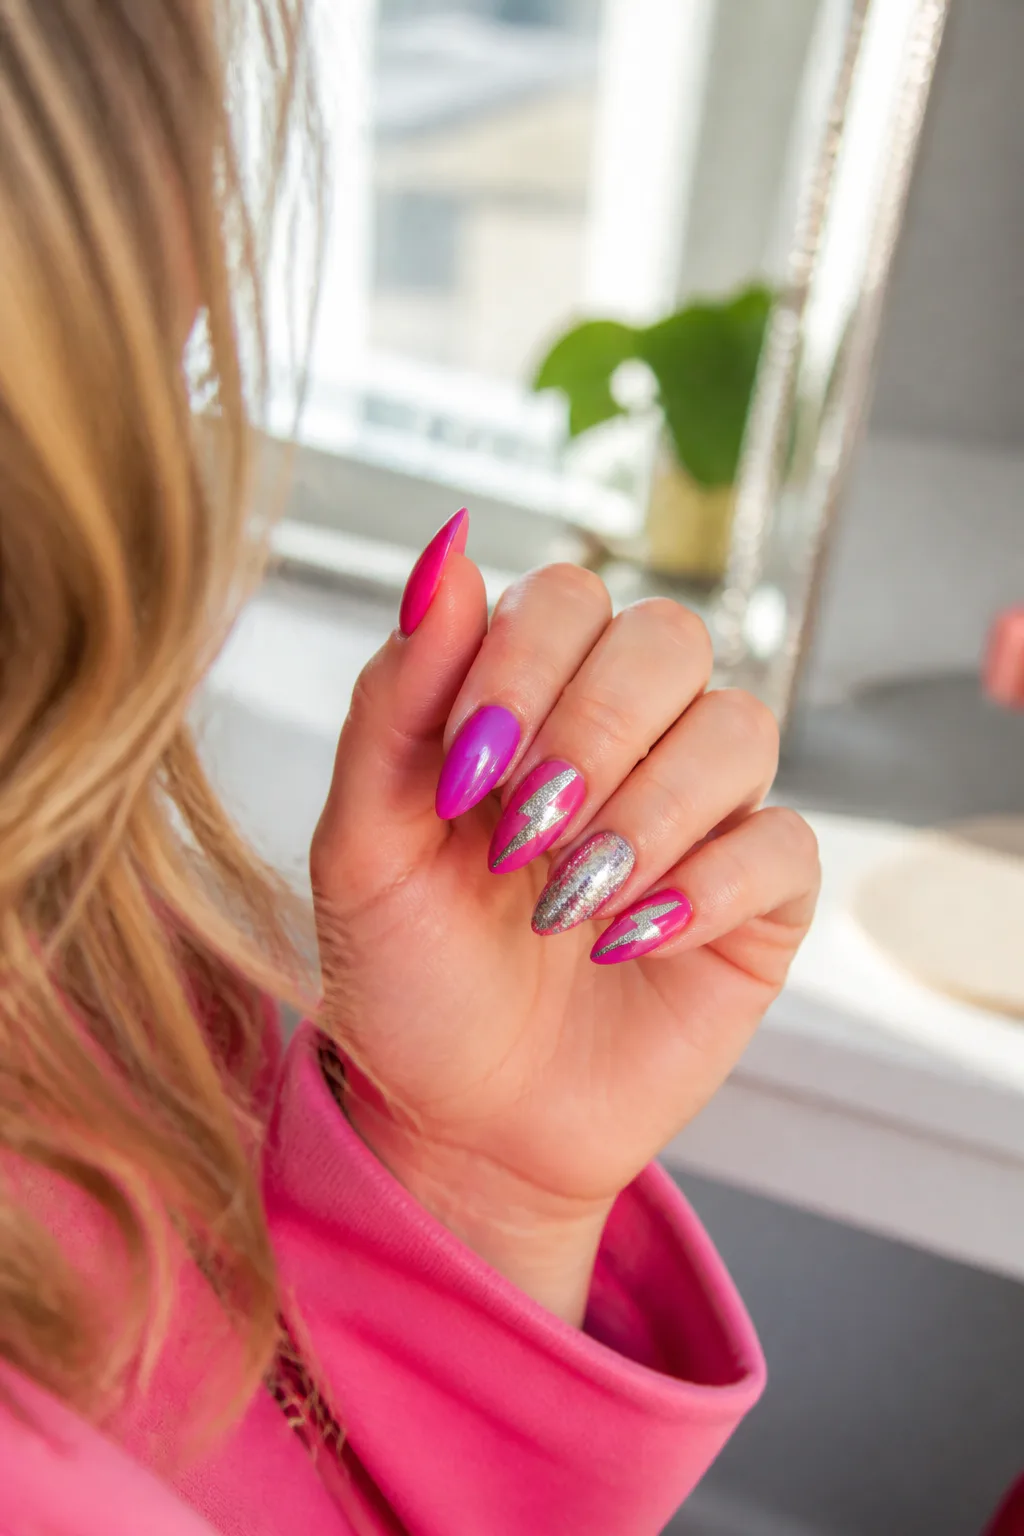
Hot pink and silver make a high-impact pairing that feels right at home in an 1980s-inspired manicure. Vivid magenta polish provides a saturated base, while chunky silver glitter adds texture and shine. If you prefer a cleaner detail, silver chrome lightning bolts offer a sharp, energetic accent.
There are plenty of ways to balance the two finishes. Paint every nail pink and reserve glitter for one or two accents, or alternate solid magenta with full-sparkle nails for a bolder party-ready set. The contrast works across different nail lengths, though longer nails give more room for graphic metallic shapes.
Ways to wear the pairing
Choose the layout according to how much shimmer you want. Glitter can be concentrated near the tips or cuticles, while metallic line art looks striking against a flat pink background.
- Use silver glitter on accent nails to keep the look balanced.
- Add a lightning bolt in chrome for a crisp retro detail.
- Layer glitter gradually for a fade instead of full coverage.
Finish with a smooth top coat to help the glitter feel comfortable and bring extra gloss to the magenta.
5. Cassette Tape and Boombox Art
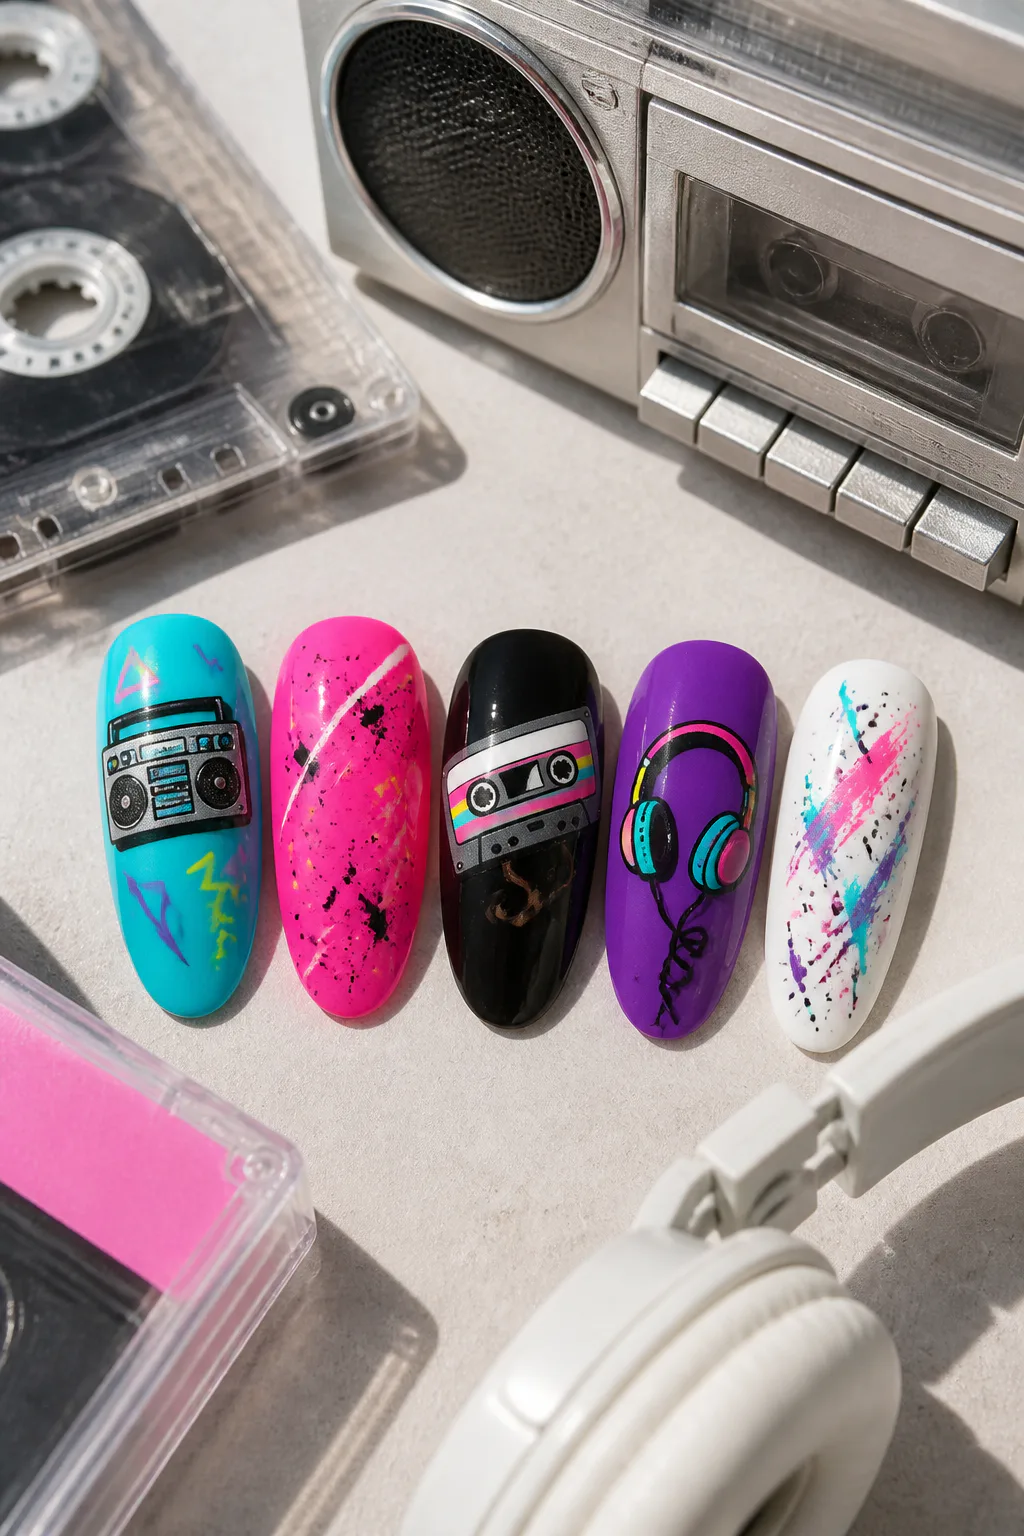
Turn your manicure into a little tribute to music and mixtapes with miniature cassette, headphone, or boombox designs. These nostalgic motifs look especially clear on an accent nail with a dark or neon background, where the tiny outlines can stand out from a distance.
Because small illustrations need room to read, this idea is often easiest on longer nails or a couple of feature nails. Keep the other nails in coordinating solid colors or simple stripes so the detailed artwork gets attention without making the entire set feel busy.
Making the details work
Hand painting gives the art a personal, slightly imperfect feel, while decals can make intricate shapes easier to apply. If painting, sketch the largest outline first and add small details only after the main shape is dry.
- Use a black or deep-purple accent base for contrast.
- Add simple tape-window lines rather than tiny lettering.
- Repeat one bright color across the other nails to tie in the art.
A few well-placed music motifs can evoke the era more effectively than trying to fit a different illustration on every nail.
6. Electric Zigzag Nails
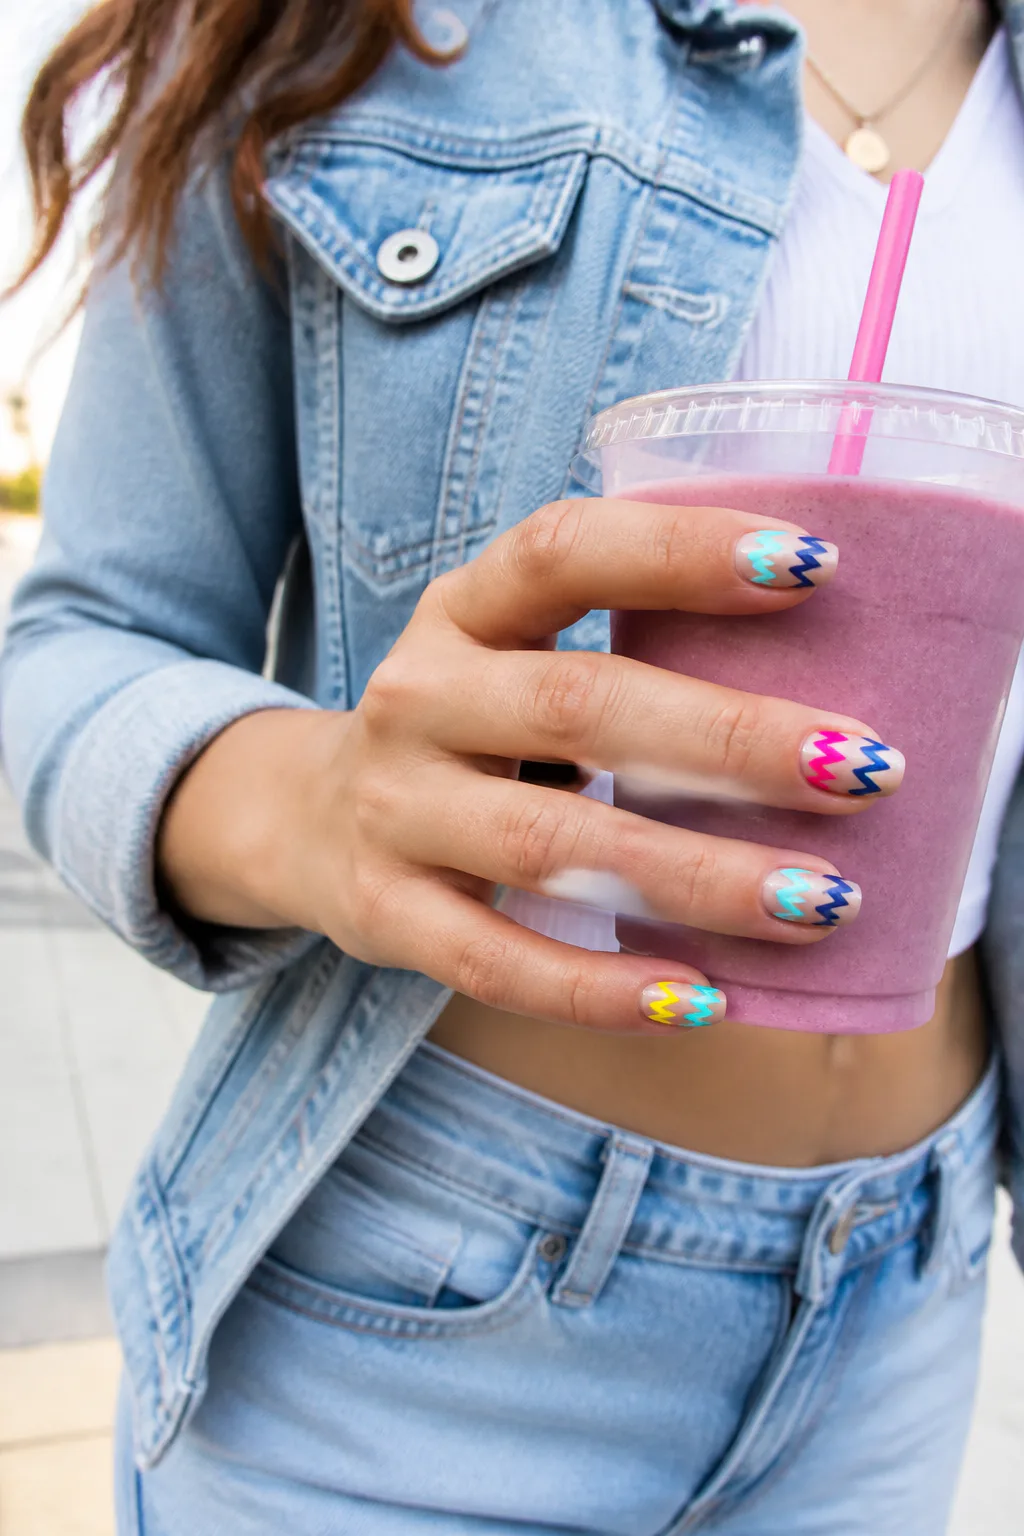
Sharp zigzag lines bring movement to a manicure and make even a simple palette feel energetic. Run contrasting chevrons horizontally across the nail, or stretch them vertically for a look that emphasizes length. Layering several bright shades creates a bold, graphic pattern with a distinctly retro mood.
Long almond and square shapes offer generous space for repeating lines, but shorter nails can carry a simplified version with one or two chevrons. You can use a nude or pale base to make the pattern the focus, or start with a bright background for an even more colorful result.
Tips for crisp chevrons
Let each stripe dry before adding the next so the colors stay distinct. Nail tape can help map straight edges, but a fine brush is useful for a more hand-drawn look that feels playful rather than perfectly uniform.
- Pair two contrasting shades for an easy starting point.
- Use three or four colors for a more maximalist pattern.
- Keep the lines consistent in width for a tidy finish.
Glossy top coat adds depth and helps the layered colors look like one cohesive design.
7. Pop-Art Comic Nails
Bright yellow or cyan, bold black dots, and action-bubble details give this manicure the look of a comic-book panel. The contrast makes the design easy to notice, while the halftone effect adds texture without needing elaborate illustration on every nail.
Use one nail for a speech or action bubble and repeat the dotted pattern across the rest of the set. Words such as “POW!” or “BAM!” can add a playful comic touch, but the look still works with dots and outlines alone if you want to avoid lettering.
Building the comic effect
Start with a bright, opaque background and allow it to dry completely. Add black dots in a regular cluster or fade them toward one edge, then outline an accent bubble with a fine brush for a clear graphic focal point.
- Choose yellow or cyan as the main background shade.
- Vary dot size to create a more dynamic halftone look.
- Keep lettering short and bold so it remains legible.
This style is a fun choice when you want a manicure that feels expressive, graphic, and a little tongue-in-cheek.
8. Miami Vice Pastel Sunset Nails

Soft pink, mint, and baby blue create a pastel sunset palette that feels both relaxed and unmistakably retro. Blend the shades into a gradient for a dreamy horizon effect, then add tiny palm-tree silhouettes or fine black lines inspired by architectural details.
This design offers a gentler alternative to all-over neon while still capturing the color and visual drama of the decade. It works on a full set of gradient nails or as a feature design on one or two fingers, with the remaining nails painted in a coordinating pastel.
Creating the sunset look
Apply the pastel colors in adjacent bands and blend their edges while the polish is still workable, or use a makeup sponge to soften the transition. Let the gradient dry before adding dark details so the silhouettes remain crisp.
- Blend pink, mint, and blue in a consistent order.
- Use a fine brush for small palm fronds or line details.
- Keep black accents minimal so they don’t overwhelm the pastels.
A glossy finish makes the soft color transitions look luminous and ties the different shades together.
9. Neon Splatter Paint Nails
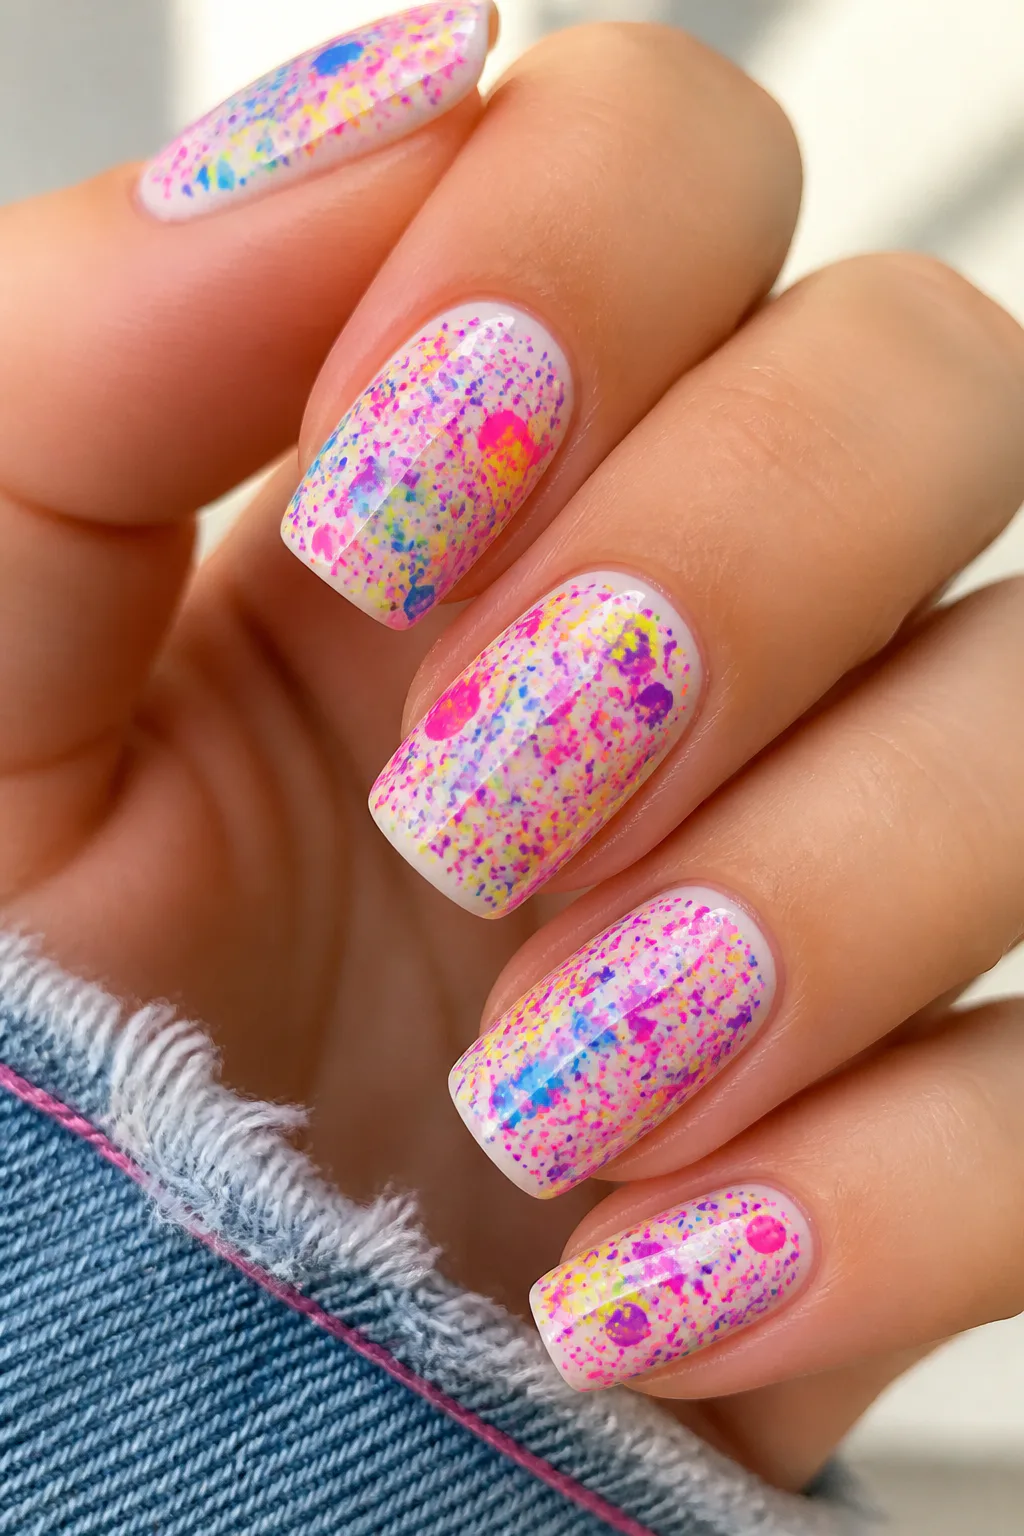
Neon splatter nails turn bright polish into an intentionally loose, paint-flecked design. Scatter pink, yellow, blue, and purple over a clear or white base for a lively result that feels spontaneous and party-ready. Since the pattern is irregular, each nail can look different while still belonging to the same set.
This idea suits anyone who enjoys color but doesn’t want to draw precise lines or shapes. A white base makes the splatters especially vivid, while a clear base gives the manicure a more open, airy feel. You can keep the effect on every nail or use it on a few accents beside a solid neon shade.
Getting the splatter effect
Work carefully and protect the surface around your hands, since the technique can send polish beyond the nail. Use small amounts of color and build the pattern in layers, allowing each shade to dry enough to avoid blending into muddy patches.
- Start with a dry white or clear base coat.
- Use several bright shades, but apply them one at a time.
- Keep splatters finer near the edges for a cleaner outline.
The uneven pattern is part of the charm, so aim for lively variation rather than perfectly matching nails.
10. Checkerboard and Smiley Faces
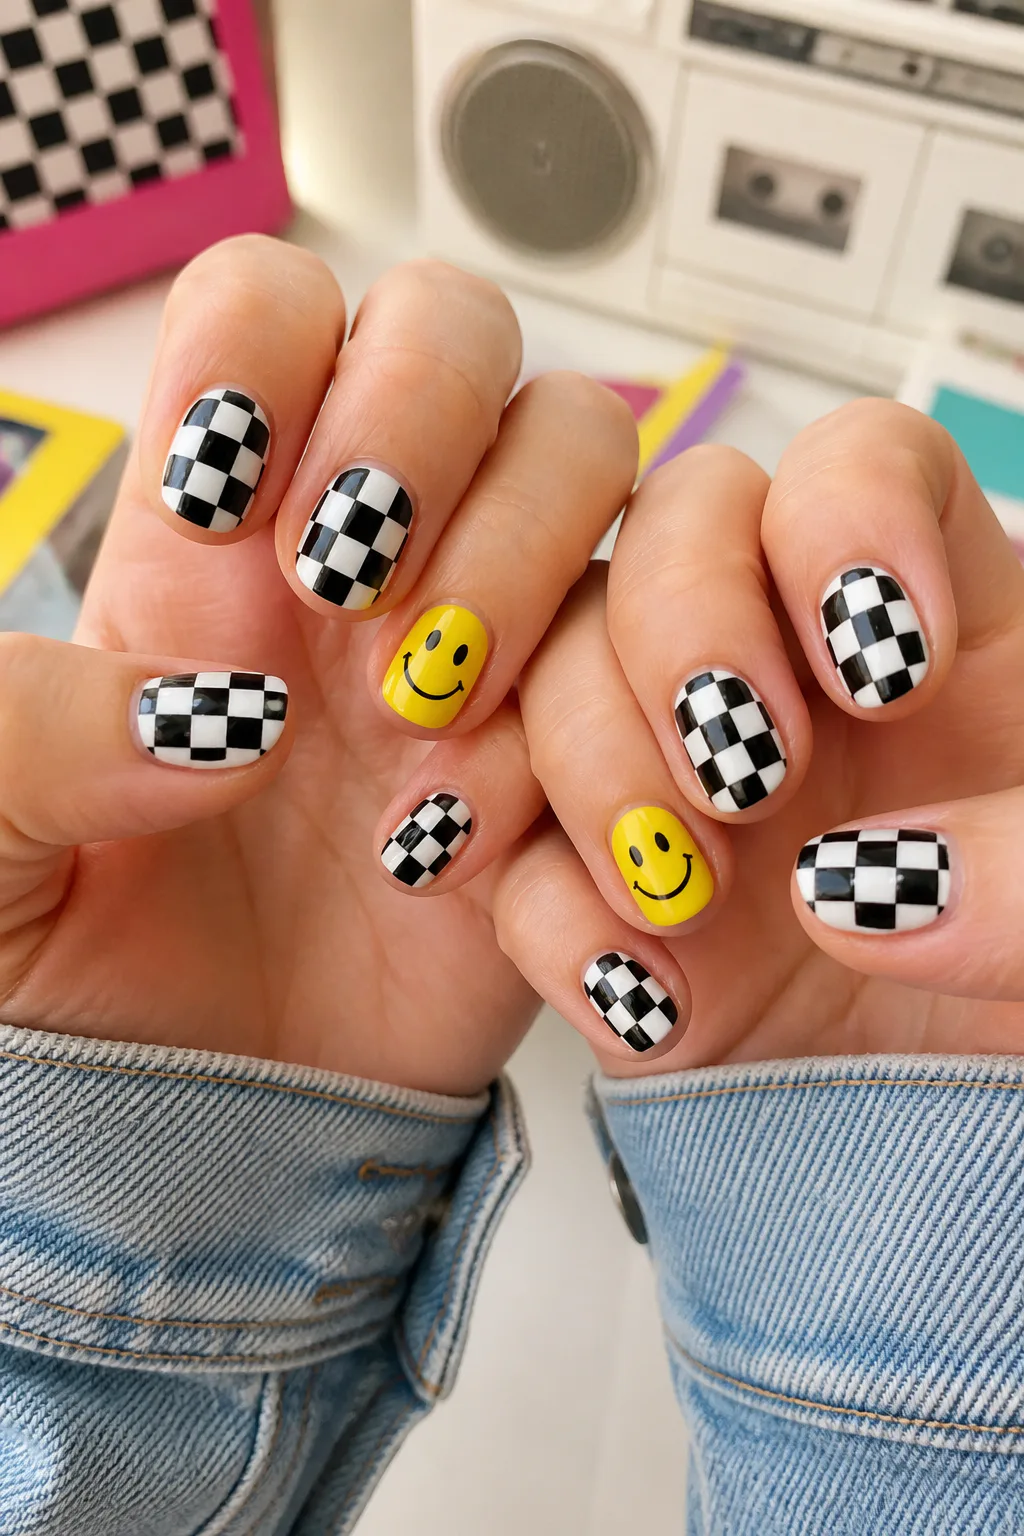
Pair a checkerboard pattern with bright yellow smiley faces for a manicure that feels graphic, cheerful, and unmistakably nostalgic. Traditional black and white checks offer strong contrast, while neon squares make the design even more colorful. A smiley on one or two nails gives the pattern a friendly focal point.
This combination can be adapted to different nail shapes and levels of detail. Full checkerboard nails make a bold statement, but a single checked accent beside solid-color nails is easier to create and wear. The smiley face can sit over a plain bright base or be layered onto a contrasting section of the pattern.
Balancing the patterns
Checkerboard lines look best when the grid is spaced as evenly as possible. Use a striping brush or guides for the squares, and wait until the pattern is dry before painting the face with simple dots and a curved smile.
- Choose black-and-white checks for a classic graphic contrast.
- Try neon squares when you want a brighter, bolder set.
- Place smiley faces on accent nails to keep the design readable.
Repeating one shade from the checks in the smiley accents helps the whole manicure feel intentional.
11. Retro Arcade Grid Nails
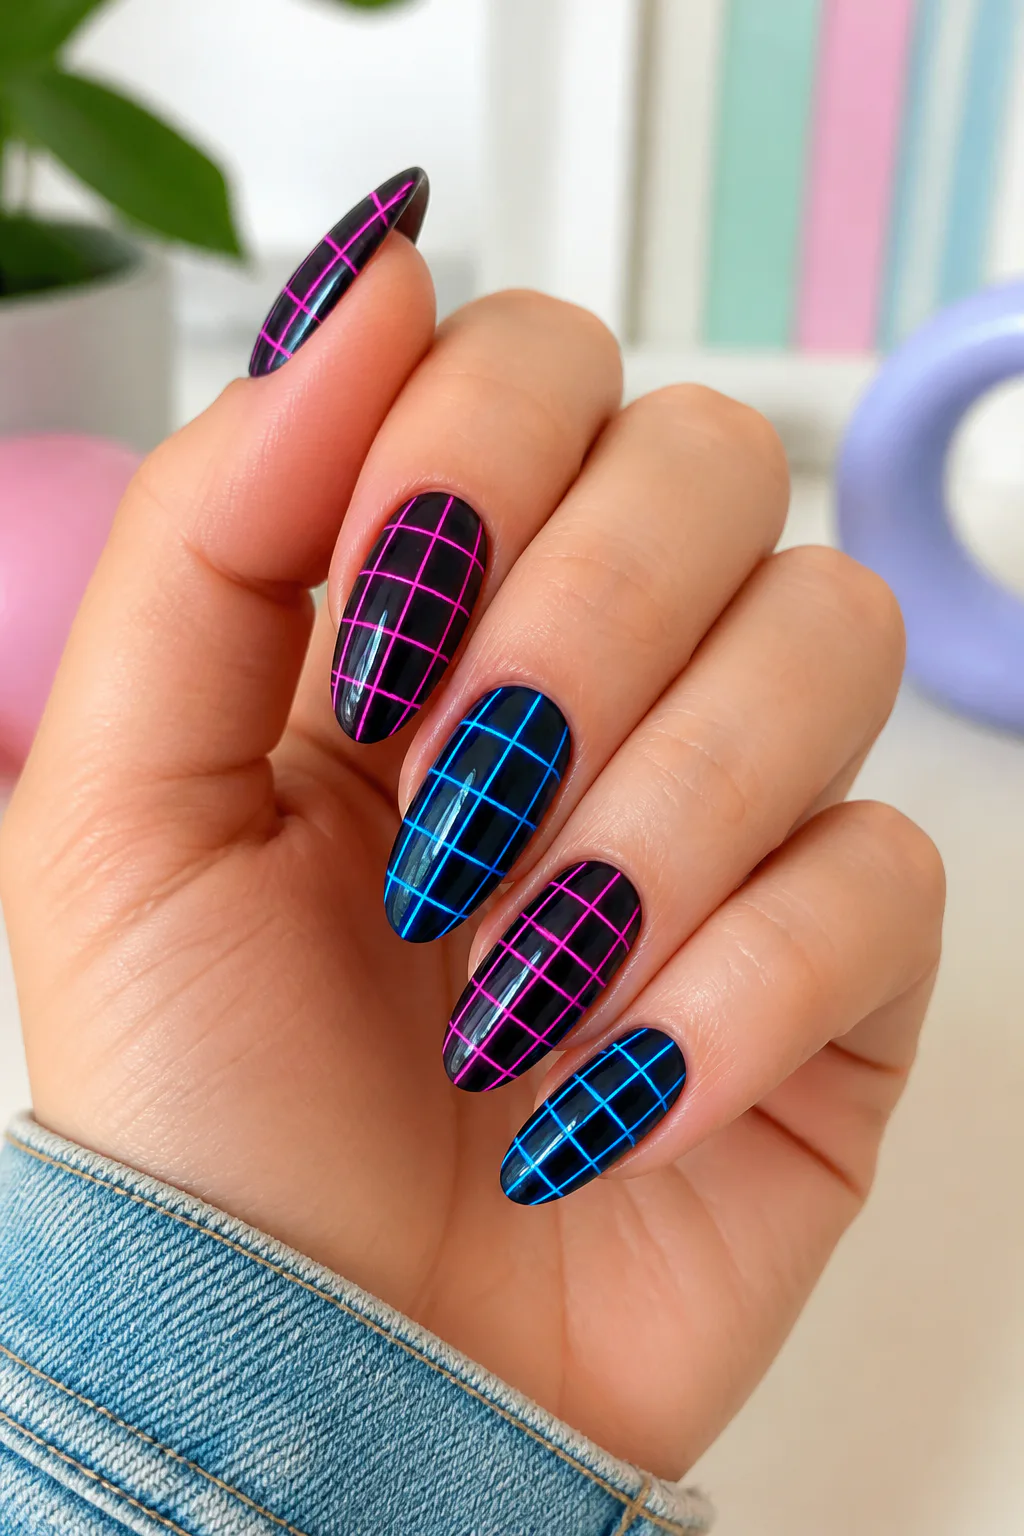
A dark base makes neon grid lines look as if they’re glowing against a night sky. Use black or deep purple polish, then add electric blue or pink lines that cross into a retro arcade-inspired grid. The result is sleek and graphic, with a moody background that gives the bright details room to shine.
This design can be as simple as a few intersecting lines or as detailed as a grid that narrows toward the tip to suggest depth. It works well on accent nails, but a repeated grid across the full set creates a more immersive, coordinated look.
Drawing the grid
Apply the dark base evenly and let it dry before adding the lines. A fine liner brush helps keep the grid clean; if you’re new to nail art, begin with fewer lines and leave generous space between them.
- Use a bright blue or pink that stands out against the base.
- Make horizontal lines slightly curved for a dimensional effect.
- Add a second neon shade sparingly as a highlight.
A glossy top coat enhances the contrast and gives the finished set a smooth, polished surface.
12. Neon Leopard and Acid Wash
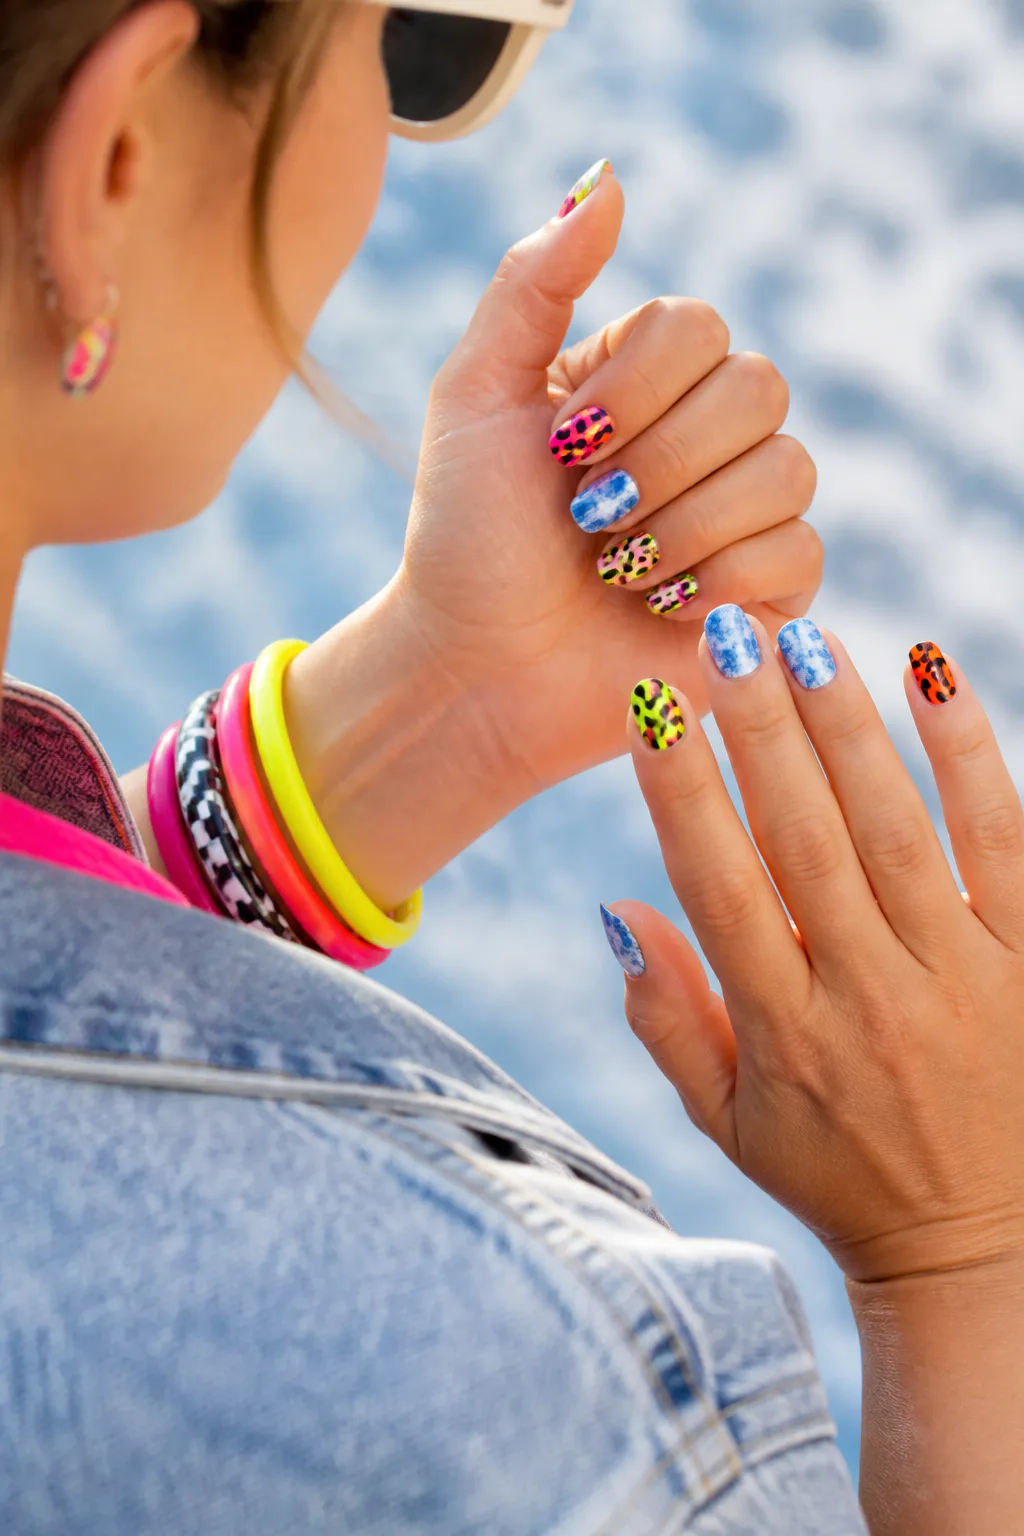
Neon leopard spots and blue-and-white acid-wash effects both bring playful texture to a retro manicure. Leopard print feels bold and lively when the spots use bright colors, while a sponged acid-wash pattern gives nails the look of softened, faded denim.
You can choose one technique for a coordinated set or combine them as contrasting accents. For example, a couple of bright leopard nails can sit beside blue-and-white acid-wash nails, with a solid color tying the two patterns together. This is a good choice if you like variety and don’t mind an intentionally busy finish.
Choosing your pattern
Leopard spots don’t need to be uniform; irregular rings and dots give the print a natural, hand-drawn feel. For acid wash, layer white over blue with a sponge, building the mottled effect gradually rather than covering the base completely.
- Use two or three neon shades for colorful leopard spots.
- Leave some blue visible beneath the acid-wash texture.
- Repeat a shared accent color across both patterns.
Keep the rest of the manicure simple if you want these textured designs to remain the main attraction.
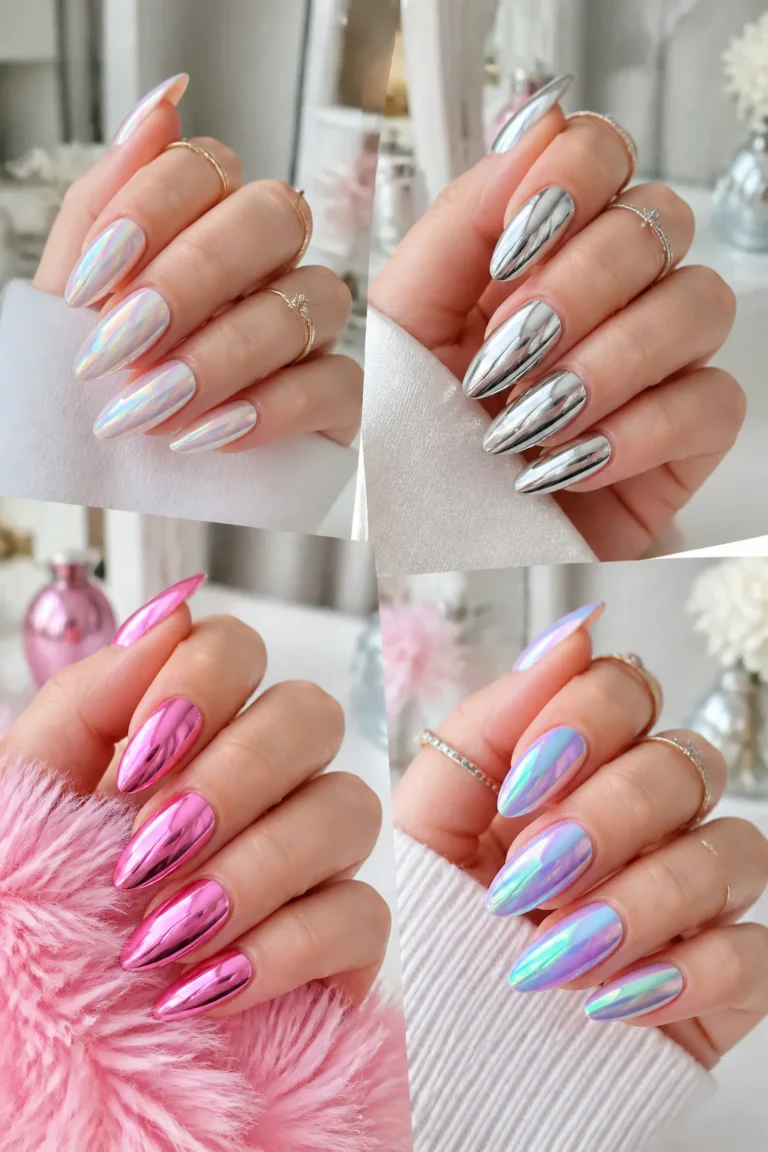
13. Metallic Chrome Stiletto Nails
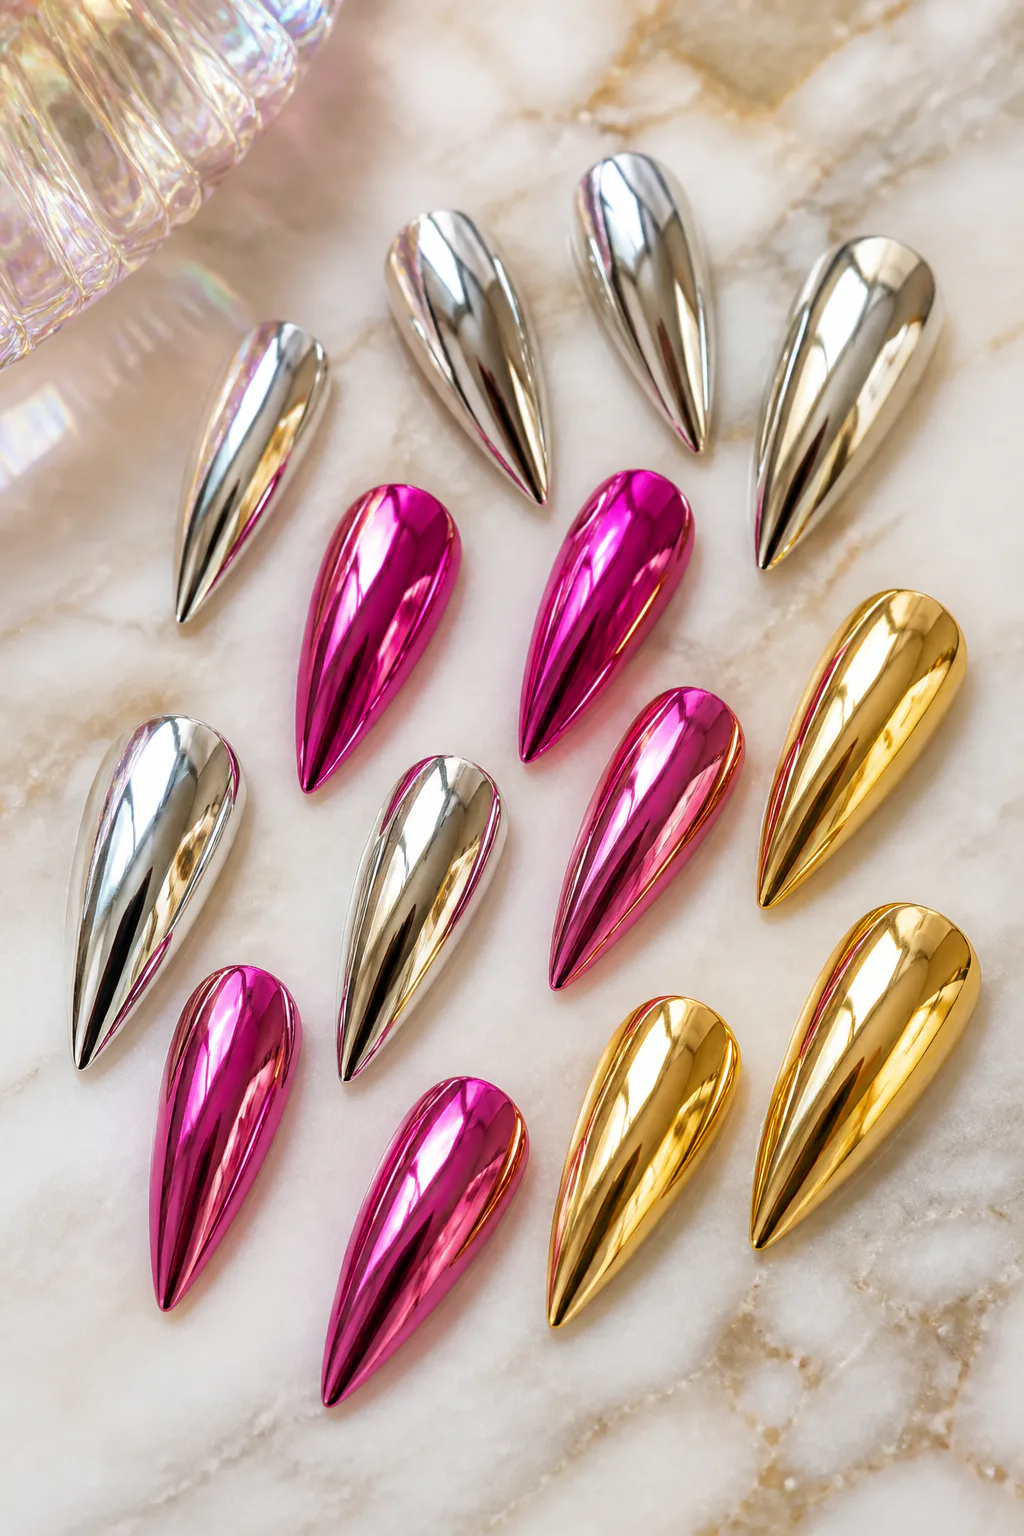
Long, pointed stiletto nails and mirror-finish polish create a dramatic take on 1980s glam. Silver brings a cool, reflective shine, while magenta and gold offer warmer or more colorful alternatives. The metallic surface catches the light and makes the nail shape part of the statement.
This look can be worn as a full set of matching chrome nails or broken up with a few glossy color accents. If a full mirror finish feels like too much, use metallic polish on selected nails or add a single chrome stripe over a solid base.
Making chrome wearable
Because the shape is already eye-catching, a simple finish often has the strongest effect. Keep the color consistent across the set, or choose one accent shade that complements rather than competes with the metallic nails.
- Choose silver for a cool, reflective look.
- Try magenta or gold for a warmer, more colorful finish.
- Consider a shorter pointed shape if you want less length.
For a less dramatic version, the same metallic shades can also work on almond or square nails.
14. Squiggle and Blob Abstract Nails
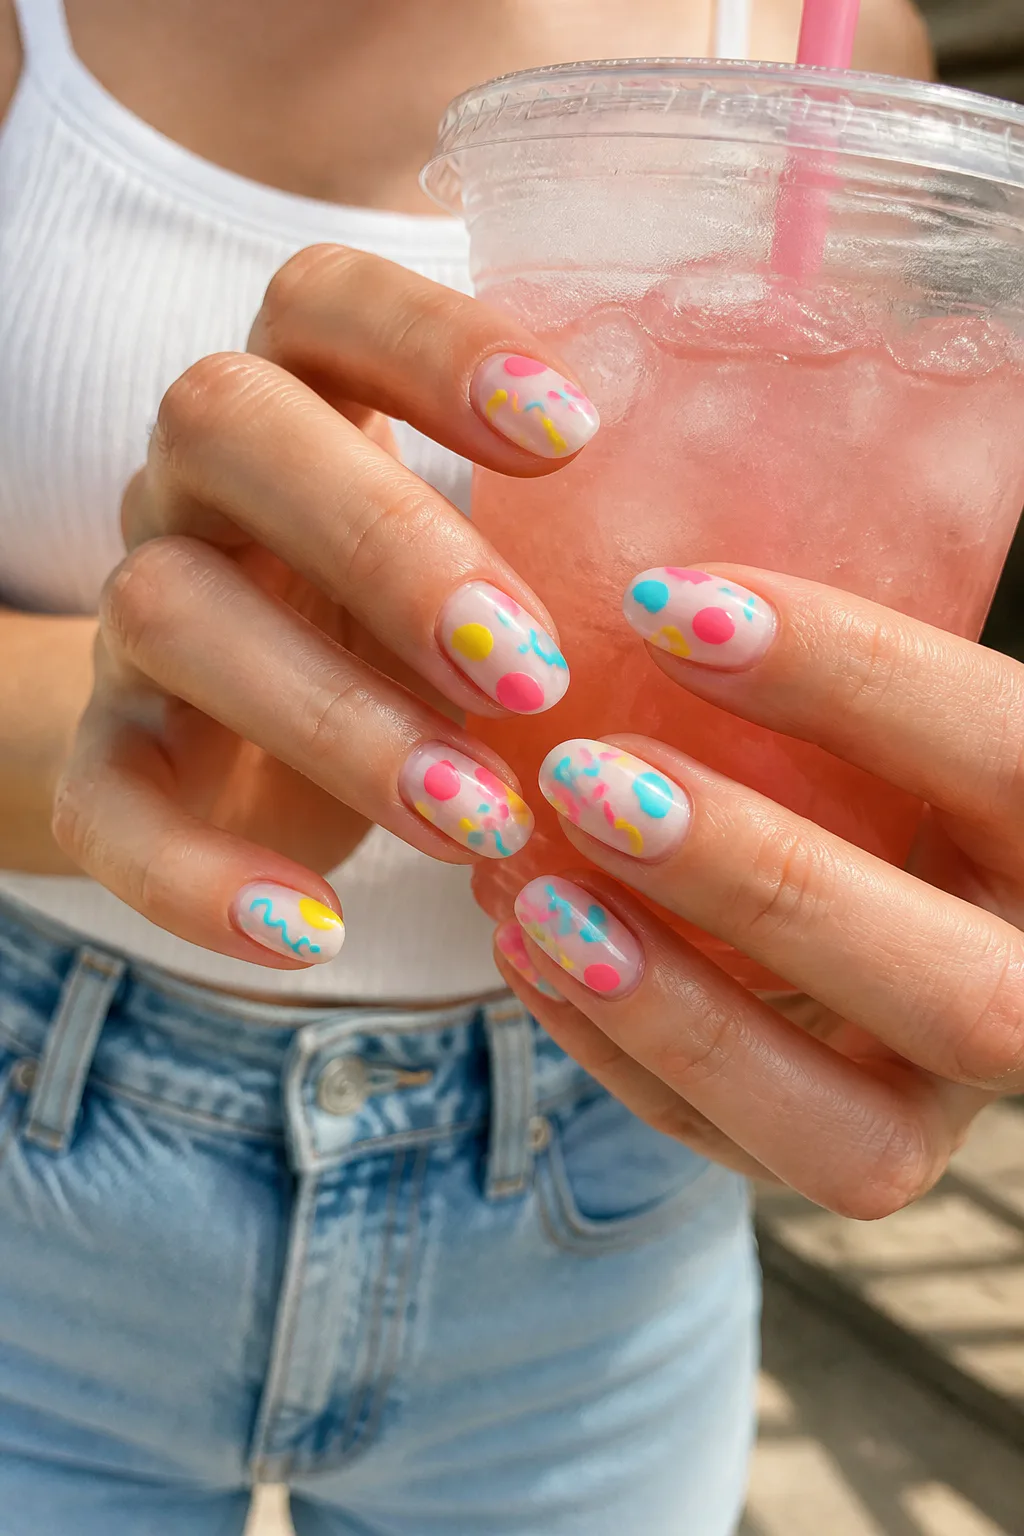
Floating squiggles and rounded color shapes create a playful abstract manicure without requiring detailed illustrations. Layer hot pink, turquoise, and canary yellow over a milky white base so each color remains bright while the background keeps the overall design light.
The look is easy to personalize because the shapes can be large and graphic or small and scattered. Use a few bold blobs on each nail for a confident, modern arrangement, or repeat one wavy line across the set to create a clearer visual rhythm. This idea suits both full-coverage art and a more restrained accent-nail approach.
Arranging the shapes
Let each color dry before adding a shape that overlaps it, especially when working with regular polish. A fine brush can create wavy lines, while a rounded brush or dotting tool helps form soft-edged blobs.
- Start with a milky white or pale neutral base.
- Repeat the same three shades for a cohesive palette.
- Vary the size and placement to avoid a rigid pattern.
The open background keeps this colorful design feeling fresh rather than crowded.
Final Thoughts
From bright French tips and comic-book dots to chrome finishes and abstract shapes, these 1980s nail ideas offer plenty of ways to bring retro energy to your manicure. You can go all in with neon colors and detailed art, or borrow just one motif for a subtler nod to the decade.
Choose a design that suits your nail length, comfort level, and favorite colors, then adjust the details to make it your own. Whether you paint at home or bring an idea to a nail artist, a little bold color and playful pattern is all it takes to capture the spirit of the era.