13 Stunning Red Glitter Christmas Nails Ideas for a Festive Manicure
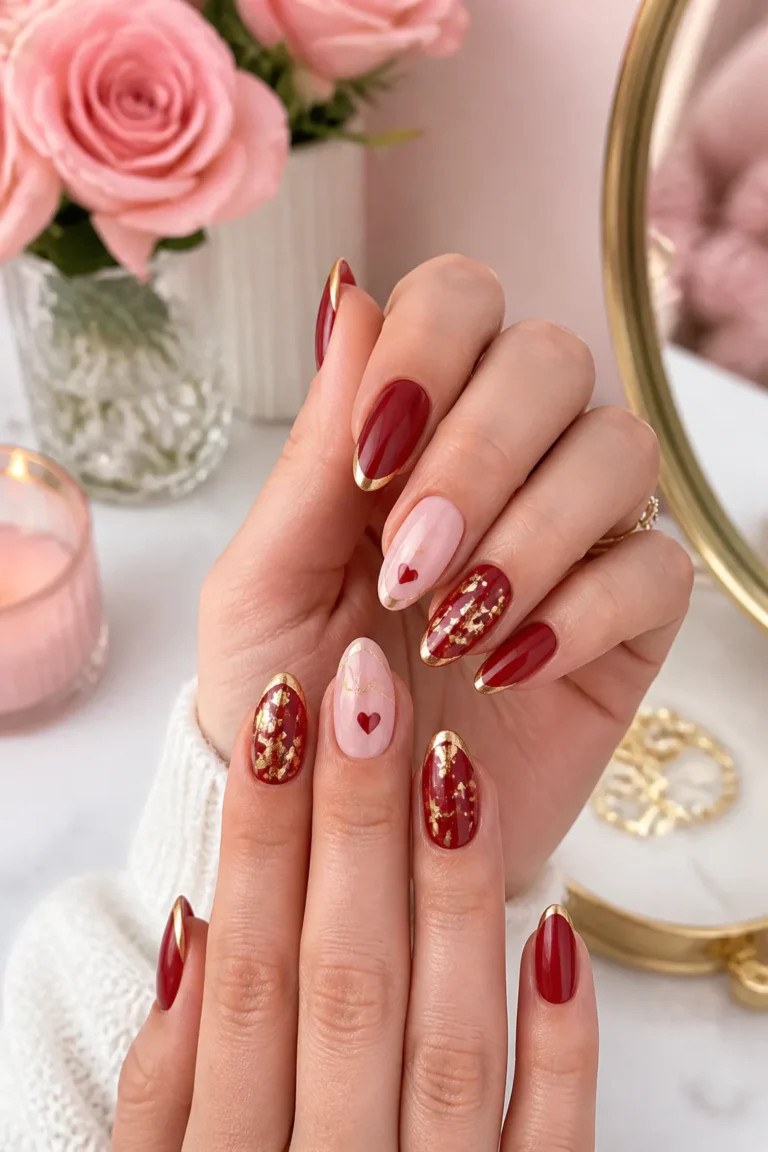
Red glitter Christmas nails can feel polished and festive, whether you prefer a soft shimmer or a full-on sparkle. This collection pairs classic holiday red with details like snowflakes, candy-cane stripes, metallic accents, and playful seasonal art.
There are ideas here for short and long nails, as well as simple accent designs and more intricate looks. Choose a shape and finish that suit your everyday routine, then use the details as inspiration for a salon appointment or a careful at-home manicure.
For a cohesive result, decide whether you want the glitter to be the main feature or one part of a design. A sheer base and delicate accents keep things understated, while dense glitter, bold color contrasts, and dimensional details bring extra holiday drama.
1. Ruby Glitter French Tips
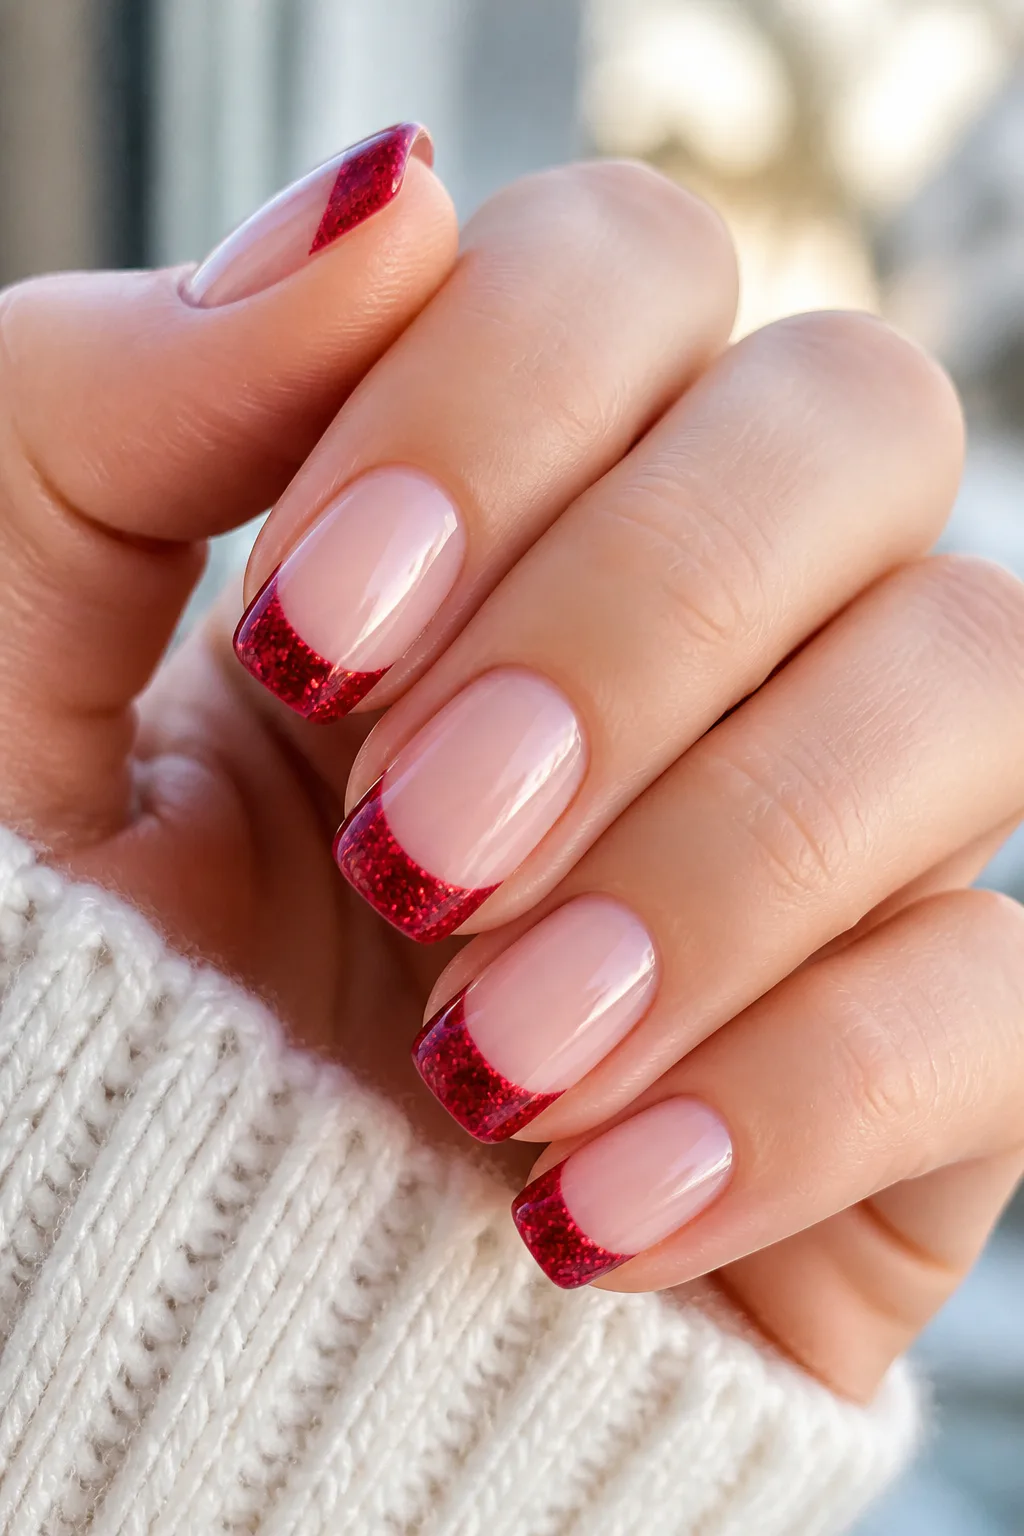
Photo: @pedinnails_northyork on Instagram. Style shown: red glitter French tips on a nude base.
Ruby glitter French tips give a familiar manicure a bright seasonal update. A nude or milky white base keeps the look clean, while sparkling red tips bring in Christmas color without covering the entire nail in glitter.
This design works beautifully on short, rounded nails as well as longer almond or square shapes. The tip can be narrow for a subtle flash or wider for a more noticeable festive finish, so it is easy to adjust the balance to your personal style.
How to pull it off
Start with a smooth, sheer base and create an even smile line before applying the glitter. Fine glitter gives a delicate finish, while chunkier particles make the tips more reflective; a clear top coat helps smooth the surface and seal the edge.
- Choose a milky base for a softer, wintery contrast.
- Keep the glitter band slim on shorter nails.
- Use a small brush to refine the tip line before sealing.
The result feels festive but still versatile enough to wear beyond a single holiday gathering.
2. Encapsulated Snowflake Glitter Nails

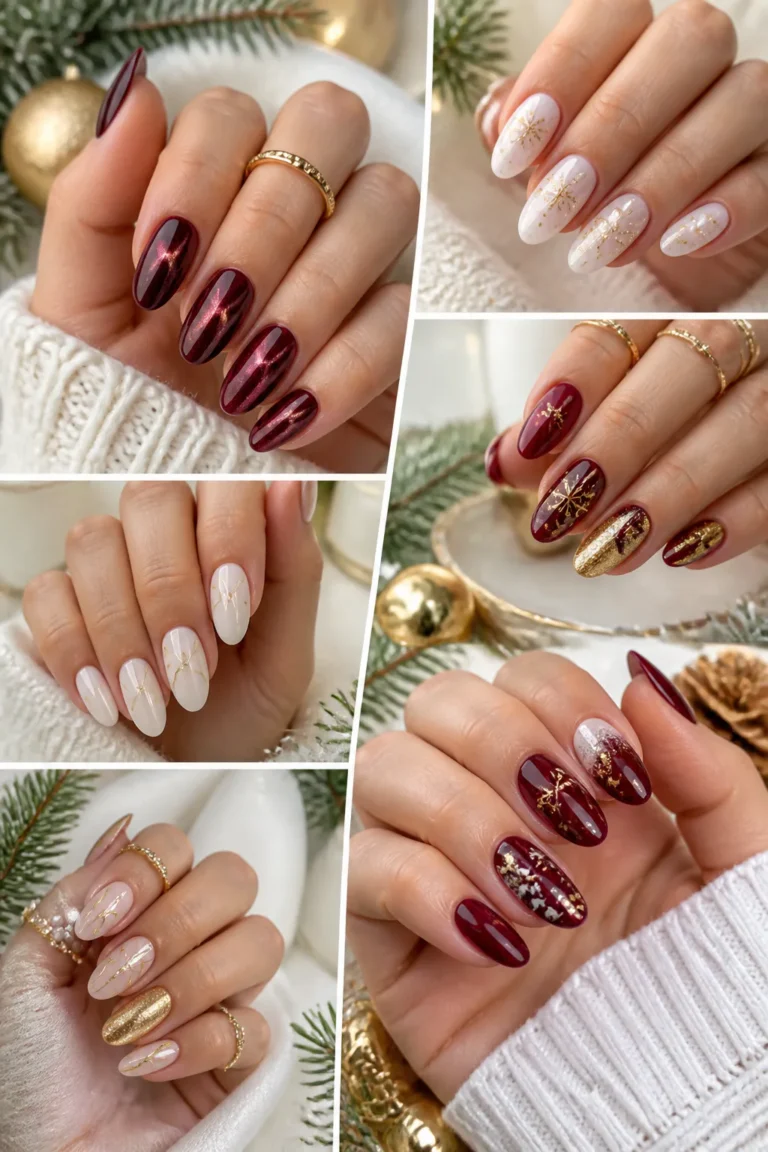
Deep crimson glitter beneath a clear gel layer creates a dimensional, glassy effect. The sparkle appears to sit inside the nail rather than on top, giving the manicure a smooth finish that catches the light from different angles.
White snowflakes on one or two accent nails add a delicate winter detail without competing with the glitter. This design is especially striking on medium or longer nails, where there is room for the layered effect and a clearly defined snowflake motif.
Design tips
Build the glitter in controlled layers so the color looks rich rather than uneven. Encapsulation is a gel technique, so follow the product instructions and avoid getting gel on the skin; if you are unsure about the process, ask a nail professional to create the design.
- Use a deep crimson glitter for a saturated base.
- Place snowflakes on accent nails, leaving some open space.
- Keep the snowflake lines fine for a light, crisp finish.
A glossy top layer brings the glitter and painted details together into one polished look.
3. Candy Cane Accent Nail

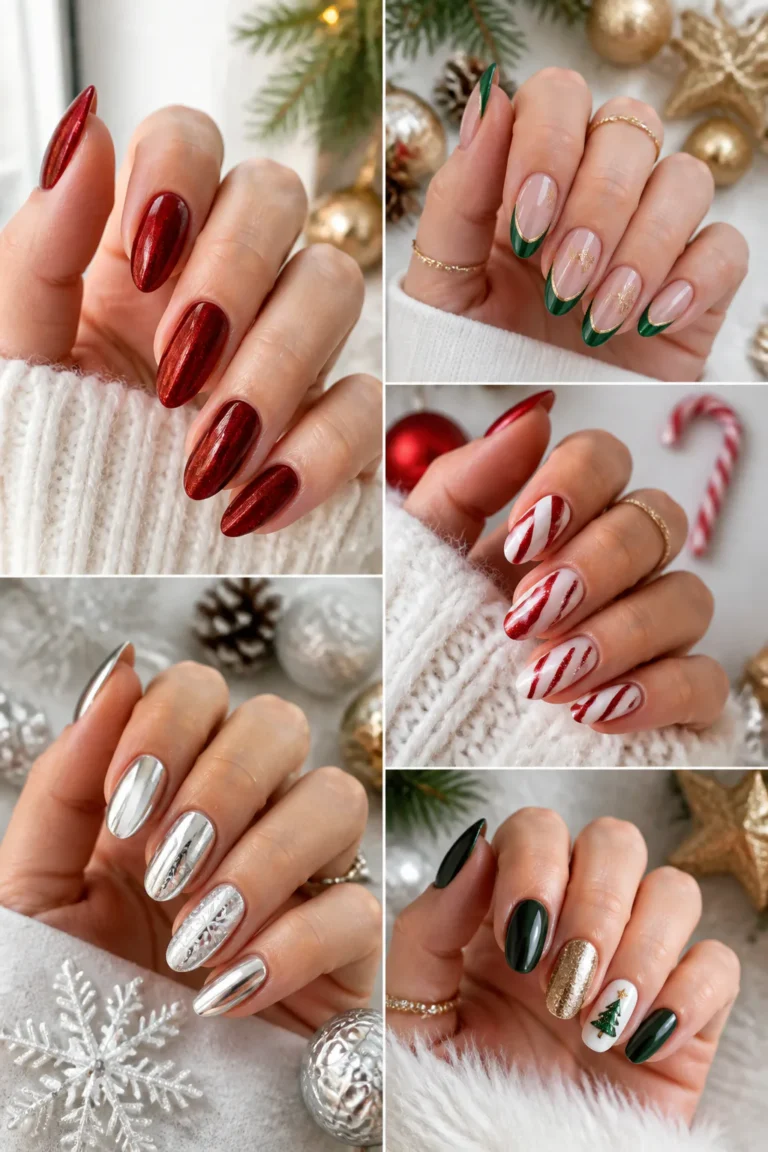
Reflective red glitter on most nails gives this manicure its bold, celebratory base. A glossy white accent nail becomes the focal point, with raised red-and-white stripes that recall the familiar shape of a candy cane.
The contrast between sparkling red and clean white helps the accent stand out without requiring elaborate art on every finger. It suits a festive party manicure, but the design can be toned down by using just one accent nail and keeping the other shapes simple.
Creating the candy cane detail
Apply the white base evenly and let it set or cure according to the polish system you are using. Add curved stripes with a fine brush or striping material, building texture carefully so the raised design stays neat and comfortable to wear.
- Use a glossy white base to make the red stripes pop.
- Angle the stripes diagonally for a classic candy cane effect.
- Keep the glitter coverage consistent on the remaining nails.
Repeating the same red tone in the stripes and glitter makes the accent feel connected to the full manicure.
4. Ruby Glitter Ombré Fade

Photo: @julienailandspa_middleton on Instagram. Style shown: red glitter ombré fading to nude.
A ruby glitter ombré moves from dense sparkle at the tips into a sheer pink or nude base. The gradual fade feels lighter than full-coverage glitter while still giving the nails a noticeable holiday gleam.
This design can visually elongate the nail because the color and sparkle are concentrated toward the ends. It works on many nail shapes, and the transition can be kept soft and delicate or made more dramatic with a deeper, more saturated glitter tip.
Making a smooth gradient
Apply glitter in thin layers, placing the most product near the free edge and gently diffusing it toward the middle. A makeup sponge or a small detail brush can help distribute the particles, but take care not to create a thick, rough ridge where the glitter ends.
- Choose a sheer base close to your natural nail tone.
- Build the glitter gradually rather than applying one heavy layer.
- Use a smoothing top coat to even out the texture.
The fade gives you the festive impact of red glitter with a graceful, airy finish.
5. Red and Gold Confetti Nails

Chunky red and gold flecks floating in a translucent jelly-red base create a playful, party-ready manicure. The sheer layers let the glitter show through with a sense of depth, while the warm metallic notes add contrast to the red.
This look is a natural choice for holiday dinners, celebrations, or New Year’s gatherings. It makes a statement across every nail, but you can also confine the confetti effect to a few accent nails if you prefer a more balanced design.
Balancing the glitter
Use a transparent red layer to let the individual flecks remain visible. Place larger pieces thoughtfully rather than piling them near the edges, and check that each nail has an even distribution before sealing with a glossy finish.
- Mix red and gold flecks in different sizes for dimension.
- Leave small areas of jelly color visible between pieces.
- Turn or place chunky glitter with a fine tool for better control.
The translucent base keeps a dense confetti design from looking flat or overly heavy.
6. Matte Red with Glitter Accents

Alternating matte dark-red nails with high-shine red glitter accents creates contrast through texture rather than color. The matte finish feels smooth and understated, while the glitter nails catch the light and draw attention to the manicure.
This pairing works well when you want a festive look that feels a little more modern than all-over sparkle. You can alternate finishes evenly or use glitter on just one or two nails, depending on how much shine you want in the overall design.
Choosing the finish pattern
Apply the matte top coat only to the solid-color nails, and use a glossy top coat over glitter to preserve its reflective effect. Plan the pattern before painting so the placement looks intentional, especially if the nails are different lengths.
- Pick a deep red or burgundy for the matte nails.
- Use matching red glitter to keep the palette cohesive.
- Try glitter on the ring fingers for a restrained accent.
The mix of soft and sparkling surfaces gives a classic holiday color a fresh, tactile quality.
7. Emerald and Ruby Glitter Nails
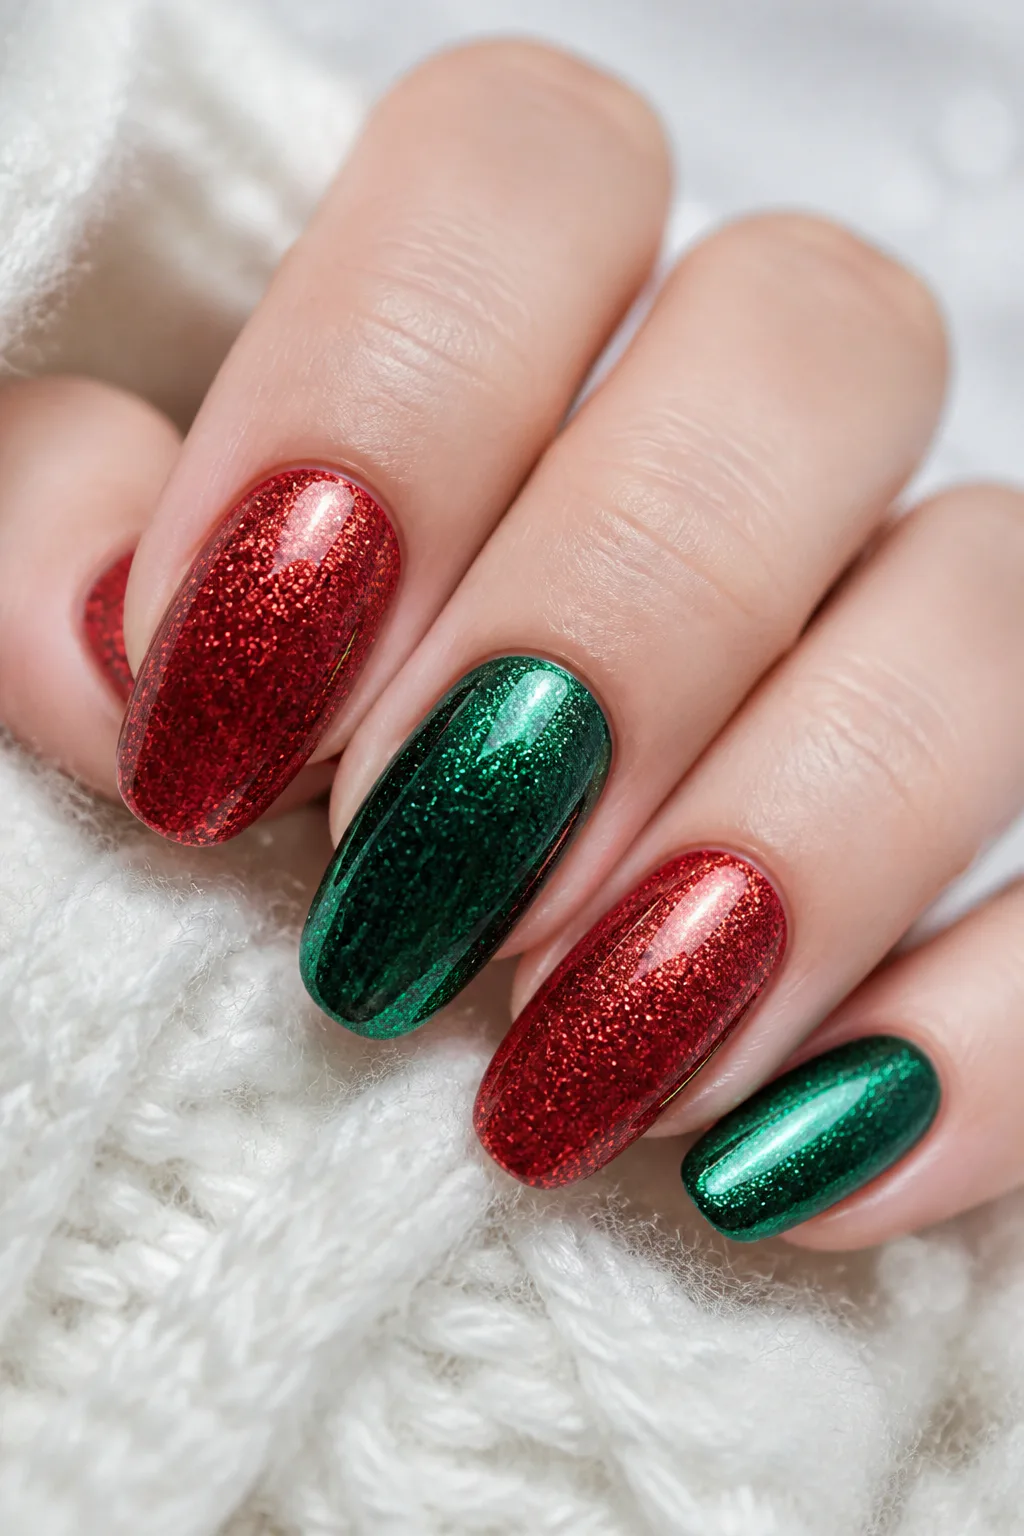
Ruby glitter paired with deep hunter-green glitter or chrome brings two traditional Christmas shades together. The rich colors create a bold manicure, while the different finishes can add another layer of interest without introducing extra patterns.
Use red on most nails and reserve green for one or two accents, or divide the colors more evenly for a stronger color-blocked effect. This combination suits both short and long nails, though a clean shape helps the saturated shades feel polished.
Keeping the palette balanced
Think about which color should lead before applying polish. If red glitter is the main feature, let green act as a quiet accent; if you choose a chrome green, its reflective surface can stand out even with limited coverage.
- Pair ruby glitter with a deep, rather than bright, green.
- Use accent nails to keep the two-color look controlled.
- Repeat each finish consistently for a deliberate pattern.
A glossy top coat helps unify the manicure and bring out the jewel-like color combination.
8. Vampy Cherry Micro-Glitter Nails
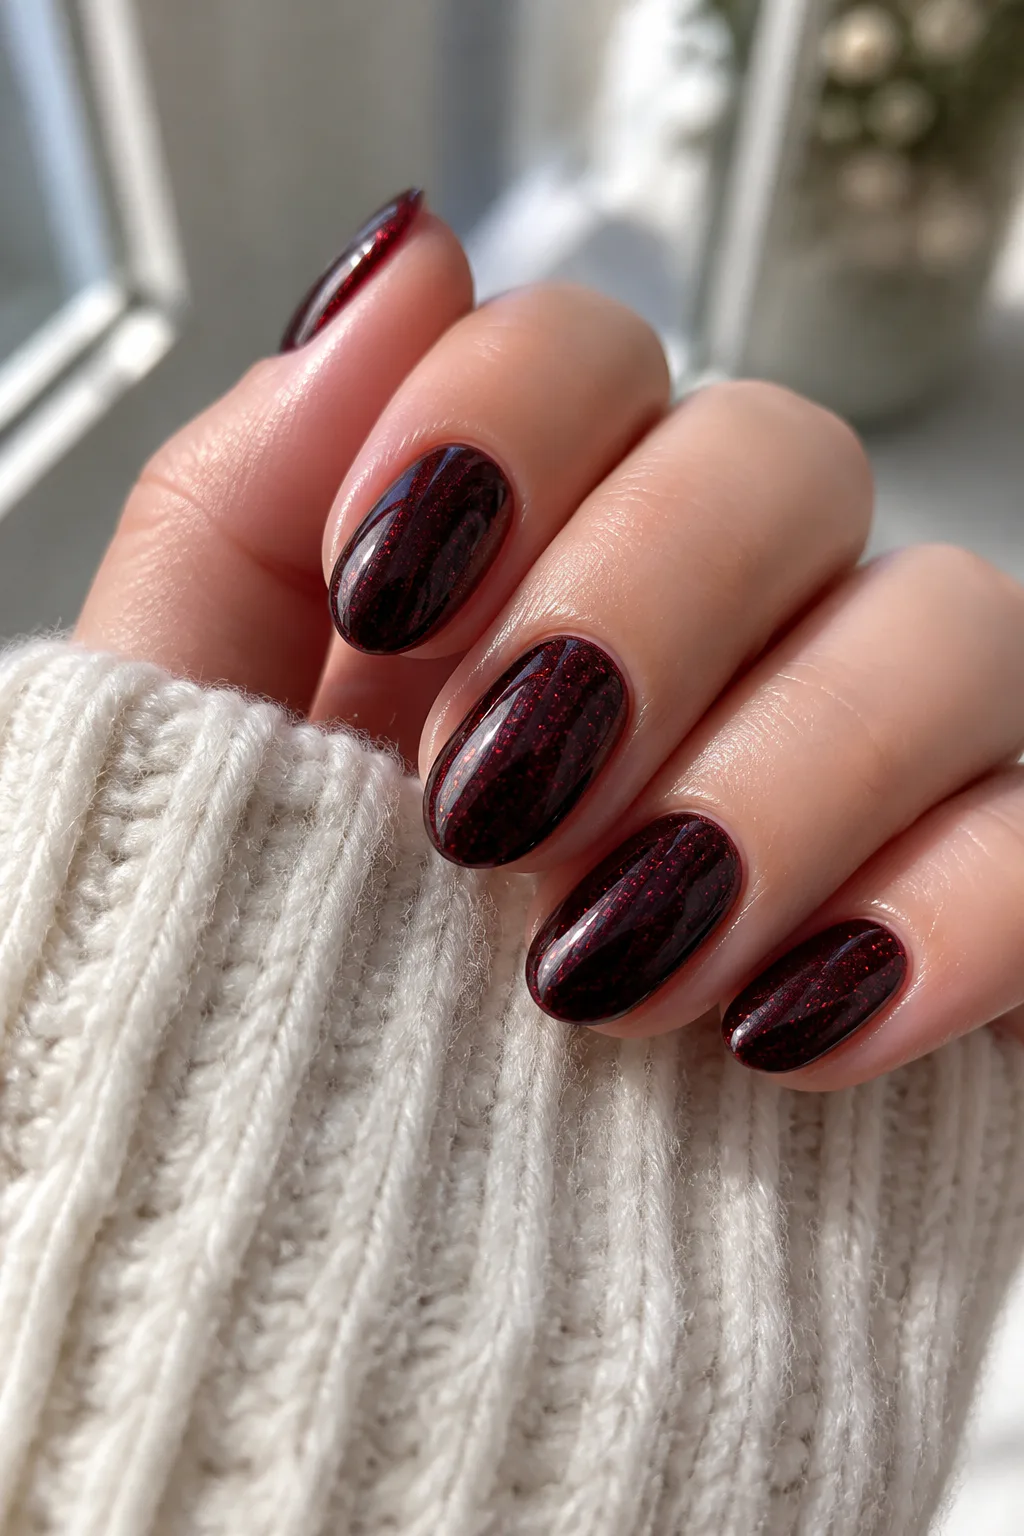
Photo: @monmayernails on Instagram. Shade shown: Black Cherry with Burgundy/Red Glitter (CND).
An almost-black cherry-red base gives this manicure a dark, wintry mood. Fine micro-glitter adds a subtle flash that appears when the nails move into the light, so the finish feels rich rather than overtly sparkly.
This is a lovely option for anyone who enjoys deeper shades but still wants a holiday detail. It works across nail lengths and shapes, and its near-black undertone makes it especially suited to evening plans or a more understated seasonal wardrobe.
Getting a smooth, deep finish
Apply thin, even coats to build the cherry color without streaks. Fine shimmer tends to look most refined when the surface is smooth, so finish with a compatible top coat and give the polish enough time to set or cure as directed.
- Choose a dark cherry shade with a red undertone.
- Look for fine micro-glitter rather than large particles.
- Keep nail art minimal so the moody color stays prominent.
The effect is festive in a low-key way, with sparkle that reveals itself gradually.
9. Crimson Starry Night Nails
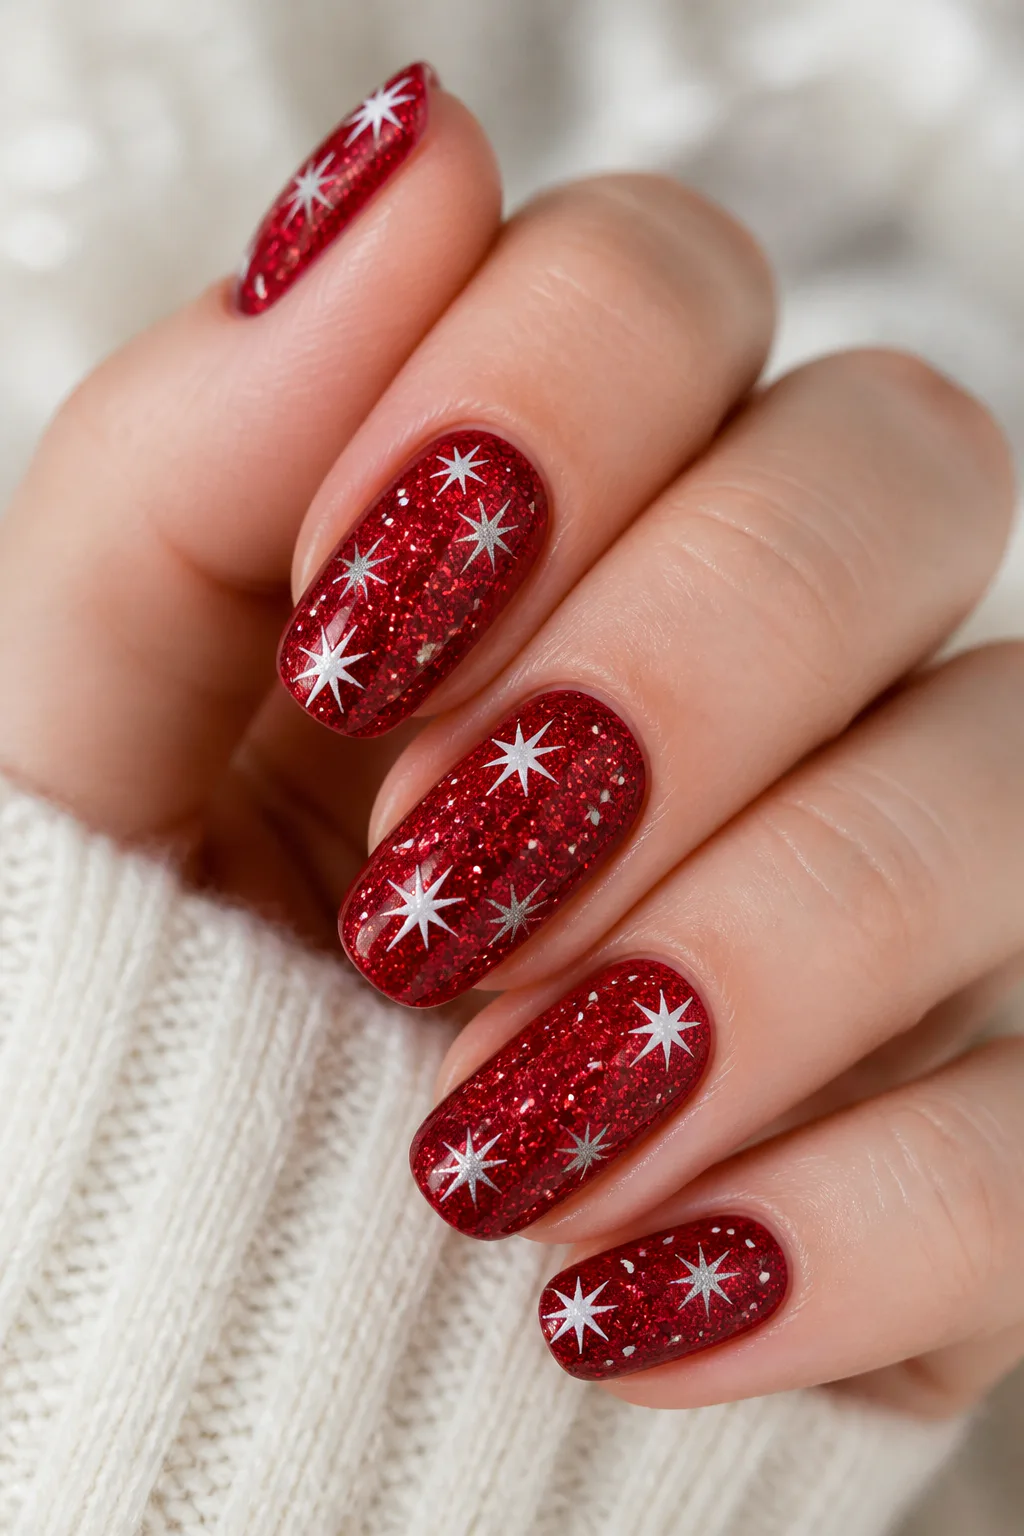
A bright crimson glitter base becomes a festive night sky when decorated with delicate white or silver stars. Tiny dots around the stars suggest scattered points of light and keep the design from feeling too plain or overly graphic.
This manicure can be painted on one or two accent nails, or repeated across the full set for a more whimsical result. It works particularly well on nails with enough space for the star shapes to remain clear, though miniature motifs can suit shorter nails too.
Adding the celestial details
Let the glitter base set before adding stars with a fine nail-art brush, dotting tool, or stamping design. Keep the lines light and the details spaced out; crowded motifs can get lost against a sparkling background.
- Use white for a crisp contrast or silver for a softer shimmer.
- Vary the star sizes while keeping the overall layout balanced.
- Add a few small dots instead of filling every open space.
The celestial accents give classic red glitter a playful, wintry twist.
10. Red Nails with Glitter Cuticle Cuffs

Photo: @ks_classynails on Instagram. Style shown: red nails with gold glitter cuticle cuffs.
Fine gold or silver glitter crescents at the base of glossy red nails create a reverse-French effect. The curved “cuffs” frame the cuticle area, adding a small metallic detail without covering the bold red polish.
This design feels elegant and works on both short and long nails. Gold brings warmth to a classic red, while silver creates a cooler, brighter contrast; either option can make a simple manicure feel more considered for holiday events.
Creating a clean crescent
Apply the red color first and let it dry or cure fully before adding the glitter. Use a fine brush or small detail tool to follow the curve of the nail bed, keeping the line thin enough to look crisp rather than heavy.
- Choose gold for a warm, traditional holiday combination.
- Try silver for a cooler, more icy contrast.
- Keep the glitter curve even across all nails.
A smooth top coat seals the glitter and leaves the red surface glossy and refined.
11. Plaid and Red Glitter Accent Nails

Plaid art brings a cozy, patterned detail to a set of full-glitter red nails. Red-and-green plaid feels unmistakably seasonal, while red-and-black creates a bolder, more graphic contrast against the sparkle.
Because plaid requires several intersecting lines, it is often easiest to feature the design on one accent nail. The surrounding glitter nails provide color and shine, allowing the pattern to stand out without making the full manicure feel busy.
Planning the plaid accent
Begin with a light or contrasting base so the lines remain visible. Add the plaid in thin layers with a detail brush, allowing each color to dry or cure before crossing it with another; a stamping method can also help create consistent lines.
- Pick red-and-green for a classic Christmas palette.
- Choose red-and-black for a stronger, high-contrast look.
- Keep glitter on the other nails close in tone to the plaid red.
The blend of cozy pattern and sparkling color makes the manicure feel festive without losing its polish.
12. Gingerbread and Red Sparkle Nails

Tiny gingerbread-person designs on warm neutral nails add a playful note beside sparkling red glitter. The beige or gingerbread-brown base gives the small figures a natural backdrop, while the remaining glitter nails keep the overall look bright and seasonal.
This design is especially charming for casual celebrations, baking days, or anyone who likes a little character in their manicure. One or two illustrated nails are usually enough to make the theme clear while leaving room for the red sparkle to shine.
Making miniature art readable
Keep the gingerbread figures simple, using small dots and short lines for features and decorations. A neutral background helps the details stand out, and a fine brush or nail-art pen can make the shapes easier to control.
- Use a warm beige or brown base for the accent nails.
- Keep the figures small and uncomplicated.
- Balance the artwork with solid red glitter on the other fingers.
The combination feels cheerful and handmade while still tying back to a classic red holiday manicure.
13. Diamond Red Cat-Eye Nails
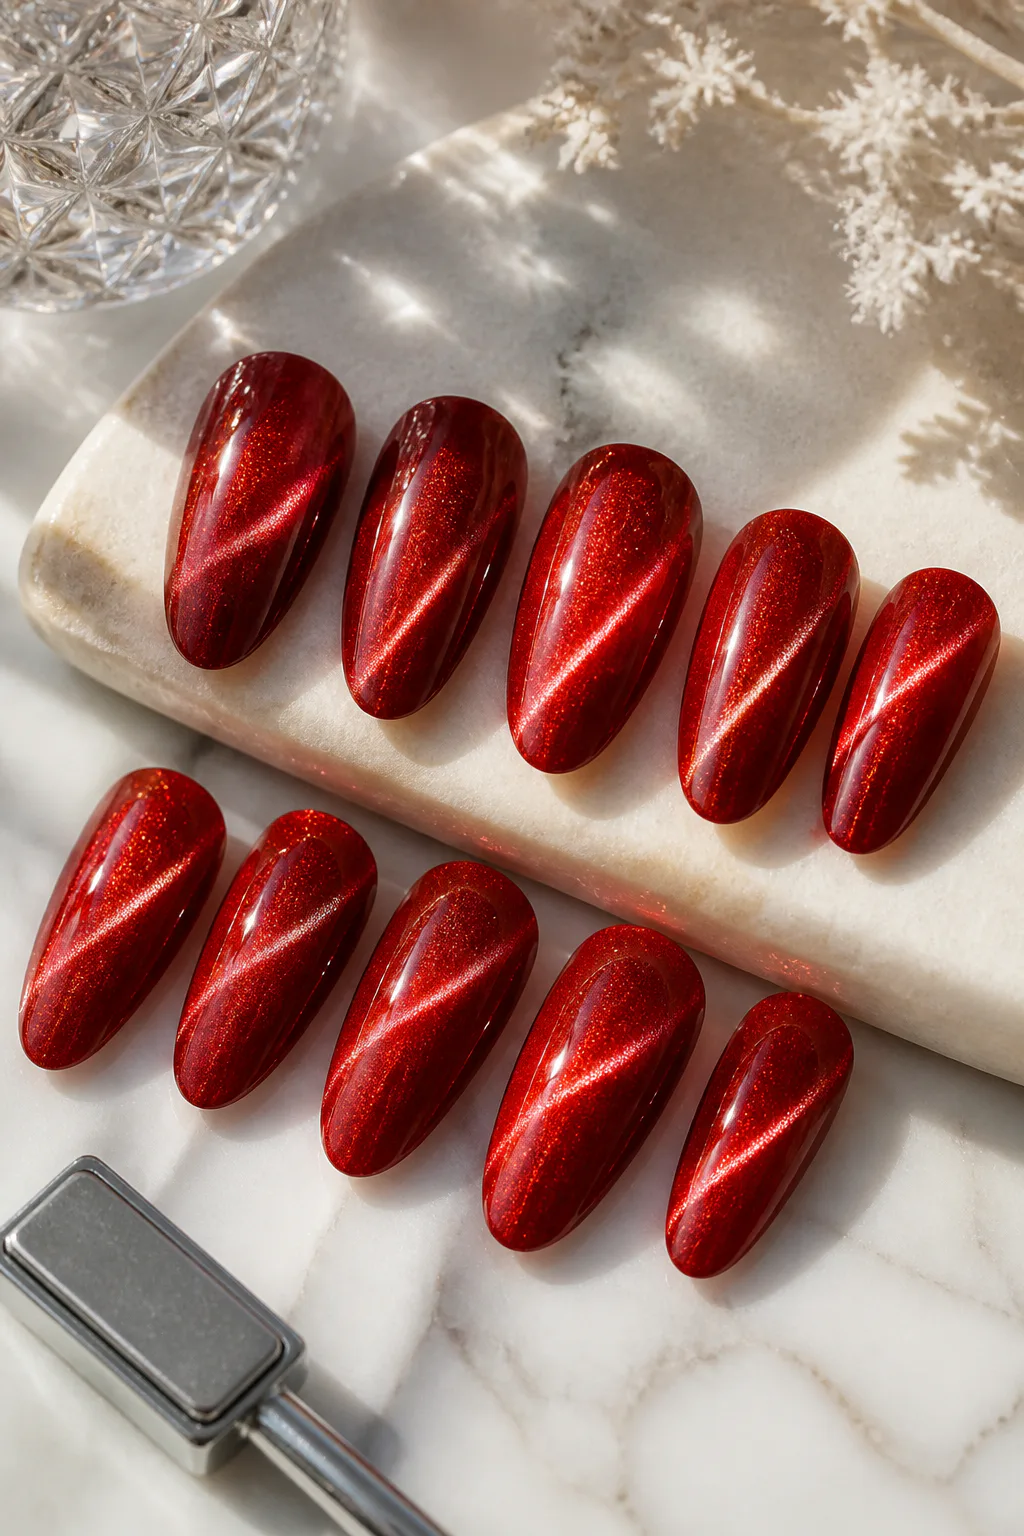
Photo: @nailpro.beauty on Instagram. Style shown: deep red cat-eye nails.
Magnetic red cat-eye gel creates a luminous line that shifts as the nails move. The velvet-like glow gives the manicure depth and dimension, making it an elegant alternative to traditional loose glitter while still delivering a striking holiday shimmer.
This effect can be worn on every nail for a dramatic finish or paired with a simpler red accent for a more restrained look. It suits a range of nail shapes, and the shifting highlight is particularly noticeable when the surface is smooth and glossy.
Working with magnetic gel
Cat-eye polish uses magnetic particles that can be guided into a glowing band before the gel is cured. Follow the product directions for timing and magnet placement, and consider visiting a salon if you have not worked with magnetic gel before.
- Choose a rich red cat-eye gel for a deep holiday glow.
- Hold the magnet at a consistent angle to shape the light line.
- Finish with a glossy top coat to emphasize the shifting effect.
The result is a sleek, luminous manicure that brings a modern finish to Christmas red.
Final Thoughts
From delicate glitter tips to rich cat-eye shimmer, these red Christmas nail ideas offer plenty of ways to make a festive manicure feel personal. Choose a design based on how much sparkle you enjoy, how intricate you want the nail art to be, and what will feel comfortable for your everyday plans.
You can also adapt any idea to your preferred nail length, shape, and polish method. Whether you keep the look simple with one accent nail or go all in with glitter and seasonal details, a thoughtful red manicure is an easy way to bring a little holiday cheer to your style.