15 Stunning Polka Dot Nail Ideas
Polka dot nails can feel playful, polished, retro, or surprisingly minimal depending on the colors and placement you choose. A sheer base with tiny scattered dots creates a very different mood from crisp cream circles on chocolate polish, but both let a simple shape do plenty of work.
This collection explores 15 ways to wear the look, from soft glazed finishes and French tips to graphic color blocking and tiny jeweled details. Each idea offers a different balance of color, texture, and negative space, so you can choose a manicure that feels personal rather than overly busy.
These designs work for anyone planning a salon appointment or trying nail art at home. Keep the dots small and spaced for a subtle finish, or make them larger and bolder when you want the pattern to stand out. A dotting tool is helpful, but the right polish colors and a steady pace matter just as much.
1. Scatter Micro-Dots Across Milky Glazed Nails
A sheer, creamy-white base gives this manicure its soft, luminous quality. Tiny white or silver dots scattered across the nails add detail without disrupting the translucent finish, making the pattern feel more like a delicate texture than a bold print.
This design suits short or long nails and works especially well when you want nail art that feels understated. The milky base keeps the look fresh, while a glazed topcoat can bring out a subtle sheen. Keep the dots loosely spaced rather than arranging them in perfect rows for an easy, airy effect.
How to pull it off
Start with a sheer creamy polish and let each coat dry before adding dots. Use a fine dotting tool or the rounded end of a small pin to keep the marks delicate. A few varied placements can make the set look artful while still feeling cohesive.
- Choose white dots for a barely-there finish or silver for a hint of sparkle.
- Vary the spacing so the pattern feels scattered, not crowded.
- Keep dots small to preserve the milky base’s soft look.
- Seal with a glossy topcoat for a glazed effect.
2. Dot Chocolate Nails with Crisp Cream Circles
Deep espresso or chocolate polish gives cream-colored dots a striking, clean backdrop. The contrast makes even a simple pattern feel intentional, while the warm brown base keeps the manicure cozy rather than stark. It’s a modern take on a classic spot print that feels easy to wear across seasons.
Try this combination on a short rounded manicure for a casual feel, or use longer oval nails to give the dots more room. Keep the base glossy and the circles opaque for a polished finish. Evenly spaced dots look graphic, while a slightly irregular layout adds a more relaxed, hand-painted character.
Design tips
Let the brown polish dry fully before dotting; pale polish can drag if the base is still tacky. Use a dotting tool to make each circle similar in size, then step back and check the balance before adding more. A restrained pattern often looks sharper than covering every open space.
- Choose a rich espresso or chocolate shade for the base.
- Use creamy white polish rather than a sheer off-white for crisp dots.
- Place larger dots near the center and smaller ones toward the edges.
- Keep the finish glossy to emphasize the color contrast.
3. Line French Tips with Tiny Matching Dots
This design combines the familiar shape of a French manicure with a dotted detail that follows the smile line. The tiny circles echo the curve of the tip, so the pattern feels connected to the nail’s shape rather than added on as an afterthought. It’s a subtle way to refresh a classic look.
Use a traditional white tip for a clean finish, or choose a colored tip and dots for a more playful version. The design is especially suited to almond and oval nails, where the curved edge gives the dotted trail a natural path. On shorter nails, a finer line of dots keeps the tip from feeling crowded.
How to pull it off
Paint the French tip first and let it dry completely. Add a neat row of small dots just below or along the edge of the smile line, following its curve. Keeping the dots consistent in size helps the manicure look intentional and tidy.
- Match the dots to the tip for a cohesive finish.
- Use fewer dots on shorter nails to keep the design light.
- Choose a sheer pink or nude base to preserve the French look.
- Apply a topcoat carefully so the dots stay crisp.
4. Add Cherry-Red Dots to Sheer Nude Nails
Vivid cherry-red dots against translucent nude-pink polish create a charming retro contrast. The sheer base keeps the design light, while the glossy red marks bring in the energy of a classic polka-dot print. It’s a simple color pairing that feels playful without needing extra embellishment.
This manicure can be scaled to suit your style. Small dots scattered across each nail give a delicate finish, while larger circles make the red more noticeable. The nude-pink base also leaves plenty of visual breathing room, making the look easy to pair with everyday outfits or a brighter accent color.
Make the pattern feel balanced
Apply a thin, even layer of sheer polish and allow it to dry before adding the red. Plan a few dot placements before you begin so the marks don’t bunch together. A glossy topcoat helps the cherry shade look vivid and ties the manicure together.
- Choose a translucent nude-pink rather than an opaque base.
- Use glossy cherry red for a lively, retro effect.
- Keep the dots evenly distributed but not perfectly regimented.
- Try smaller dots near the cuticle and larger ones toward the tip.
5. Place Metallic Gold Dots on Sheer Nails
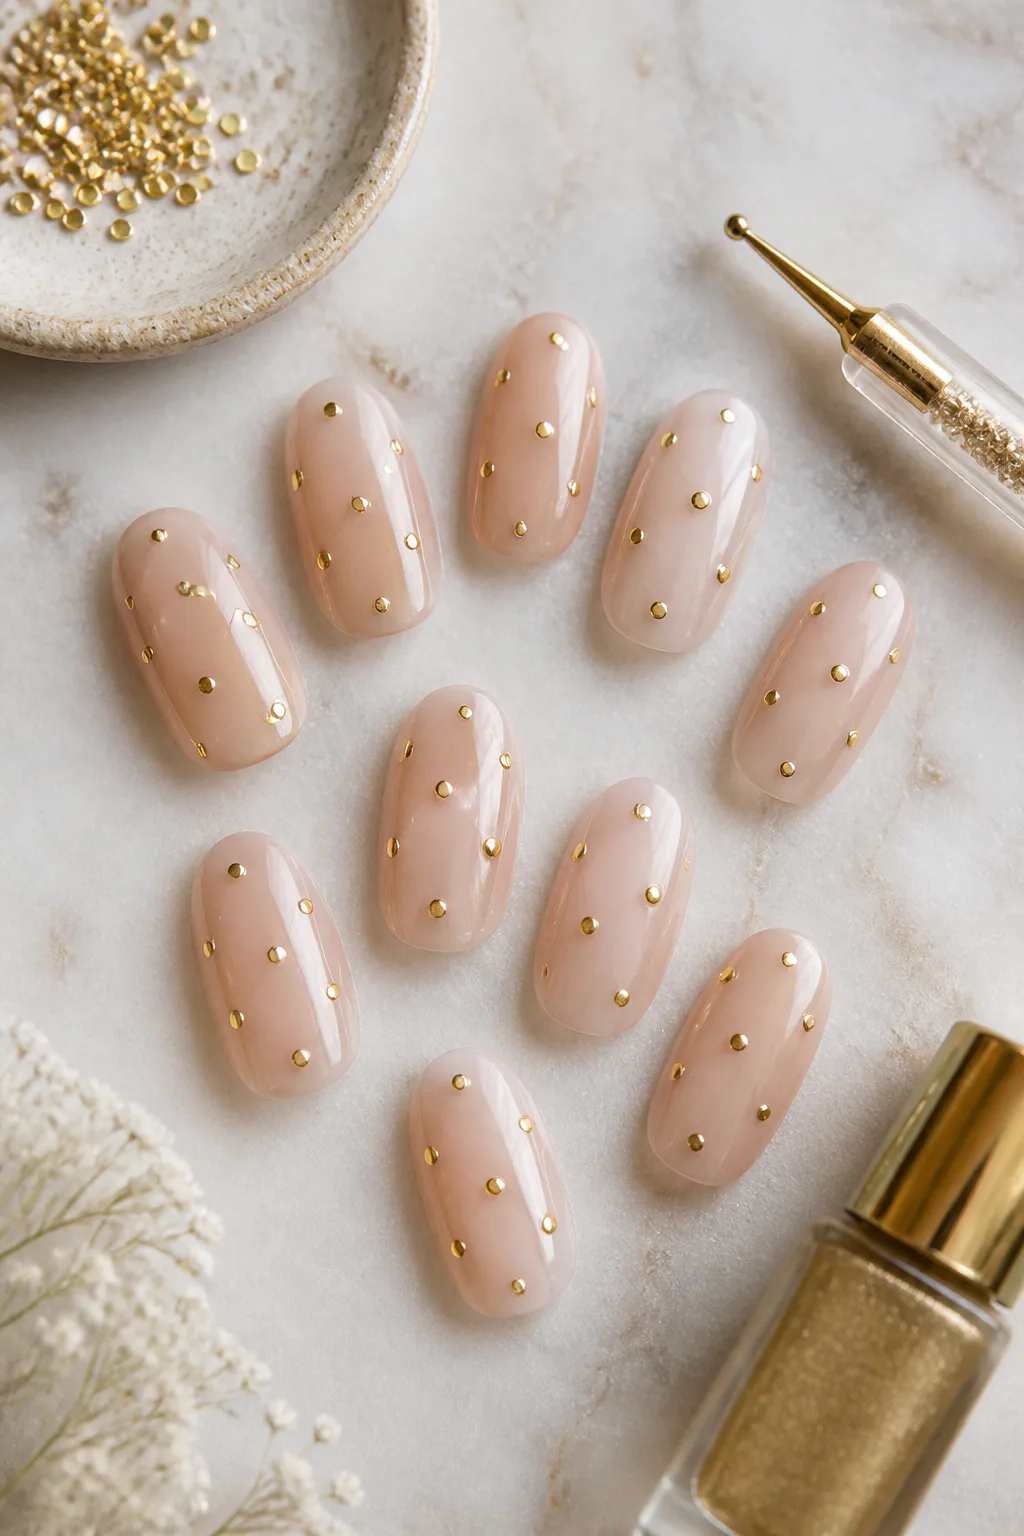
Metallic gold dots bring a refined glimmer to a sheer or nude manicure. Against a translucent base, the small accents seem to float on the nail, keeping the design elegant rather than ornate. A sheer black base offers a moodier alternative, with gold creating a dramatic point of contrast.
Flat metallic dots are easy to keep minimal, while a raised finish adds more texture. This idea works for a special occasion but can also feel subtle enough for everyday wear when the dots are tiny and sparse. Consider placing them in a loose pattern instead of repeating the same design on every nail.
Choosing the right placement
Use a metallic polish with a fine dotting tool, or apply small embellishments if you want a raised look. Give each dot space so its shine remains visible. If you’re working over sheer black, use fewer accents to keep the overall effect balanced.
- Pair gold with nude or sheer polish for a soft, delicate look.
- Try sheer black when you want stronger contrast.
- Use small dots for understated shimmer.
- Vary the placement while keeping the size consistent.
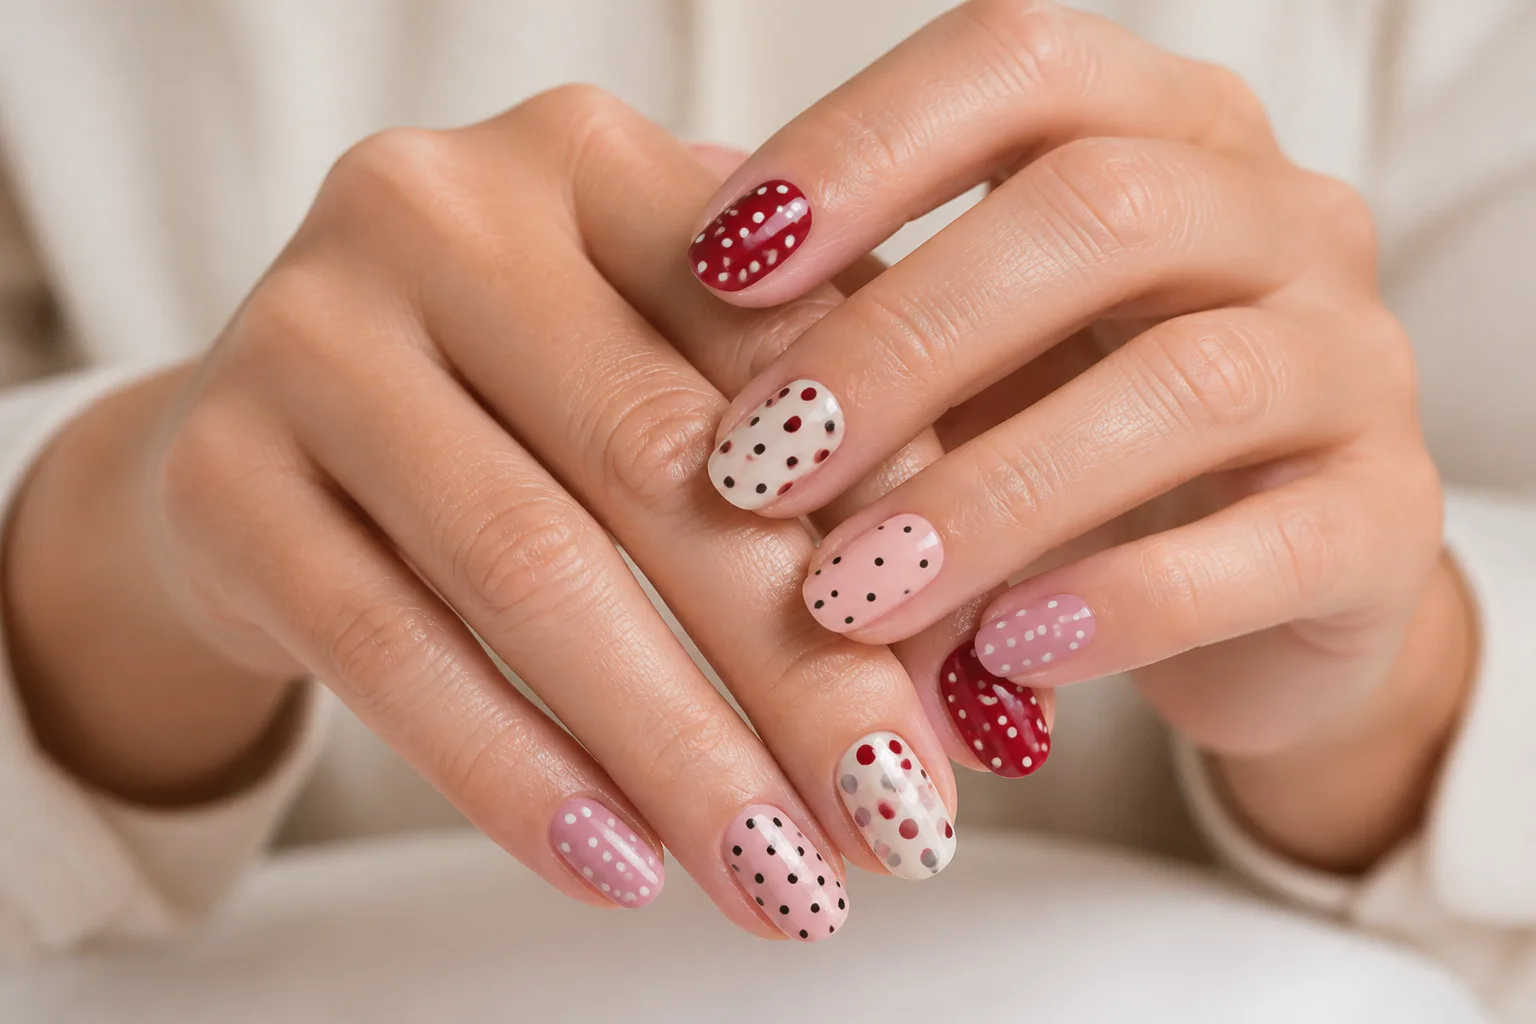
6. Mix Pink Nails with Contrasting Red Dots
Pink and red make a lively combination that feels both sweet and bold. Try a pastel or vivid pink base with red dots, then reverse the pairing on a few nails for a mismatched effect. The familiar polka-dot shape helps the contrasting colors feel coordinated rather than random.
This manicure can be as restrained or energetic as you like. Use a pale pink base and tiny red dots for a softer look, or choose brighter shades for a more graphic finish. Alternating the base colors across fingers adds variety, while repeating the same dot size keeps the set visually connected.
Ways to balance the colors
Decide which shade will lead before painting so the manicure has a clear rhythm. You can use pink as the main base on most nails and reserve red for a couple of accents, or split the colors evenly. Keep the dot pattern simple to let the color pairing take focus.
- Pair soft pink with vivid red for a gentle contrast.
- Reverse the base and dot colors on selected nails.
- Repeat one shade across the set to tie mismatched nails together.
- Choose a glossy finish to make both colors look crisp.
7. Float Black Dots Over Velvet Cat-Eye Polish
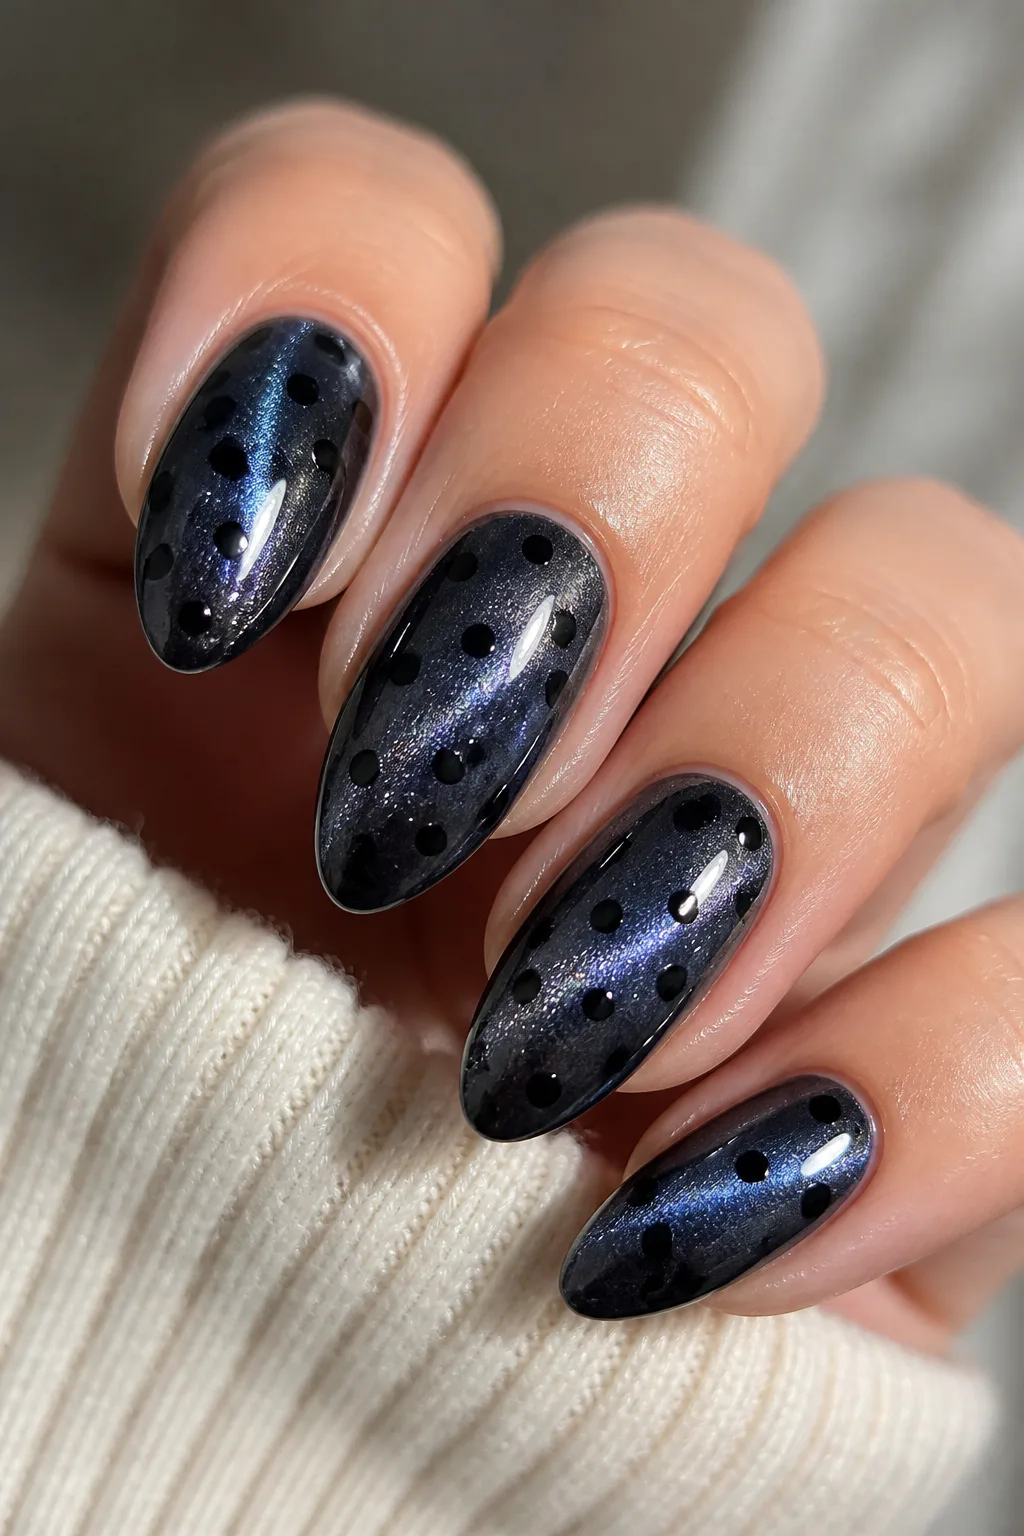
Deep magnetic cat-eye polish has a shifting, velvet-like glow that gives black dots an intriguing backdrop. The dots can appear to sit above the luminous finish, creating a dimensional effect without complicated artwork. It’s a moodier interpretation of polka dot nails, suited to anyone who enjoys darker colors and a little drama.
Use glossy black dots for a subtle, blended look or matte dots for more visible contrast. The magnetic polish is already visually rich, so a simple pattern usually works best. This design can suit different nail lengths, though longer nails offer extra room for a scattered arrangement.
Build the dimensional look
Create the cat-eye effect according to your polish directions and allow the color to set before adding dots. Place the dots with a steady hand, leaving some of the magnetic shimmer visible between them. A compatible topcoat can help protect the design without hiding the finish.
- Choose a deep magnetic shade with a visible light-catching effect.
- Use matte black dots for a stronger finish contrast.
- Keep the dots spaced so the cat-eye shimmer remains noticeable.
- Try a glossy black if you prefer a more blended look.
8. Dot Short Olive Nails with Cream Circles
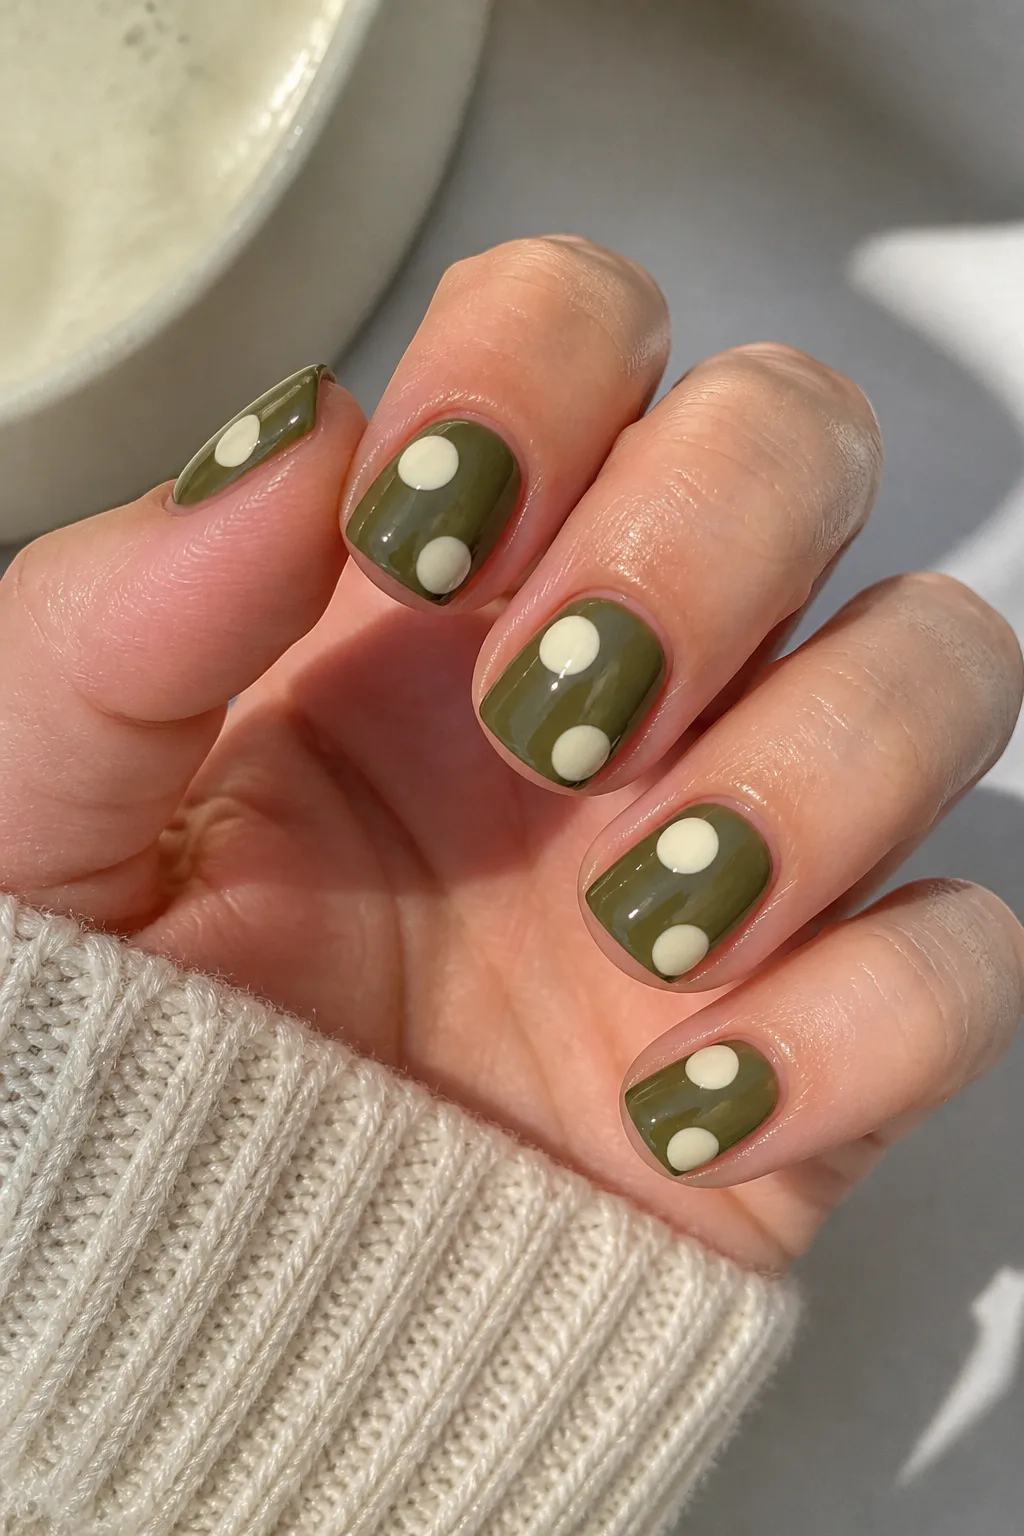
Olive green and soft cream create a grounded, easygoing color combination. On short, squared nails, the pairing feels neat and modern, while the rounded dots soften the straight edges. It’s a wearable option if you want a little nail art without a bright or overly delicate palette.
The olive base can lean muted or deep, depending on the mood you want. Cream circles show up clearly without the sharper contrast of pure white, giving the manicure a relaxed finish. Keep the dots medium-sized so they remain visible on shorter nails, but leave space around each one.
Keep short nails looking balanced
Apply the olive shade evenly, paying attention to the side edges for a tidy shape. Once dry, add a few cream dots to each nail rather than filling every open space. A consistent dot size helps the design look clean, even when the placement varies slightly.
- Choose a squared or softly squared nail shape.
- Use creamy off-white polish for a softer contrast.
- Make dots large enough to read on a short nail.
- Leave visible olive space between each circle.
9. Pair Pastel Polka Dots with Coquette Bows
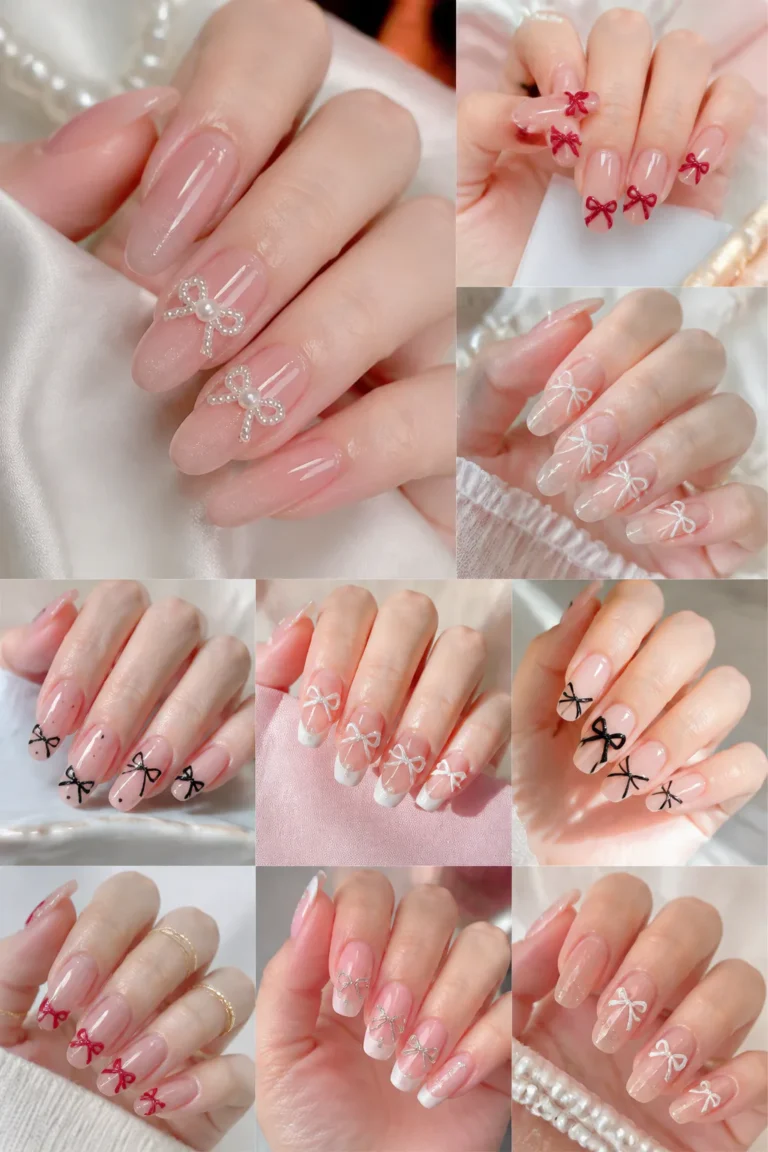
Delicate dots and ribbon details create a romantic manicure with a playful, coquette-inspired feel. A sheer pink or pastel base keeps the look light, while painted bows or small raised accents add a focal point. The contrast between simple circles and a more detailed bow makes the design feel layered.
This idea works best when the two details have room to breathe. Use dots across several nails, then reserve one or two nails for a bow accent. On shorter nails, fine painted ribbons may feel more comfortable than raised decorations, while longer nails can accommodate more elaborate details.
Pair the accents thoughtfully
Choose a restrained palette, such as pale pink with white dots and matching bows, to keep the manicure cohesive. Place the bows where they won’t compete with the dot pattern, such as on an accent nail. A glossy finish can enhance the delicate, polished effect.
- Start with sheer pink or a soft pastel base.
- Keep dots small and evenly distributed.
- Use painted bows for a flatter, simpler finish.
- Reserve raised ribbon accents for one or two nails.
10. Flip Black-and-White Dots Across Alternating Nails
Alternating black dots on white nails with white dots on black nails turns a simple print into a bold graphic manicure. The reversed pattern gives each hand visual variety while keeping the palette limited and cohesive. It’s a crisp option for anyone who likes high contrast and clean lines.
You can alternate the designs finger by finger or use one pattern on each hand. A white base makes black dots stand out sharply, while the black base creates a more dramatic canvas for white circles. The design suits a range of nail lengths, but consistent dot placement helps it look considered.
Plan the pattern before painting
Decide which nails will carry each base shade before you begin. Apply the lighter polish in thin coats for an even finish, and let each base dry fully before dotting. Try to keep the circles similar in size so the reversed patterns feel like a matched set.
- Alternate black and white base colors across the fingers.
- Reverse the dot color on every nail.
- Use a dotting tool for crisp, repeatable circles.
- Choose glossy polish to sharpen the monochrome contrast.
11. Scatter Pastel Confetti Dots on Sheer Nails
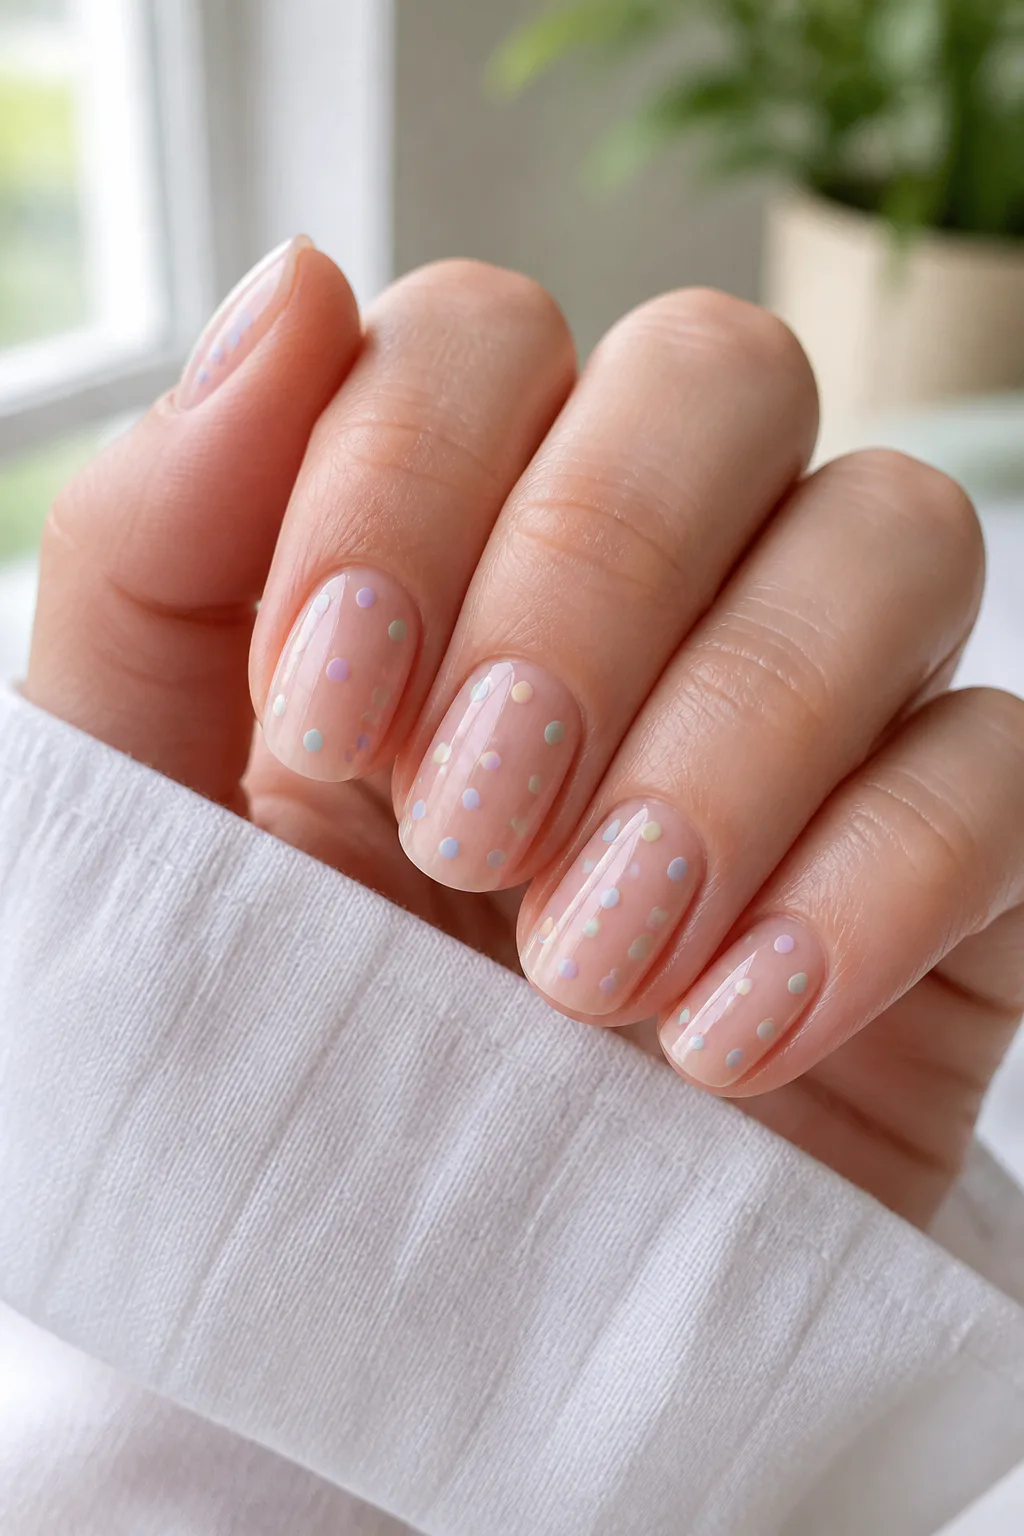
A sheer nude base scattered with tiny pastel dots feels like a light confetti print. Lilac, butter yellow, baby blue, and mint add color without making the manicure heavy, because the transparent-looking background leaves plenty of open space. The result is cheerful, delicate, and easy to customize.
Use several shades for a playful look, or limit the palette to two or three pastels for a calmer finish. Small dots work particularly well here, since they let each color appear without crowding the nail. This style can be worn across all nails or concentrated on a few accent fingers.
Create an airy scatter
Apply a sheer nude or pink base and let it dry completely. Add one color at a time, spreading the dots around rather than placing all of one shade together. A light hand keeps the colors distinct and allows the base to remain part of the design.
- Choose a mix of lilac, yellow, blue, and mint.
- Keep the dots small for a confetti-like effect.
- Leave visible gaps between colors.
- Use fewer shades if you prefer a quieter finish.
12. Adorn Burgundy Nails with Tiny Gold Dots
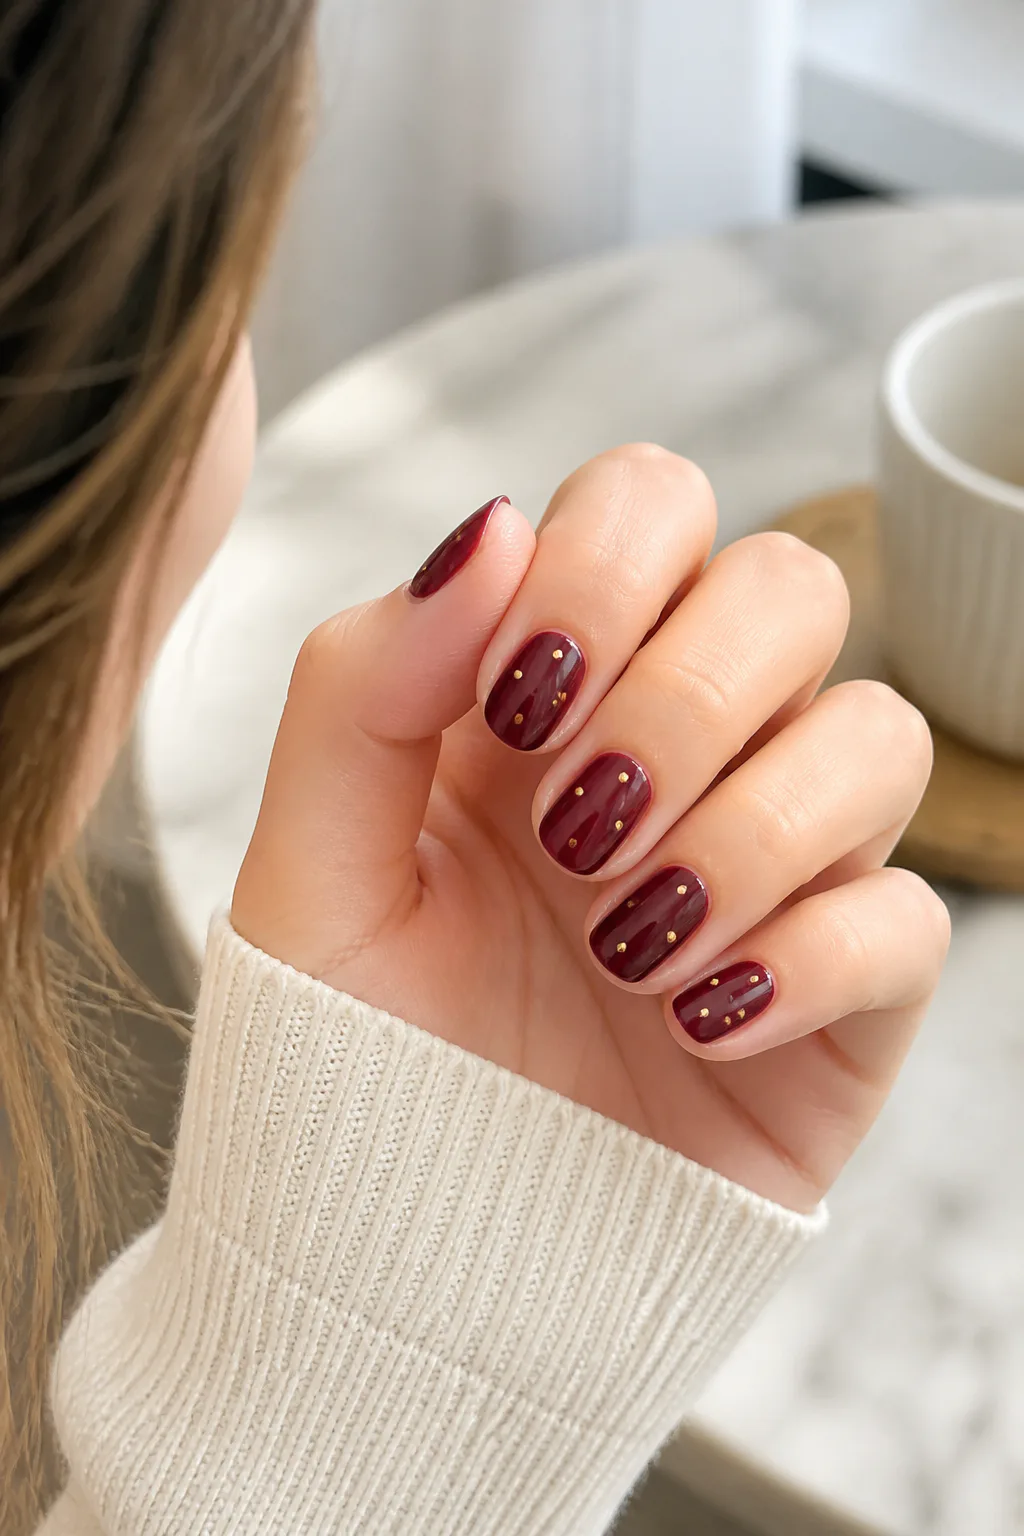
Deep wine-red polish paired with tiny gold or champagne dots creates a polished, evening-ready manicure. The dark base gives metallic accents a rich backdrop, while the small scale keeps the design from feeling overly ornate. It’s a classic color pairing that can look elegant with very little extra detail.
Place one or two dots near the cuticle for a restrained accent, or scatter them across each nail for a more noticeable pattern. A glossy burgundy finish emphasizes the depth of the color, while keeping the gold dots delicate lets their shimmer do the work. This combination suits both short and longer nail shapes.
Keep the gold accents refined
Use a fine dotting tool and metallic polish to make neat, tiny circles. If you prefer a more dimensional effect, carefully apply small gold embellishments and secure them with topcoat. Give each accent enough room so the burgundy remains the dominant color.
- Choose a deep burgundy or wine-red base.
- Use gold or champagne dots for a warm metallic contrast.
- Try sparse cuticle placements for a minimal look.
- Seal the manicure while keeping the dots visible.
13. Create Floating Dots on a Clear Jelly Base
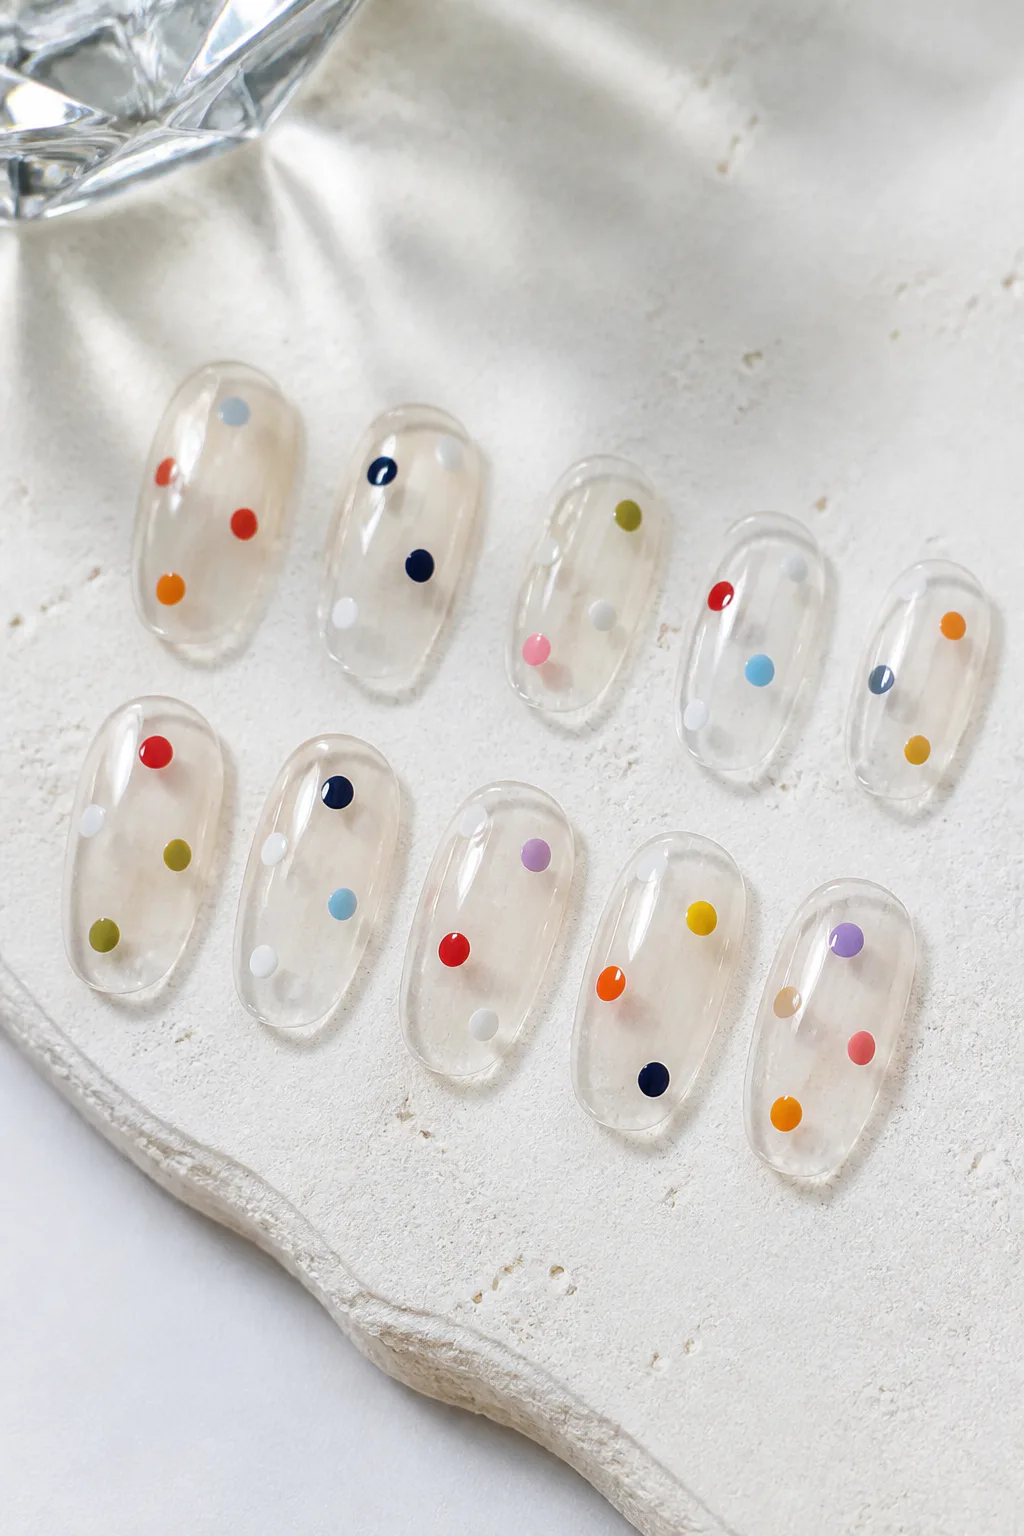
A clear or sheer jelly base makes isolated dots look as though they are floating on the nail. With no opaque background to fill the space, the design highlights negative space and gives even simple geometric circles a modern feel. It’s an understated choice for anyone who enjoys minimal nail art.
Choose one dot color for a clean graphic effect, or combine a small number of shades for more personality. The key is to leave generous open areas around each mark. This approach works on short nails as well as longer ones, since the clear base keeps the design visually light.
Make negative space part of the design
Apply one or two sheer coats, allowing the natural nail to remain visible. Plan the dots before placing them, especially if you want an intentionally off-center layout. A glossy topcoat can enhance the jelly effect and create a smooth finish.
- Use a clear or translucent jelly polish as the base.
- Keep dots isolated rather than arranging a dense grid.
- Choose a single color for a minimal design.
- Vary the placement while preserving open space.
14. Center Polka Dots with Tiny Rhinestones
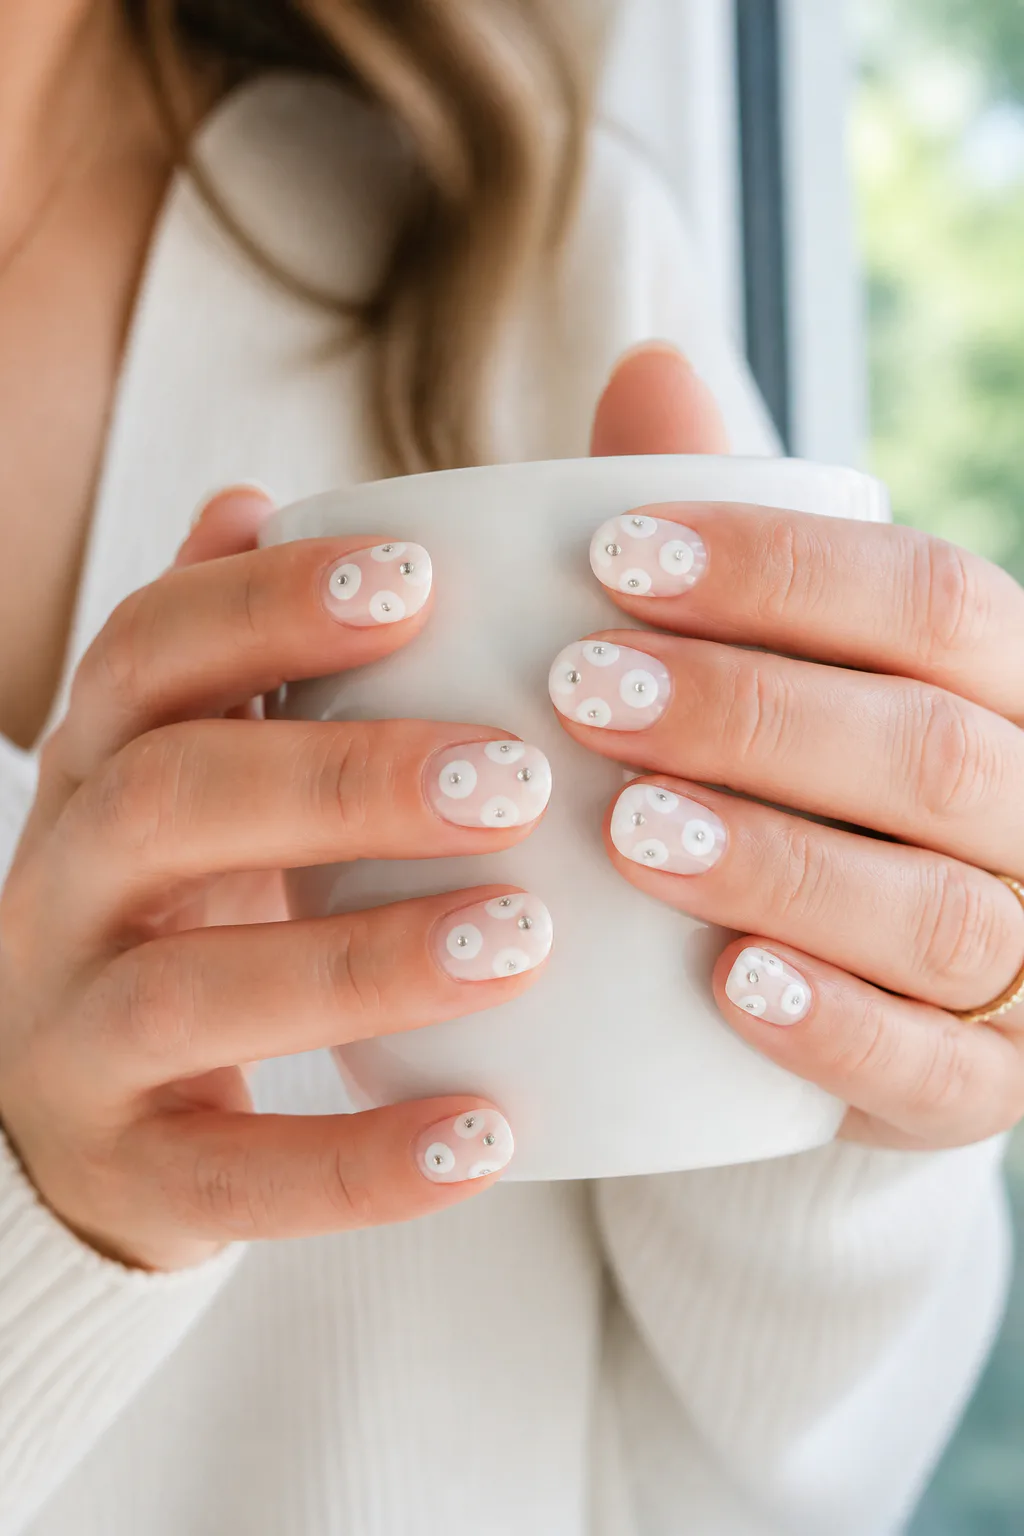
A tiny rhinestone placed in the center of a painted circle turns a familiar polka-dot pattern into a jeweled accent. The combination of a flat color and a small point of shine gives the manicure extra dimension without requiring an elaborate design. It’s an easy way to make selected nails feel special.
For a balanced look, add rhinestones to alternate dots or use them on only one or two nails. A neutral or pastel base keeps the accents delicate, while a darker base makes the stones more noticeable. The raised details are best kept limited if you want a more comfortable, everyday manicure.
Secure the details carefully
Paint each circle and let it dry before placing a tiny stone at its center. Use a small amount of nail-safe adhesive or a suitable gel product, then seal around the embellishment without covering its shine. Keep the remaining dots simple so the rhinestones stand out.
- Choose small stones that fit comfortably inside the circles.
- Place gems on alternating dots or accent nails.
- Use a simple base color to avoid visual clutter.
- Secure embellishments carefully for a smoother wear.
15. Mix Blue and Brown Nails with Inverted Dots
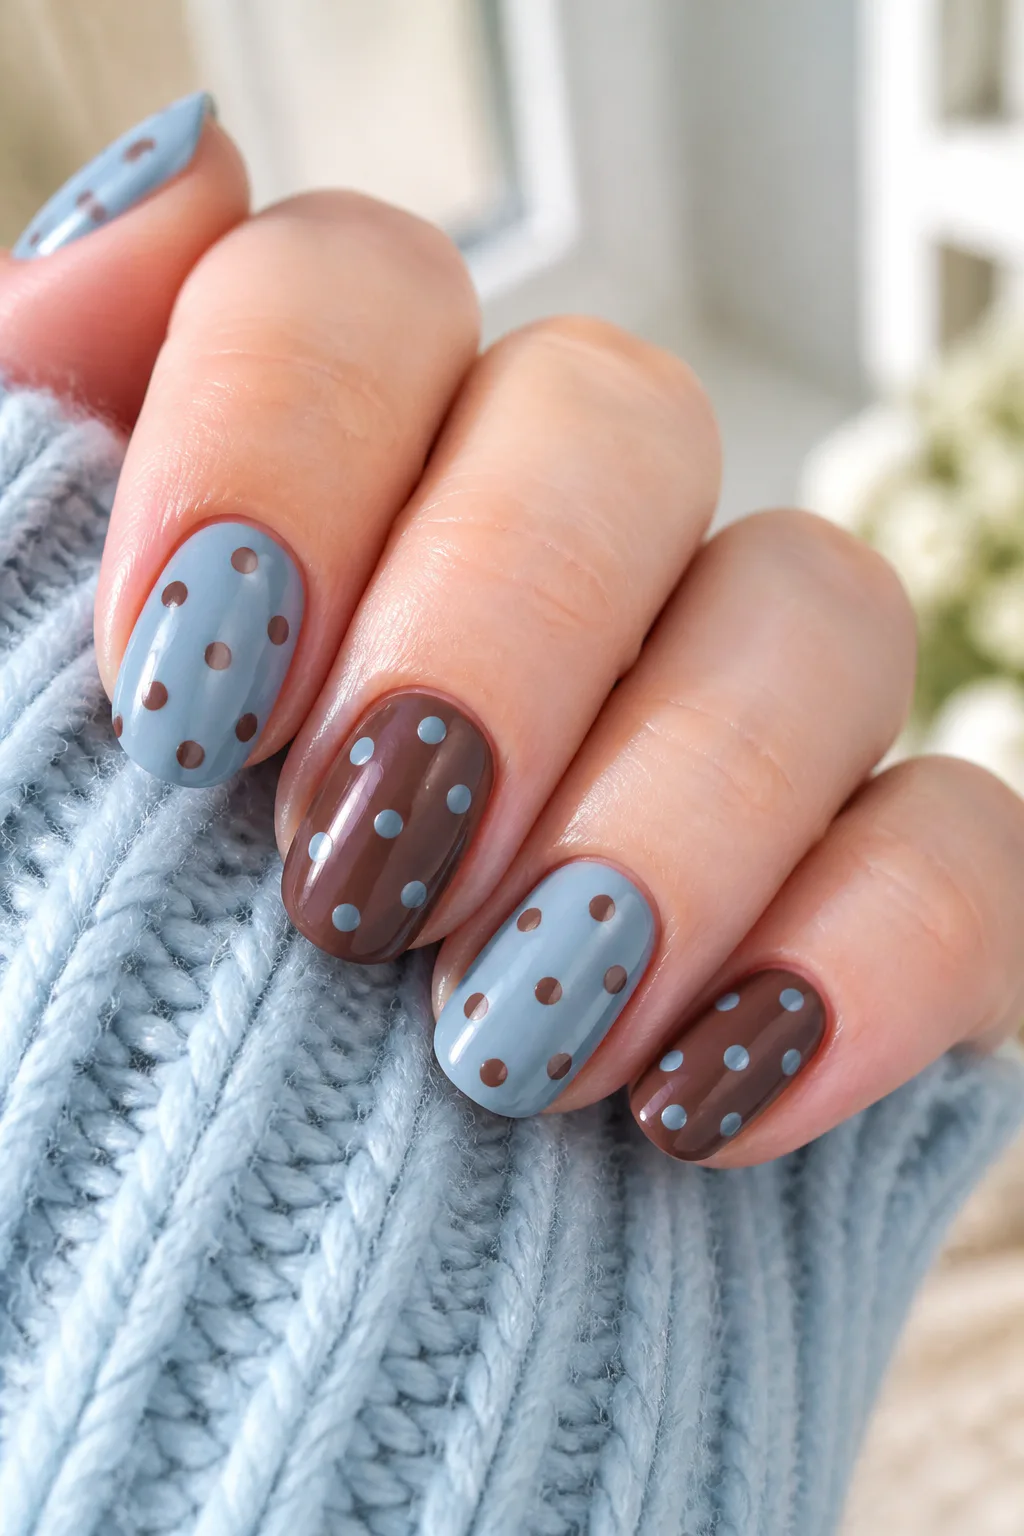
Dusty sky blue and chocolate brown make an unexpected pairing that feels both soft and grounded. Color-block the nails between the two shades, then reverse the dot colors: brown dots on blue nails and blue dots on brown nails. The repeated pattern connects the contrasting colors into one cohesive manicure.
This design gives each shade equal attention without making every nail identical. It works well when you want a playful mismatch that still feels coordinated, and the dusty blue keeps the brown from seeming too heavy. Keep the dots a consistent size to make the color reversal easy to notice.
Make the color blocking cohesive
Choose a muted blue and a warm chocolate shade that have enough contrast to remain distinct. Apply the base colors in a planned sequence, then use the opposite color for each nail’s dots. Leave space between circles so both the base and the dot color stay clear.
- Alternate dusty blue and chocolate brown base colors.
- Reverse the dot shades on each nail.
- Use matching dot sizes to unify the manicure.
- Finish with a glossy topcoat for a clean, polished look.
Final Thoughts
Polka dot nails can be as subtle as tiny silver marks on a milky base or as graphic as reversed black-and-white circles. Changing the base color, dot size, spacing, or finish gives the same simple motif a completely different character, making it easy to adapt to your nail length and personal style.
If you’re doing the design at home, start with a simple two-color idea and let each layer dry before adding the dots. You can always build on the look with metallic details, pastel shades, or a small accent, but a little negative space often makes the finished manicure feel especially polished.