15 Stunning Minimalist Nails Ideas for a Clean, Polished Look
Minimalist nails prove that a manicure can feel polished without relying on bold colors or elaborate designs. A sheer base, a fine line, or one carefully placed detail can add just enough interest while keeping your nails looking clean and wearable.
These ideas range from classic micro-French tips to tiny botanical accents and subtle chrome finishes. Most work beautifully on short or long nails, and many can be adapted for a salon appointment or a careful at-home manicure.
If you prefer a low-key look for everyday wear, these minimalist nail designs offer plenty of ways to personalize a neutral manicure. Choose one detail that suits your style, or keep the colors soft and let the finish do the talking.
1. Try a Classic Micro-French Manicure

A micro-French manicure puts a fresh spin on a timeless look by keeping the white tip exceptionally fine. Pair it with a sheer nude or milky base to create a clean, understated finish that still gives the nail a defined edge.
This design suits nearly any nail shape and length, though a thin tip can look especially crisp on short, softly squared nails. Because the contrast stays subtle, it works just as well for an everyday manicure as it does for a more dressed-up occasion.
How to keep the tip delicate
Start with a smooth, translucent base and let it dry fully before adding the white line. A fine brush gives you more control than a standard polish brush, while a little cleanup around the edges helps the result look intentional.
- Choose a milky base for a soft, creamy effect.
- Keep the white line narrow and consistent across each nail.
- Use a glossy top coat to bring the layers together.
The restrained tip adds definition without overwhelming the natural look of your nails.
2. Add a Single Cuticle Dot

One tiny dot near the cuticle is an easy way to make a simple manicure feel considered. On a sheer nude or pale pink base, a black dot gives the design a crisp graphic touch, while gold creates a warmer, softer accent.
Because the detail sits close to the base of the nail, it leaves most of the surface open and uncluttered. It can work on every nail for a coordinated look or be reserved for a few nails when you want an even quieter finish.
Placement makes the difference
Apply the dot after the base coat is completely dry, using a dotting tool or the tip of a fine brush. Keep it small and place it just above the cuticle line, leaving a little breathing room so the design does not look crowded.
- Use black polish for a clean, high-contrast accent.
- Choose metallic gold for a subtle glint against a warm nude.
- Repeat the same placement on each nail for a tidy rhythm.
A glossy top coat helps protect the small detail and keeps the overall manicure looking smooth.
3. Paint Delicate Negative-Space Swirls

Negative-space swirls bring a little movement to a minimalist manicure while allowing the natural nail to remain part of the design. A clear, glossy base makes the nail look fresh, and one fine white or cream line creates a soft, artistic accent.
The open areas around the swirl are what keep this look light. It can sit on every nail for a cohesive set or appear on one or two accent nails alongside plain, glossy nails. A gentle curve often feels more relaxed than a perfectly symmetrical pattern.
Keep the line fluid
Work with a fine liner brush and make the curve in one steady motion where possible. If the design is for a short nail, keep the swirl compact so it does not take over the available space; on longer nails, a slightly more elongated line can follow the nail’s shape.
- Use white for a crisp, bright line or cream for a softer contrast.
- Leave generous clear space around the design.
- Let the line dry before adding a clear top coat.
The result feels personal and expressive without straying from a clean, understated palette.
4. Create Milky Glazed Donut Nails
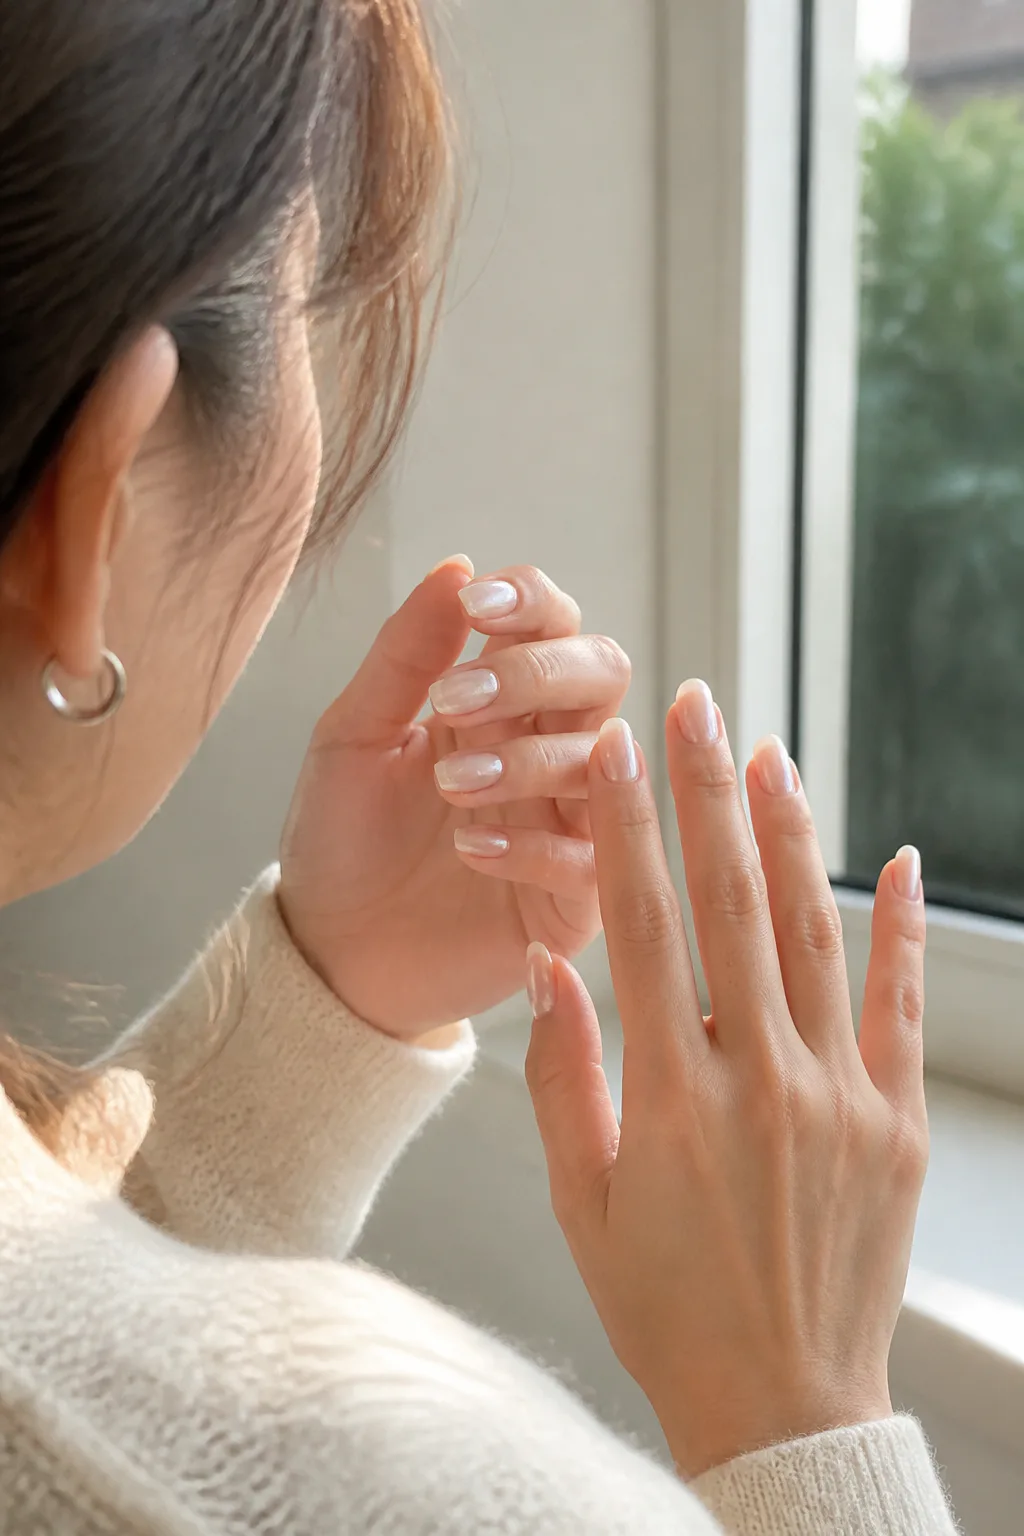
Milky glazed donut nails combine a translucent white base with a delicate pearlescent sheen. The color stays soft and natural-looking, while the reflective finish catches the light and gives the manicure a smooth, glazed appearance.
This design is a lovely choice when you want something more luminous than plain nude polish but still easy to wear. It looks polished on short nails and can also complement longer shapes, especially when the base remains sheer rather than fully opaque.
Build the glow in light layers
Apply a sheer milky-white polish first, allowing each coat to dry before adding the next. A light dusting of pearlescent chrome over the base creates a subtle glow; too much shimmer can shift the look away from its soft, minimalist feel.
- Choose a translucent white rather than a dense, stark white.
- Keep the pearl finish fine and even across each nail.
- Seal the surface with a glossy top coat for a glassy finish.
The combination of milky color and gentle shine makes this manicure feel refined without needing extra nail art.
5. Trace a Tip with Gold Foil
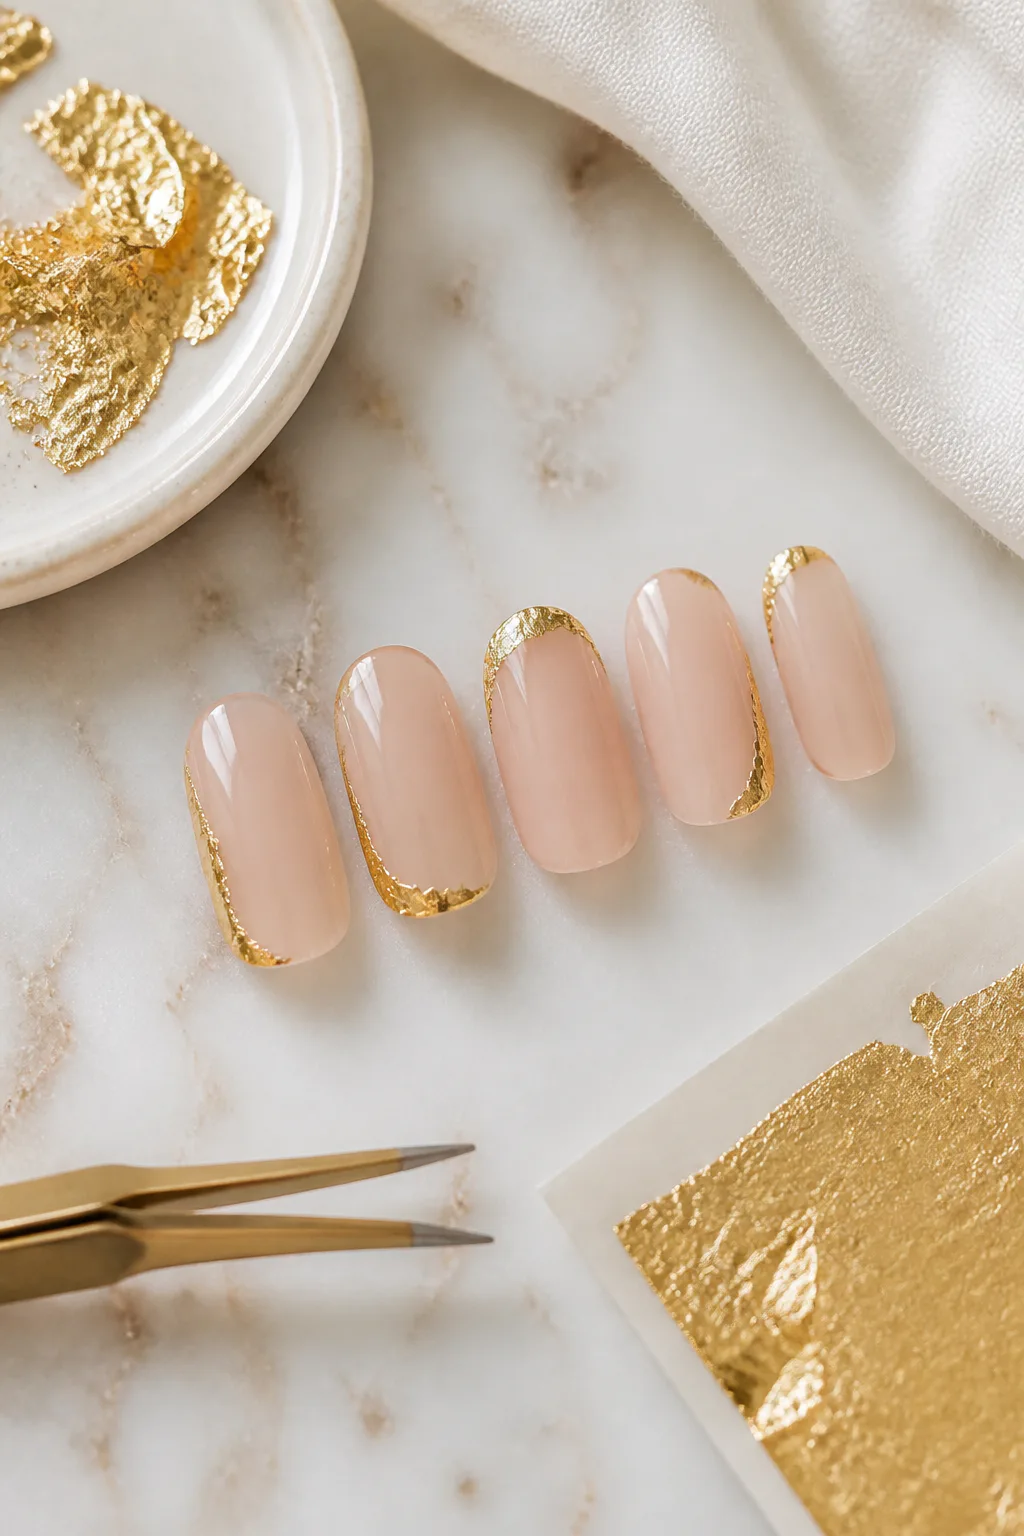
A faint sliver of gold foil can add a warm glimmer to an otherwise natural manicure. Instead of covering the nail, let the foil trace a small part of the tip or one edge, keeping the accent irregular and delicate.
This detail pairs well with beige, nude, or sheer pink polish because the quiet base gives the metallic finish room to stand out. It works particularly well when you want a special touch that still feels subtle enough for regular wear.
Use foil sparingly
Apply the base color and let it dry before placing a small piece of foil with a fine tool. Press it gently into place rather than creating a thick, continuous stripe; a slightly imperfect edge can make the detail feel light and organic.
- Place foil on just one section of the tip or side edge.
- Keep the pieces small so the natural base remains visible.
- Finish with top coat to smooth and protect the accent.
The gold catches the light in small flashes, adding interest without turning the manicure into a full metallic look.
6. Add Double-Line Nail Geometry
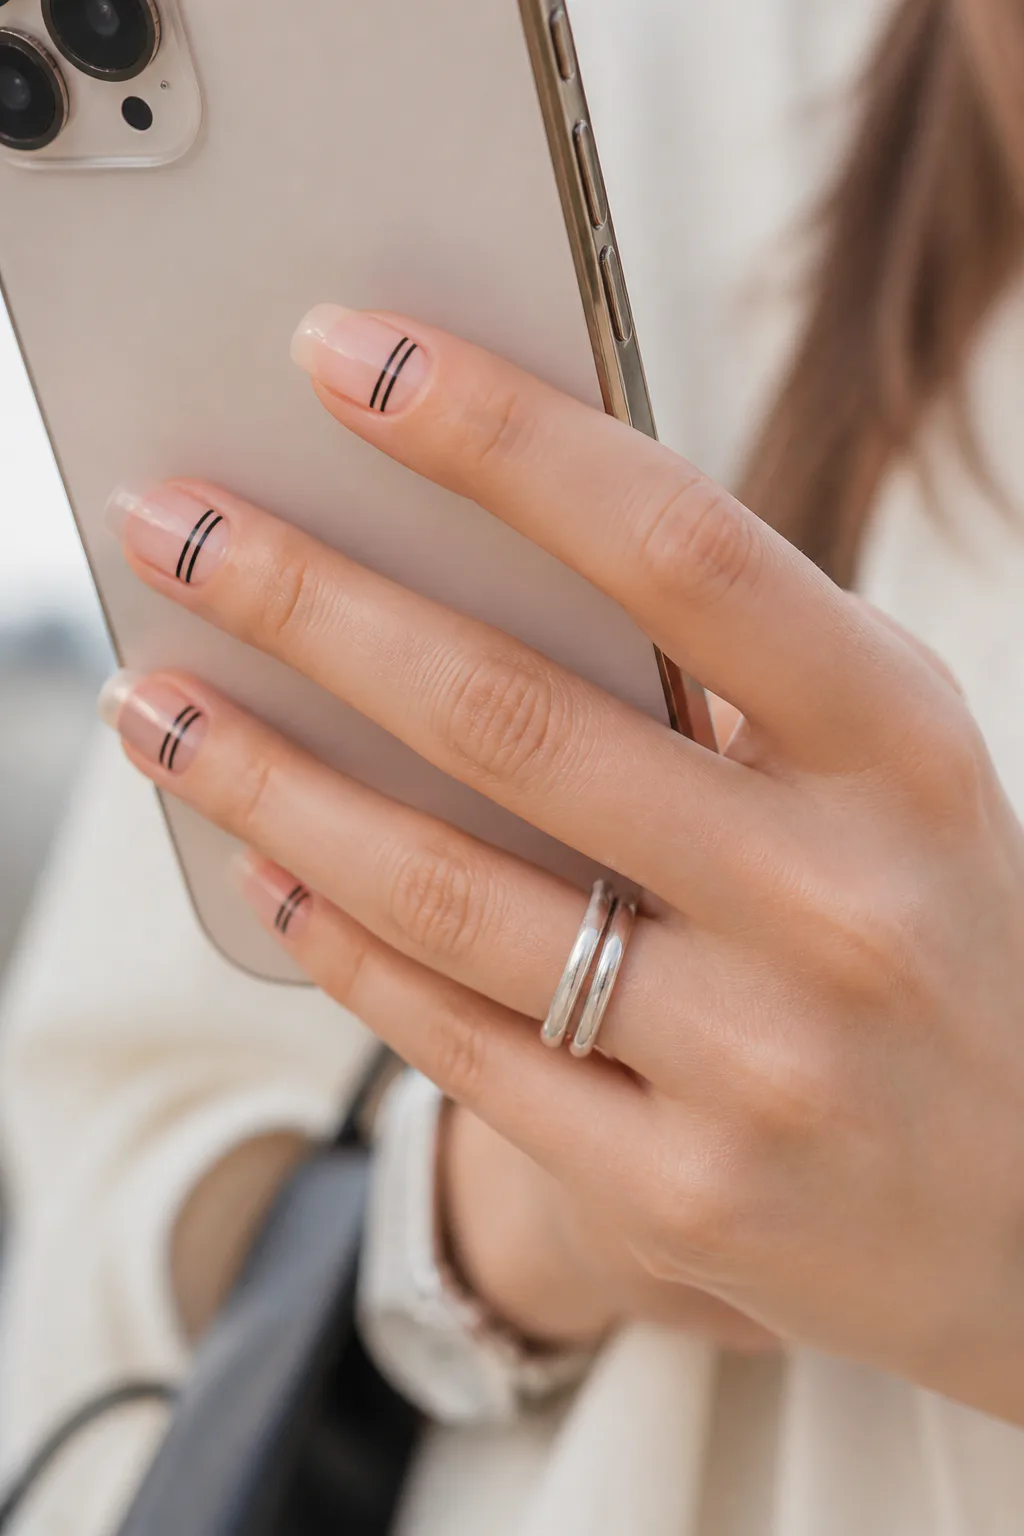
Two parallel, razor-thin lines give a neutral manicure a neat, graphic element. Black creates a sharper contrast, while silver keeps the look cool and reflective; either option can sit across the middle of a nude or sheer nail.
The design feels structured, but the fine lines keep it from appearing heavy. It can be repeated across all the nails for a coordinated pattern or used on an accent nail to preserve a particularly pared-back look.
Make the lines clean and balanced
Use a liner brush or fine striping tool, and wait until the base is fully dry before drawing. A steady hand helps, but the lines do not have to span the entire nail: shorter, carefully placed strokes can still read as a deliberate geometric detail.
- Keep the two lines parallel and close in width.
- Try black for contrast or silver for a softer metallic touch.
- Position the lines across the mid-nail for a simple layout.
Against a quiet base, this small amount of geometry feels modern while staying easy to pair with everyday outfits.
7. Try a Soft Blush Center
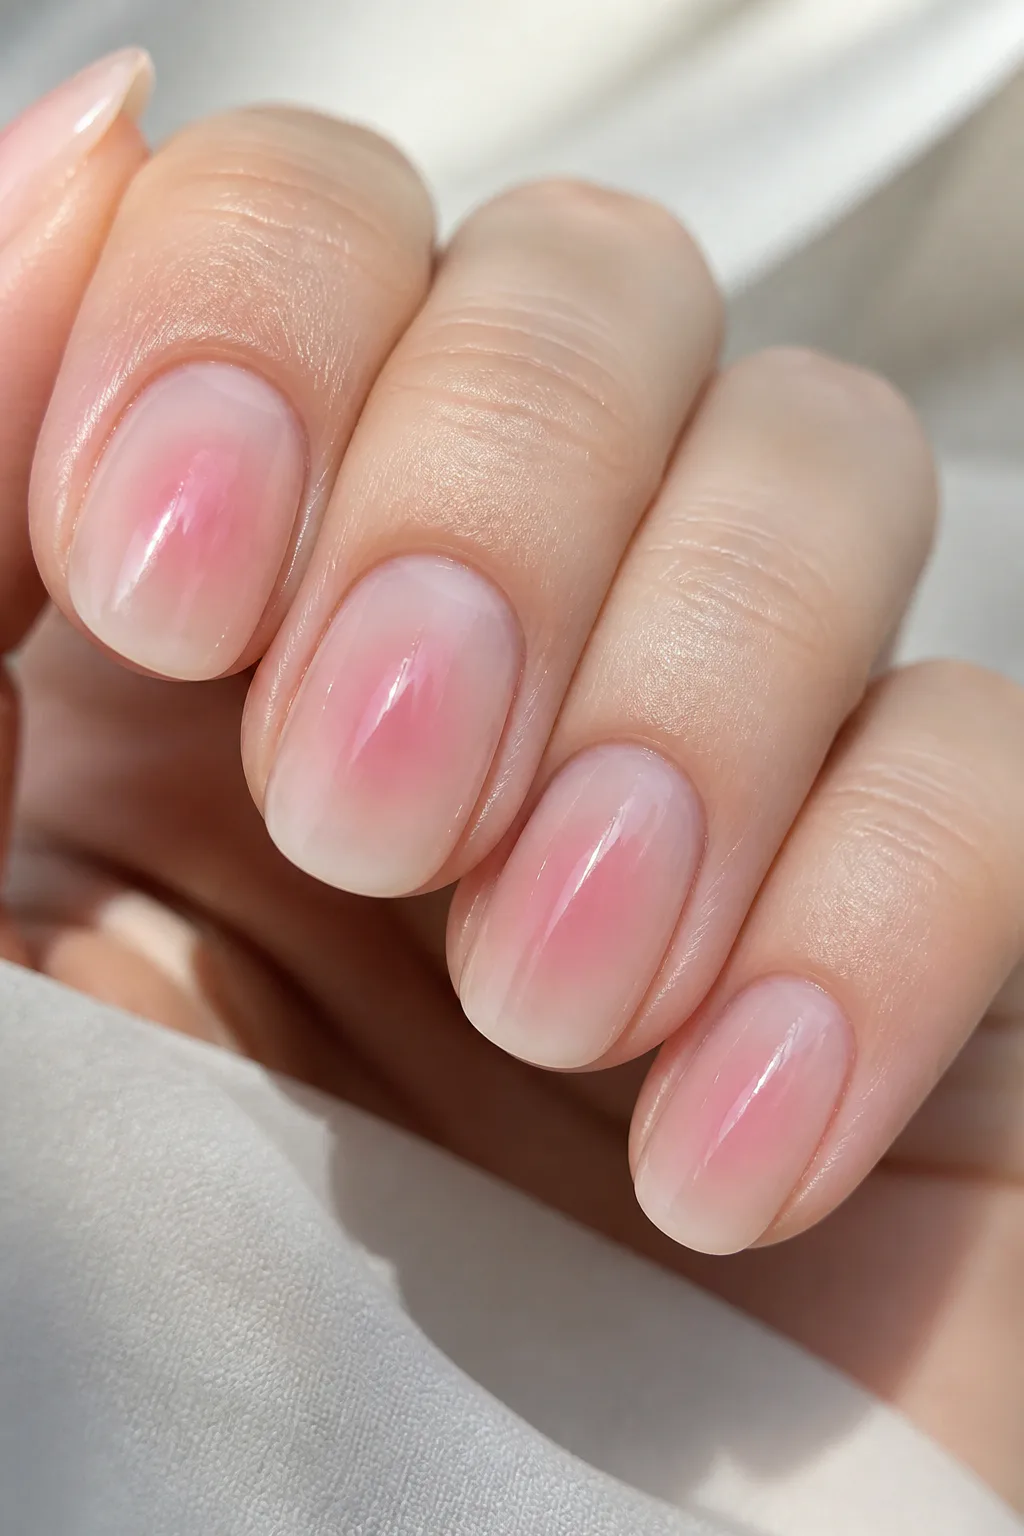
A soft blush center gives a neutral manicure a hint of color without creating a solid pink nail. The sheer base stays visible, while a diffused wash of muted pink sits near the center and fades gently toward the edges.
This design has a soft, almost airbrushed effect that feels romantic but not overly sweet. It suits a range of nail lengths and is especially appealing if you like the look of natural nails but want a little more warmth and dimension.
Blend the color gently
Begin with a sheer neutral base, then use a sponge or a light touch with a brush to apply the pink in thin layers. Build the color gradually and keep the edges soft; a sharply defined circle will change the effect from a subtle blush to a more graphic design.
- Choose a muted pink that blends naturally with your base.
- Concentrate the color at the center of each nail.
- Finish with a glossy top coat to soften the transition.
The gentle color wash adds life to a minimalist manicure while keeping the overall look airy.
8. Paint a Tiny Botanical Stem
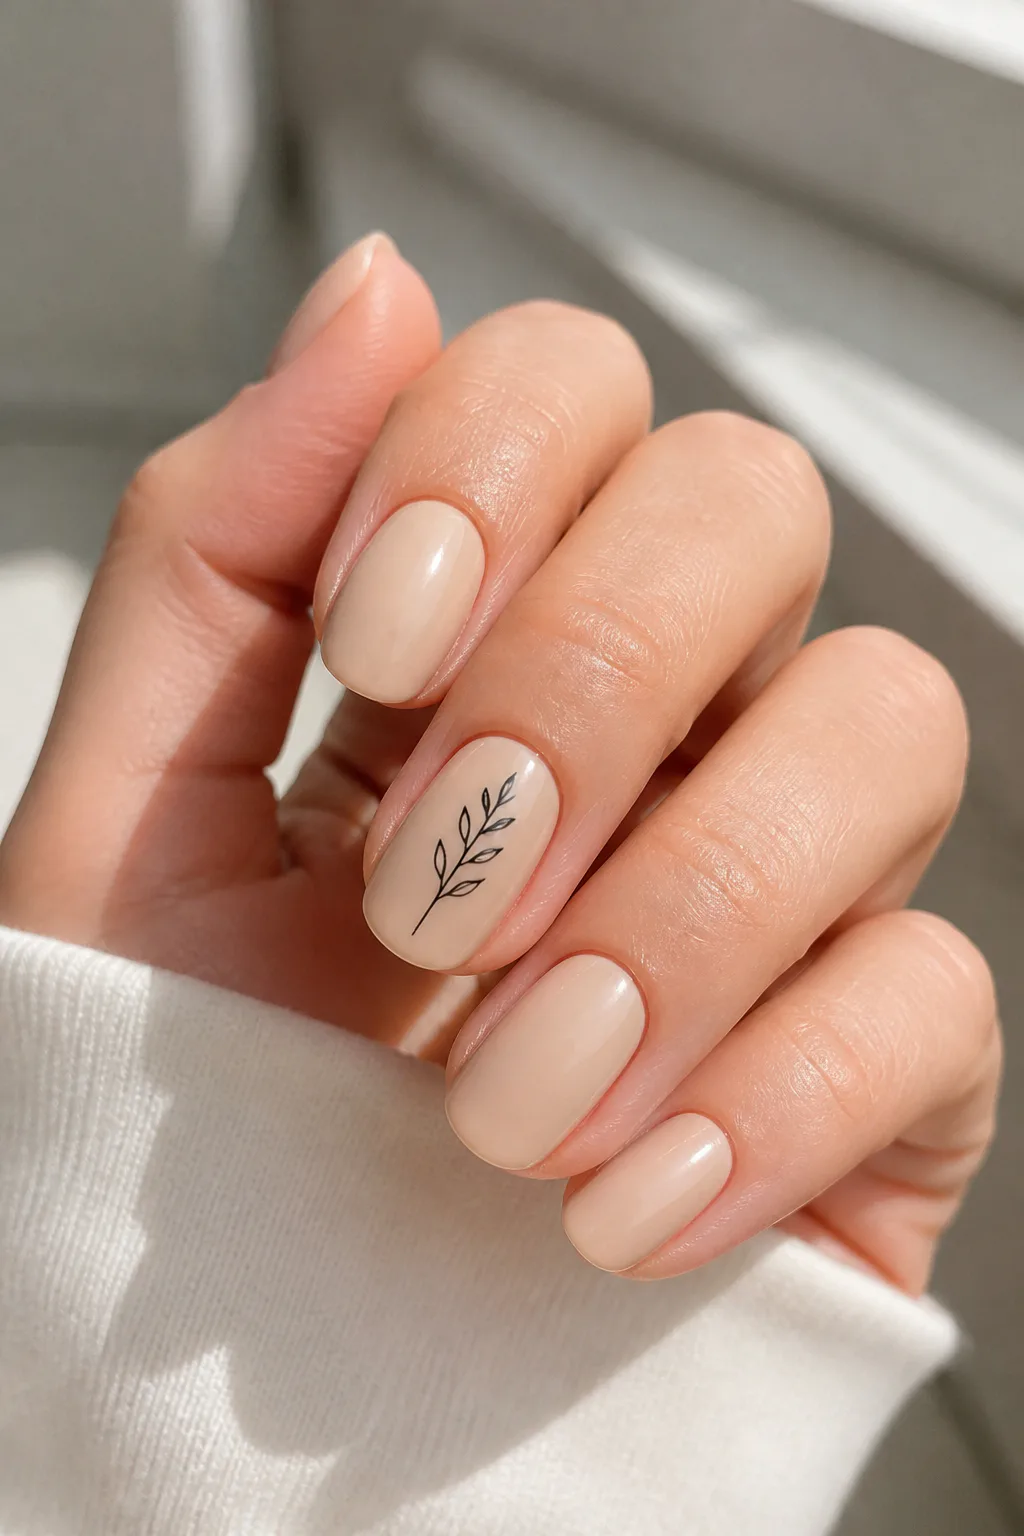
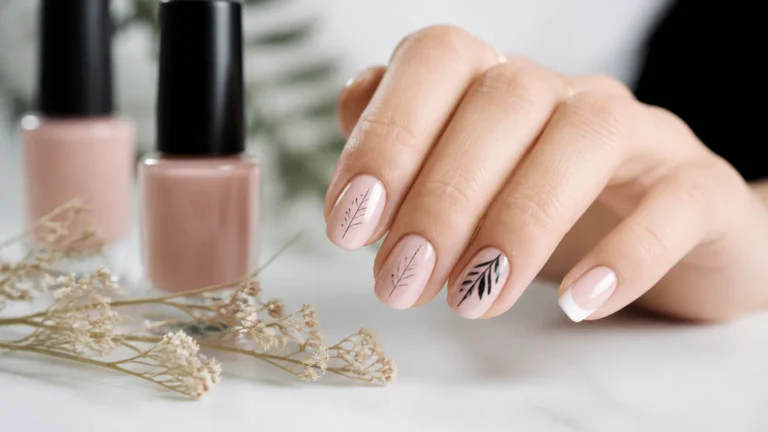
A fine-lined botanical stem on one beige accent nail brings a hint of nature to a clean manicure. The simple artwork can be a slender black stem with a few small leaves, leaving plenty of the neutral base uncovered.
Limiting the design to one nail helps the detail feel intentional rather than busy. A ring finger or thumb can provide a little more room for the line art, while the remaining nails can stay in a matching beige or sheer neutral polish.
Keep the illustration simple
Use a fine brush to draw a narrow stem and add only a few small leaves. The design does not need to be perfectly botanical or filled with detail; a clean outline and thoughtful placement are enough to suggest a delicate sprig.
- Choose a beige base that offers gentle contrast with black art.
- Reserve the stem for one accent nail.
- Keep leaves small and spaced along the line.
This understated motif adds personality while letting the rest of the manicure remain calm and cohesive.
9. Sweep on an Asymmetrical French Tip
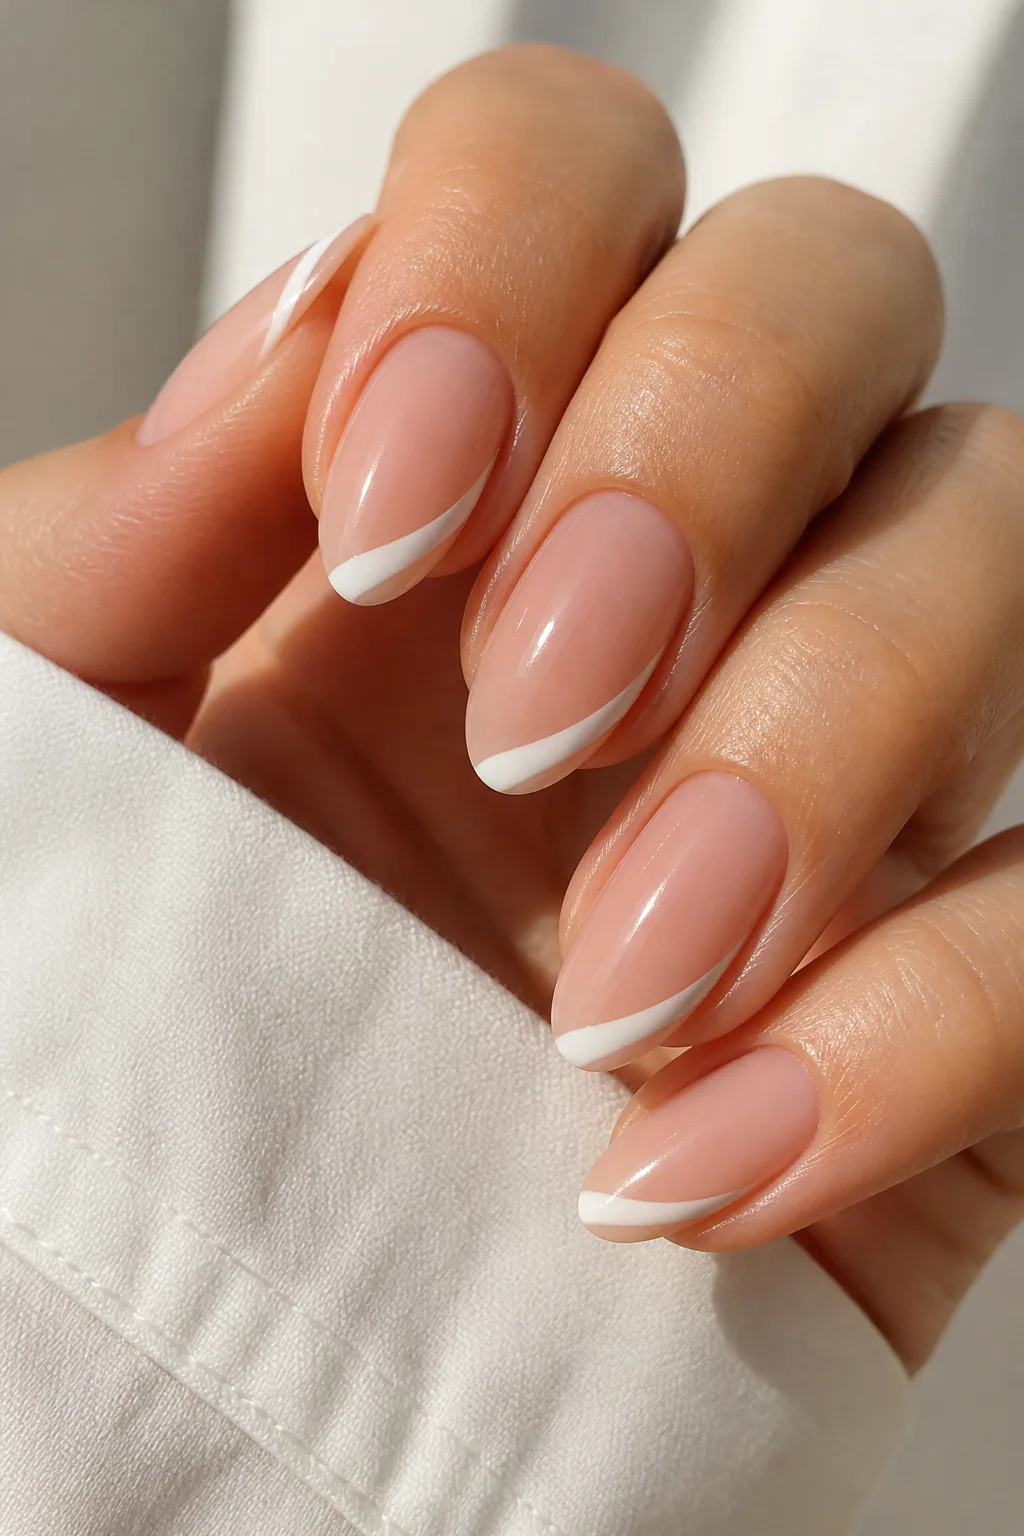
An asymmetrical French tip offers a relaxed alternative to the familiar line that spans the whole nail. Instead, a fine curve follows one side of the edge and sweeps slightly down the nail, giving the tip a modern, off-center shape.
A sheer nude or milky base keeps the design fresh and wearable. This style works especially well on nails with enough length to show the curve, but the line can be made more compact to suit shorter nails as well.
Follow the nail’s natural curve
Use a fine brush to draw a delicate arc along one side of the tip. The line can be white for a classic French feel, or a soft cream for less contrast; either way, keeping the stroke light is key to preserving the minimalist effect.
- Start the curve at one side edge rather than across the full tip.
- Keep the base sheer so the shape remains the focus.
- Repeat the direction consistently for a coordinated set.
The off-center sweep adds a subtle sense of movement while keeping the manicure simple.
10. Hide a Tiny Heart Near the Cuticle

A microscopic heart makes a sweet, personal accent without turning a neutral manicure into a bold statement. Place it near the cuticle or along one side wall on a clear or nude nail so it feels like a small detail discovered up close.
Red gives the heart a classic pop, while a metallic finish makes it feel more understated and decorative. You can place one on every nail for a repeated motif or keep it to a single accent nail for a more discreet result.
Make the heart small and clear
Use a fine brush or dotting tool to create the shape with two tiny touches joined at a point. Work over a dry base and avoid adding extra decoration around it; the open space is what helps the heart feel delicate rather than crowded.
- Choose red for a simple, recognizable accent.
- Try a metallic heart for a quieter glint.
- Place the detail close to, but not on, the cuticle line.
A clear top coat helps the tiny symbol sit smoothly on the nail and preserves the clean finish.
11. Contrast Matte Nude with Glossy Tips
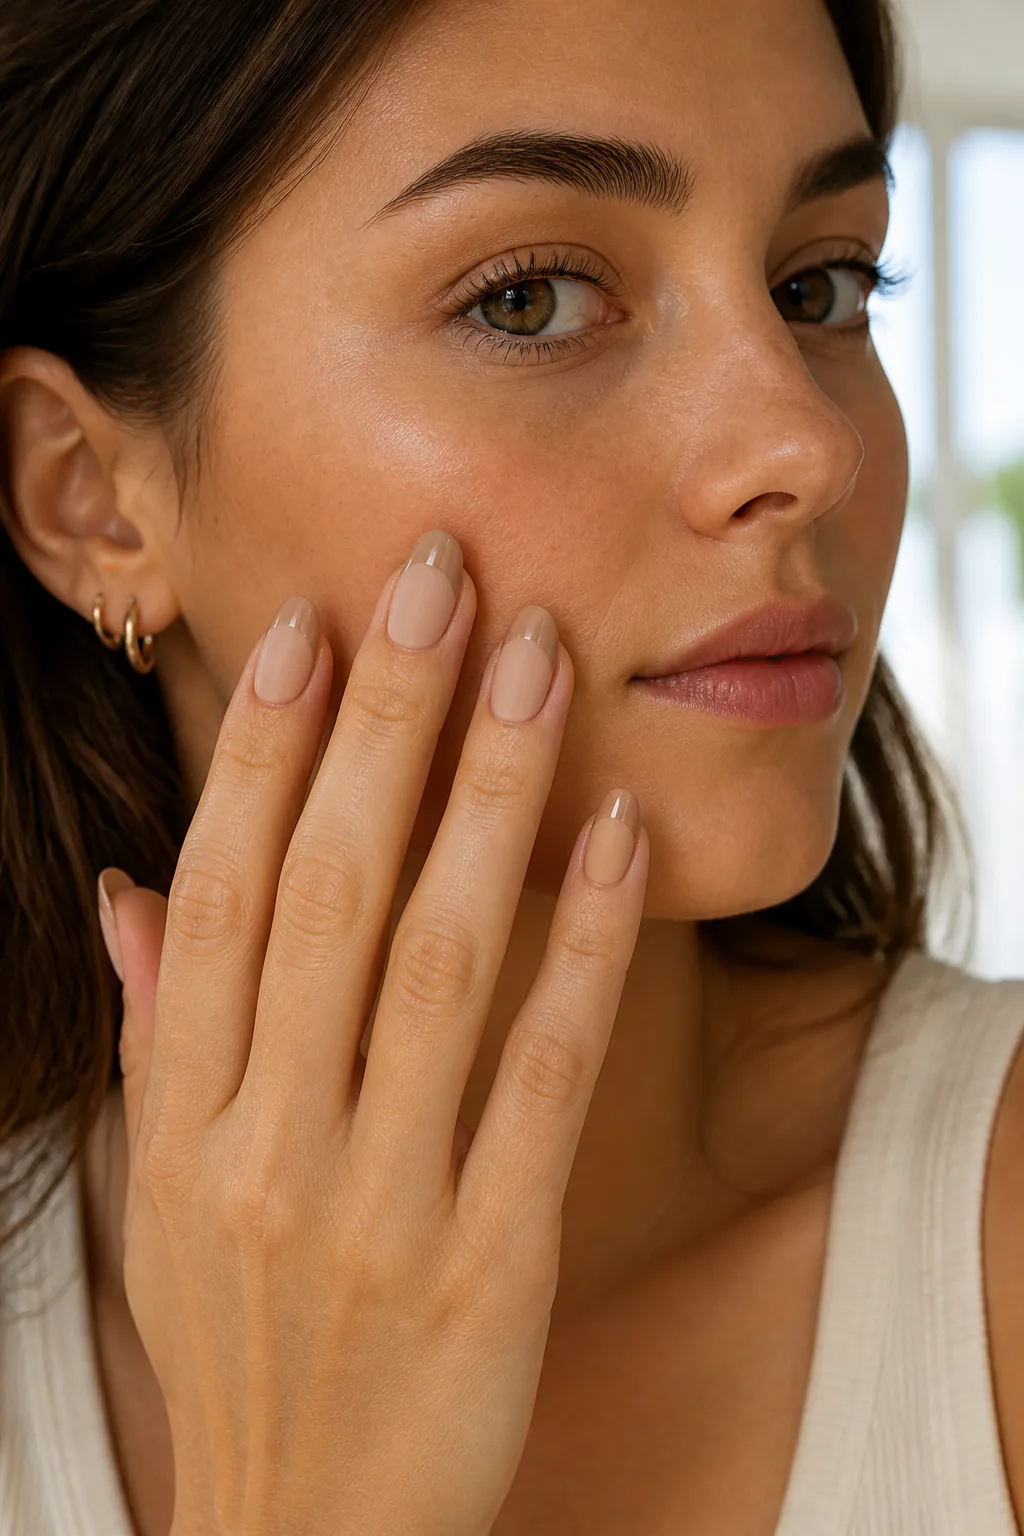
A matte nude base paired with glossy tips creates contrast through texture rather than color. The manicure remains tonal and restrained, but the difference between the soft, flat surface and the reflective edge gives it an extra layer of interest.
You can use a matching nude shade for a subtle tonal effect or choose clear gloss for a nearly invisible shine. The design is versatile across nail shapes, and its simplicity makes it easy to wear with both casual and polished looks.
Let the finish create the detail
Apply nude polish across the nail and seal it with a matte top coat, taking care to keep the surface even. Once dry, add a glossy matching or clear finish just at the tips, using a fine brush to define the edge cleanly.
- Choose a nude tone that complements your natural coloring.
- Keep the glossy tip narrow for a restrained look.
- Use a steady brush to keep the finish line crisp.
Because the palette stays simple, the contrasting textures become the quiet focal point.
12. Add a Silver Chrome Constellation

A silver chrome constellation brings a small celestial accent to a sheer pink manicure. Tiny dots or fine cross-lines can suggest starbursts across the nail, while the translucent base keeps the design light and polished.
This look can be as minimal as a few scattered marks on one accent nail or repeated in a restrained pattern across the set. The cool silver detail stands out against pale pink without requiring a dark or highly saturated background.
Space out the star-like details
Use a fine brush or dotting tool to place the marks carefully, leaving plenty of open space between them. A few varied points can feel more natural than a tightly packed pattern, and small details are easier to keep refined on short nails.
- Start with a sheer pink base for a soft backdrop.
- Use tiny silver dots or delicate cross-lines.
- Keep the pattern sparse so the nail remains uncluttered.
The reflective accents catch the light gently, adding a little sparkle while preserving the manicure’s minimal feel.
13. Try a Tortoiseshell Micro-Tip

A tortoiseshell micro-tip brings a warm pattern to a neutral manicure without covering the whole nail. Keep the design restricted to a small section of the tip, leaving a beige, nude, or sheer base visible for a balanced finish.
The mix of warm tones gives this detail depth, while its small scale keeps it from feeling too bold. It can be repeated across the nails for a coordinated look, or used on a few tips alongside plain neutral nails.
Keep the pattern contained
Shape the accent along the edge of the nail rather than extending it toward the cuticle. A small tip area is enough to suggest tortoiseshell, and leaving the surrounding base clean helps the pattern read clearly without crowding the manicure.
- Choose a neutral base that complements the warm tip detail.
- Limit the tortoiseshell design to a narrow section of the edge.
- Keep the pattern subtle and contained on each nail.
This approach adds a little richness and texture while keeping the overall look polished and understated.
14. Add a Microscopic Yin-Yang Accent

A tiny yin-yang symbol creates a distinctive accent on an otherwise simple nude manicure. The black-and-white design can sit on one thumb or ring finger, allowing the rest of the nails to remain clean and neutral.
Because the symbol has a clear shape, keeping it small is especially important. A neat accent on a nail with enough room to show the curved halves will look more legible than a design squeezed into a very small area.
Give the symbol room to read
Apply the design over a smooth, fully dry base and use a fine brush to keep the edges clean. If drawing the complete symbol feels difficult, a nail artist can help create a tidy version; the surrounding nails can stay plain to keep the look balanced.
- Choose one accent nail rather than repeating the symbol everywhere.
- Use crisp black and white for clear contrast.
- Keep the rest of the manicure in a soft nude tone.
The small graphic detail adds character while the neutral base maintains an overall minimalist finish.
15. Alternate Sheer Neutral Nail Colors

For a minimalist manicure without nail art, alternate sheer neutral shades across the nails. Soft taupe, milky white, pale peach, and translucent rose create gentle variety while keeping the palette cohesive and understated.
This idea is easy to personalize because the colors can be arranged in any order. You might use one shade on each nail or repeat a favorite tone, and the sheer finish helps different neutrals sit together without looking too stark.
Choose tones that work as a set
Look for colors with a similar softness and level of translucency so no single nail feels too heavy next to the others. Keeping the finish consistent—glossy, for example—helps the mixed shades feel like one intentional manicure.
- Mix soft taupe with milky white for gentle contrast.
- Add pale peach or translucent rose for a warm touch.
- Repeat colors in a balanced order across both hands.
The result feels fresh and coordinated, proving that a thoughtful color mix can be enough on its own.
Final Thoughts
Minimalist nails can be as simple as one fine line or as expressive as a tiny symbol, a soft color wash, or a subtle chrome finish. The key is to let one small detail stand out against a clean base, rather than adding decoration everywhere.
Choose the idea that feels most like you, then adjust the color, placement, or number of accent nails to suit your taste. Whether you try a classic micro-French manicure or mix a few sheer neutrals, a restrained design can make your next manicure feel both polished and personal.