15 Stunning Olive Green Nail Ideas for Every Style
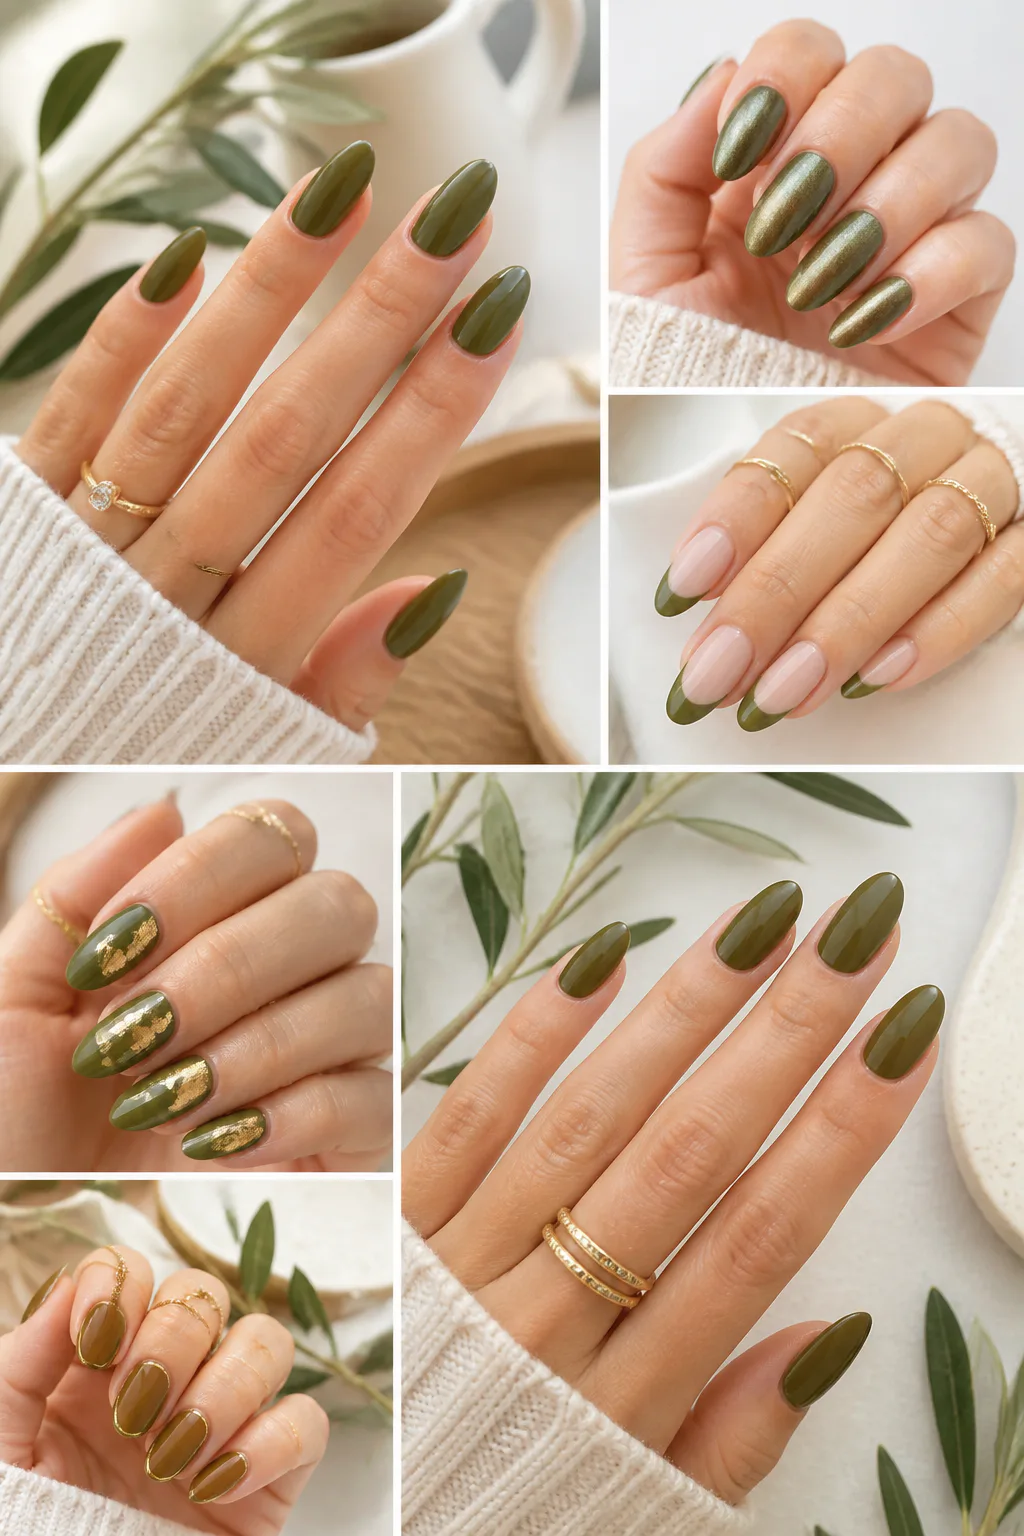
Olive green nails bring an earthy, polished feel to a manicure without relying on a classic neutral or bright color. The shade can look soft and understated, rich and dramatic, or playful depending on the finish and nail art you choose.
These 15 ideas range from simple glossy color to magnetic shimmer, graphic patterns, and delicate accents. There are options for short nails and longer shapes, as well as designs that keep most of the nail bare.
If you’re choosing a look for your next salon visit or planning a manicure at home, use these ideas as a starting point. You can adjust the olive shade, accent colors, and amount of detail to suit your personal style.
1. Classic Glossy Olive Almond Nails
A solid coat of glossy olive is an easy way to wear the shade while keeping the manicure clean and timeless. On short almond or oval nails, the softly tapered shape complements olive’s natural, earthy character without making the color feel too bold.
The shine adds depth and helps a single-color manicure look polished for everyday wear. Choose a lighter, muted olive for a softer effect, or a deeper mossy shade when you want more contrast against your skin tone.
How to pull it off
Start with neatly shaped nails and an even base coat so the rich color goes on smoothly. Apply thin layers, allowing each one to dry or cure fully, then finish with a glossy topcoat to bring out the color.
- Keep nails short to medium for an understated look.
- Choose almond or oval edges for a softly elongated effect.
- Refresh the shine with a clear topcoat as needed.
2. Velvet Olive Cat-Eye Nails
Magnetic cat-eye polish gives olive nails a shifting shimmer that can look like velvet, polished stone, or a gemstone in changing light. The effect adds dimension without needing extra colors or elaborate nail art, making it a striking option for a full set.
Deep olive shades make the magnetic line especially noticeable, while a softer olive creates a more subtle glow. This finish works on short nails as well as long ones, though a little extra length gives the shimmer more room to sweep across the nail.
Design tips
Magnetic polish needs to be shaped before it sets, so work on one nail at a time and follow the product’s curing directions. Experiment with the magnet’s angle to move the light-catching band into a vertical, diagonal, or centered position.
- Use a dark base if you want a more dramatic effect.
- Try a diagonal shimmer for a dynamic, elongated look.
- Keep the rest of the design simple so the finish stands out.
3. Olive Micro-French Tips
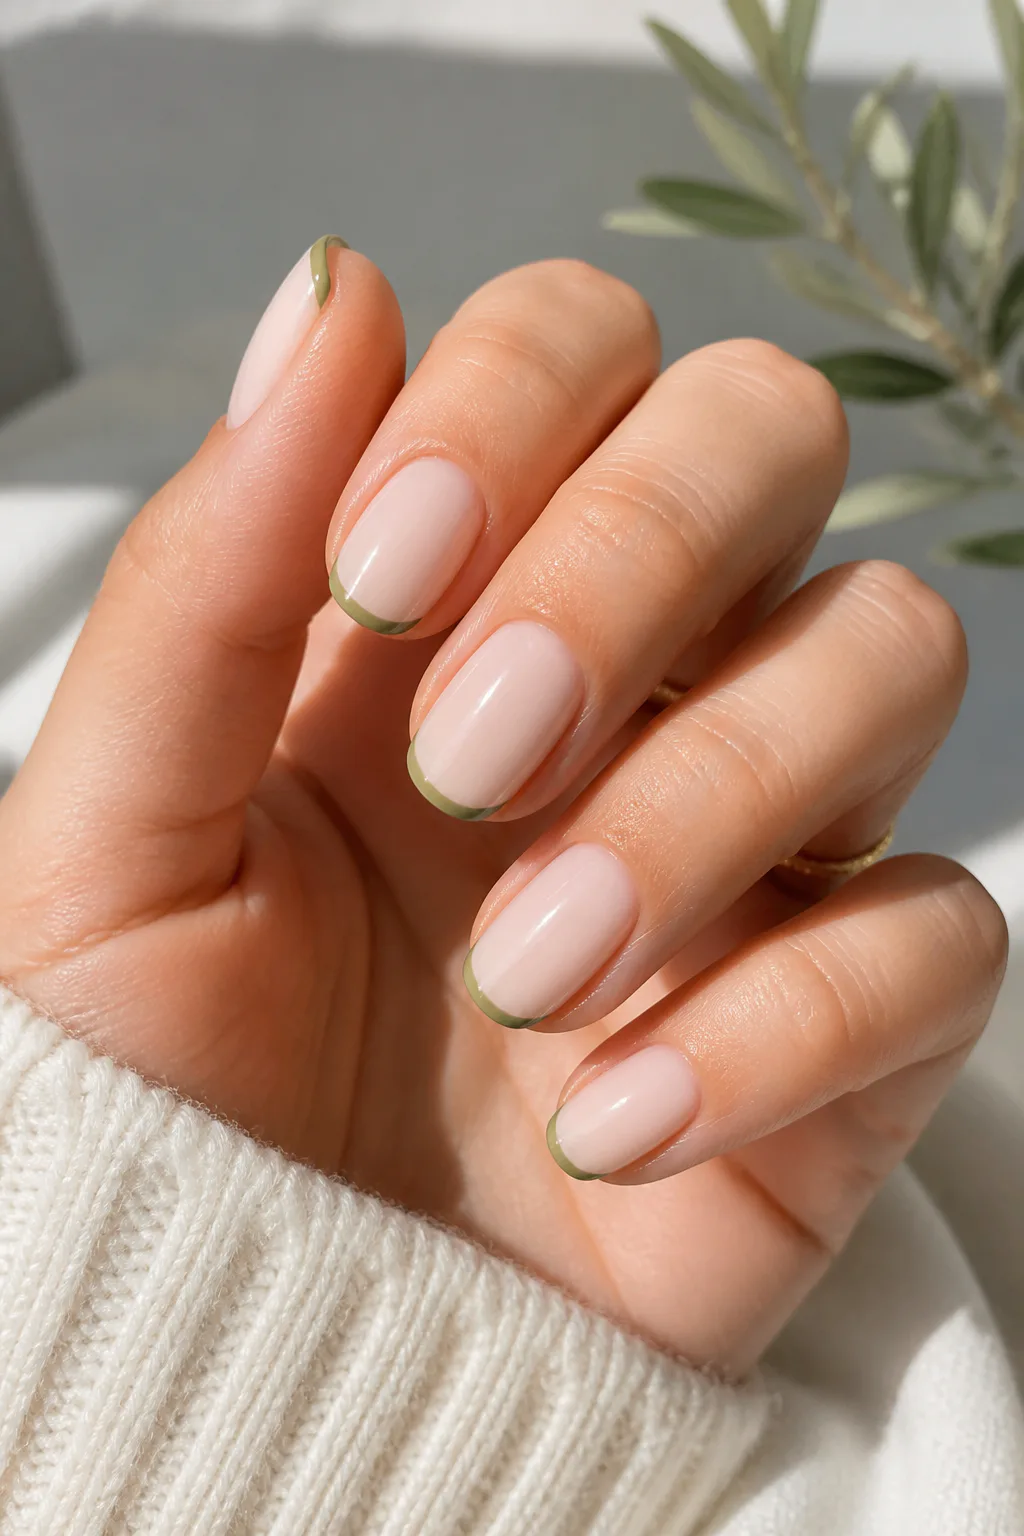
Micro-French nails offer a delicate way to add olive green while leaving most of the nail looking natural. The tip is much thinner than a traditional French manicure, so it reads as a fine line of color rather than a large block.
A sheer milky-white or nude base keeps the design airy and lets the olive edge provide a crisp little contrast. This style suits short nails particularly well, and it also looks refined on longer shapes when the tip follows the natural curve.
How to get the look
Use a sheer base shade that complements your skin tone, then keep the olive line consistent in thickness across each nail. A fine nail-art brush can help create a neat curve; if you’re doing the manicure yourself, work slowly and clean up the edges before sealing.
- Choose a muted olive for a subtle finish.
- Pair the design with oval, almond, or square-shaped nails.
- Keep the base sheer rather than fully opaque for a light effect.
4. Matte and Glossy Olive Nails
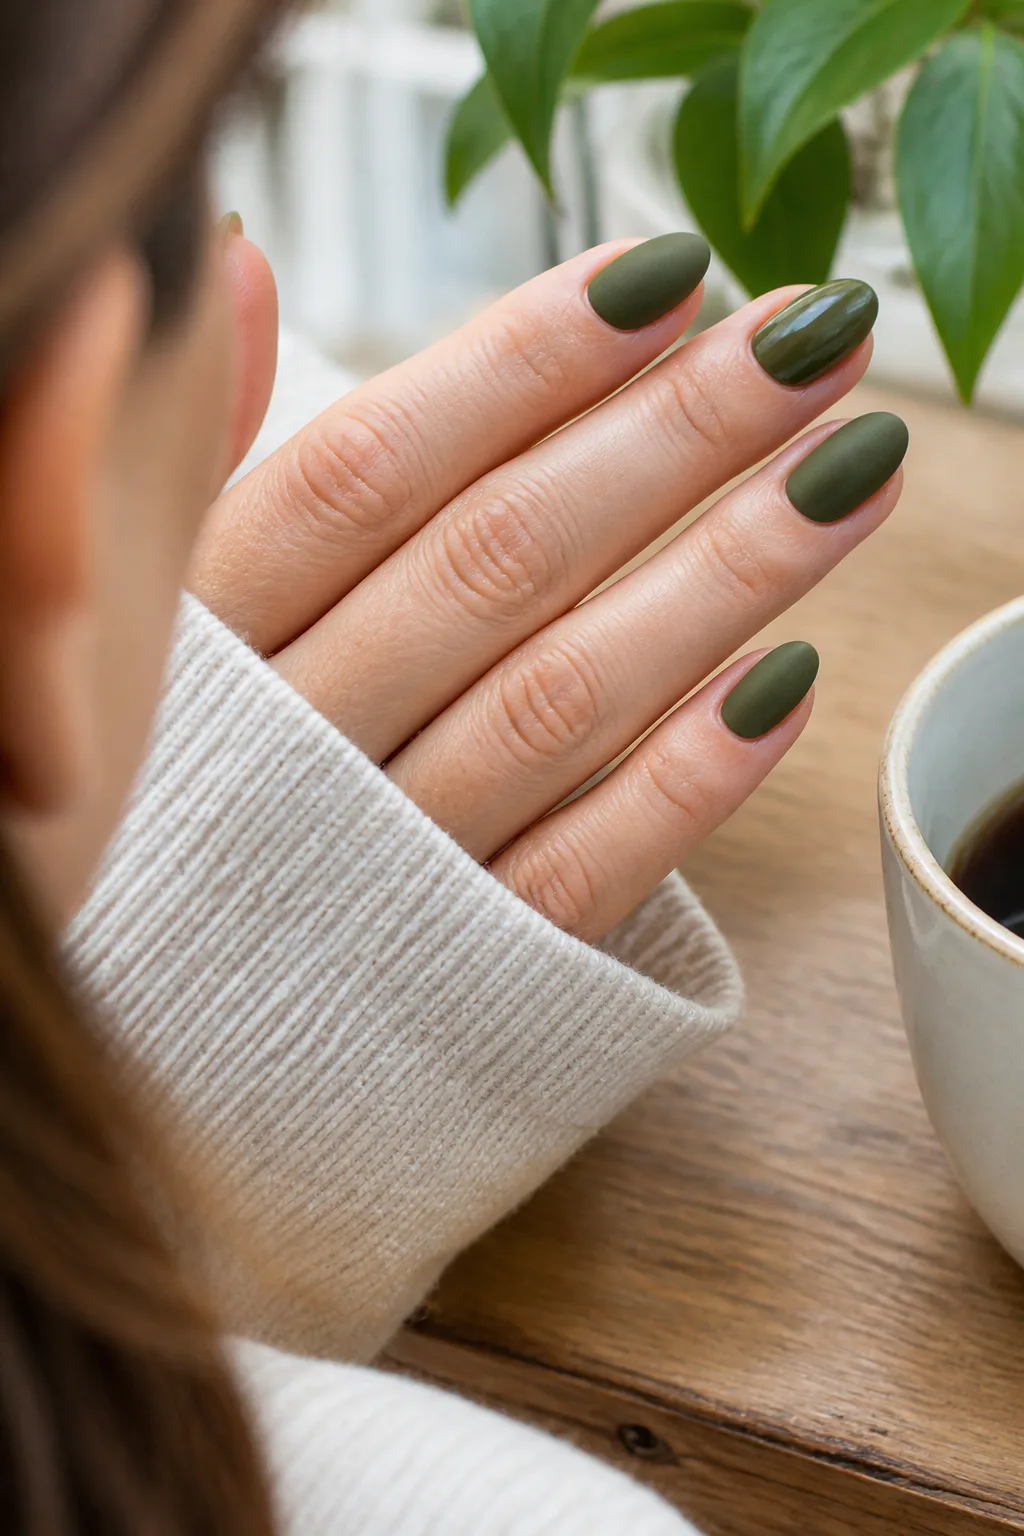
Combining matte and glossy finishes makes a single olive shade feel more dimensional. You can alternate the topcoat finish from nail to nail, or use matte olive as a base and add glossy olive details such as French tips or narrow curved lines.
Because the colors stay within one shade family, the contrast feels considered rather than busy. The design works on a full set of short nails, but longer nails offer more space for clean finish changes and graphic details.
Design tips
Apply the olive color evenly before deciding which areas will be matte and which will shine. If you’re creating glossy details over a matte base, make sure the matte finish is fully set and use a fine brush to keep the lines intentional.
- Alternate finishes across fingers for a simple approach.
- Try a glossy French tip over a matte base.
- Use curved lines or dots for understated contrast.
5. Olive Nails with Gold Foil
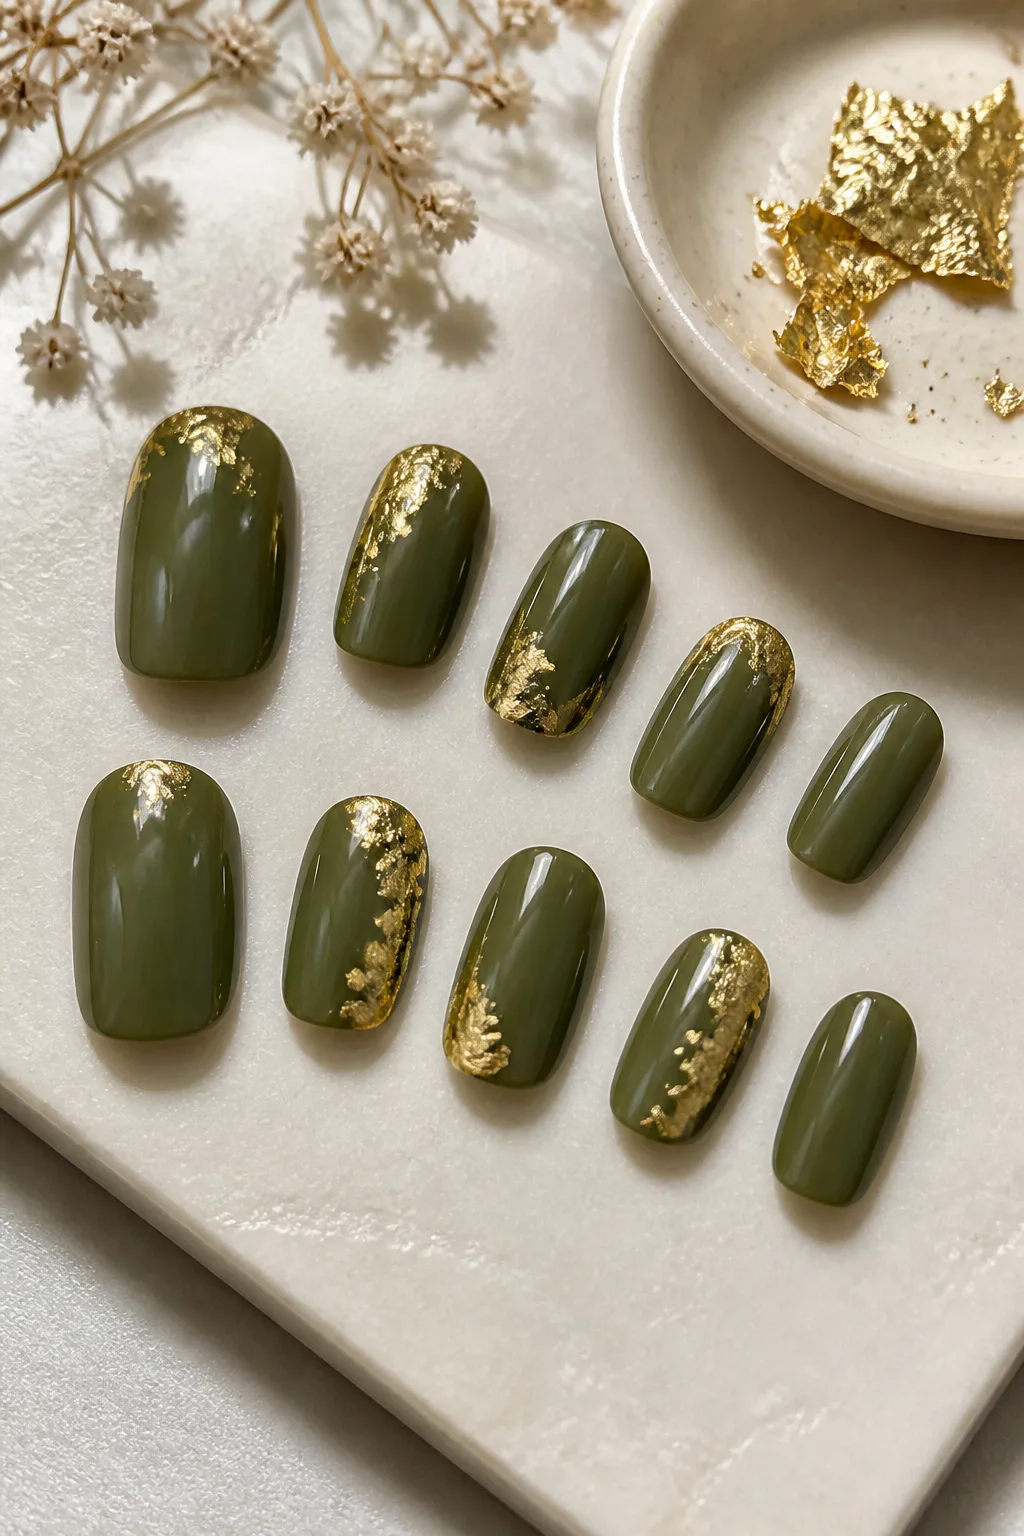
Gold foil brings a warm, decorative accent to deep olive nails. Instead of covering each nail, place small irregular flakes near the cuticle or along one side so the design feels organic and the rich green remains the main feature.
This combination can look elegant for an event while still feeling wearable as an accent manicure. It suits short nails with a few restrained flecks, and longer nails can accommodate a slightly more scattered arrangement without losing the polished effect.
How to place the foil
Apply foil sparingly over tacky polish or the appropriate nail-art layer, pressing it gently into place. The pieces don’t need to match from nail to nail; varied placement helps create a natural, leaf-like impression. Finish with a smooth topcoat to protect the details.
- Concentrate foil near the cuticle for a delicate accent.
- Use a few side flakes for an asymmetrical look.
- Pair gold with deep olive for warm, clear contrast.
6. Olive and Tortoiseshell Accent Nails
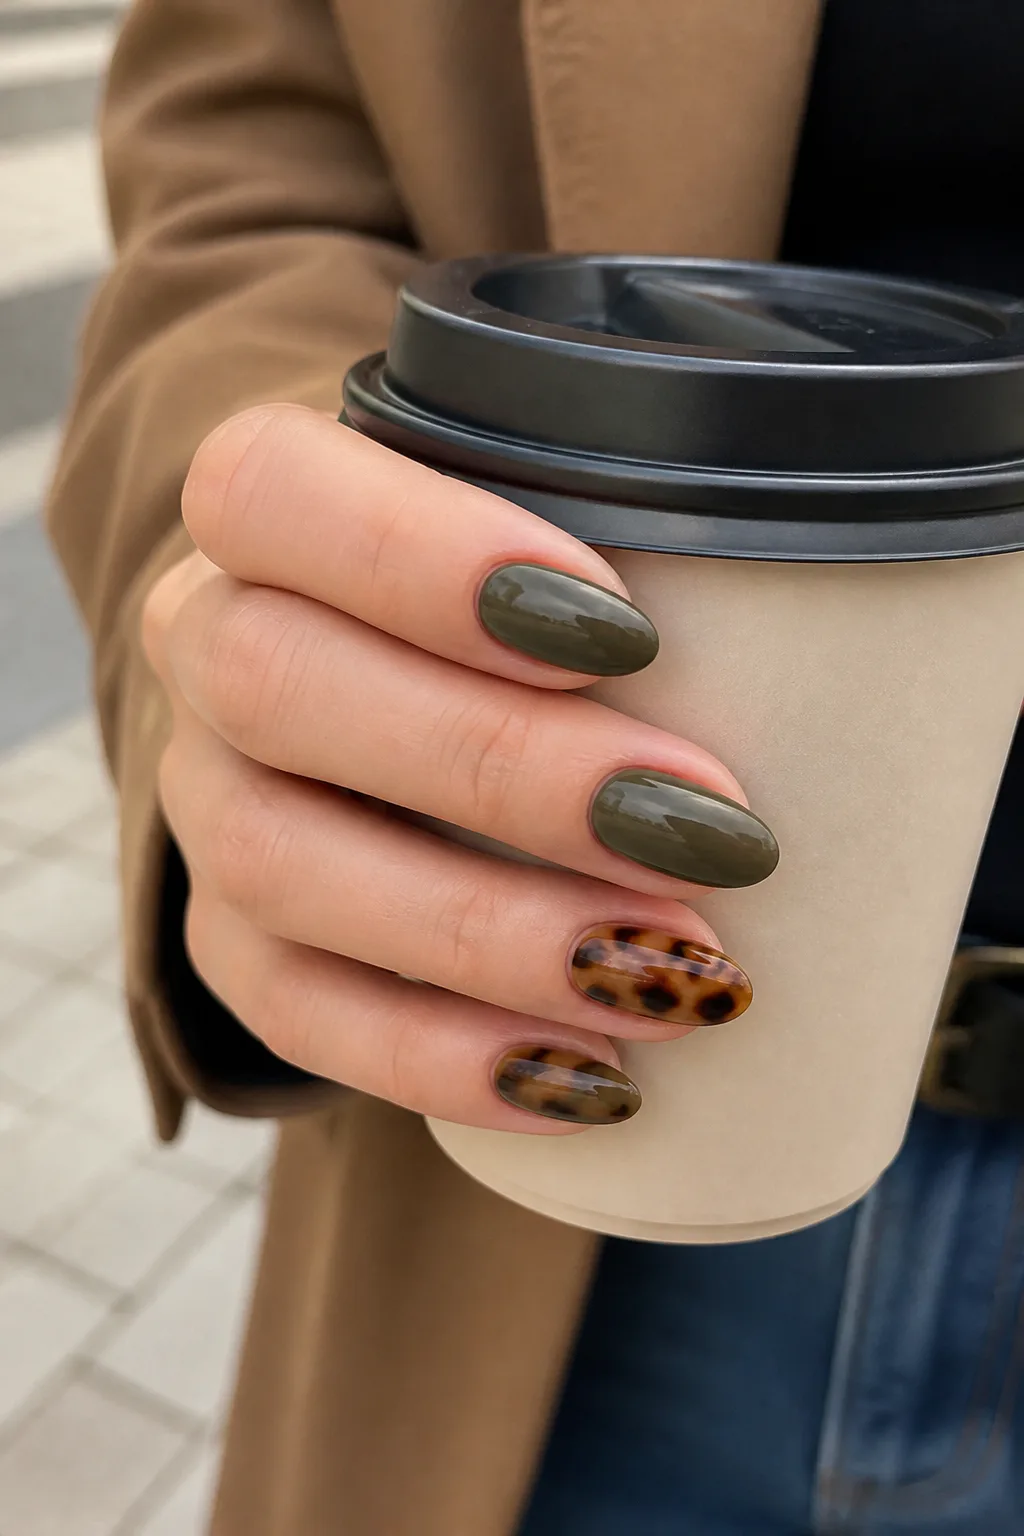
Olive green and tortoiseshell share a warm, earthy palette, making them a natural pair. Alternate solid olive nails with amber-and-brown tortoiseshell accents for a manicure that mixes a clean color with a more intricate pattern.
The print can take center stage on one or two nails, while the solid green keeps the overall design balanced. This combination works across seasons and looks especially cohesive on almond, oval, or squoval shapes that give the patterned accents a little room.
Make the pairing cohesive
Keep the olive shade muted or deep enough to sit comfortably beside the warm amber tones. For the tortoiseshell nails, layer translucent caramel and brown marks over a lighter base rather than drawing a uniform grid; the variation is what gives the pattern its character.
- Limit the print to one or two accent nails.
- Repeat the same olive shade across the solid nails.
- Use warm amber tones to connect the two looks.
7. Olive and Cream Checkerboard Nails
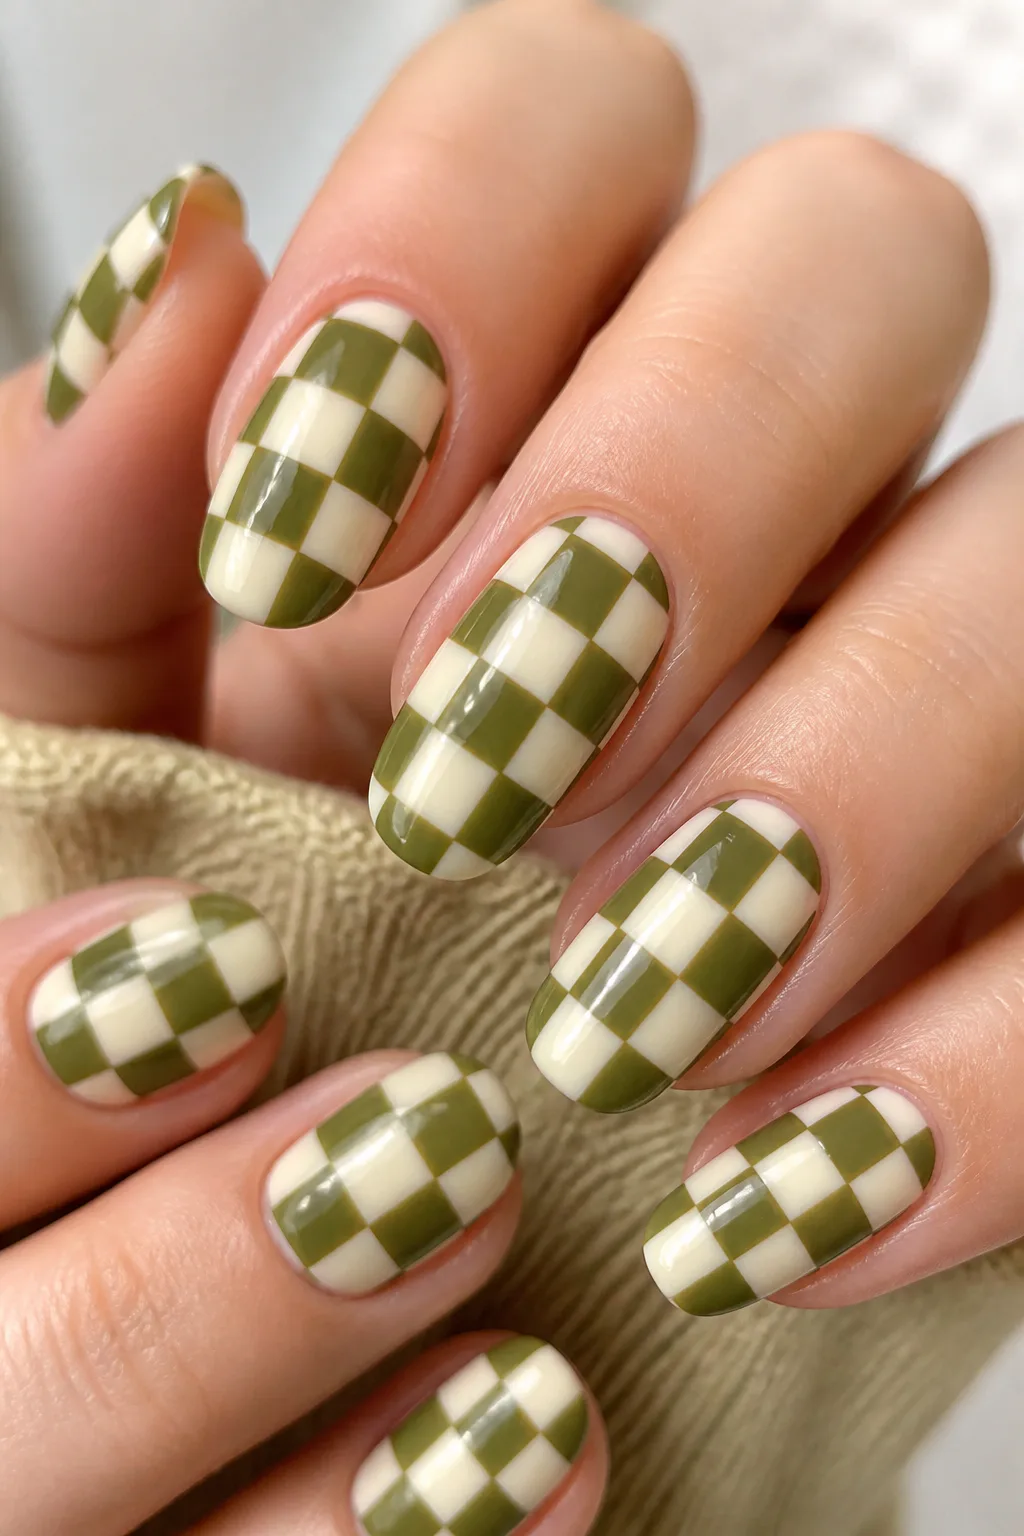
An olive-and-cream checkerboard adds a playful retro note to a manicure. The soft contrast between green and cream keeps the pattern gentler than a stark black-and-white grid, while still making each nail feel graphic and eye-catching.
You can cover every nail with checks or reserve the pattern for a few accents and paint the rest in solid olive or cream. The design is easiest to read on medium or long nails, though a simplified, larger-scale grid can work on shorter nails too.
Keep the pattern neat
Plan the grid before painting so the squares stay a similar size. A thin brush or nail-art striping tool helps create clean lines, and a cream base can make it easier to build the olive squares evenly. Let each layer dry before adding the next.
- Use a soft beige or creamy white for a warm palette.
- Choose larger checks when working with short nails.
- Pair patterned accents with simple solid-color nails.
8. Olive Abstract Swirl Nails
Fluid swirls in olive, white, and a touch of gold create movement over a milky-white or nude base. The curving lines can feel artistic and relaxed, and the pale background gives the deeper green enough contrast to show clearly.
Each nail can have a slightly different arrangement, so the manicure feels coordinated without looking overly uniform. This design suits longer nails that have space for sweeping curves, but a small swirl or two can add a similar effect on shorter nails.
Build the design
Begin with a smooth sheer base, then add a few flowing olive lines rather than filling the nail with color. Add white to create contrast and use gold sparingly as a fine accent. If painting by hand, leave open space between the swirls to keep the design light.
- Vary the direction of the lines from nail to nail.
- Use a fine brush for narrow, fluid curves.
- Keep gold subtle so it supports rather than dominates.
9. Olive Nails with Pearl Chrome
Pearl chrome over olive polish gives the color an iridescent, glazed finish. The soft reflective layer shifts the look of the base, adding a luminous sheen that feels more delicate than chunky glitter but more distinctive than a standard glossy topcoat.
This finish can be worn on every nail for a unified, light-catching manicure or used on one or two accents alongside plain olive polish. It works on a range of nail lengths, and a smooth surface helps the pearlescent effect look especially even.
Apply the glazed effect
Follow the instructions for your chrome product and nail system, since application can vary. Start with an even olive base and use a light touch when adding the powder so the finish stays pearly rather than overly metallic. Seal the edges and surface carefully.
- Choose a deep olive base for a richer contrast.
- Try chrome on accent nails for a more restrained manicure.
- Keep the nail surface smooth before applying the effect.
10. Olive Stars on Milky White Nails
Tiny olive stars, moons, or botanical leaves turn a sheer pink or milky-white manicure into something quietly whimsical. The small green motifs stand out against the pale base without making the design feel heavy, which keeps it easy to wear day to day.
You can repeat one motif across the whole set or mix small stars with a few leaves for a gentle garden-inspired theme. The idea works on short nails, where a single detail can feel intentional, and on longer nails with room for a few scattered accents.
Keep the details delicate
Use a fine brush or dotting tool to form small shapes, spacing them out so the base remains visible. A simple star or leaf is often easier to read than several tiny motifs crowded together. Seal the design with a clear topcoat to protect the art.
- Pick one or two motifs and repeat them consistently.
- Leave generous space around each small accent.
- Choose a sheer base for a soft, airy background.
11. Olive Negative-Space Cuticle Cuffs
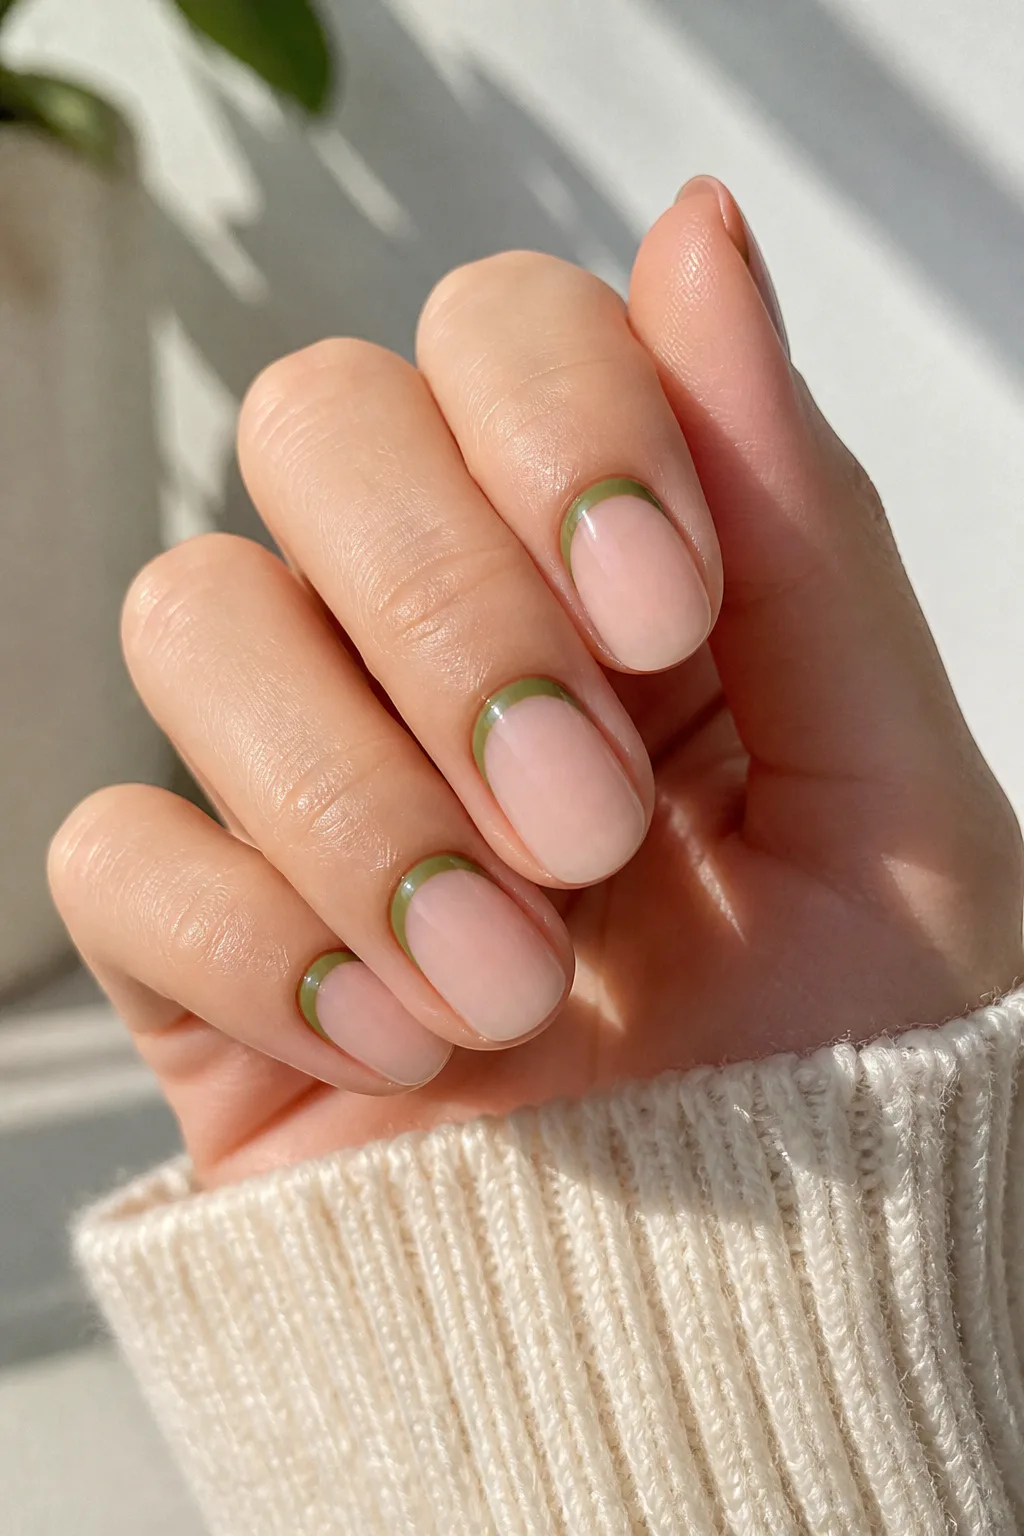
Negative-space cuticle cuffs frame the base of the nail with olive green while leaving the surrounding area bare or sheer. This reverse-French detail draws attention to the cuticle line and gives a minimal manicure a crisp, modern edge.
The design can be a narrow half-moon outline or a slightly bolder curved band, depending on how much color you want. It works particularly well with short and medium nails, where the open space helps the manicure feel light rather than crowded.
Shape a clean cuff
Start with a transparent, nude, or sheer pink base and let it dry thoroughly. Use a fine brush to trace a smooth arc around the cuticle, keeping the line consistent and leaving the natural cuticle area neat. A little asymmetry can feel artistic, but clean edges help the design look intentional.
- Keep the cuff thin for a subtle finish.
- Choose a curved outline that follows each nail’s base.
- Pair with bare-looking nails rather than extra patterns.
12. Olive and Dusty Rose Color-Block Nails
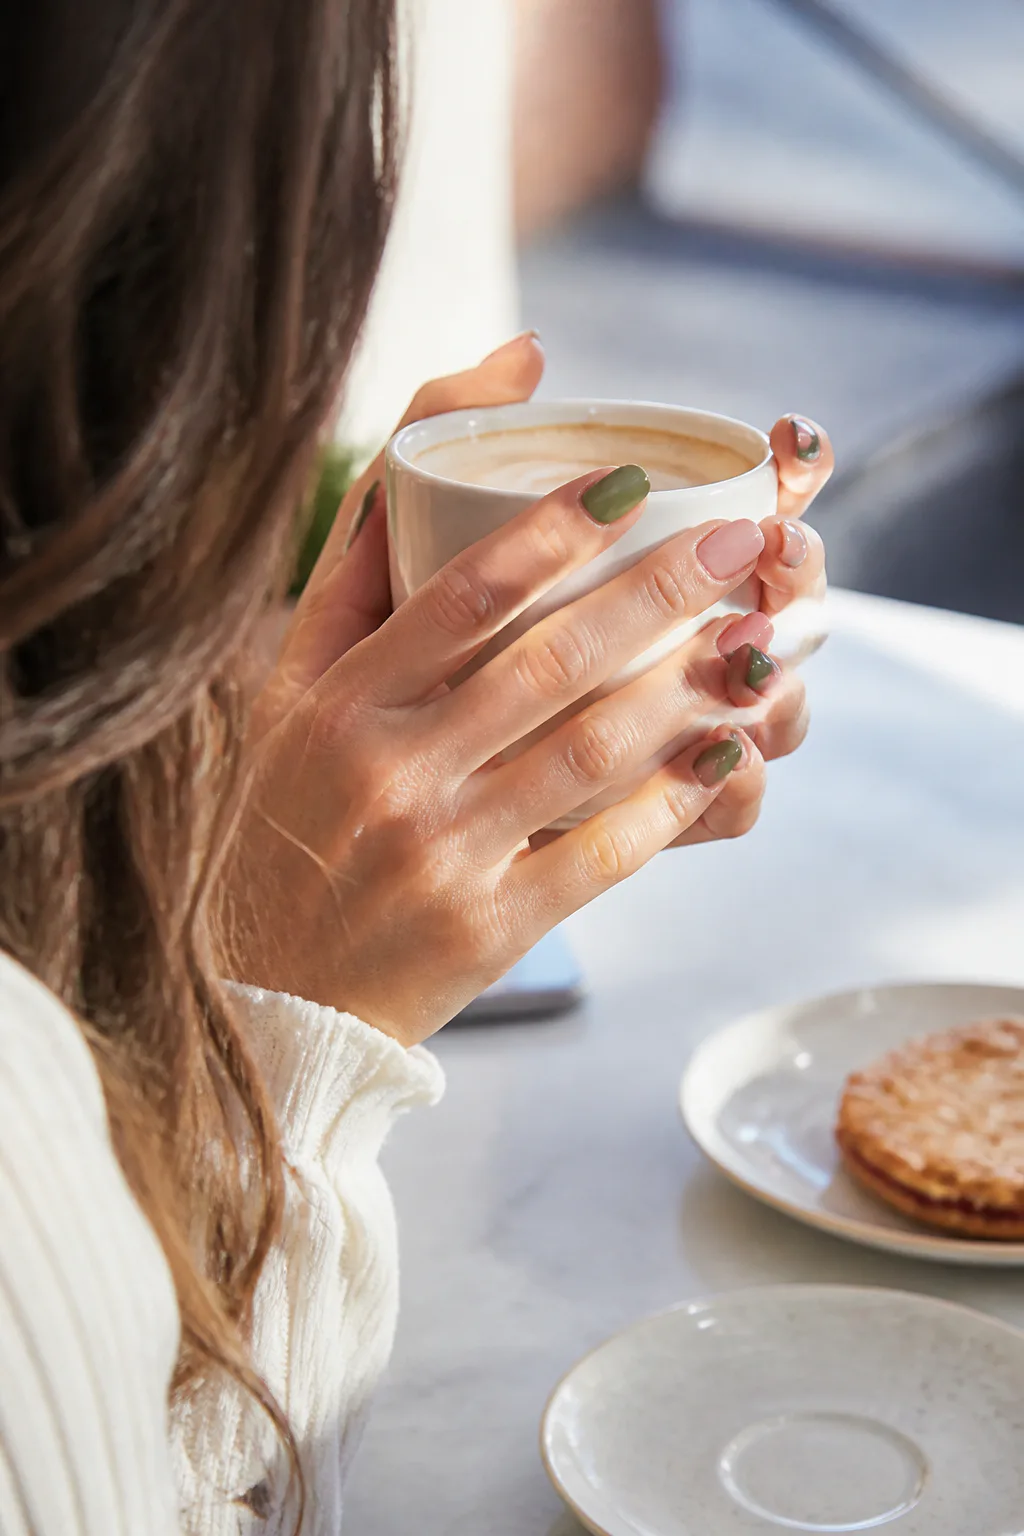
Deep olive and muted dusty rose make an unexpected but balanced color pairing. The green grounds the manicure, while the soft pink adds warmth and contrast without making the palette feel overly bright.
For a simple version, alternate solid olive and rose nails. If you want a more graphic look, divide individual nails into blocks of each color using diagonal lines or rounded shapes. This idea can be adapted to short nails by keeping the shapes broad and easy to see.
Balance the two shades
Choose a dusty rose with a muted undertone so it sits naturally beside the earthy green. When color-blocking on one nail, plan the division before painting and let the first shade dry before adding the second. A fine brush can sharpen the boundary between colors.
- Alternate solid shades for the easiest design.
- Try diagonal blocks for a little movement.
- Use a similar finish on both colors for a cohesive set.
13. Olive and Cream Yin-Yang Nails
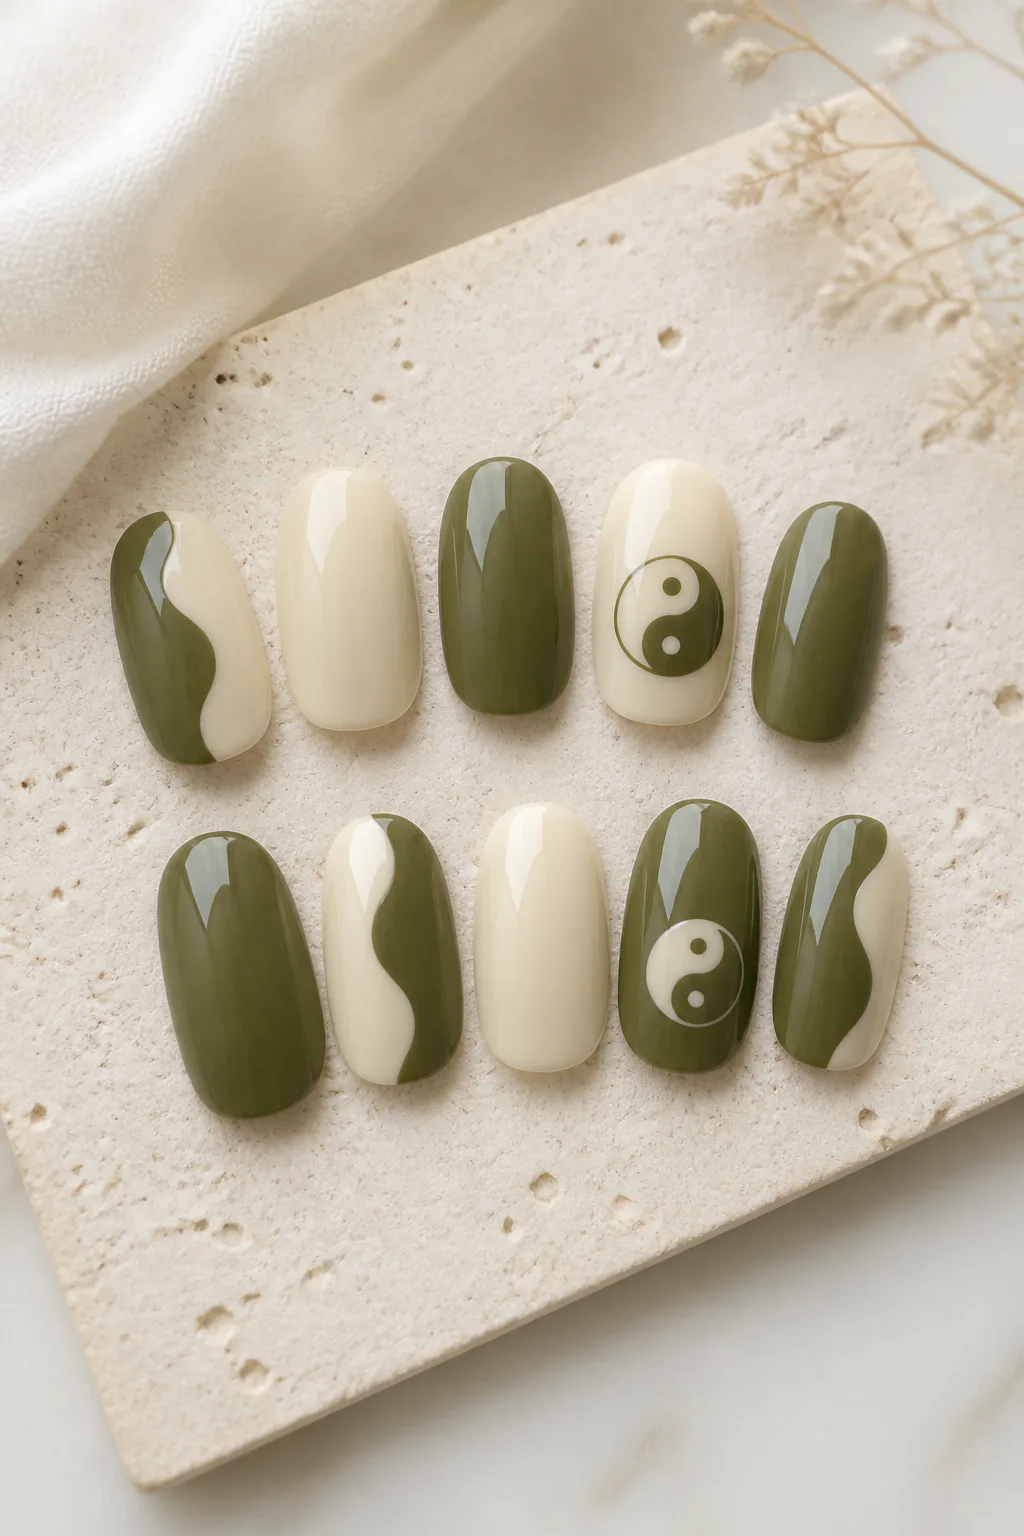
Olive and cream create a soft, earthy take on yin-yang nail art. You can use split-color accents for a simple graphic look or add a small yin-yang symbol to one or two nails while keeping the rest of the manicure solid.
The curved design brings a sense of balance to the set, and the subdued colors make the familiar motif feel more understated. It suits medium-length nails with enough room for a clear symbol, but simplified half-and-half accents can work on shorter nails.
Choose a scale that reads clearly
Use cream rather than bright white if you want the design to stay warm and mellow. Keep the symbol large enough to see and avoid crowding it with extra decoration. If the detailed motif feels difficult to paint, a clean olive-and-cream split still carries the same balanced feel.
- Place the symbol on a single accent nail.
- Use alternating olive and cream nails for a simpler set.
- Keep the remaining nails relatively uncluttered.
14. Olive-to-Sage Gradient Nails
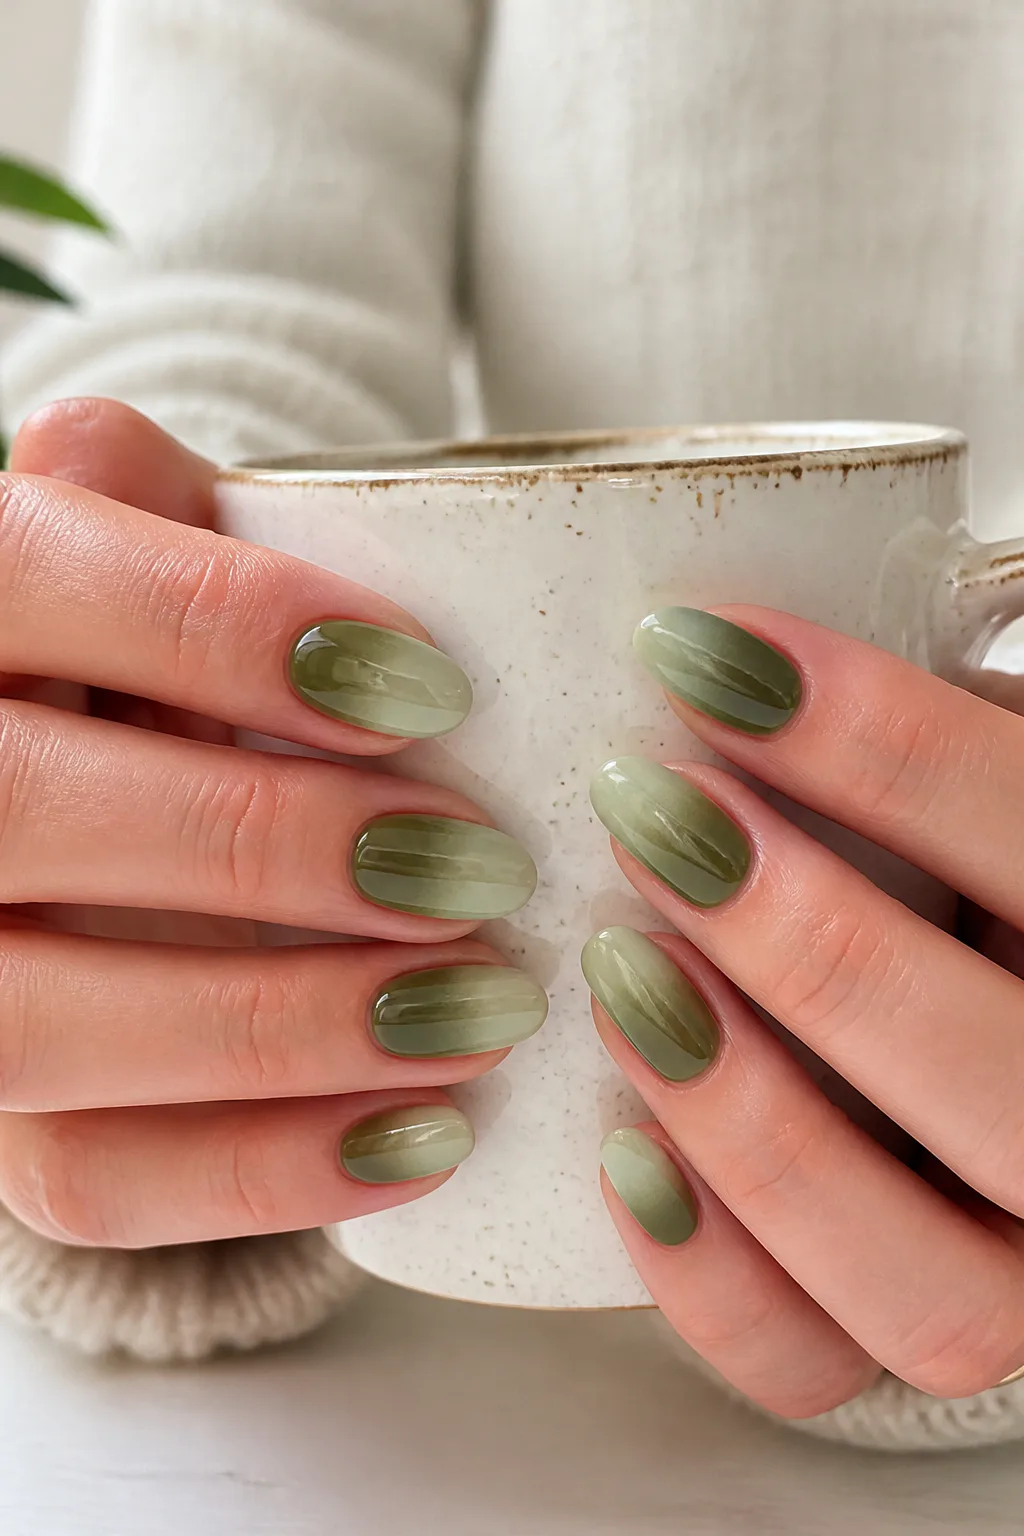
A gradient that moves from deep mossy olive to pale sage gives the manicure a soft, blended look. The neighboring green tones create interest without the sharp contrast of a graphic pattern, so the finish feels calm and wearable.
The fade can run from side to side or from the nail bed toward the tip. A horizontal ombré creates a classic gradient effect, while a vertical blend can make the color feel more unusual. This style is especially effective when the transition has enough space to remain visible.
Blend the greens smoothly
Use shades with related undertones so they transition naturally rather than looking like separate blocks. A sponge can help soften the boundary between colors, though several light passes are usually easier to control than one heavy application. Finish with a clear topcoat to unify the surface.
- Place the darkest olive at the base or tip.
- Choose a pale sage that complements the deeper green.
- Use light layers to avoid a harsh line between shades.
15. Matte Olive Nails with Water Droplets
Clear, raised gel droplets over matte olive polish create a fresh, garden-inspired effect. The contrast between the velvety background and glossy three-dimensional drops makes the design feel tactile, as though water has settled on green leaves.
The droplets can cover every nail or appear on just a few accents for a more understated look. This design is easiest to appreciate when the matte base stays simple, and it works on different nail shapes as long as there is enough surface area for the raised details.
Add the droplets
Apply and set the matte olive base first, then create small domes with clear 3D gel according to the product directions. Vary their size and spacing for a natural look, and avoid placing them too close to the edges where they may be more likely to catch.
- Use a matte topcoat to make the clear drops stand out.
- Vary droplet sizes instead of arranging them in a grid.
- Try the effect on accent nails to keep the set comfortable.
Final Thoughts
Olive green nails can be as simple as a glossy solid color or as detailed as foil accents, tiny stars, and raised water droplets. Finishes and pairings make the shade adaptable, so you can choose something quiet for everyday wear or add a more expressive design for a special occasion.
Use your preferred nail length and the amount of detail you enjoy as a guide. Save the ideas that catch your eye, then adjust the colors and accents to make an olive manicure feel like your own.