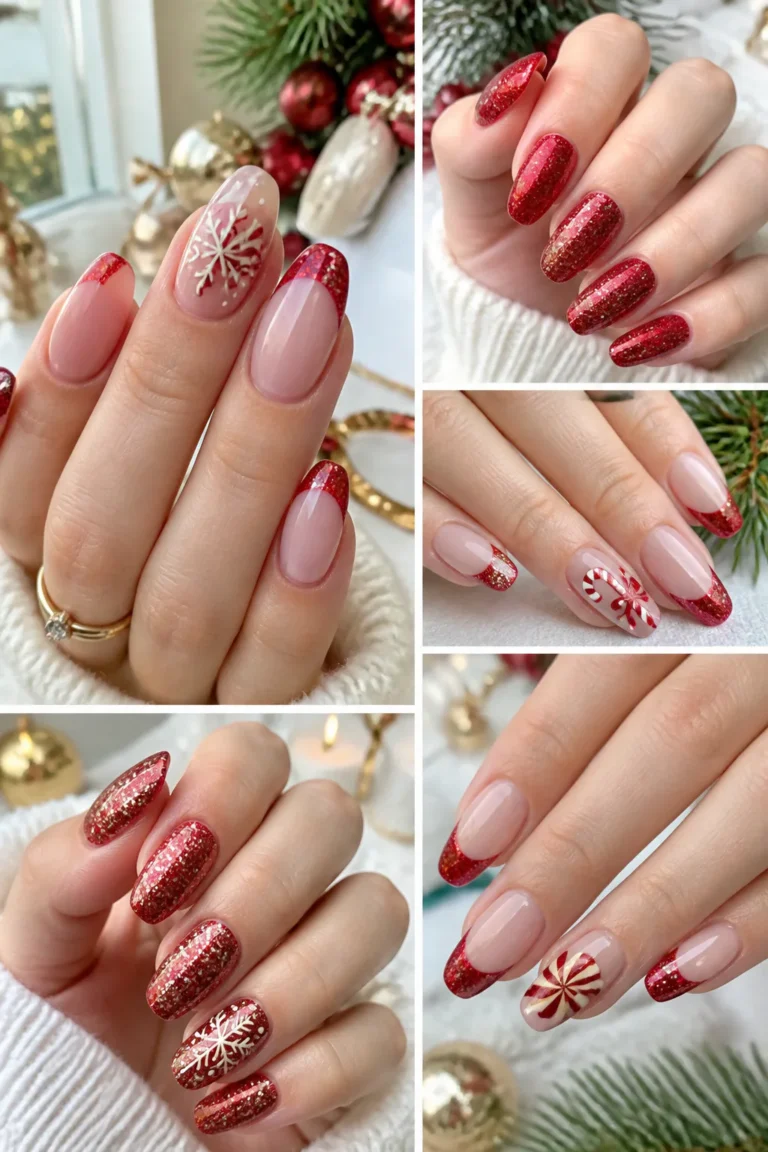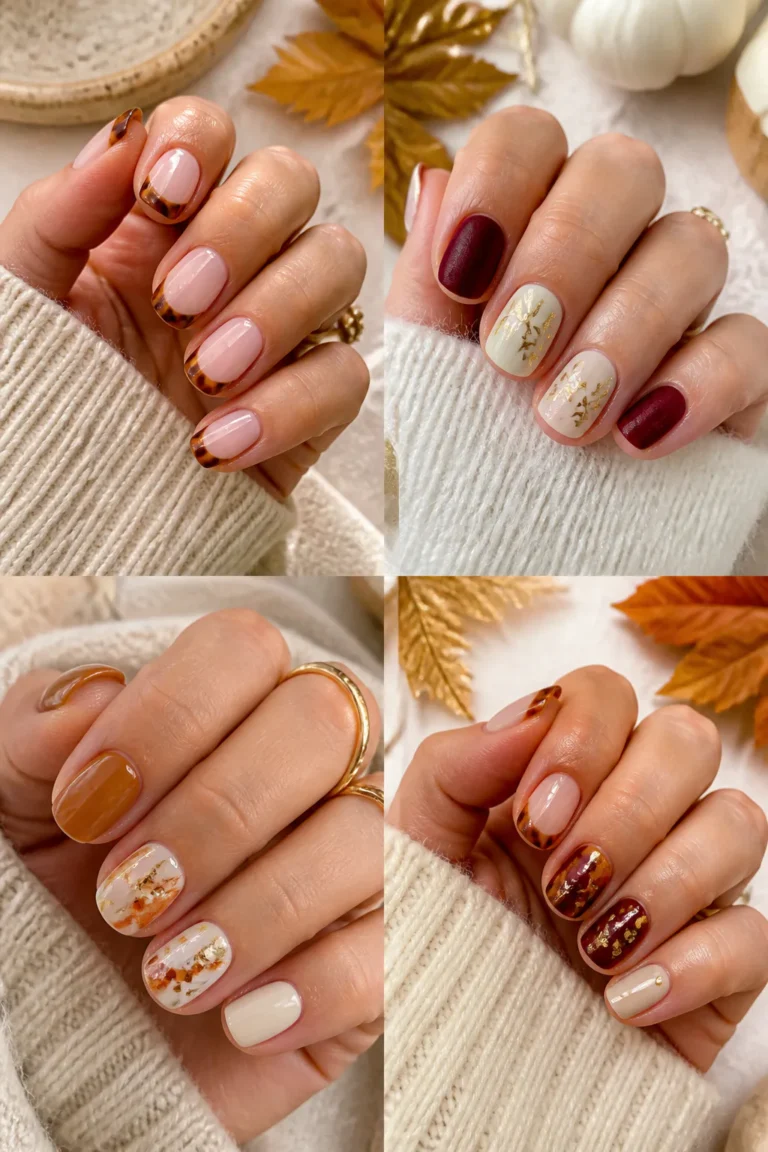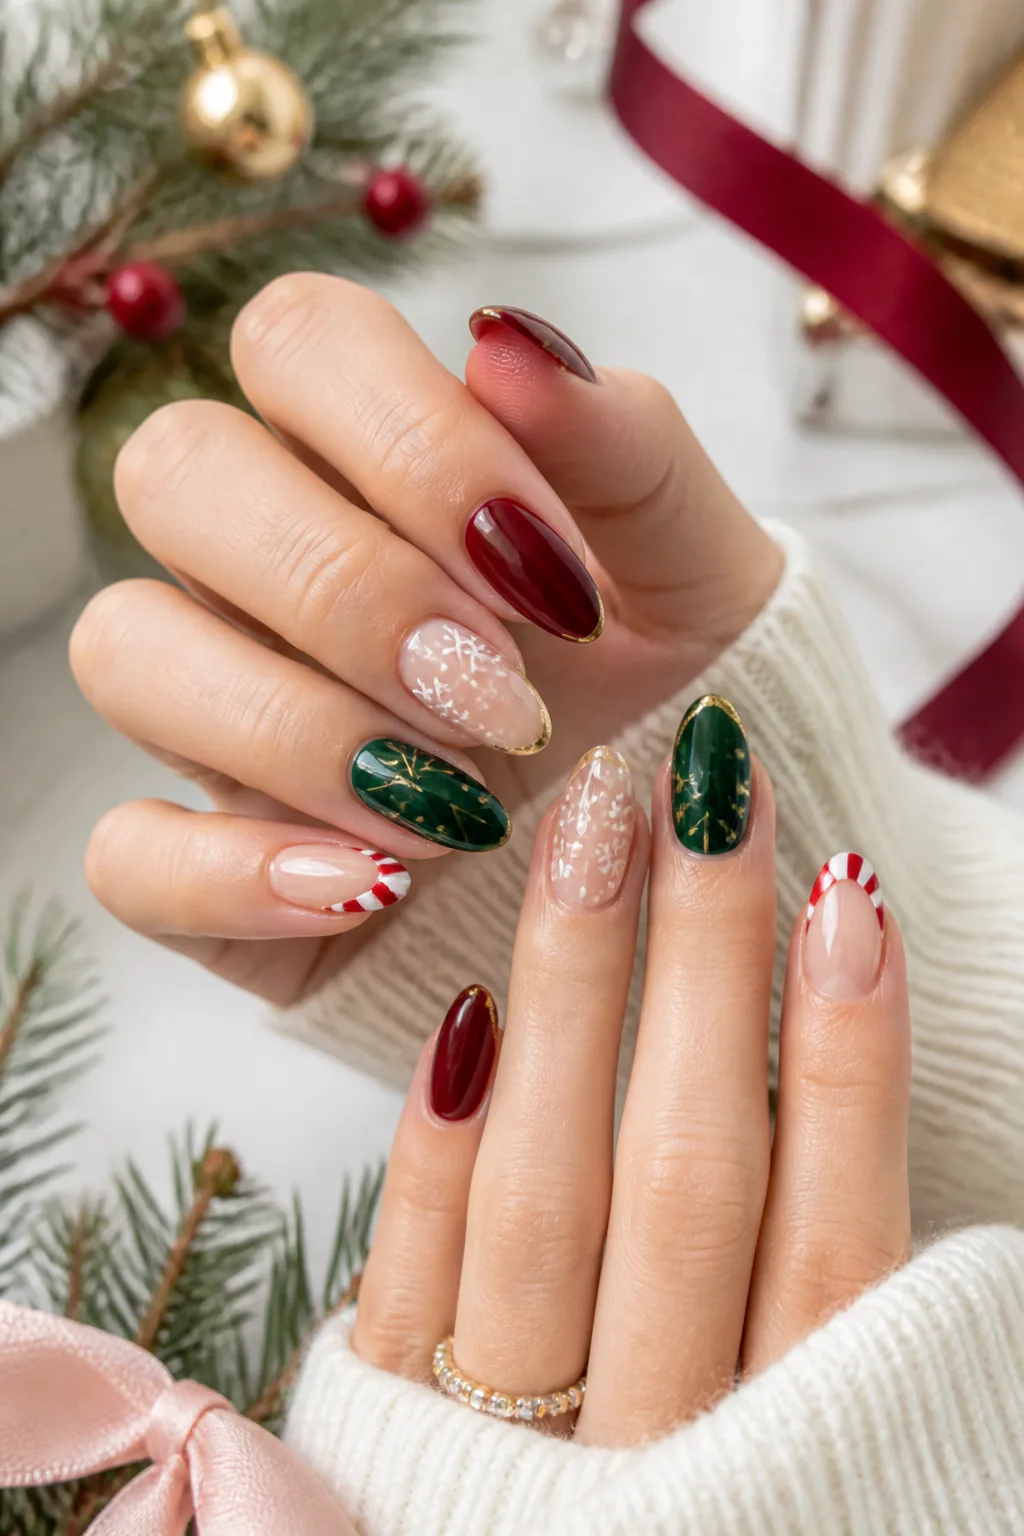
15 Stunning Holiday Nails Ideas for Every Style
Holiday nails can be as subtle or as statement-making as your plans. From glossy reds and wintry pearls to cozy sweater textures and tiny hand-painted details, these ideas bring a festive touch to your manicure without requiring every nail to have the same look.
Some designs are easiest to recreate with a fine nail-art brush or dotting tool, while others are good choices to show your nail technician as inspiration. You can adapt most of them to short or long nails by simplifying the details or using just one or two accent nails.
Whether you want a polished look for a holiday party, a playful design for seasonal gatherings, or something understated for everyday wear, this list has options across the spectrum. Consider your favorite colors, your nail shape, and how much detail you enjoy before choosing a design.
Quick Answer
The easiest holiday nails to start with are velvet red with gold tips, candy cane French tips, champagne glitter fades and holly berry accents. For a softer look, try glazed pearl snowflakes or sheer nails with tiny bows; for a bold statement, go for metallic gold chrome, a midnight-blue starry night or raised Scandi knit art.
1. Pair Velvet Red Nails with Delicate Gold Tips
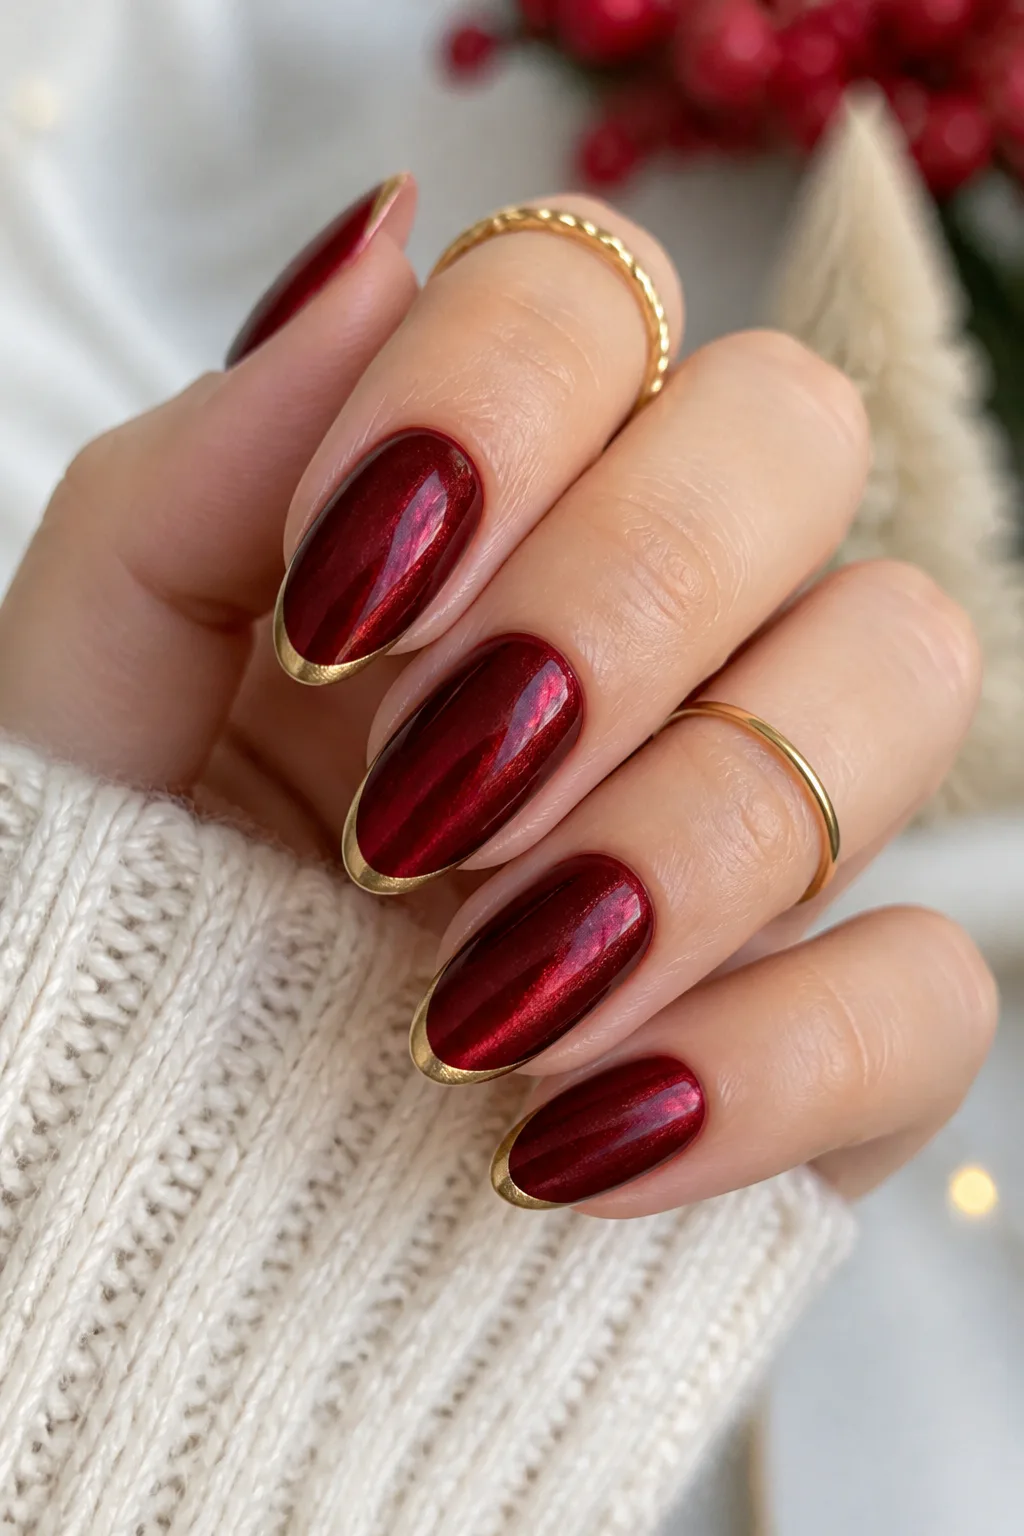
Best for: Classic, elegant holiday look
Skill level: Intermediate (fine lines)
Deep cherry magnetic polish gives a classic holiday red an extra layer of dimension. Its shifting, velvet-like glow catches the light as your hands move, making the manicure feel special even before you add any decoration. It works beautifully on almond or oval nails, though a shorter rounded shape can make the color feel more understated.
Fine gold French tips bring a crisp, festive finish without competing with the magnetic effect. For a softer look, use small foil accents on one or two nails instead of outlining every tip. A glossy topcoat keeps the red rich and helps the gold details look intentional.
How to pull it off
Start with an even base, then apply and shape the magnetic polish according to its directions before sealing it. Keep gold lines delicate; thick tips can hide the velvet finish and make the design feel heavier.
- Choose a deep cherry or wine-red magnetic shade.
- Use a fine brush for narrow gold French tips.
- Try foil on an accent nail if precise lines feel tricky.
The combination feels festive yet polished, making it easy to wear from a family dinner to a dressier evening out.
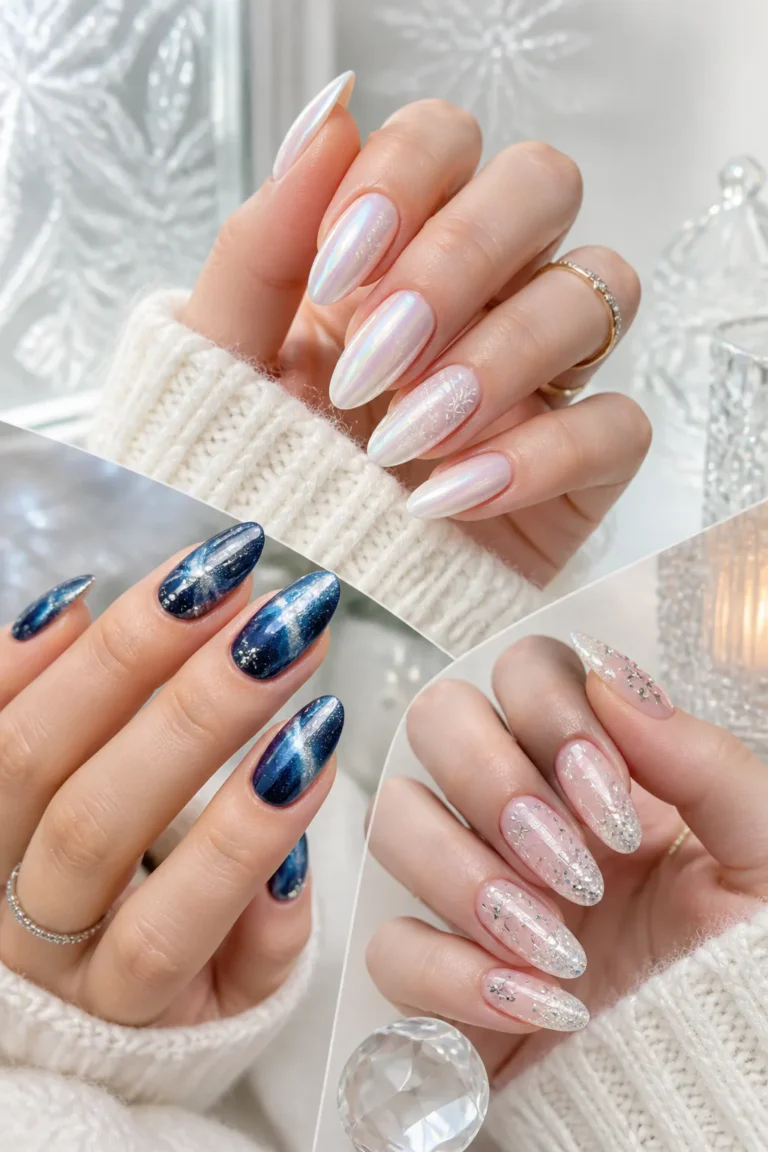
2. Paint Snowflakes on Glazed Pearl Nails
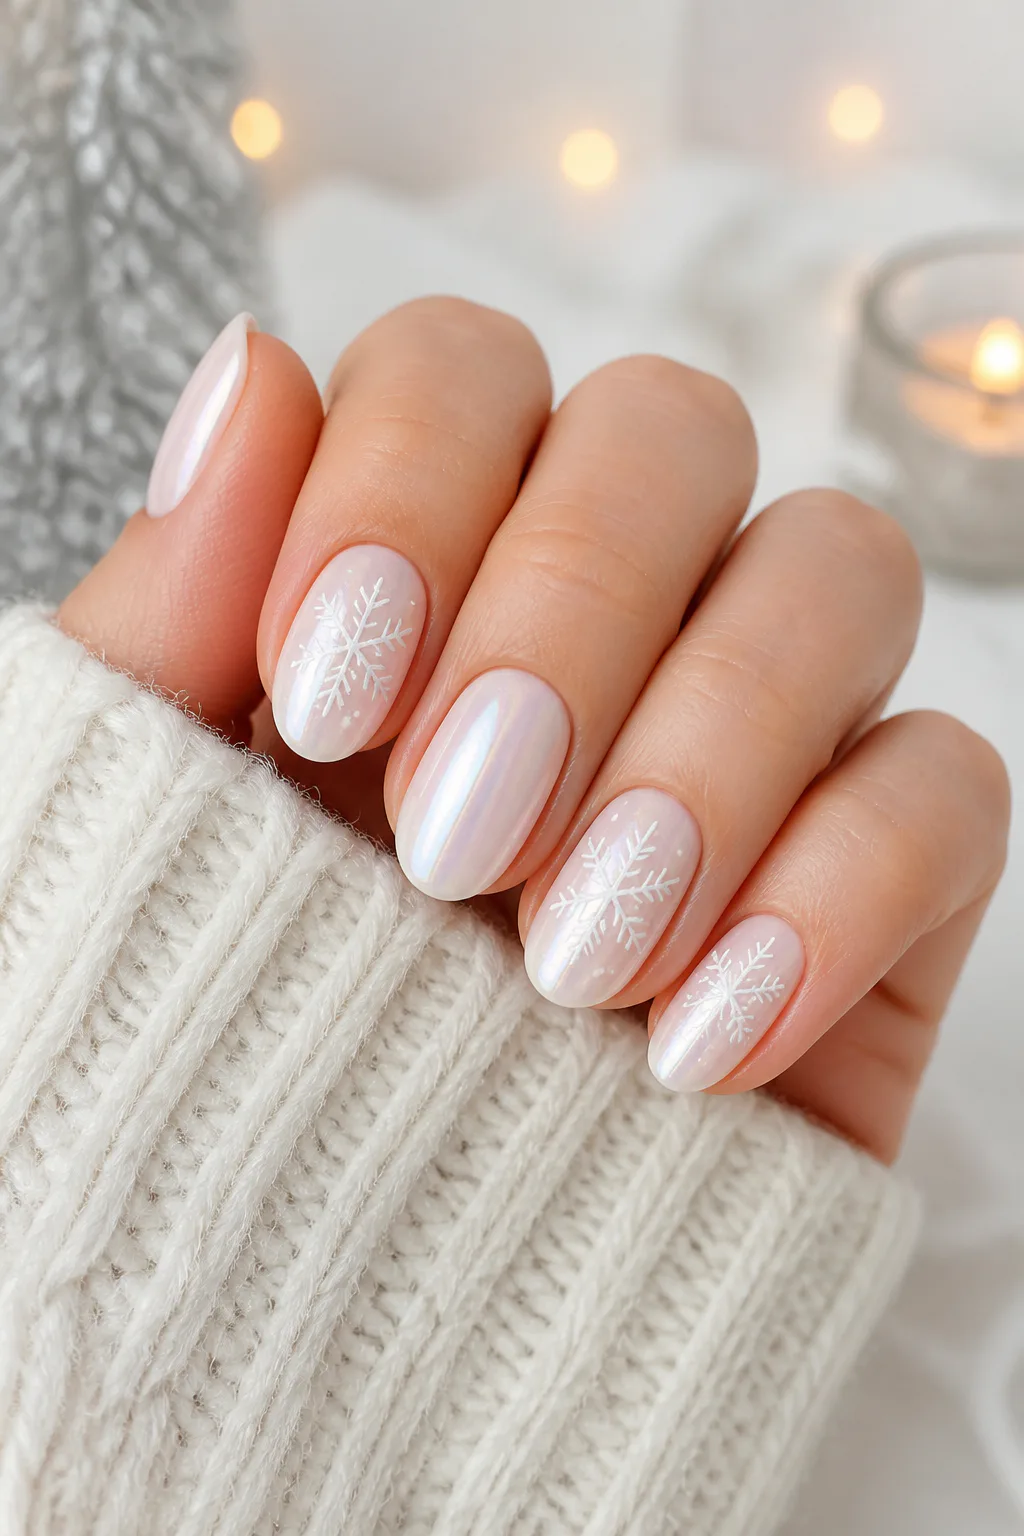
Best for: Soft winter-white style
Skill level: Intermediate
A milky, iridescent base gives nails the soft sheen of glazed pearls, creating a wintry look that stays light and wearable. The finish reflects just enough color to feel special while still pairing easily with neutral outfits, cozy knits, or a dressier holiday look. It suits most nail lengths and shapes, especially when you want a delicate design rather than a bold seasonal color.
Tiny white snowflakes add a recognizable winter detail without covering the luminous base. Painting them on alternating nails leaves room for the pearly finish to shine and keeps the pattern from feeling crowded. A few small flakes can be enough to make the manicure feel thoughtfully decorated.
Design tips
Apply the snowflakes after the base has fully dried or cured, using a fine liner brush or a nail-art pen. Keep each flake small and simple, since tiny lines tend to read more cleanly than dense, intricate patterns.
- Choose a sheer milky polish with a subtle iridescent sheen.
- Place snowflakes on two or three alternating nails.
- Seal the artwork with a smooth, clear topcoat.
This is a lovely choice if you want holiday nails that feel airy, graceful, and easy to wear beyond one event.
3. Add a Gold Starburst to Emerald Nails
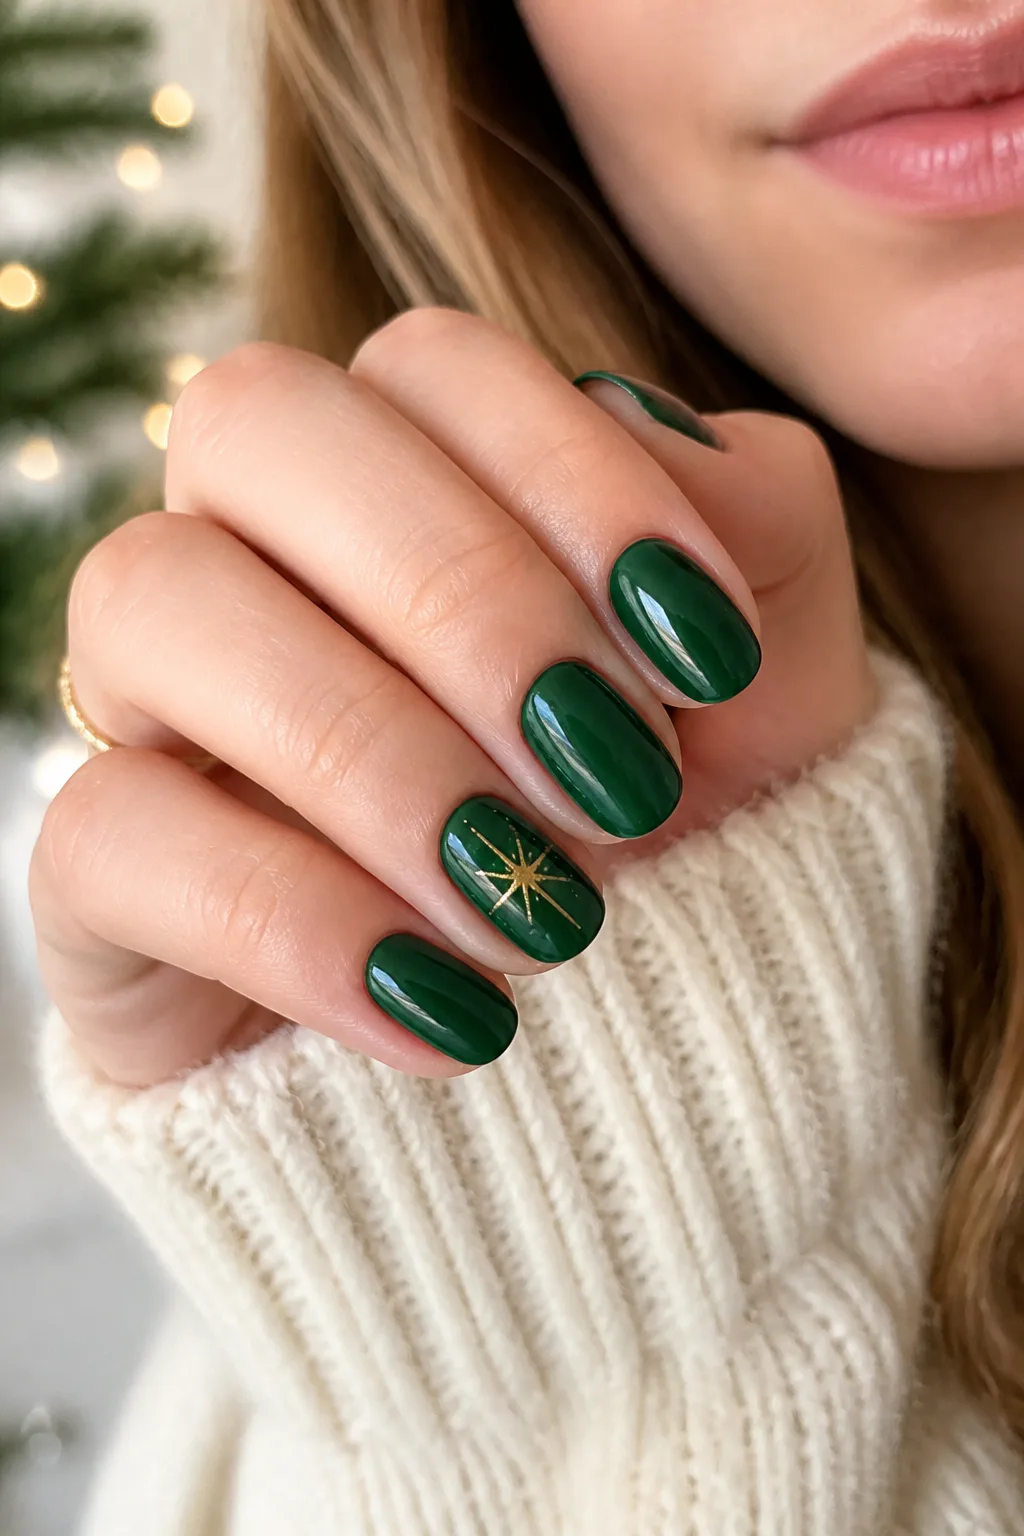
Best for: A rich jewel-tone alternative to red
Skill level: Intermediate
Glossy, deep green polish brings a rich forest tone to a holiday manicure. It feels festive without relying on traditional red, and the saturated color looks especially striking against simple jewelry or soft winter textures. Use it across every nail for a bold, coordinated look, or reserve it for a few nails if you prefer more breathing room.
A single minimalist gold starburst creates a focal point without turning the manicure into a busy pattern. Place it on one accent nail, such as the ring finger, and keep the remaining nails clean and glossy. The contrast between the dark green and warm gold makes the small detail easy to notice.
How to make the accent stand out
Let the green polish dry or cure completely before adding the starburst. A fine liner brush, metallic polish, or a small decal can create the motif; whichever method you use, aim for thin, balanced rays.
- Pick a deep emerald or forest-green creme shade.
- Use one starburst accent to keep the design minimal.
- Add a high-gloss topcoat for a smooth, reflective finish.
The result is festive and elegant, with a small flash of gold that feels intentional rather than overdone.
4. Create Candy Cane French Tips
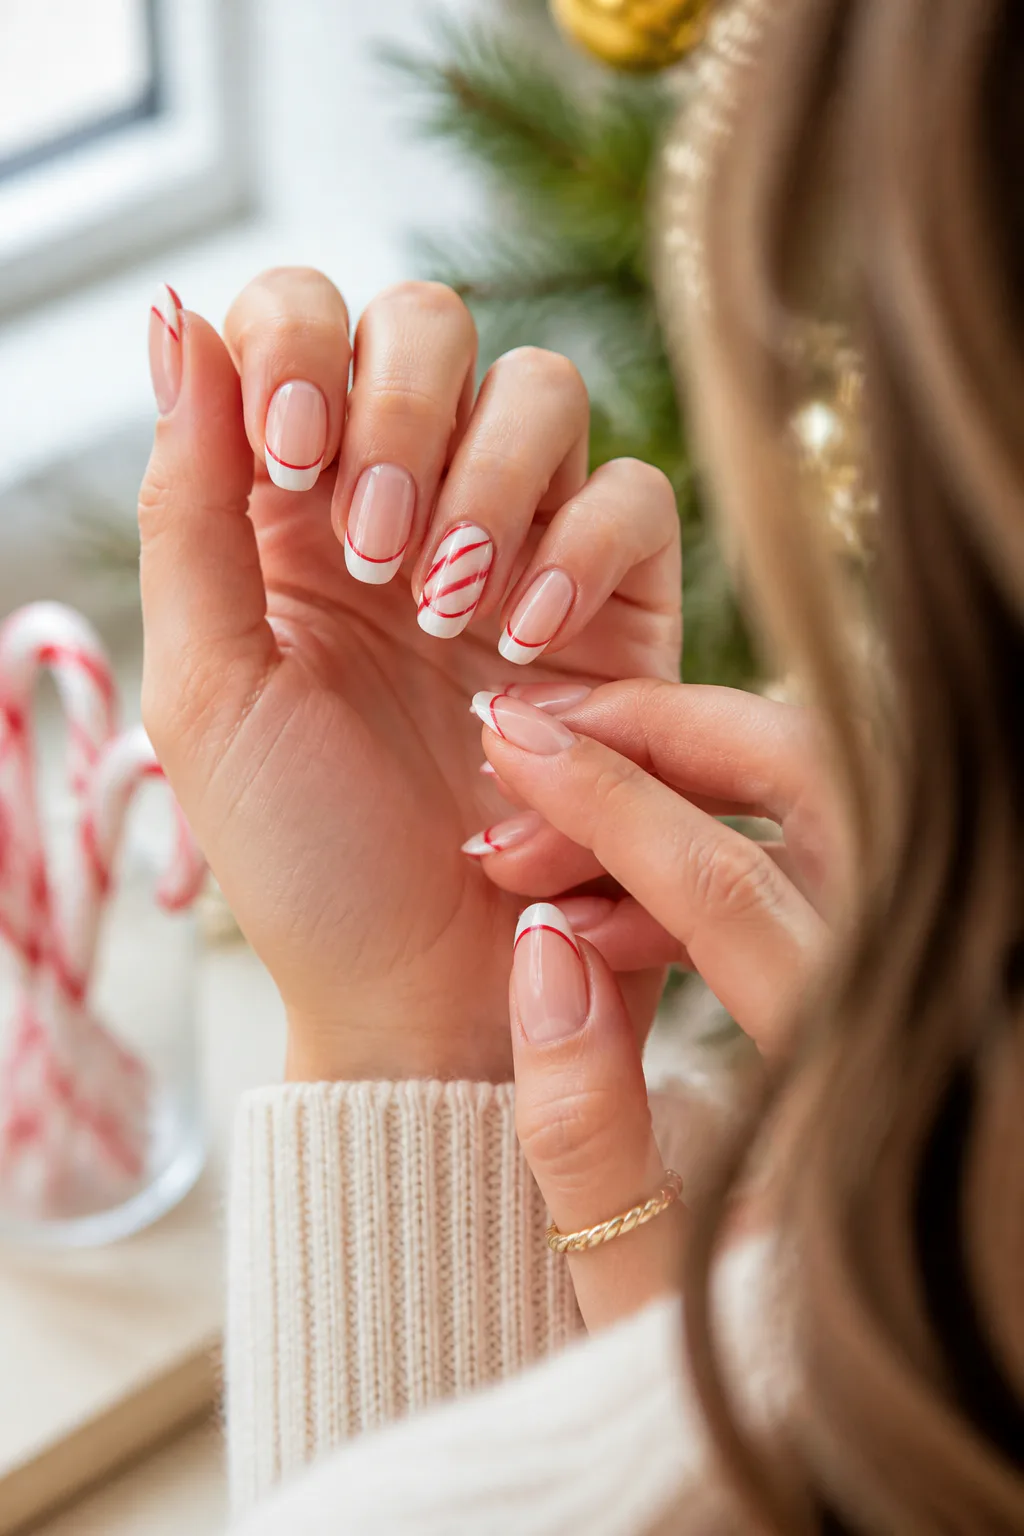
Best for: Playful festive French tips
Skill level: Intermediate
Candy cane French tips bring a playful holiday reference to a familiar manicure shape. Crisp white tips create a clean starting point, while fine red outlines or stripes add the seasonal detail. Because the color is concentrated at the ends of the nails, the design can remain polished rather than feeling like a full novelty pattern.
This look works well on oval, almond, and square nails, with the tip shape adjusted to match your natural nail. If you want a quieter version, make most nails classic white French tips and add candy-cane stripes to one or two accent nails. That balance lets the design feel festive while keeping the overall set easy to wear.
Ways to adapt the pattern
Use a thin brush to follow the curve of each white tip with a narrow red line. For striped accents, work with short, evenly spaced strokes and leave a little white visible between them so the pattern stays crisp.
- Keep the French curve neat and consistent.
- Choose red outlines for a subtle seasonal nod.
- Use striped accents on only a few nails for balance.
A sheer pink or nude base helps the white and red details look fresh and defined.
Photo: @lookingglassnailstudio on Instagram. Style shown: classic red-and-white candy cane stripes on French tips.
5. Add Tartan Plaid Accent Nails
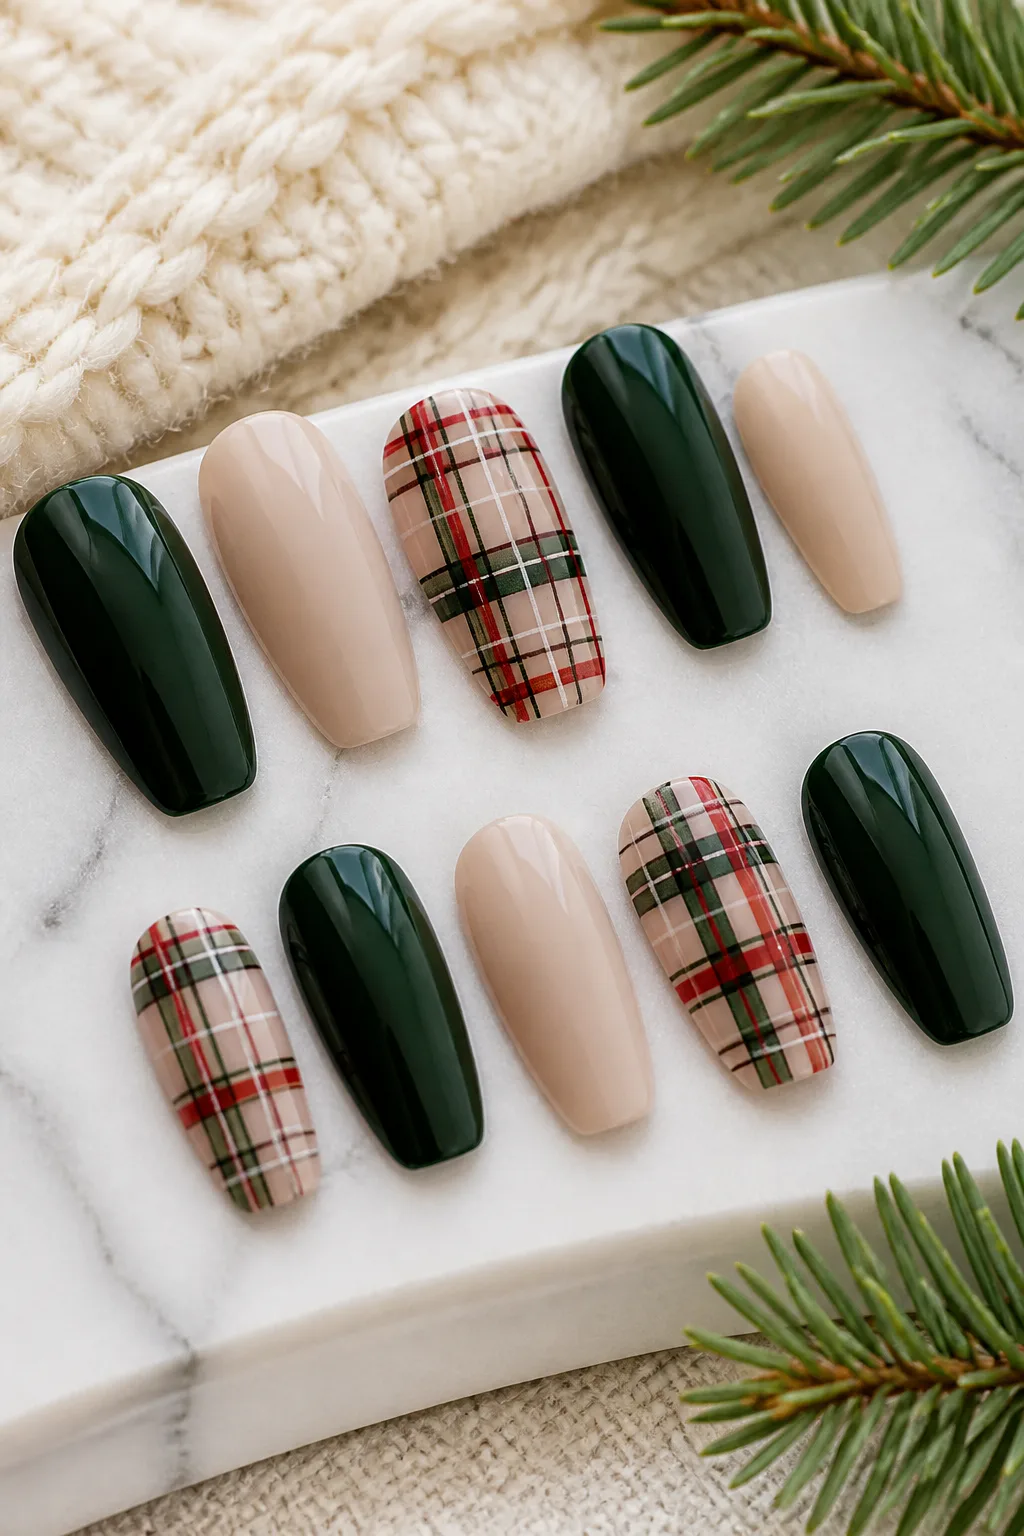
Best for: Cozy, traditional holiday feel
Skill level: Intermediate
Tartan plaid brings a cozy, classic feel to holiday nails, especially when its red, green, and white lines are set against a simple base. The pattern has plenty of visual character, so applying it to one or two accent nails is often enough. A neutral base gives the plaid a lighter look, while dark green makes the colors feel more traditional and rich.
Fine lines are the key to keeping this design readable. A few intersecting stripes can suggest the familiar woven pattern without crowding the nail. Plaid looks particularly appealing on a longer nail where there is room for the lines, but a simplified version can work on shorter nails too.
How to create a balanced plaid
Let the base color dry fully, then layer the plaid in thin strokes. Work slowly and allow each color to dry before adding a crossing line, so the pattern stays defined instead of blending together.
- Use red, green, and white over a neutral or dark-green base.
- Choose one or two nails for the detailed pattern.
- Vary line thickness slightly to add a woven effect.
Keep the remaining nails in a coordinating solid shade for a tidy, intentional finish.
6. Fade Champagne Glitter from the Cuticles
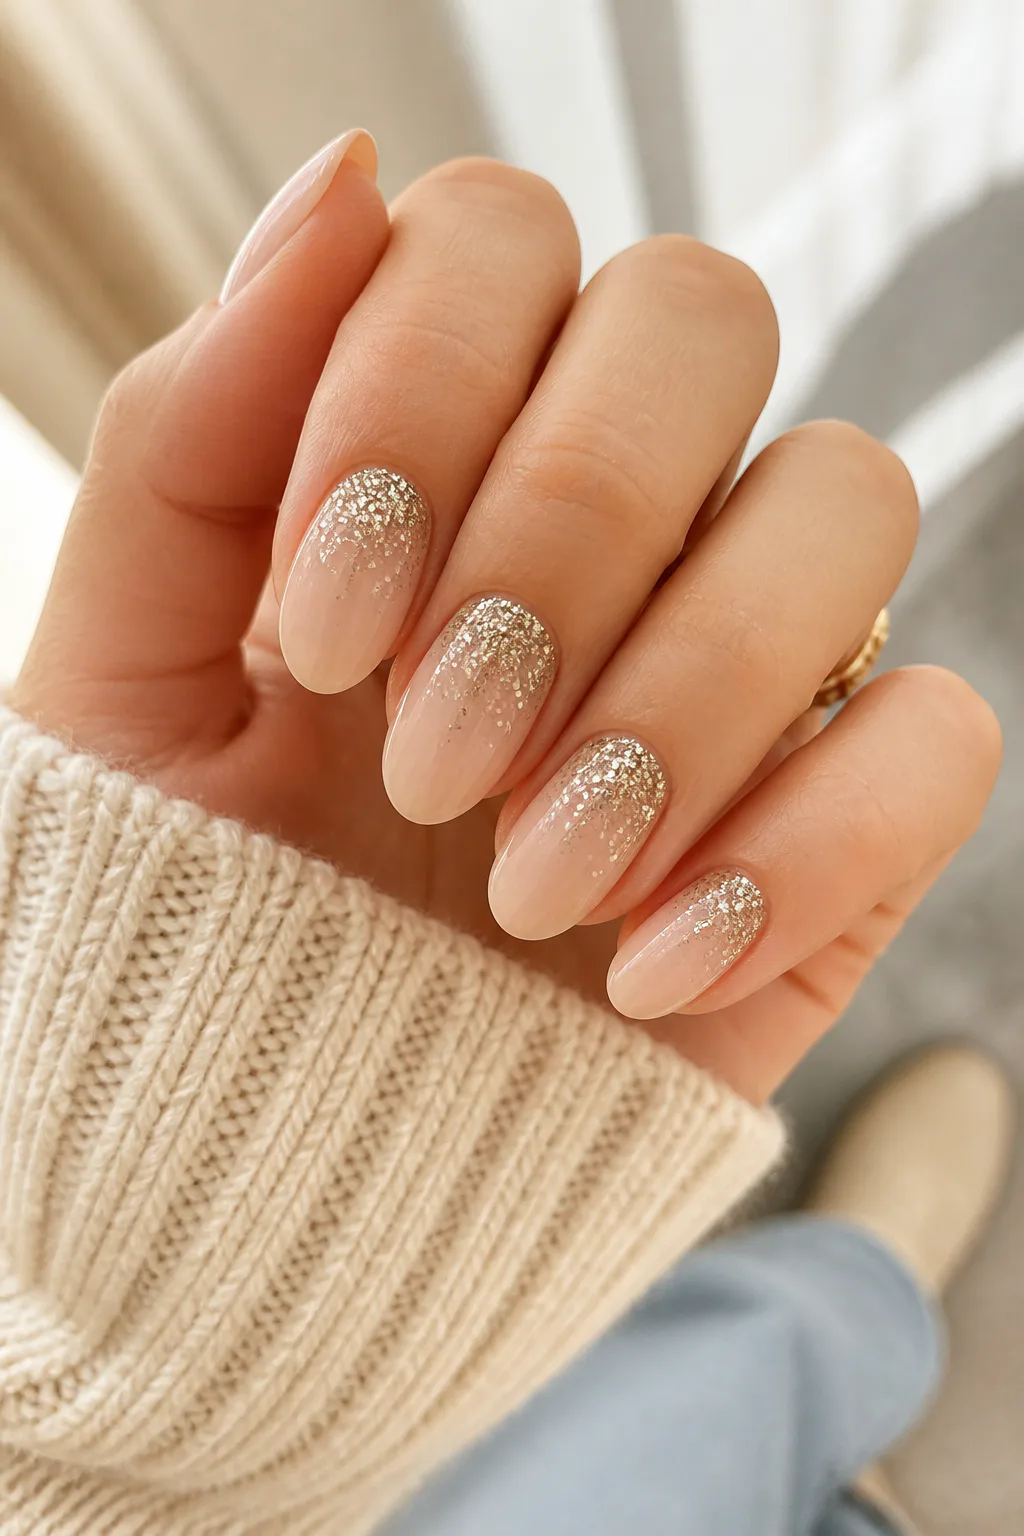
Best for: Low-effort sparkle
Skill level: Beginner
A champagne glitter fade adds festive sparkle while keeping the overall manicure soft. Start with a sheer nude base, then concentrate reflective gold and silver glitter near the cuticles and let it disperse toward the tips. The gradual fade gives the nails a bright focal point without covering the entire surface in shimmer.
This design suits a range of nail lengths and pairs especially well with understated outfits, since the glitter provides its own accent. You can make the effect delicate with fine shimmer or more playful with a mix that includes larger reflective pieces. Either way, leaving some nude polish visible helps the fade look airy.
Tips for a smooth gradient
Apply glitter in light layers, building the concentration near the cuticle before softly dragging a little product down the nail. A sponge can help distribute loose glitter, while a dense glitter polish may be easier to control with a brush.
- Begin with a sheer nude or blush base.
- Place the heaviest glitter close to the cuticles.
- Use a topcoat to smooth the surface and seal the sparkle.
The finished effect feels like champagne bubbles, making it a graceful choice for dinners and celebrations.
7. Go All-Out with Metallic Gold Chrome

Best for: Bold party statement
Skill level: Beginner–Intermediate
Full-coverage gold chrome turns every nail into a high-shine statement. Its reflective finish feels especially suited to holiday parties and New Year celebrations, when a bolder manicure can complement dressier clothes and sparkling accessories. Since the metallic surface already draws attention, it works best without extra patterns or competing colors.
Gold chrome can look sleek on a short, rounded shape or dramatic on longer almond and coffin nails. The exact effect depends on the products and application method used, so it is a good idea to ask a nail professional about the finish you want or follow the instructions for your chosen chrome system at home.
Keeping the look polished
Careful preparation helps metallic finishes appear even, so start with a smooth nail surface and tidy edges. Apply the chrome as directed and seal it with a compatible topcoat to protect the shine and finish the manicure neatly.
- Keep the rest of the design simple and uncluttered.
- Choose a nail shape that feels comfortable for your routine.
- Pair the gold with minimal jewelry if you want the nails to lead.
This is the boldest option in the collection, perfect when you want your manicure to feel like part of the celebration.
8. Decorate Sheer Nails with Tiny Ribbon Bows
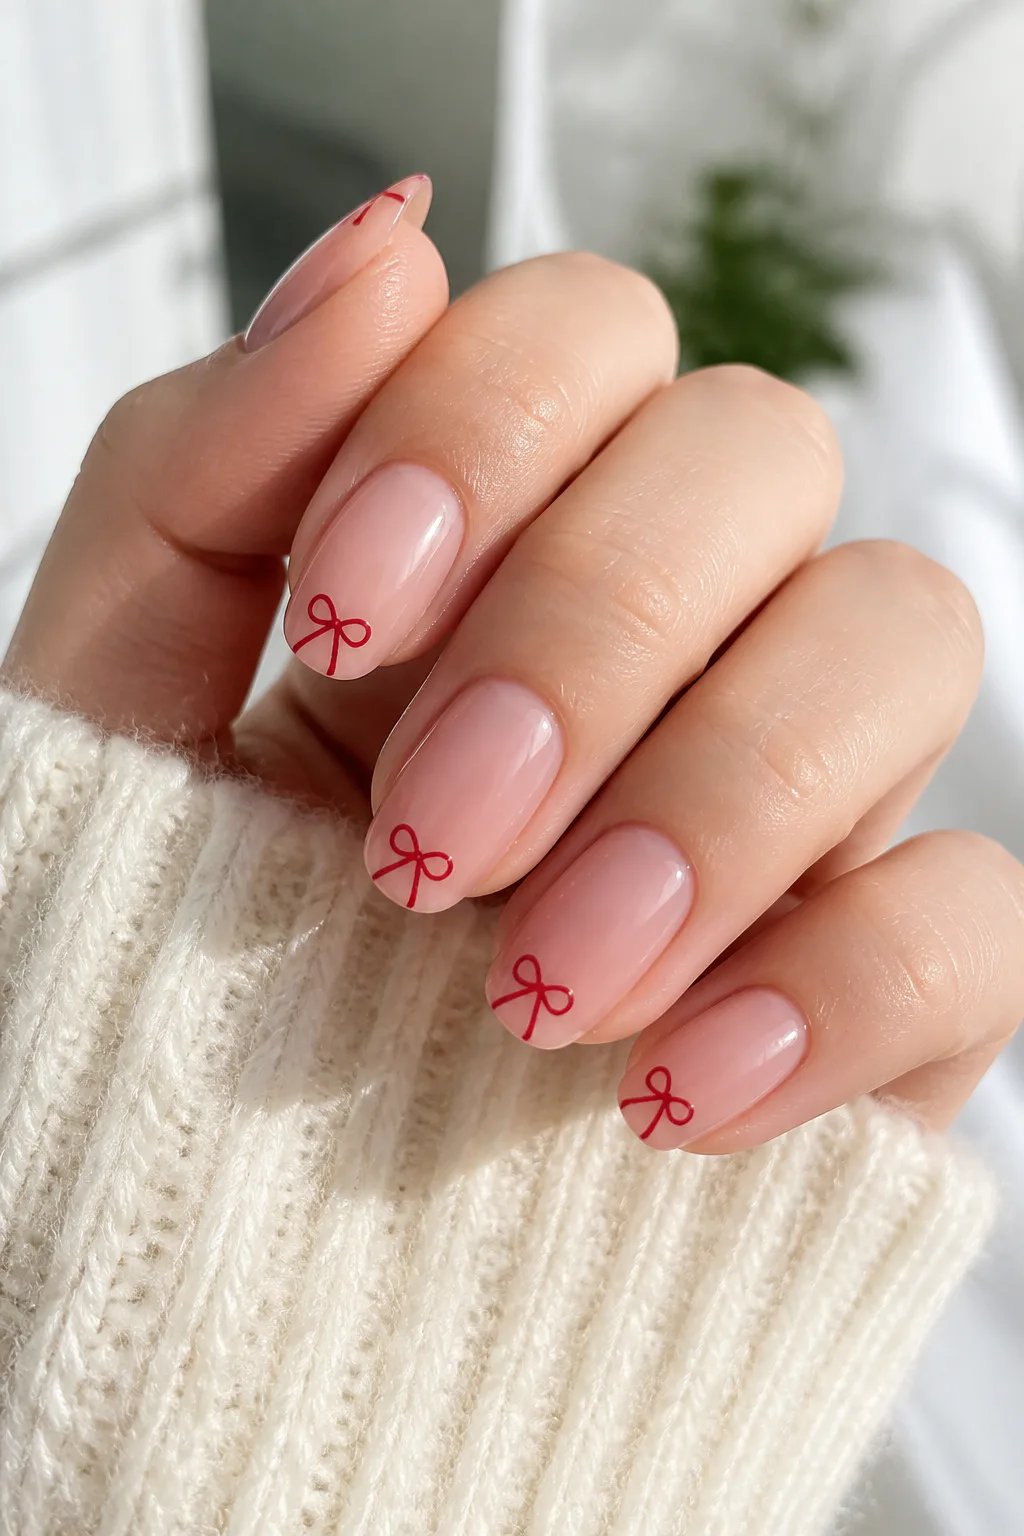
Best for: Sweet, minimal detail
Skill level: Intermediate
Tiny bows add a delicate, gift-inspired detail to a sheer manicure. A nude or translucent pink base keeps the look clean and lets small black or red ribbons stand out without overwhelming the nail. The design has a charming, dressed-up quality that can still feel understated when the bows are kept small.
Place each bow near a corner of the nail or use just one or two accent nails for a lighter effect. On short nails, a simple bow outline may be easier to see than a fully filled-in shape. Longer nails offer room to add fine ribbon tails, but the overall design should remain airy.
Making the bows look neat
Use a fine liner brush or nail-art pen to draw two loops and a small center knot. Let each detail dry before adding a topcoat, and avoid placing the bow too close to the edge where it may be more likely to wear.
- Start with a sheer nude, blush, or pale pink base.
- Choose black for contrast or red for a more festive feel.
- Keep bows small and place them near the corners.
The subtle decoration looks sweet on its own or alongside simple glossy nails.
Photo: @frazinails on Instagram. Style shown: delicate chrome ribbon bows on sheer pink nails.
9. Try Raised Scandi Knit Nail Art
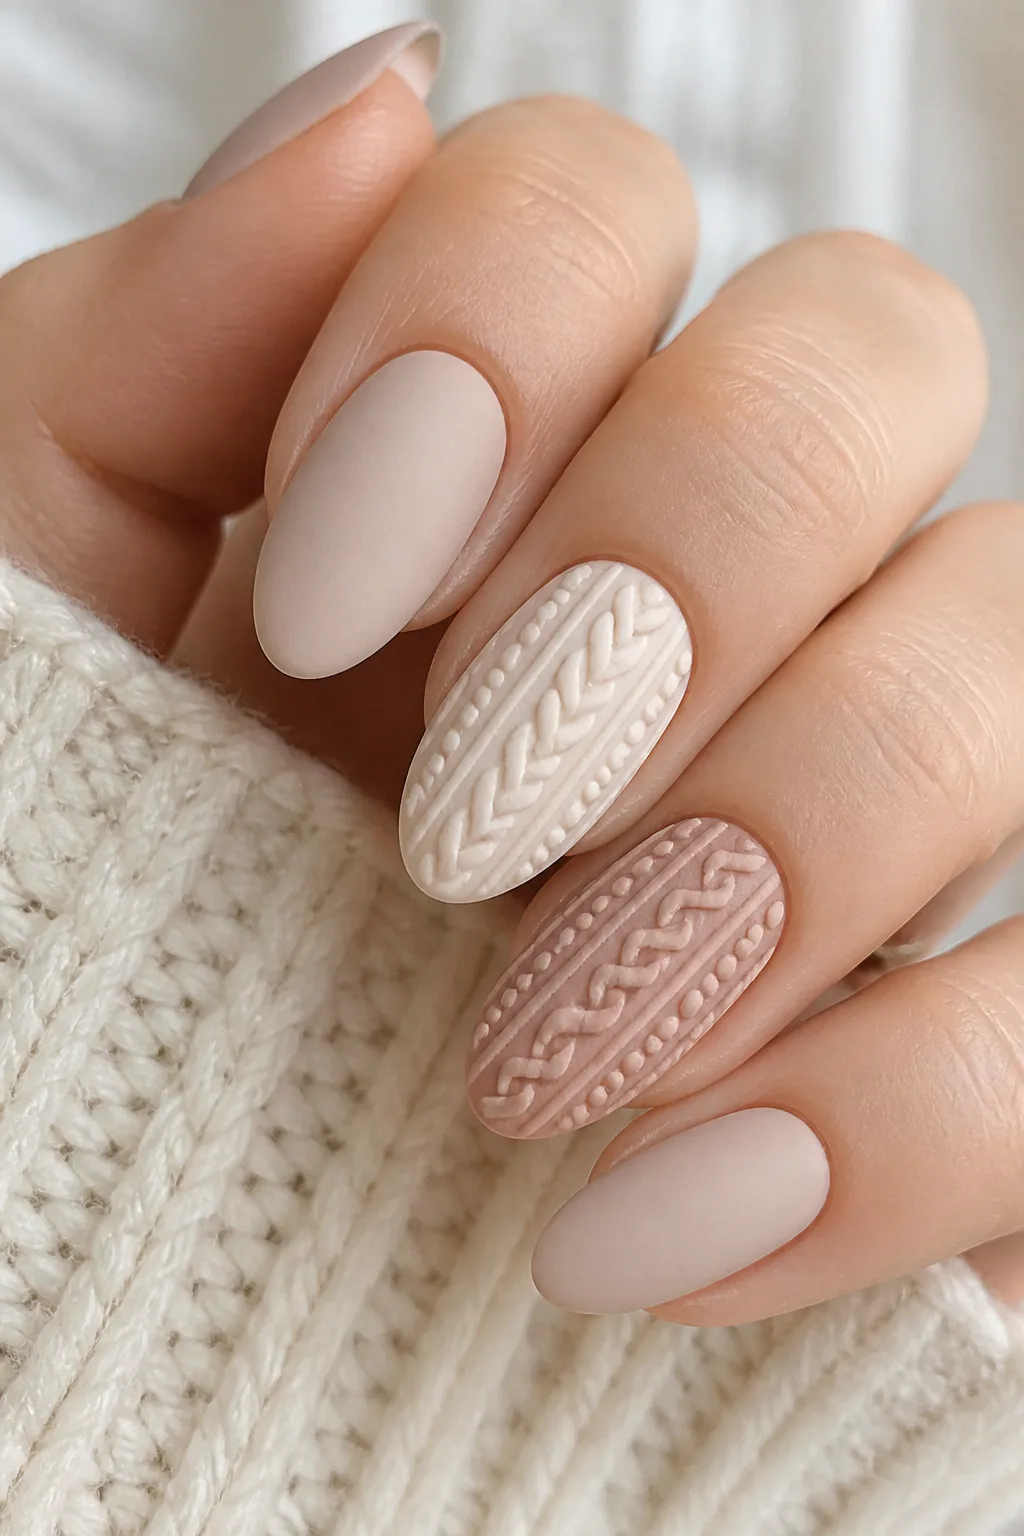
Best for: Sweater-weather texture
Skill level: Advanced (raised gel)
Raised knit nail art borrows the look of cozy winter sweaters, turning a manicure into a small seasonal texture. A matte neutral shade gives the design a soft, understated feel, while red makes it more traditionally festive. The raised pattern is tactile and dimensional, so even a single accent nail can give the whole set a winter-ready mood.
This design is usually created with gel products and works best when the pattern has enough space to show clearly. A cable, rib, or looping motif can suggest knitted fabric without covering every nail. Pairing one or two textured nails with smooth matte polish keeps the manicure comfortable-looking rather than overly busy.
Choosing the texture
Ask a nail technician for a raised sweater-knit pattern if you are not experienced with gel art. At home, use products intended for the technique and build the design carefully so the raised lines remain distinct.
- Try cream, taupe, or muted red for a cozy palette.
- Use matte polish to emphasize the sweater-like texture.
- Keep some nails smooth to balance the raised details.
The result pairs naturally with cold-weather clothes and makes a playful alternative to glitter.
10. Paint a Midnight Blue Starry Night
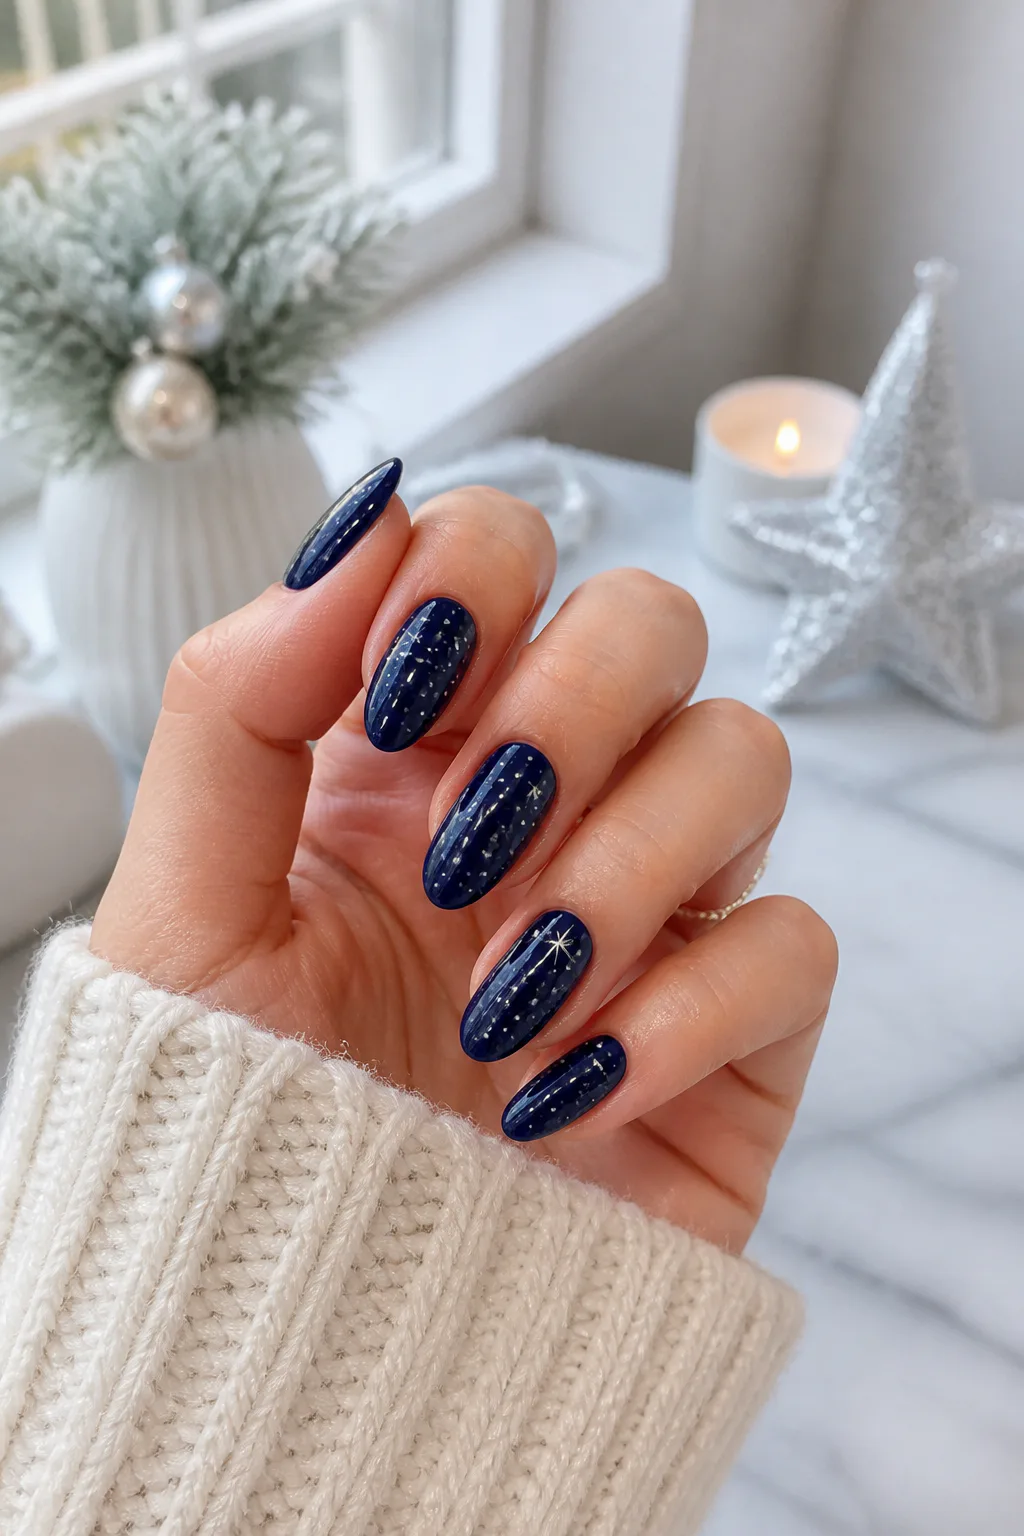
Best for: A dreamy night-sky look
Skill level: Intermediate
Deep navy polish creates a moody backdrop for a starry-night manicure. It offers a darker alternative to classic holiday colors while still feeling seasonal, particularly when paired with metallic silver details. The rich base works on both short and long nails, and its depth makes even tiny dots or stars easy to notice.
Arrange a few stars, small constellations, and scattered silver dots across the nails to suggest a clear winter sky. You can spread the details across the whole set or concentrate them on accent nails. A balanced mix of larger motifs and fine dots helps the design feel varied without becoming crowded.
Creating a starry effect
Apply the navy evenly and let it dry before adding metallic artwork. Use a dotting tool for tiny points of light and a fine brush or decals for stars and constellation lines.
- Choose a dark navy or midnight-blue base.
- Mix small silver dots with a few larger stars.
- Leave some areas open so the design can breathe.
A glossy topcoat makes the dark background look smooth and gives the metallic details extra shine.
11. Glaze Cranberry French Tips with Chrome
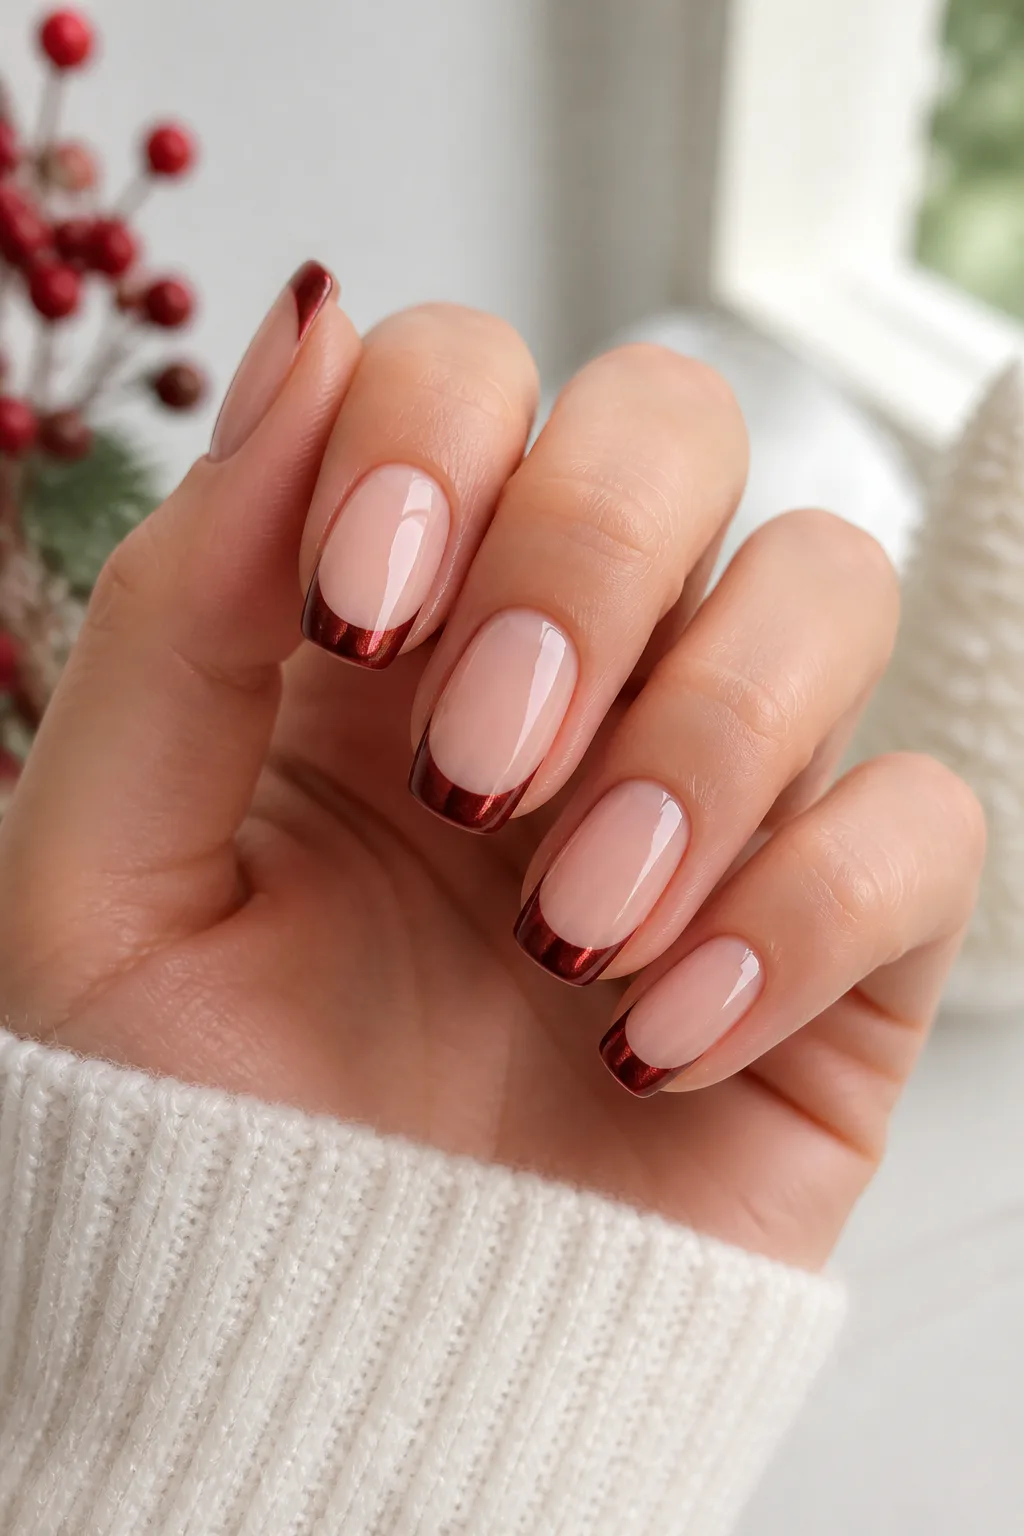
Best for: Subtle shine on short nails
Skill level: Intermediate
Deep cranberry French tips give a familiar manicure a rich holiday update. The color is softer than a bright red but still brings warmth, making it easy to pair with both neutral outfits and festive looks. Keeping the cranberry at the tips leaves the rest of the nail light and clean.
A reflective chrome glaze adds a subtle metallic sheen over the tips, changing how the color catches the light. It can make the design feel dressier without requiring glitter or extra art. This combination works on many nail shapes; simply adjust the French curve to follow the natural outline of each nail.
How to keep the finish refined
Build the cranberry tips with neat, even strokes and allow them to set before applying the chrome effect as directed. A sheer nude or pale pink base helps the colored tips remain the focus while giving the manicure a soft transition.
- Pick a deep cranberry shade rather than a neon red.
- Keep the French line smooth and consistent.
- Use a light chrome glaze for a reflective finish.
This design is a good middle ground between a classic French manicure and a more noticeable seasonal set.
12. Make Gingerbread Nails with White Icing Details
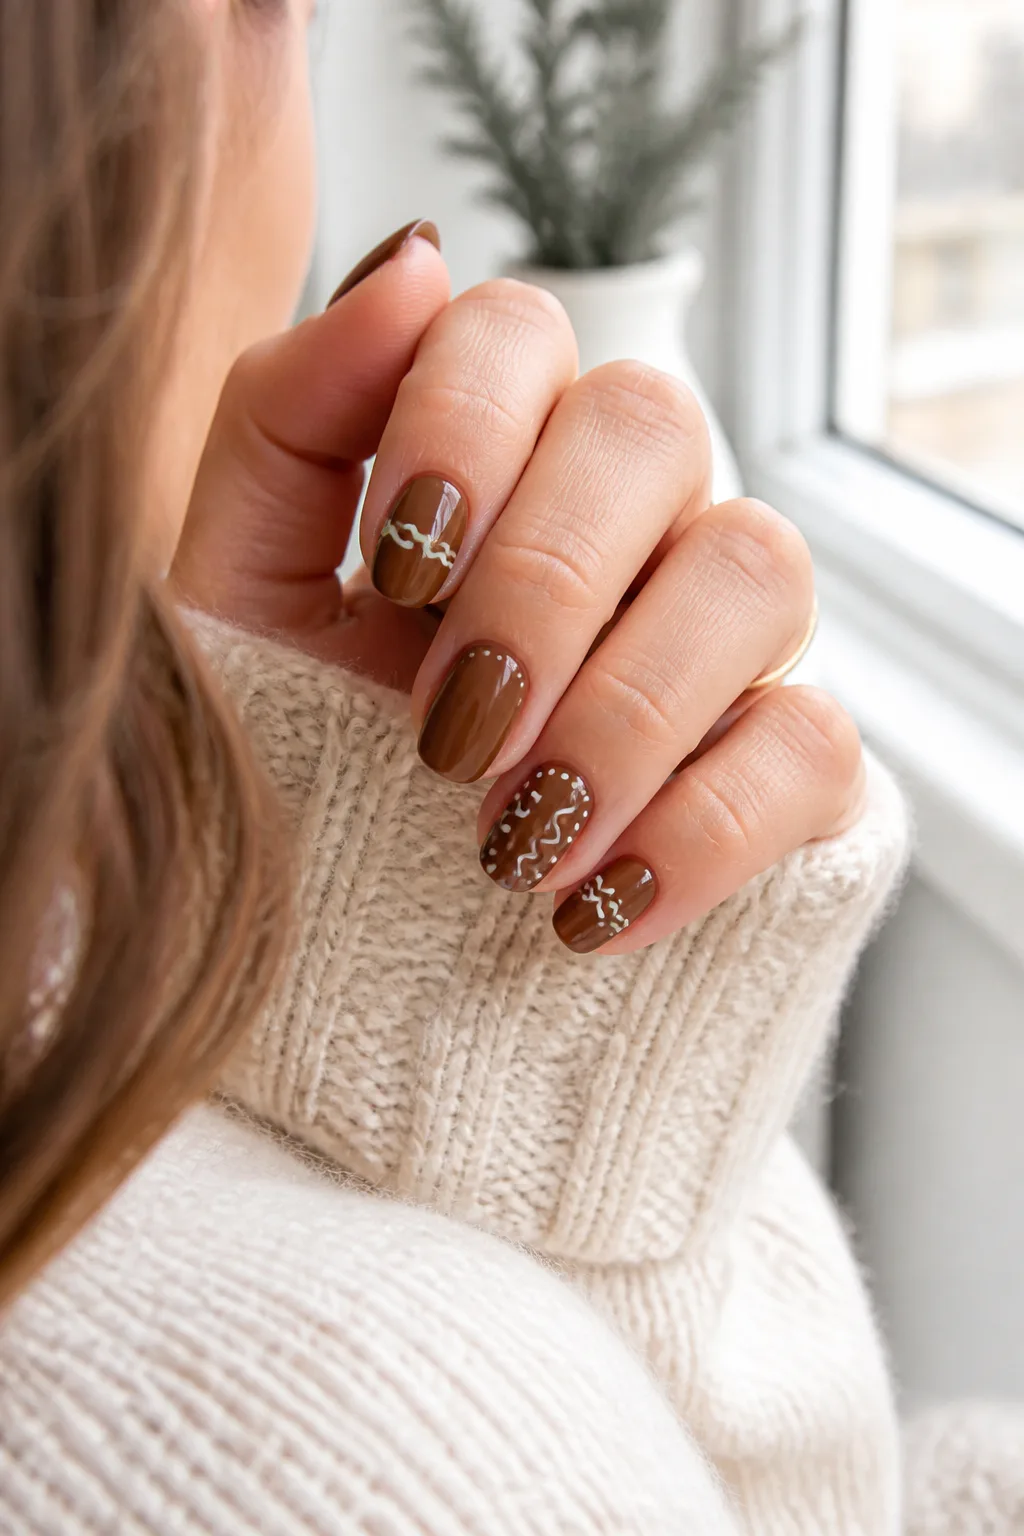
Best for: Fun, whimsical sets
Skill level: Intermediate
Warm milk-chocolate polish gives this manicure the inviting look of gingerbread cookies. The glossy brown base is a little unexpected for the holidays, yet it feels cozy and pairs beautifully with winter neutrals. You can use the shade on every nail or keep it to a few fingers for a softer take.
Tiny white squiggles inspired by cookie icing bring the playful detail. Try small curves, dots, or simple decorative lines rather than attempting to cover each nail with a complex drawing. A few accents are enough to suggest decorated gingerbread while keeping the design wearable.
Adding the icing details
Wait until the brown polish is fully dry, then use a fine brush or nail-art pen to add the white marks. Keep the lines delicate and varied, and leave enough of the chocolate base visible to preserve the warm, glossy effect.
- Choose a warm, glossy brown polish.
- Use white details on one or two accent nails.
- Try dots and short curves for an easy cookie-inspired pattern.
The finished manicure feels cheerful and cozy, especially alongside soft knits and other winter textures.
Photo: @haileykaynails on Instagram. Style shown: warm milk-chocolate nails with white icing details.
13. Scatter Silver Snow on Frosted Sage Nails
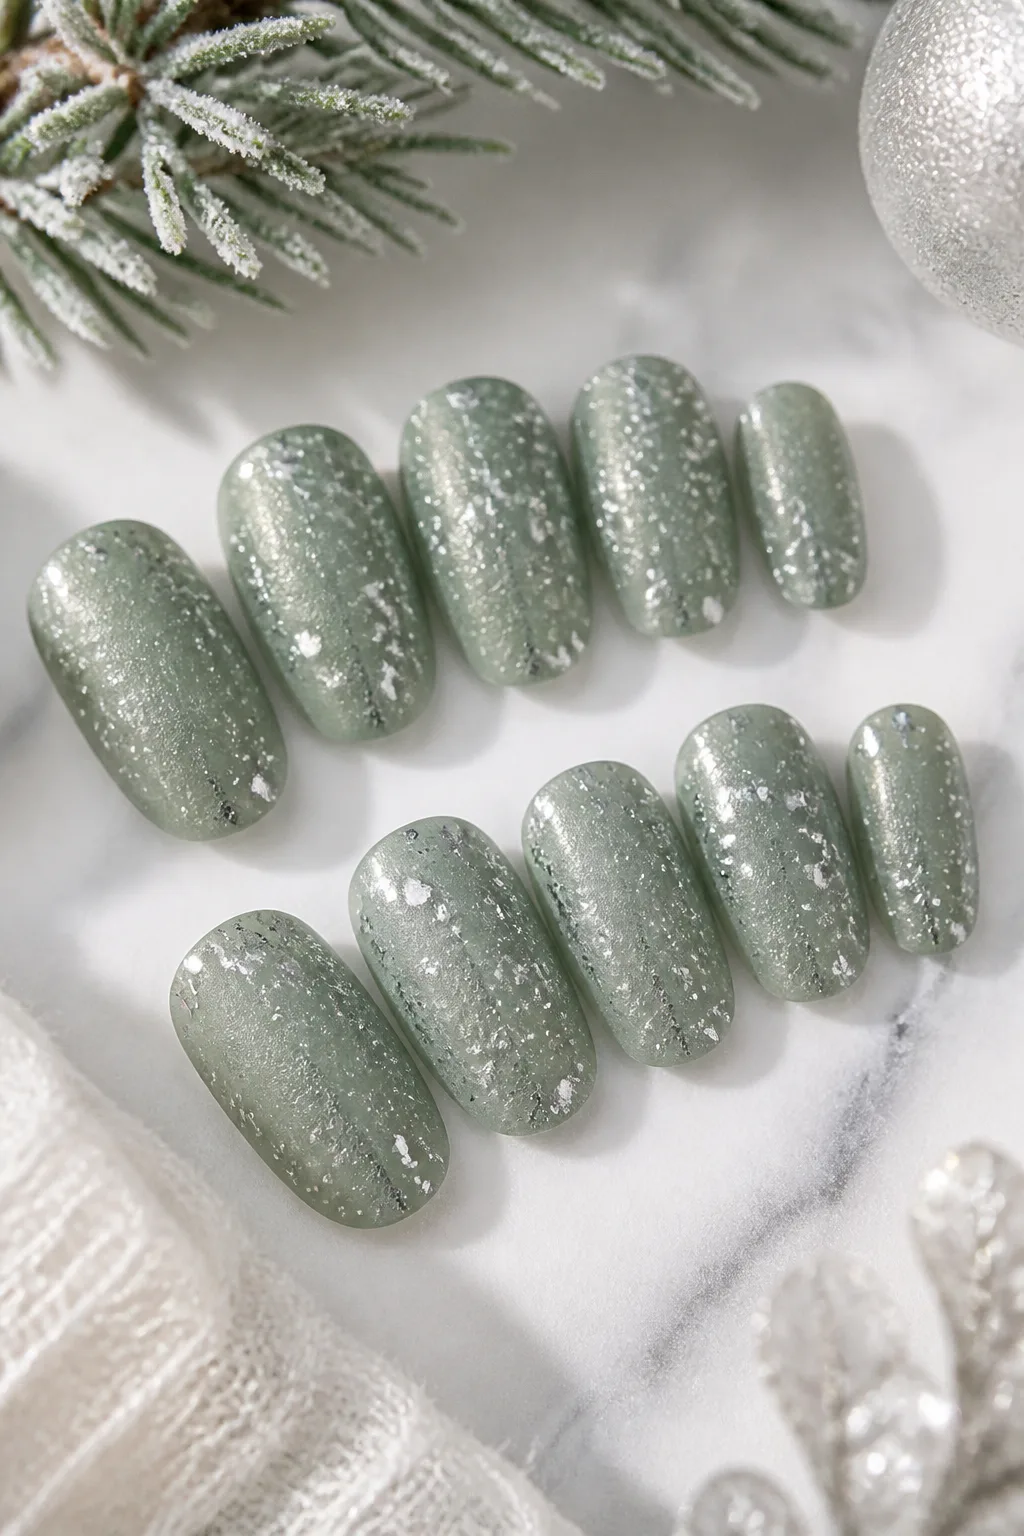
Best for: A fresh non-traditional palette
Skill level: Beginner
Muted sage green offers a calm, modern alternative to darker holiday greens. Its soft tone feels understated and works particularly well for anyone who prefers a gentler color palette. A frosted finish or light sheen can give the base a cool winter character without making the nails feel overly sparkly.
Loose silver flecks scattered across the color suggest falling snow. The irregular placement keeps the pattern relaxed, and the metallic glints add interest as the nails catch the light. Use a few flakes for a subtle look or distribute them more widely if you want the shimmer to be a stronger part of the design.
Balancing color and sparkle
Apply the sage base evenly, then place silver flecks while the polish is tacky or use a polish that contains them. Avoid clustering every piece in one area unless you want a concentrated accent; a light, uneven spread looks more like snowfall.
- Choose a muted sage rather than a bright green.
- Scatter small silver flecks across the nails.
- Use a smooth topcoat to seal the reflective details.
This manicure feels festive in a quiet, versatile way and can transition easily through the winter season.
14. Cluster Holly Berries Near the Cuticles
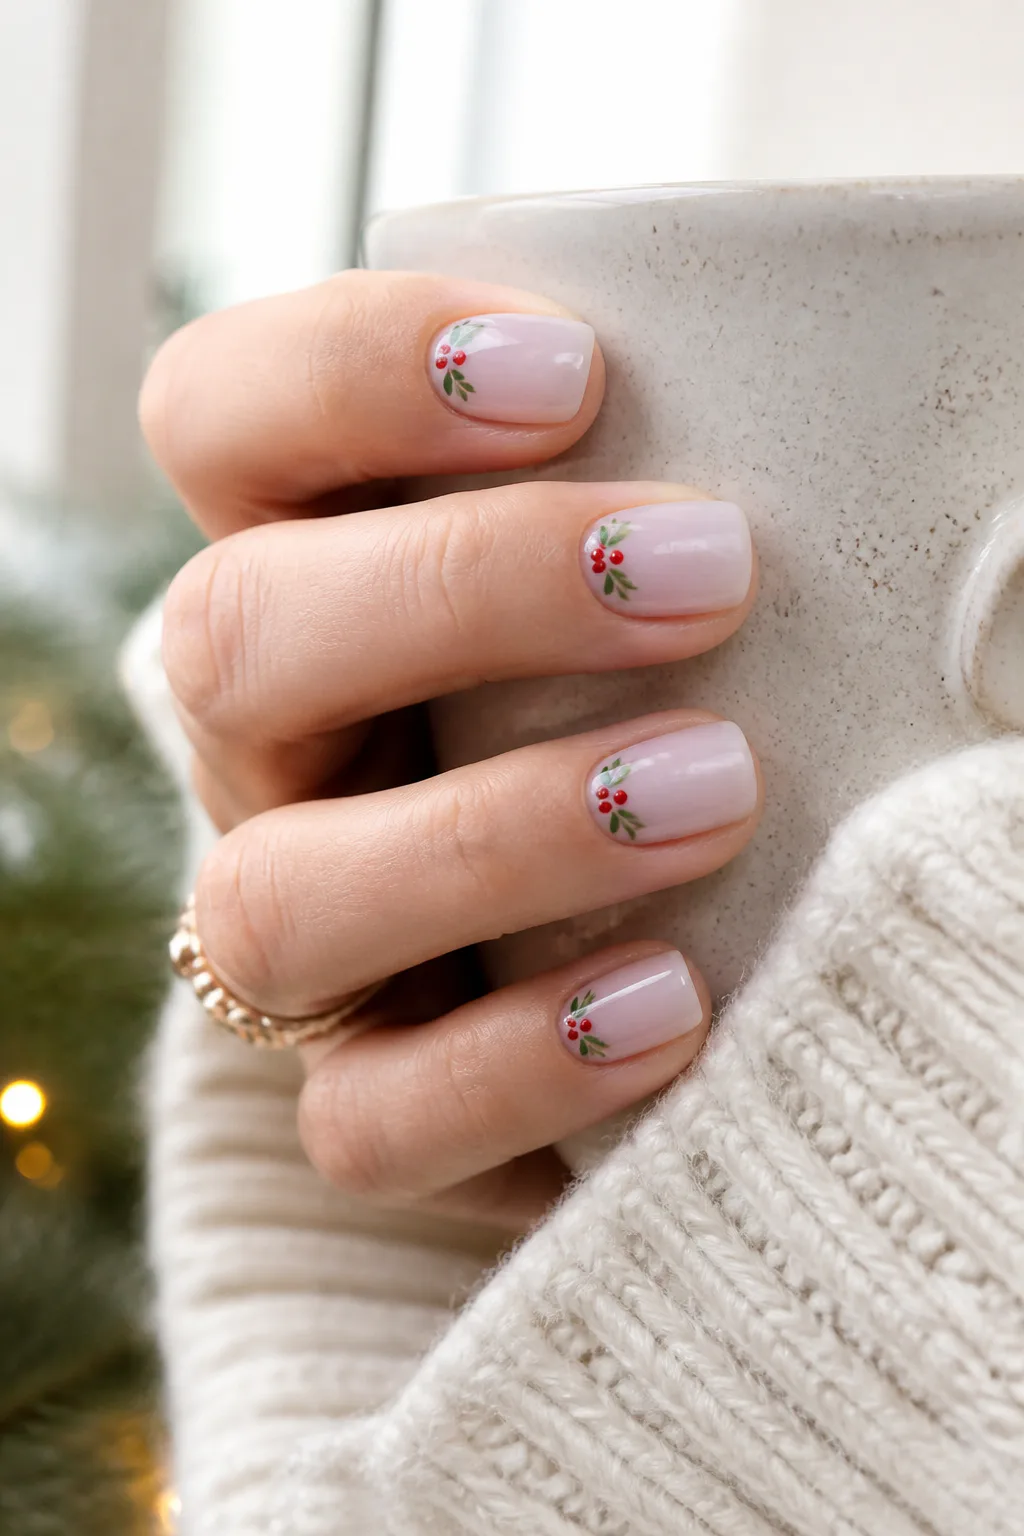
Best for: Delicate festive accents
Skill level: Intermediate (dotting tool)
A sheer milky base keeps this holly-inspired manicure delicate and bright. Small green leaves and red berry dots placed near the cuticles create a seasonal focal point while leaving most of each nail uncluttered. The restrained placement makes the design especially appealing if you enjoy festive details but do not want a full pattern.
Holly art can be repeated on every nail for a coordinated set or used on just a few fingers. On short nails, keep the leaves and berries especially small; on longer nails, you can add a little more shape to the leaves. The translucent background also helps the artwork feel light and fresh.
Placing the holly detail
Use a fine brush to paint two or three green leaves, then add tiny red dots beside them. Work close to the cuticle without touching the skin, and allow the art to dry completely before sealing it with topcoat.
- Start with sheer milky white or pale pink polish.
- Keep the leaf cluster small and near the cuticle.
- Add just a few red dots for recognizable berries.
The result is a graceful, understated holiday manicure with a little color at the base of each nail.
Photo: @mani.bykb on Instagram. Shade shown: Brillbird Brush & Go 109 with red chrome holly berries and tonal green leaves.
15. Draw Dangling Red Ornaments on Nude Nails
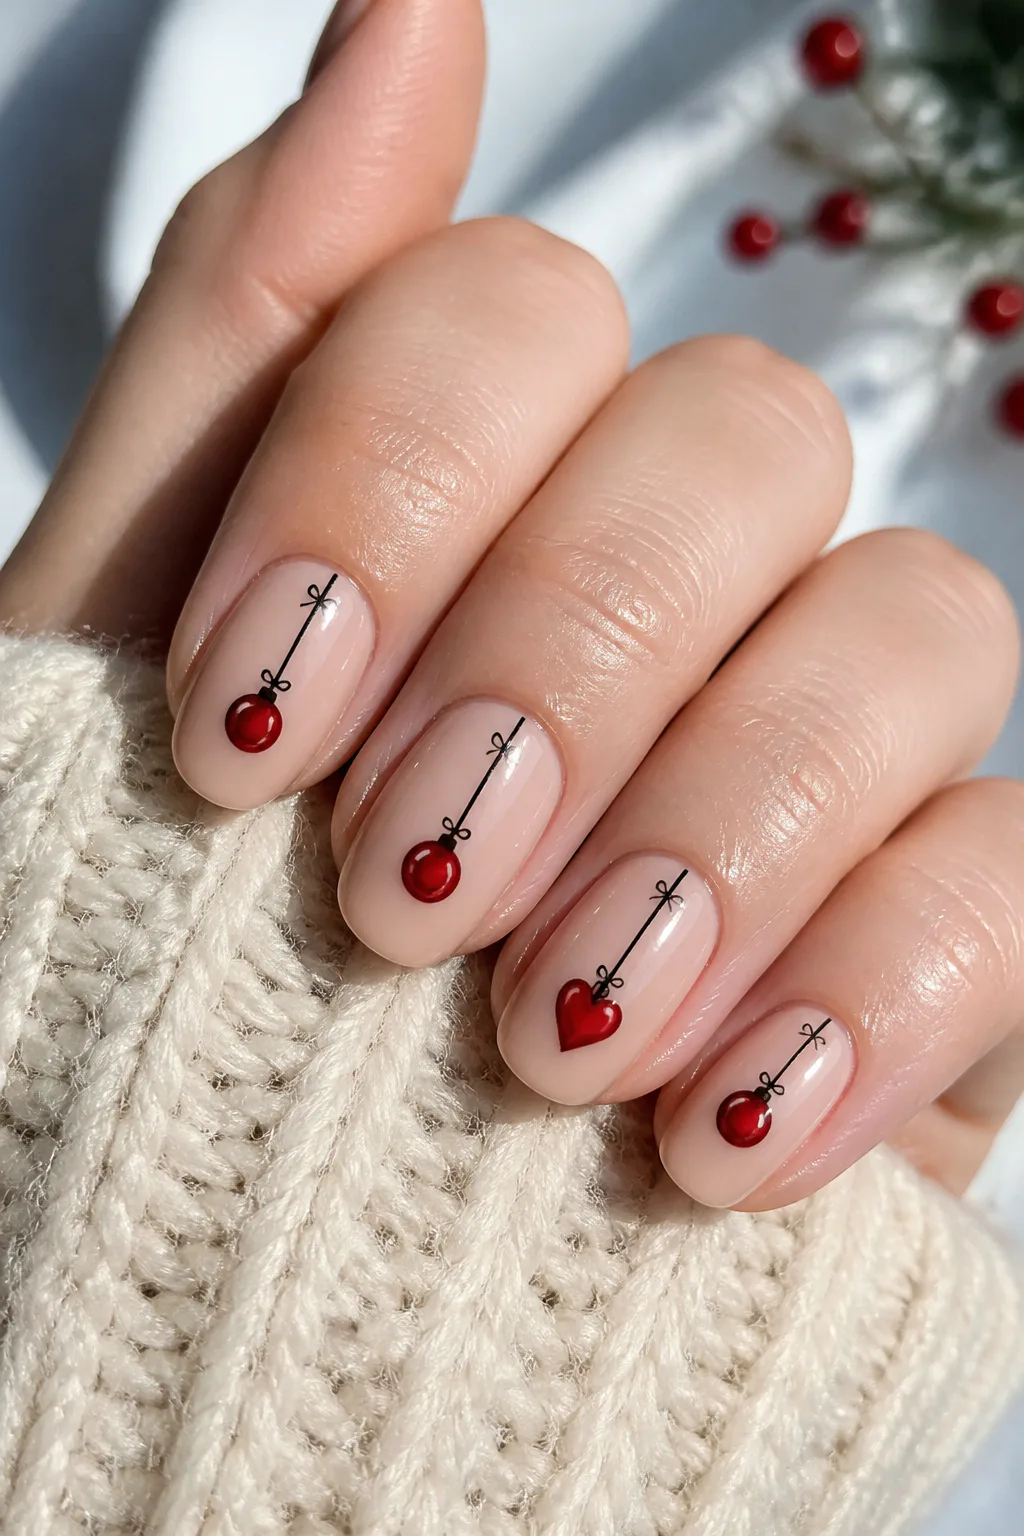
Best for: Ornament-inspired accent nails
Skill level: Intermediate
A nude base makes room for a playful ornament design without making the manicure feel too bold. Draw a thin black line from near the tip or upper edge of each nail, then finish it with a shiny red bauble or small heart. The dangling detail gives the impression of tiny decorations hanging from a festive string.
For a more minimal version, use one ornament on each nail and keep the lines very fine. You can also place the artwork on accent nails while leaving the others glossy and bare. A red heart is a sweet alternative to a round bauble, and either shape stands out beautifully against sheer pink or warm nude polish.
Keeping the ornaments delicate
Use a liner brush for the black strings and a dotting tool or fine brush for the red shapes. Let each layer dry before adding a clear topcoat, taking care not to blur the narrow lines.
- Choose a nude or sheer pink base that suits your style.
- Paint fine black lines and small glossy red ornaments.
- Keep the shapes simple so they remain clear on each nail.
This design feels charming and festive while preserving the clean look of a neutral manicure.
Frequently Asked Questions
What are the most popular holiday nail colors?
Deep reds, burgundy, emerald green, gold, champagne, pearly white and midnight blue are the classic holiday picks, with sage green as a fresher alternative.
Which holiday nail designs are easiest for beginners?
A champagne glitter fade, metallic gold chrome and frosted sage with silver glitter need little precision and look polished quickly.
How can I make holiday nails look classy?
Choose one festive detail, such as thin gold tips, a single snowflake or a small bow, and keep the rest of the set simple and glossy.
Do holiday nail designs work on short nails?
Yes. Glitter fades, holly berries near the cuticle and cranberry chrome French tips all scale down well to short nails.
Final Thoughts
Holiday nails can be as simple as a glossy seasonal shade or as detailed as plaid, snowflakes, and tiny ornaments. Choose a design that suits your plans and comfort level, and remember that an accent nail or a smaller motif can make intricate artwork feel more wearable.
Use these ideas as inspiration for your next at-home manicure or salon visit. You can adjust the colors, placement, and amount of sparkle to make the finished look feel like your own throughout the holiday season.