13 Stunning Pink Valentine’s Day Nails Ideas
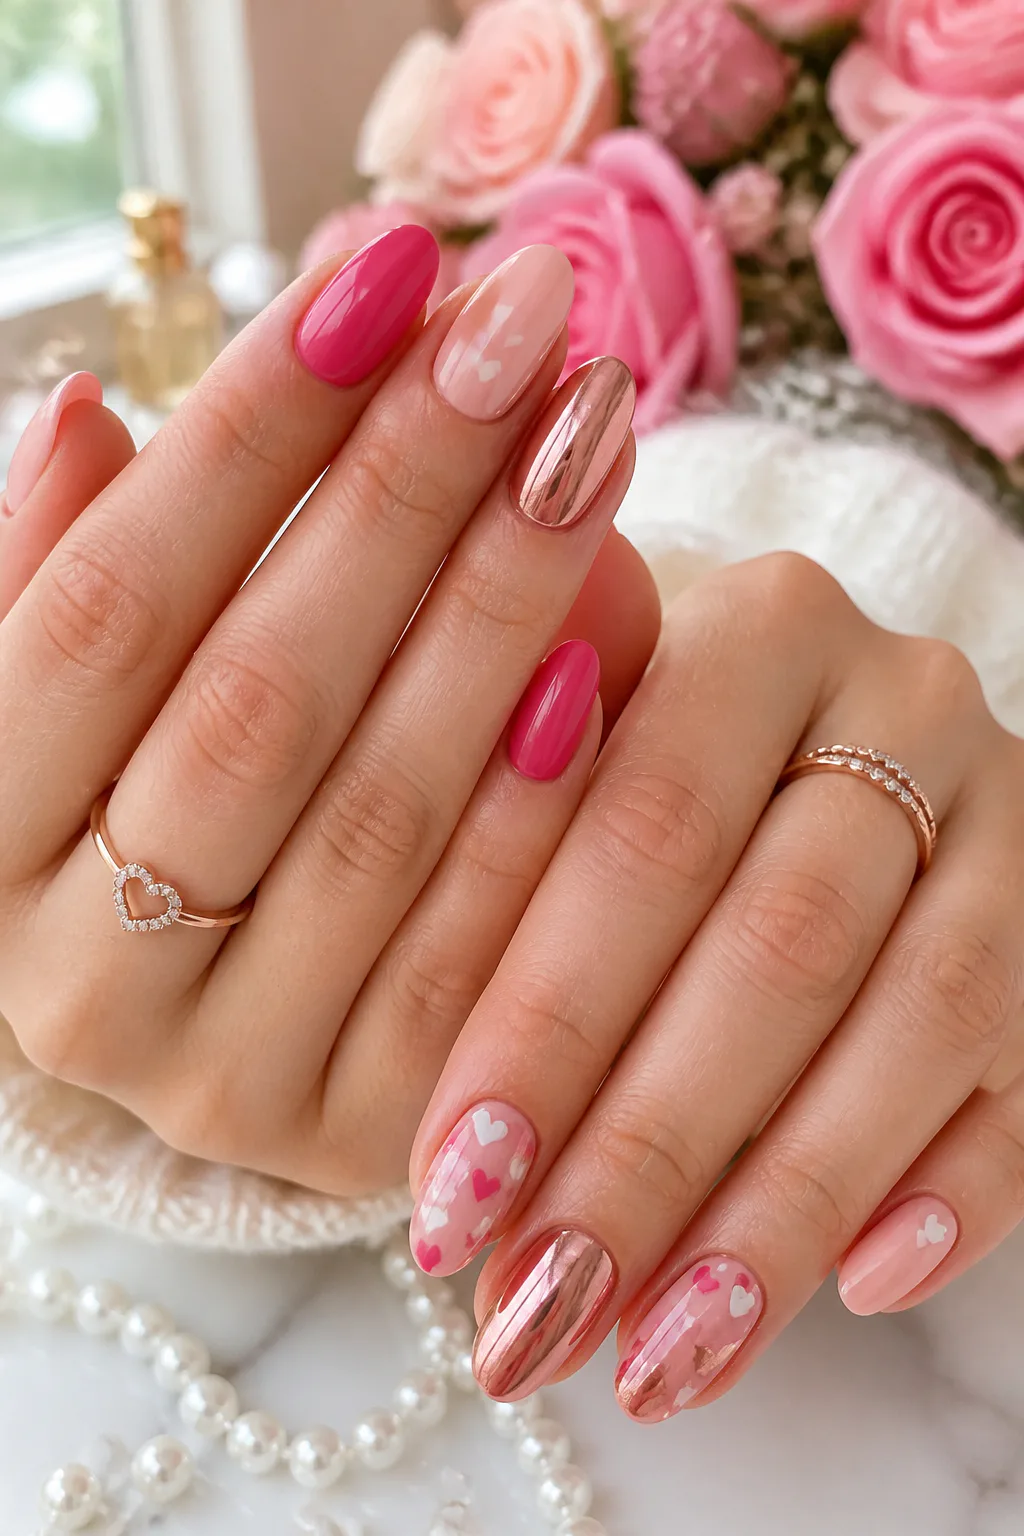
Pink Valentine’s Day nails can feel soft and understated, playful and bright, or dressed up with chrome and dimensional details. The right design depends on how much color and decoration you enjoy wearing, as well as your preferred nail length and shape.
These 13 ideas range from tiny heart accents to bold checkerboard patterns, with options that can work on short natural nails or longer shapes. Each look includes practical details to help you decide what to request at a salon or adapt for an at-home manicure.
If you’re choosing a design for a specific outfit or occasion, consider whether you want a subtle hint of Valentine’s Day or a look that makes the holiday theme unmistakable. You can also simplify detailed art by placing it on one or two accent nails.
1. Milky Pink Nails with Tiny White Hearts
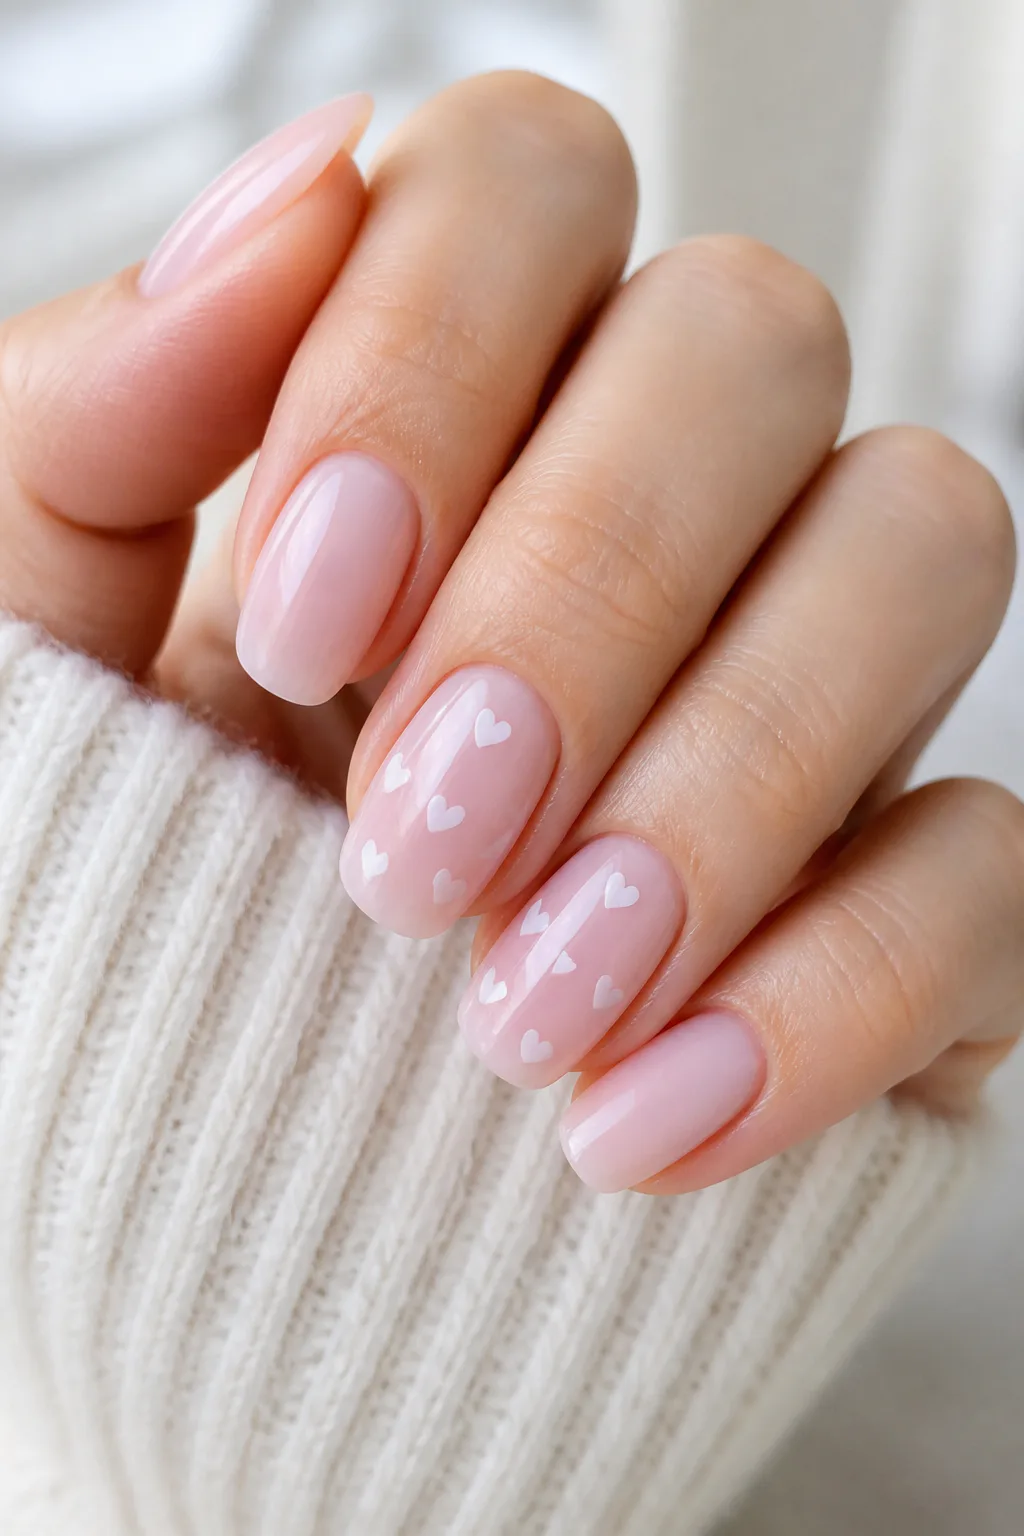
A sheer milky-pink base gives this manicure a clean, softly romantic feel, while tiny white hearts add just enough Valentine’s detail. The translucent color lets your natural nail show through, so the finished look feels light rather than heavily decorated.
Scatter micro hearts on a couple of accent nails instead of covering every finger. This design is especially pretty on short almond or square nails, where the soft base and small motifs keep the overall effect neat and balanced.
How to keep the details delicate
Ask for a thin, even layer of sheer pink and small hearts with plenty of space around them. If you’re doing the design at home, a dotting tool or a fine brush can help shape the hearts; stickers are a useful alternative when you want consistent outlines.
- Choose two accent nails for a minimal finish.
- Keep the hearts small and scattered, not crowded.
- Use a glossy top coat to smooth and seal the design.
The result suits everyday wear as easily as a Valentine’s date, making it a lovely choice if you prefer a subtle seasonal manicure.
2. Rose Gold Chrome Pink Nails
Rose gold chrome layered over translucent pink creates a glowing, mirror-like finish with a romantic warmth. The pink base keeps the metallic sheen from feeling too stark, while the reflective surface gives the manicure a polished, dressed-up quality.
This look can be striking on almond or coffin nails, where the longer shape gives the chrome more room to catch the light. If you prefer something quieter, ask for a softer chrome effect or reserve the metallic finish for a few accent nails.
How to get a smooth chrome finish
Chrome is usually applied over a prepared gel manicure, so a nail professional can help achieve an even, reflective surface. For a cohesive look, keep the base color sheer and let the rose-gold finish provide the main visual interest.
- Choose translucent pink rather than an opaque base.
- Ask for an even chrome layer across each nail.
- Keep extra art minimal so the shine stays in focus.
- Consider accent nails if you want a less dramatic version.
Pair this manicure with simple jewelry or a neutral outfit to let the rosy metallic glow stand out.
3. Hot Pink Double French Tips
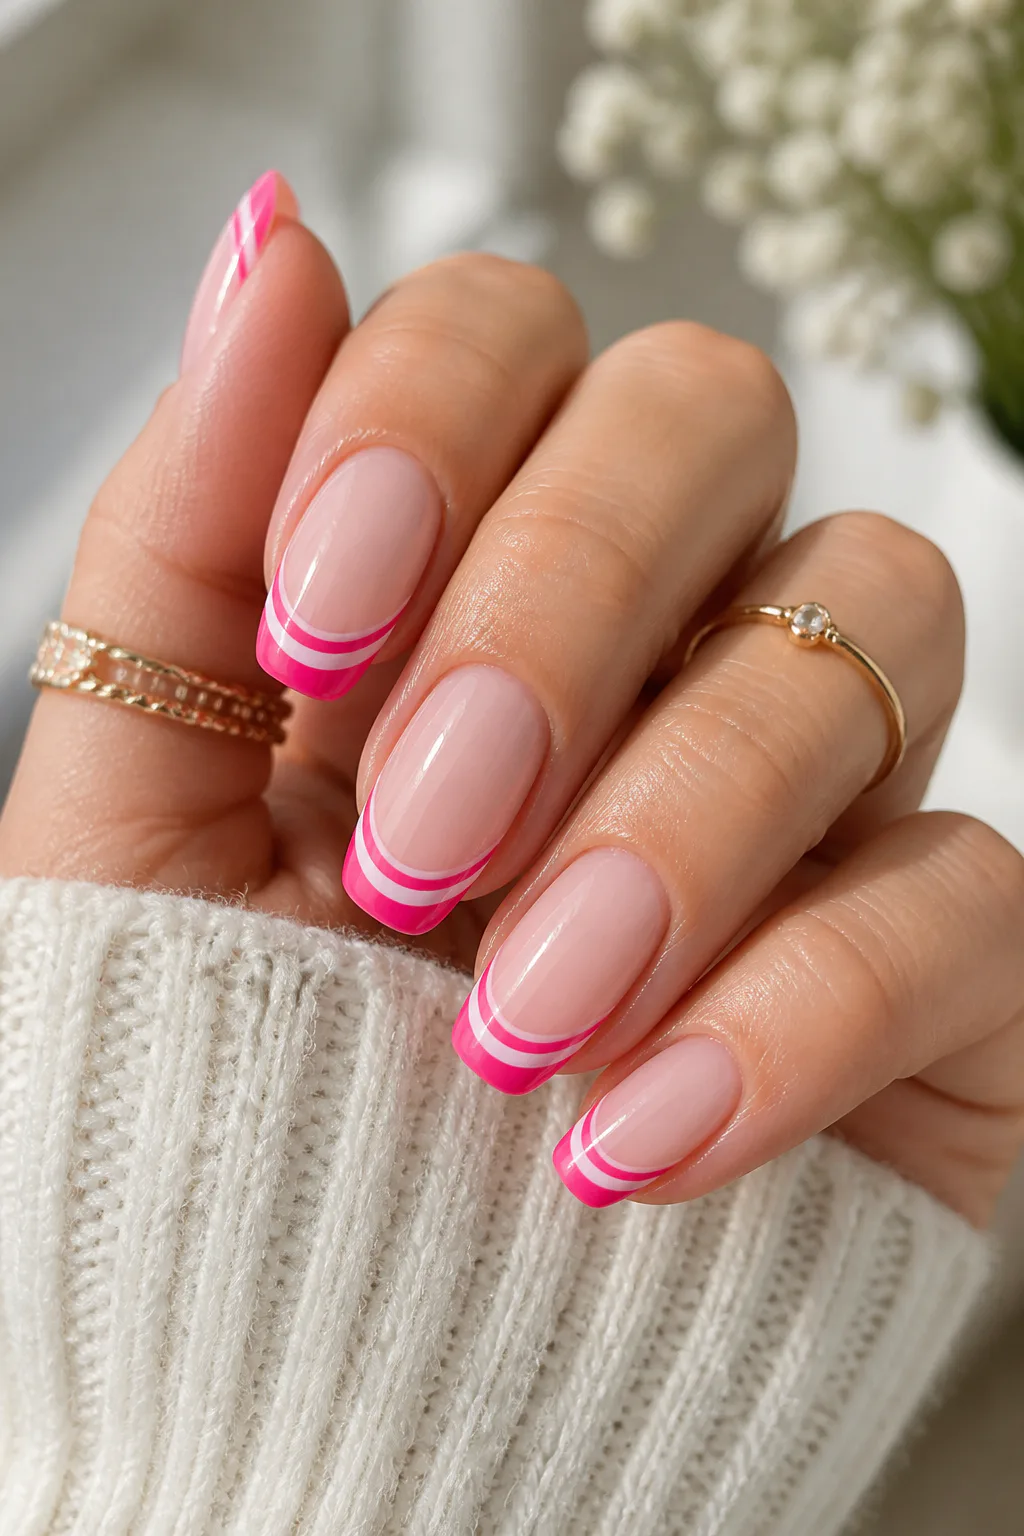
Double French tips bring a playful pop of hot pink to a classic manicure. A nude or soft-pink base keeps the design feeling familiar, while two crisp lines at the tips add a graphic detail that reads as festive without needing hearts or lettering.
A fine white outline between the pink lines helps each stripe look distinct and neatly finished. Square and oval shapes both suit this design; the most important detail is keeping the tip lines balanced with the nail’s width and length.
Designing clean, even lines
Ask your nail tech to follow the natural curve of the free edge and keep the stripes slim. If you’re painting your own nails, use a fine brush and work slowly, allowing each line to dry or cure before adding the next color.
- Use a sheer nude or soft-pink base for contrast.
- Keep both hot-pink lines similar in thickness.
- Add a fine white outline for a crisp layered effect.
- Choose one accent nail for a small heart if desired.
It’s a good option if you love a French manicure but want a brighter, more seasonal twist.
4. Pink Velvet Cat-Eye Nails
Magnetic rose-pink gel creates a shimmering effect that appears to shift as your hands move. The finish has the depth of velvet, with a luminous band of light that makes a single color feel more dimensional than a standard glossy polish.
This look works especially well on almond or stiletto nails, where the shape gives the magnetic shimmer room to stretch. It can also be worn on shorter nails; the rich pink and reflective finish make a statement without requiring extra decoration.
Making the shimmer the focus
Cat-eye polish is shaped with a magnet before it cures, so the placement of the light-catching effect can change the final look. Tell your nail tech whether you prefer a centered glow, a diagonal sweep, or a more diffused velvet appearance.
- Choose a rose-pink magnetic gel for a romantic tone.
- Keep other artwork minimal to showcase the shimmer.
- Try a darker pink for more depth and contrast.
- Use a glossy finish to enhance the light-shifting effect.
This is a lovely choice when you want color and shine without a busy pattern.
5. Negative Space Heart Cutout Nails
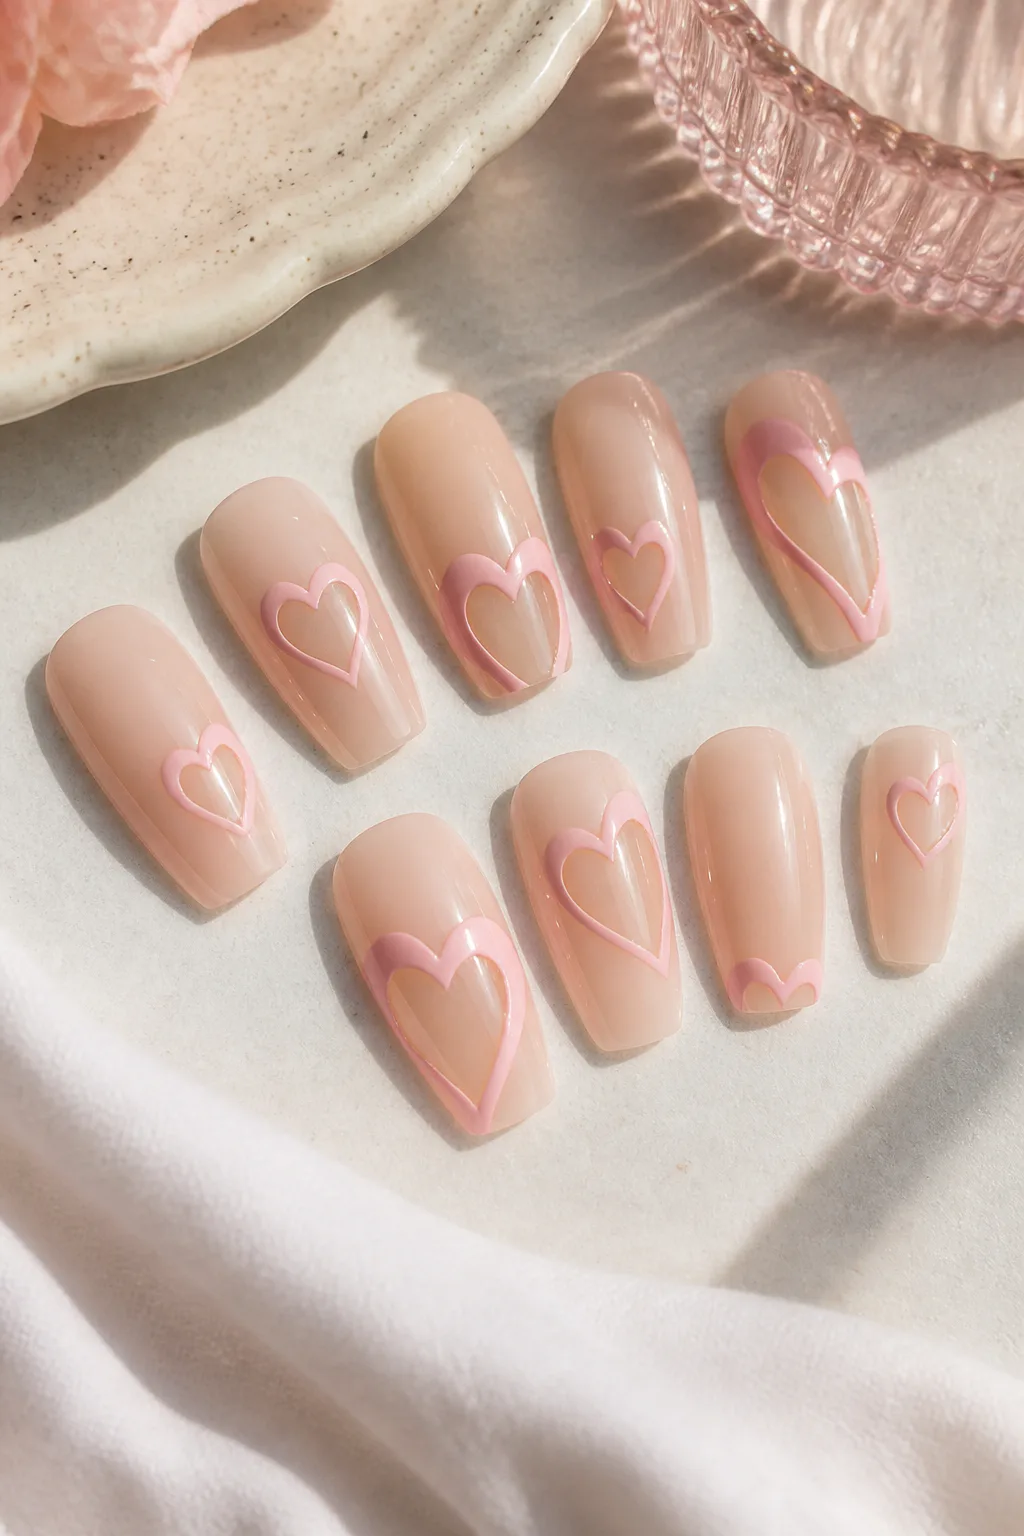
Negative-space heart nails use the natural or clear-looking nail as part of the design. Blush-pink half-hearts or floating outlines frame open areas, creating a light, modern manicure that feels more graphic than a traditional filled-in heart motif.
The open space helps the design feel airy, especially when paired with a sheer base. You can place one heart on an accent nail or repeat small outlines across several fingers; either approach keeps the Valentine’s theme visible without covering the whole nail in color.
Keeping the open areas intentional
Ask for clean, carefully shaped outlines so the heart forms remain easy to recognize. A blush shade keeps the look soft, while a slightly brighter pink makes the design stand out more against a clear or nude base.
- Choose a sheer base that blends with your natural nail.
- Use half-hearts or floating outlines for a lighter effect.
- Leave clear space around each motif so it reads clearly.
- Place the most detailed heart on an accent nail.
The result is a fresh alternative for anyone who likes Valentine’s art but prefers a less saturated manicure.
6. Blush Ombré Nails with Pearl Accents
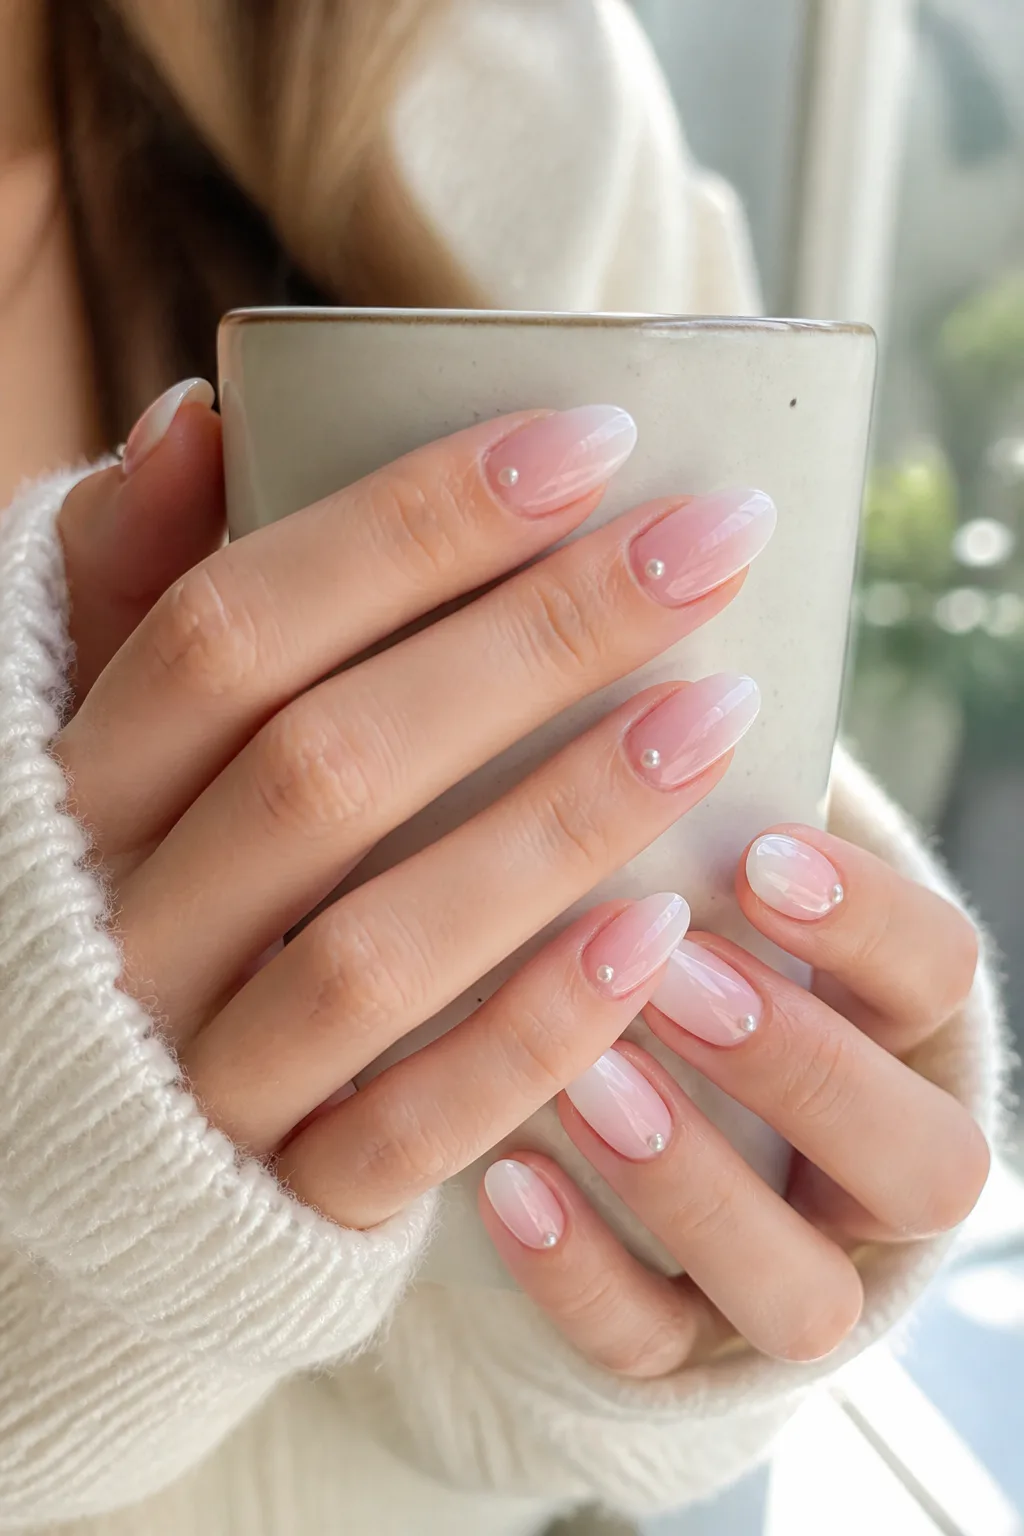
A baby-pink-to-white ombré creates a soft gradient that looks delicate and polished. The gradual blend gives the nails a subtle glow, while tiny three-dimensional pearls near the cuticles add a refined touch without competing with the color transition.
This design is especially appealing if you want a romantic manicure that feels suitable beyond Valentine’s Day. The pale palette works across nail shapes, and the pearl placement can be kept to one or two nails if you prefer less texture.
Balancing the gradient and embellishments
Ask for a smooth fade rather than a sharp division between pink and white. Small pearls are usually enough to finish the look; placing them near the cuticle keeps the gradient visible and gives the decoration a deliberate, jewelry-like feel.
- Blend baby pink into white with no obvious hard line.
- Keep pearls tiny so they don’t overwhelm the nail.
- Place embellishments near the cuticle or on accent nails.
- Choose a glossy top coat around the details for a neat finish.
This manicure pairs especially well with soft fabrics and understated accessories.
7. Cherry and Pink Mix-and-Match Nails
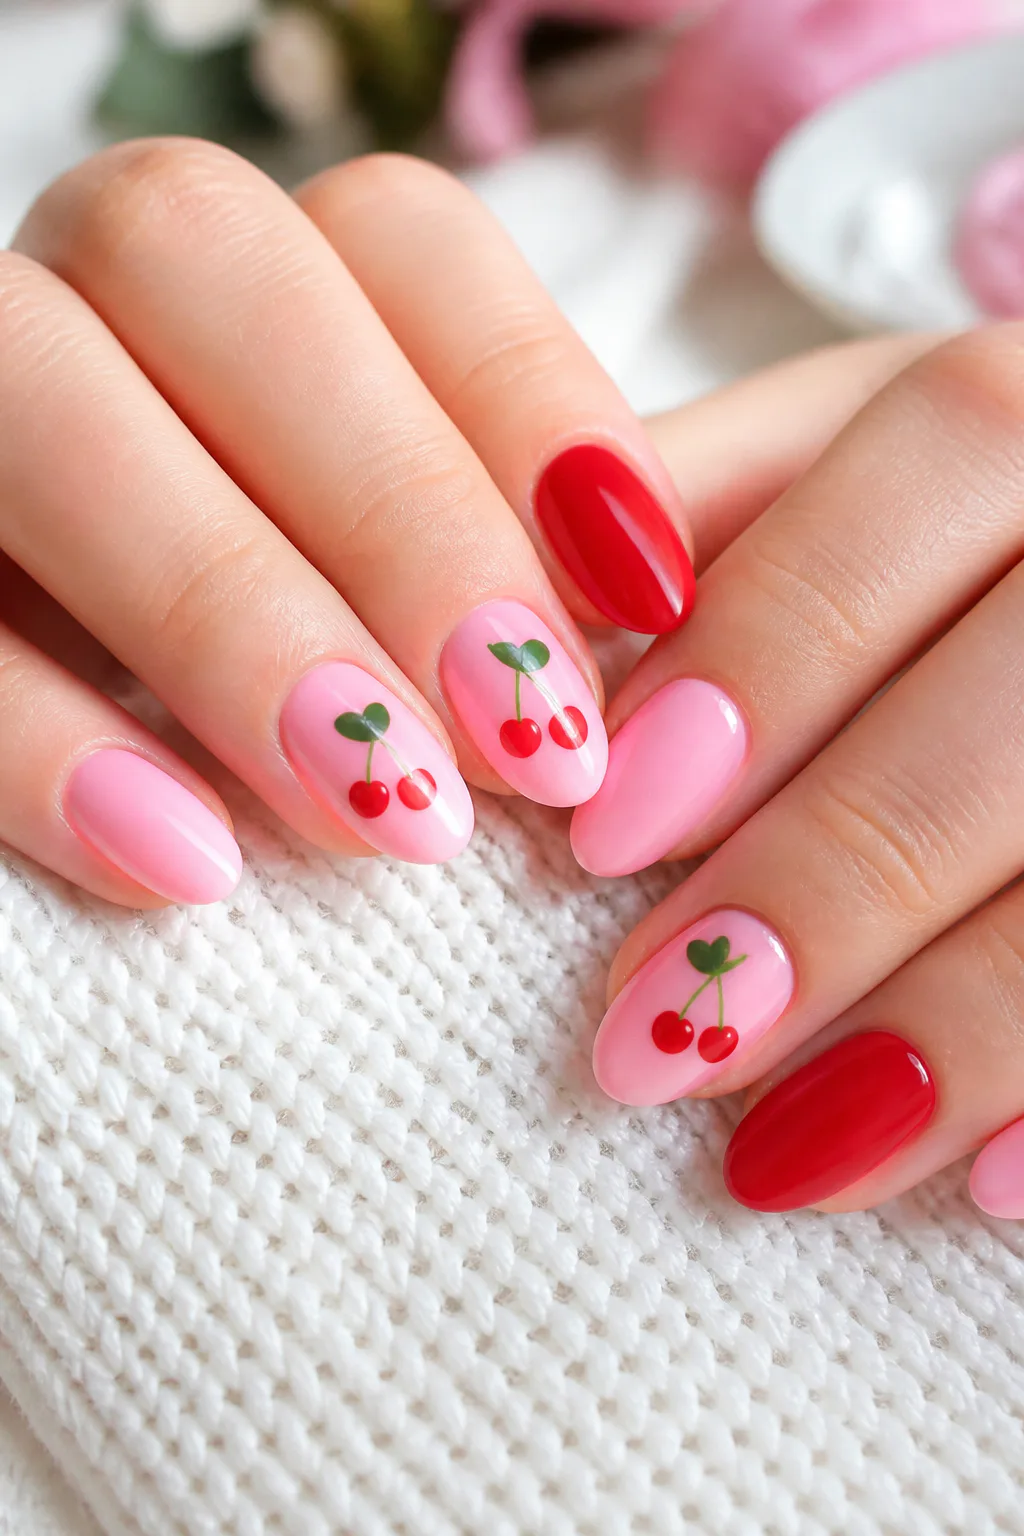
Alternating pastel-pink and cherry-red nails gives this manicure a cheerful, high-contrast feel. Tiny cherries and heart-shaped leaves bring the colors together, making the design playful without requiring every nail to carry the same artwork.
Use solid color on some fingers and cherry motifs on others to create a balanced mix. The pattern can be scaled down for shorter nails or made more detailed on a longer canvas, so you can adjust the look to suit your manicure length.
Planning a coordinated set
Choose one pink and one cherry red that feel harmonious rather than competing. Keep the cherry art simple: a small pair of fruit with a curved stem and heart-like leaves is enough to make the theme clear.
- Alternate pink and red for an easy color rhythm.
- Use cherry art on one or two accent nails.
- Keep the background simple behind detailed motifs.
- Repeat the same small design for a coordinated finish.
This is a fun choice if you enjoy cute nail art and want a brighter alternative to an all-pink set.
8. Tortoiseshell and Hot Pink Split Nails
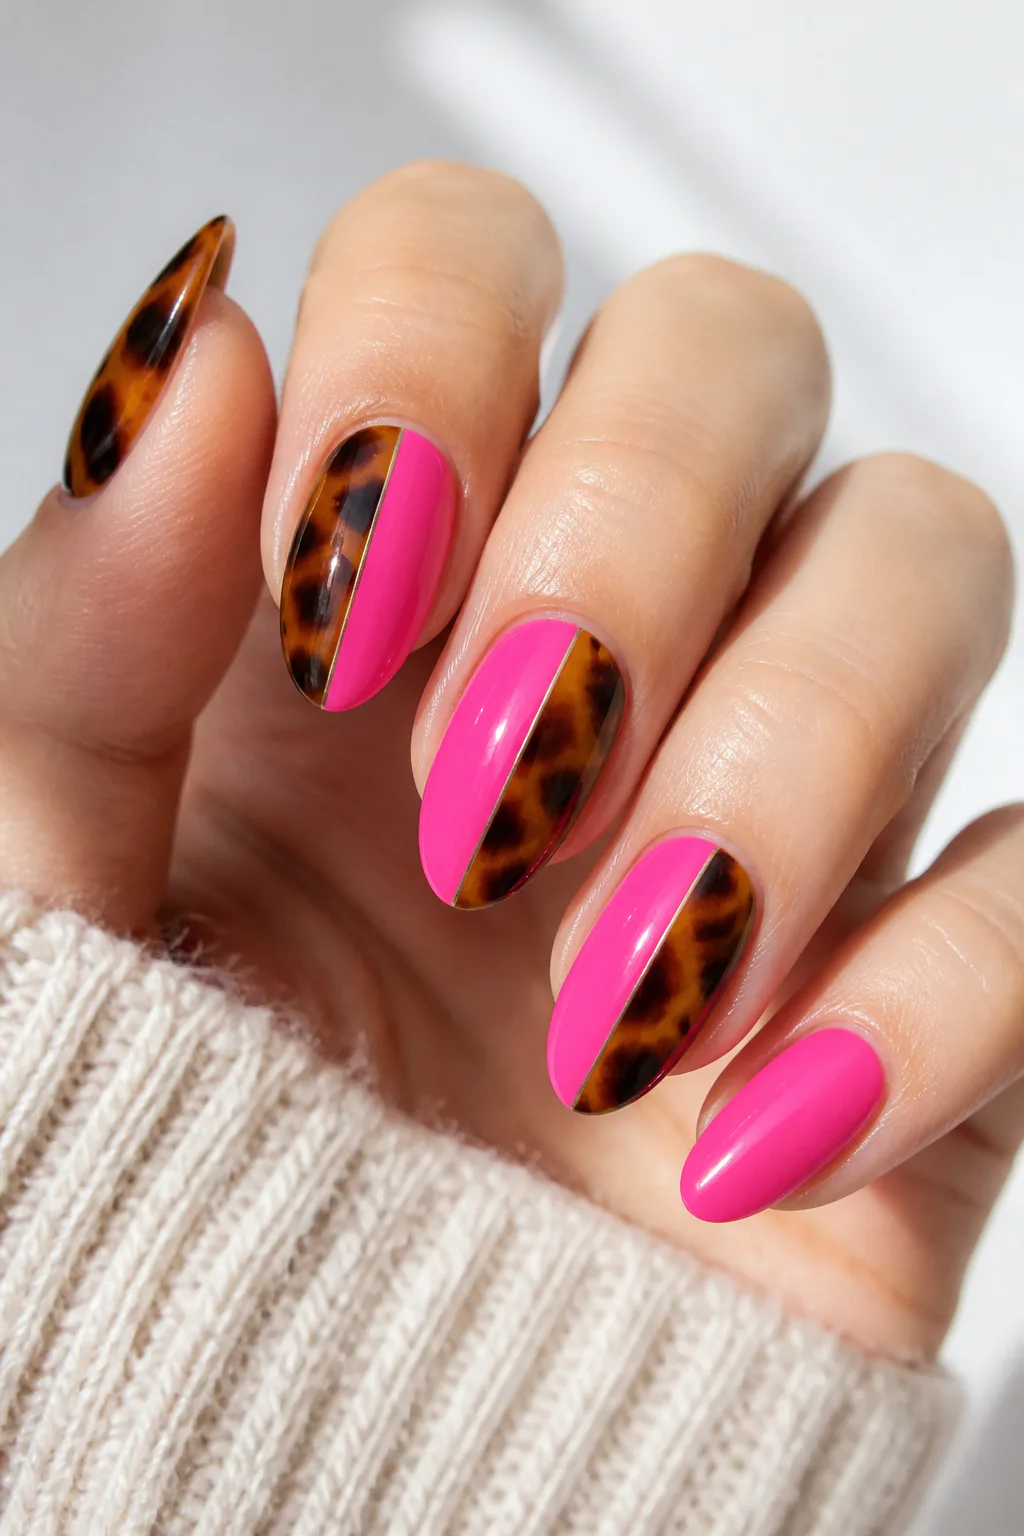
Rich brown tortoiseshell art paired with vibrant hot pink creates a fashion-forward contrast. A split design divides each nail between the two looks, while alternating nails offer a simpler way to bring both patterns into the manicure.
The warm brown pattern gives the bright pink a grounded counterpoint, so the set feels bold rather than overly sweet. This combination suits anyone who wants a Valentine’s manicure with an edgy, graphic twist instead of a classic heart motif.
Choosing how to combine the finishes
A clear split line makes the two colors feel intentional, while alternating full-color nails create a more relaxed mix. Because tortoiseshell uses layered shades, it helps to keep the hot-pink areas clean and uncluttered.
- Try half-and-half nails for a strong graphic effect.
- Alternate tortoiseshell and pink for a simpler layout.
- Keep the brown pattern varied but not overly dense.
- Use a glossy finish to tie the contrasting designs together.
The combination feels especially distinctive on medium or longer nails, but an accent-nail version works well at any length.
9. Pink Nails with XO Lettering
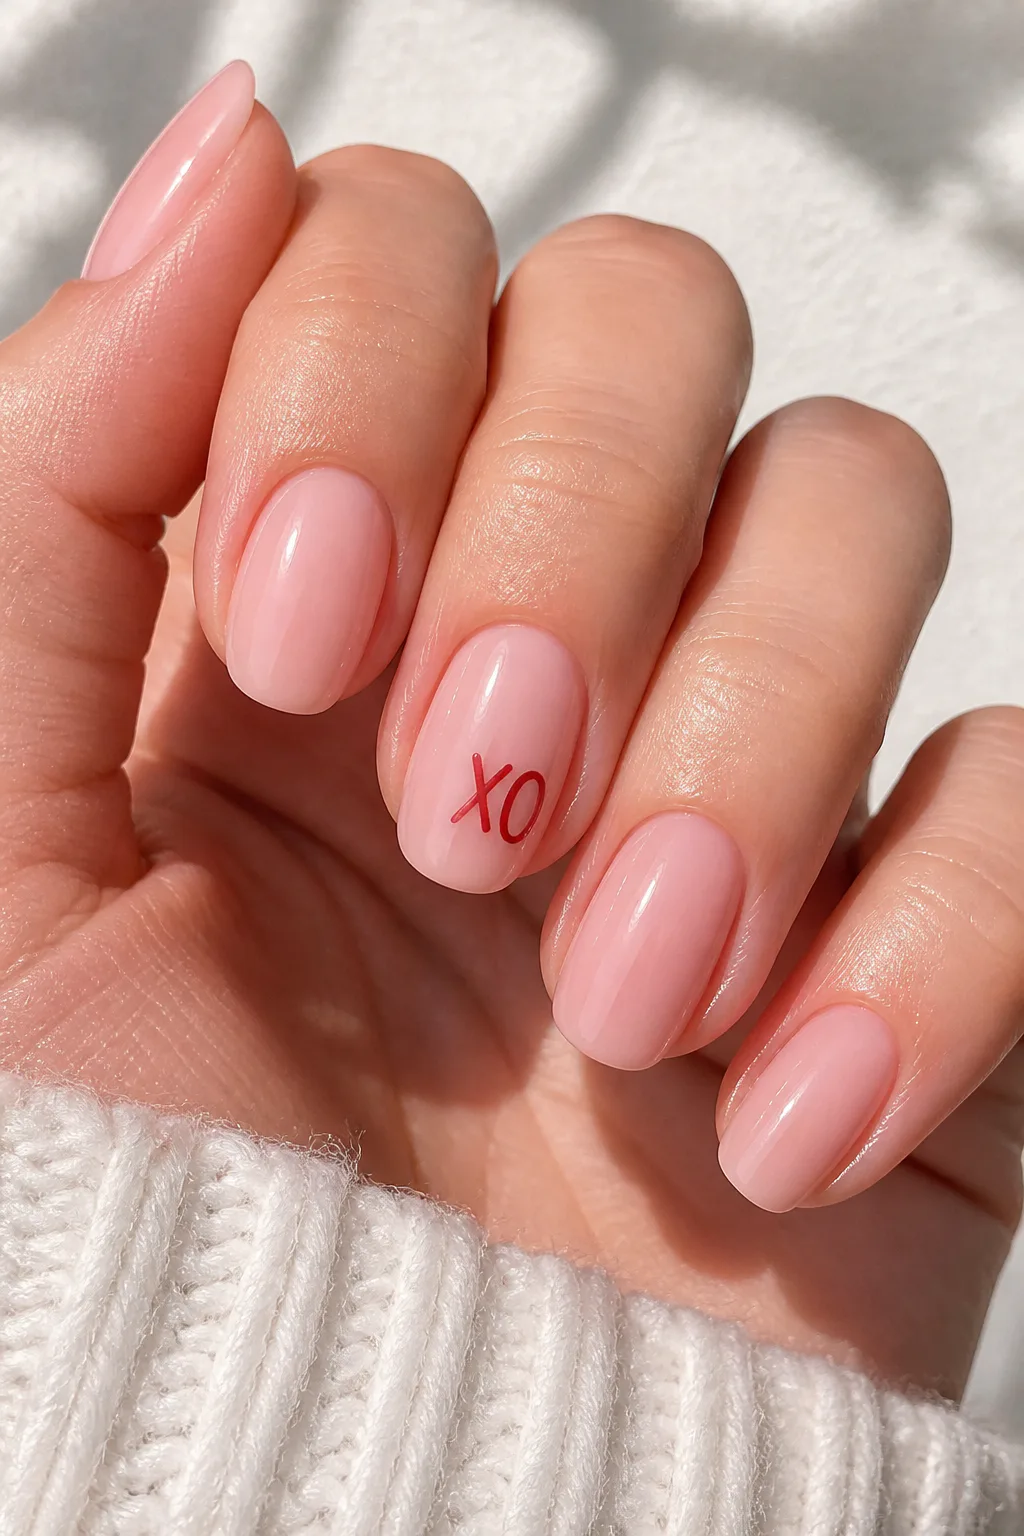
Minimal lettering turns a nude or pastel-pink manicure into a small Valentine’s message. “XO,” “love,” or a pair of initials can add personality while keeping the rest of the nails simple, so the design feels thoughtful rather than crowded.
Black lettering creates crisp contrast, while red feels more traditionally romantic. Place the words or initials on one or two accent nails, allowing the soft base color to carry across the remaining fingers for a cohesive set.
Making small lettering easy to read
Keep the message short and choose a nail with enough space for clean, legible strokes. If you’re bringing a reference to a nail tech, decide whether you want cursive or simple block lettering and show the desired placement before the design begins.
- Use “XO” or a short word for a clear accent.
- Choose black for definition or red for a softer theme.
- Keep the surrounding nails in a simple pink shade.
- Place lettering where it won’t be crowded by other art.
This personal design works well for a subtle manicure with a little message built in.
10. Matte Dusty Rose Nails with Glossy Hearts
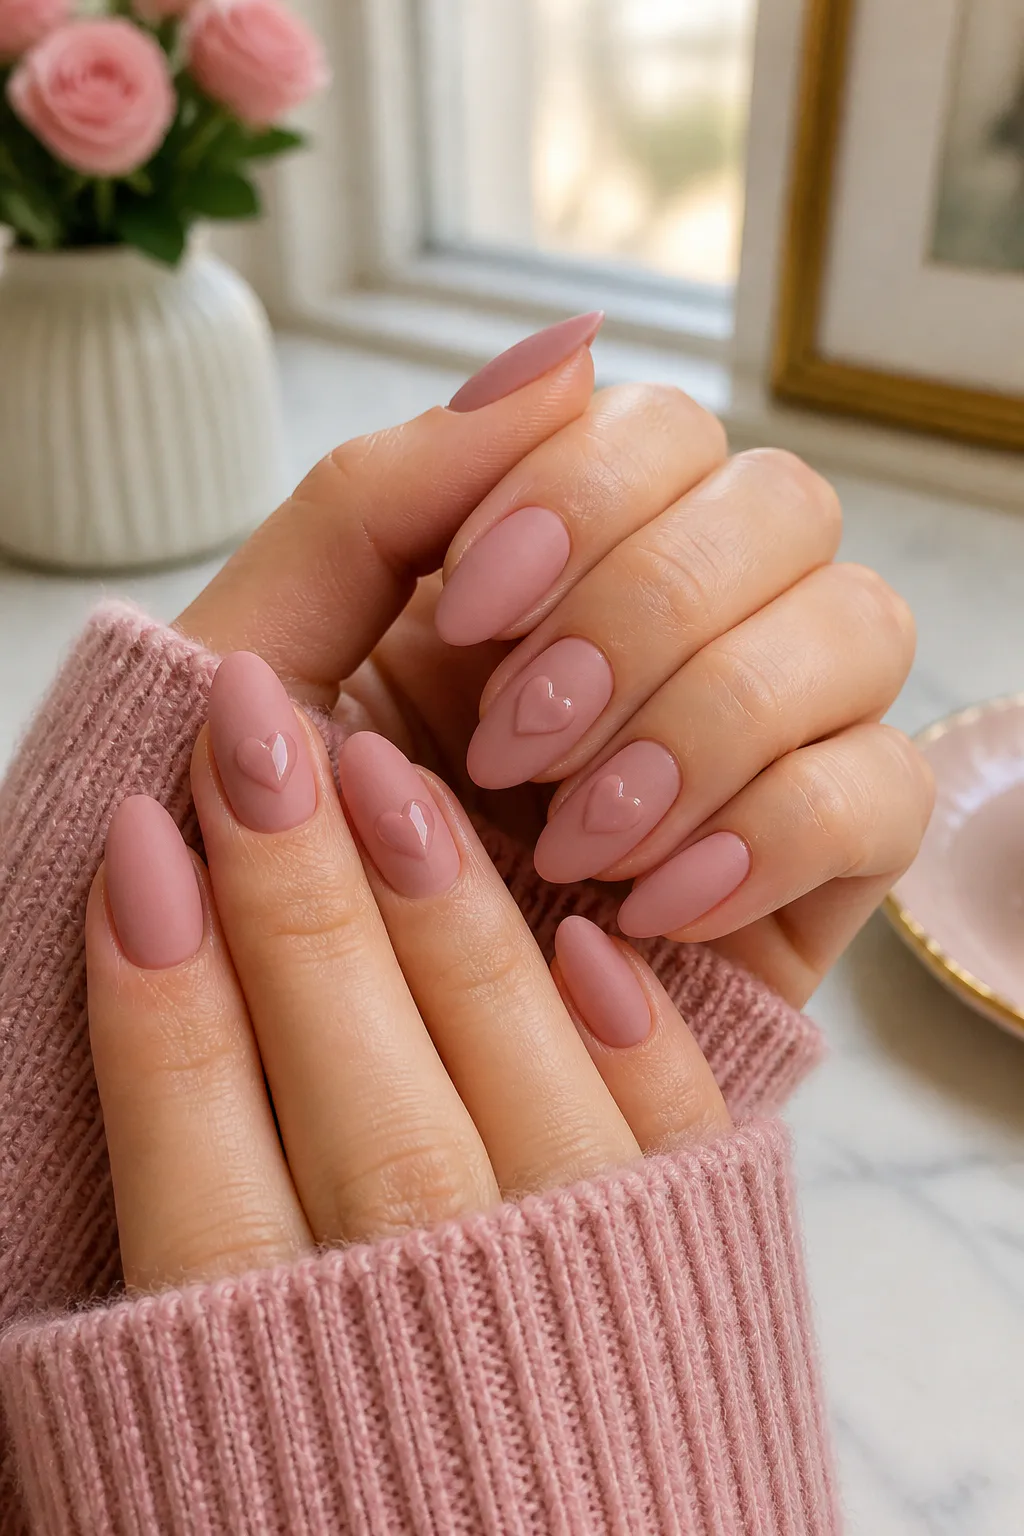
A matte dusty-rose base gives this manicure a soft, velvety appearance. Raised glossy hearts in a similar shade add a tactile contrast: they catch the light against the muted background without introducing another color or making the design feel overly ornate.
The tone-on-tone effect is a good fit if you like nail art but prefer a coordinated, understated palette. It can look especially polished with one glossy heart on each accent nail, or with smaller motifs repeated sparingly across the set.
Creating contrast with texture
Ask for the matte finish to be applied evenly, then add glossy gel hearts on top so their shine remains distinct. Keep the raised details modest in size, particularly if you use your hands often, and place them where they won’t make the design feel crowded.
- Choose a muted dusty rose rather than a bright pink.
- Keep the heart color close to the base shade.
- Use glossy details on one or two nails for restraint.
- Make sure the matte and shiny finishes remain clearly different.
The subtle texture contrast makes this design feel special even without glitter or bold color.
11. Pink and Red Checkerboard Nails
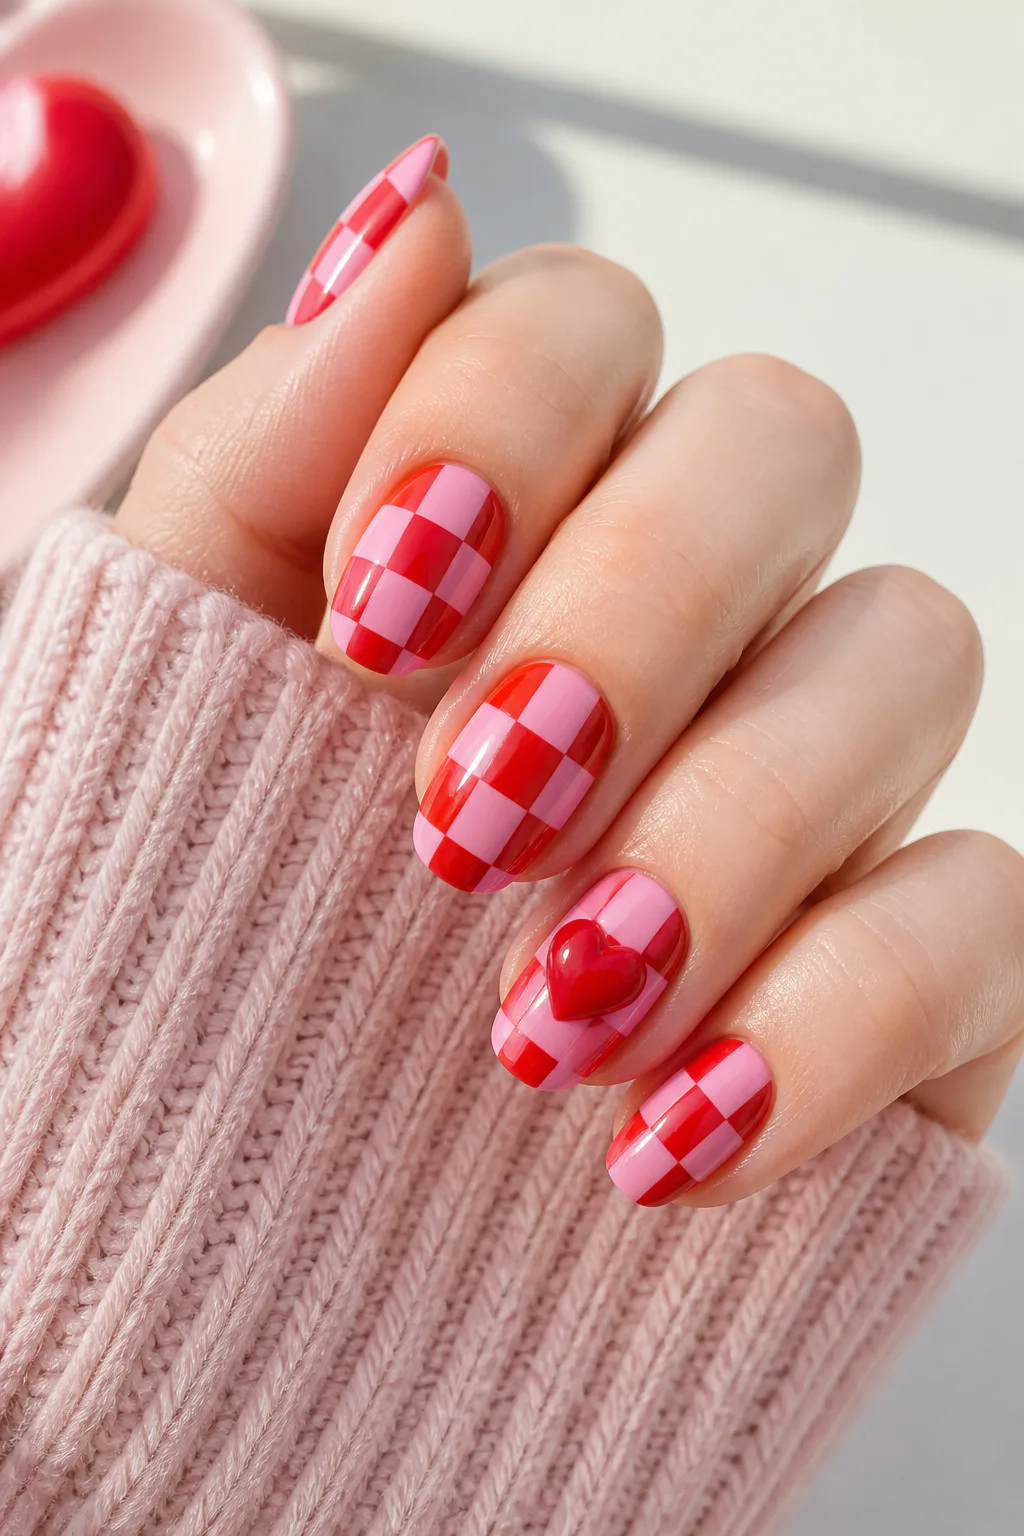
A checkerboard pattern in pastel pink and cherry red brings a retro, playful energy to a Valentine’s manicure. The repeating squares make the design graphic and easy to spot, while a glossy heart on the ring fingers gives the pattern a softer, more romantic focal point.
Checkerboard art can cover every nail for a statement set or appear on just one or two accent nails beside solid-color polish. If you have shorter nails, a smaller-scale pattern can preserve the look without making each square feel cramped.
Keeping the pattern crisp
Ask for the squares to be evenly spaced and the color contrast to remain clear. A glossy top coat helps the pink and red feel unified, while limiting extra embellishments keeps the checkerboard from becoming visually busy.
- Pair pastel pink with a clear cherry red.
- Scale the squares to fit your nail length.
- Use one glossy heart as a focal accent.
- Balance patterned nails with solid pink or red fingers.
This design is ideal when you want a bold, playful alternative to delicate hearts and soft gradients.
12. Glitter-Dipped Pink Tips
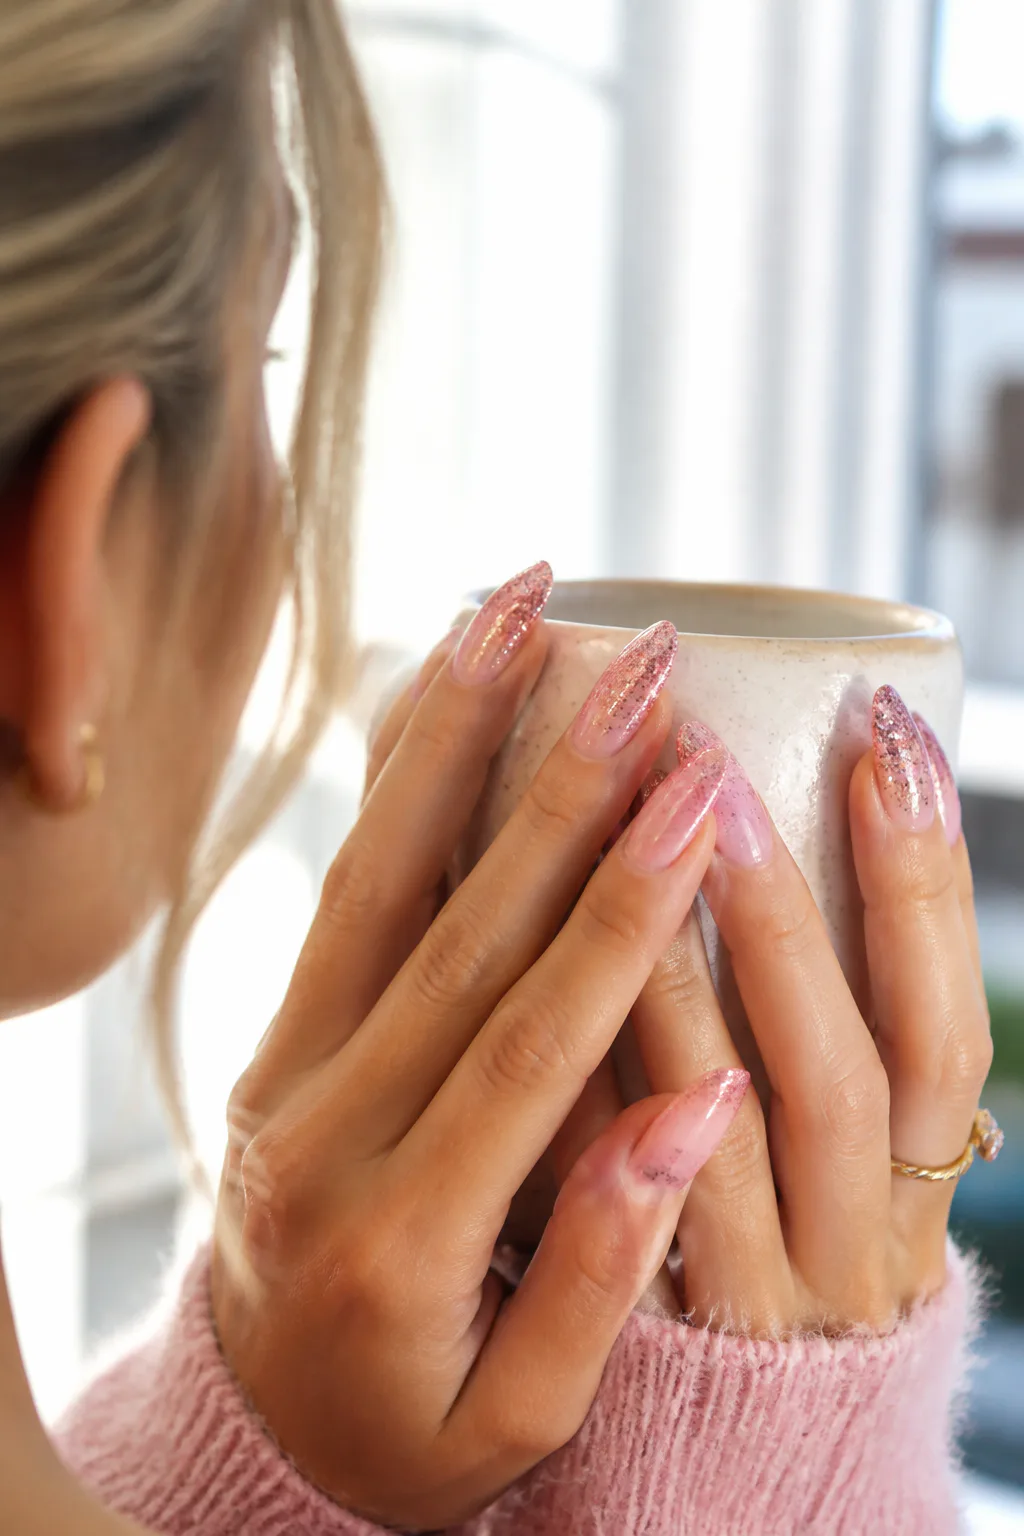
Glitter-dipped tips concentrate rose-gold or holographic sparkle at the ends of the nails, then fade it into a baby-pink base. The gradient keeps the glitter from looking like a solid block, while the bright tips add a festive finish that catches the light.
This design can feel glamorous on longer nails, but a lighter sprinkle of glitter also works on shorter shapes. Choose rose gold for a warm, romantic effect or holographic glitter when you want a more colorful flash.
Controlling the sparkle
For a soft fade, the glitter should be densest at the free edge and gradually become more scattered toward the middle. If you’re showing a reference to your nail tech, point out how far you want the sparkle to extend so the base remains visible.
- Use baby pink as a light, translucent-looking foundation.
- Concentrate glitter at the tips and taper it downward.
- Pick rose gold for warmth or holographic for extra color.
- Keep the other nail art simple to avoid visual clutter.
It’s a festive choice when you want a little more shine than a classic pink manicure.
13. Pink Jelly Nails with Clear 3D Hearts
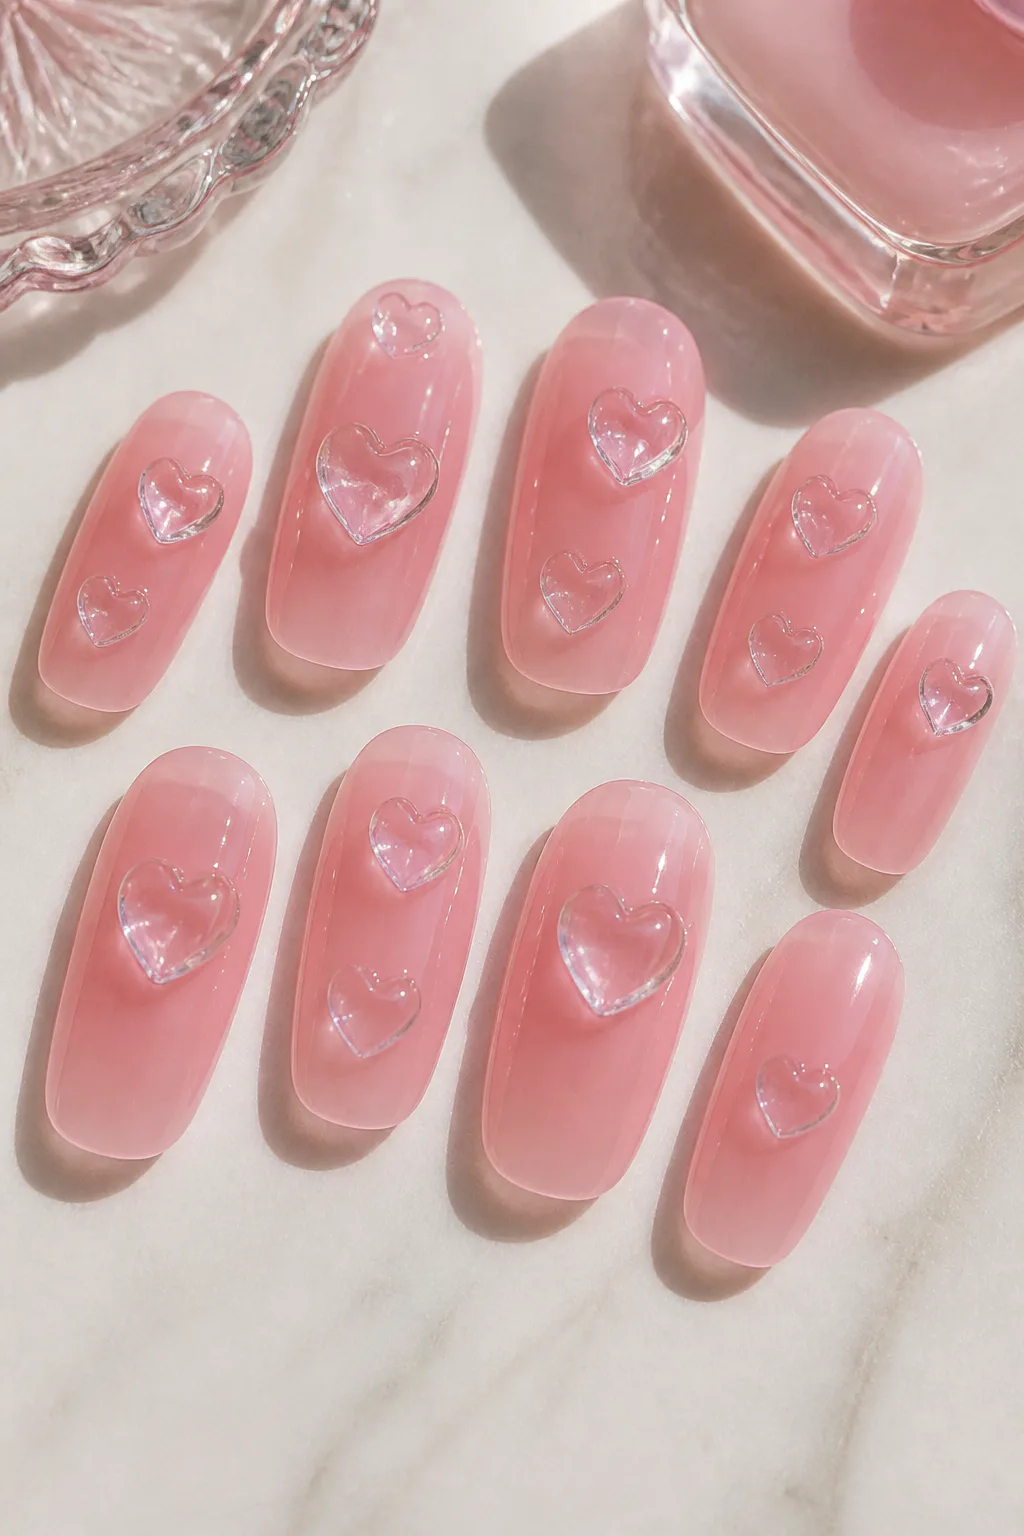
Pastel-pink jelly polish gives the nails a softly translucent, candy-like look. Raised clear gel hearts sit on top like little water droplets, adding dimension while allowing the pink underneath to remain the main color story.
The clear decorations make this design feel playful and modern rather than overly ornate. You can use a few larger hearts as accents or choose smaller shapes across the set; either way, the translucent finish helps the details stand out without adding another strong color.
Making dimensional hearts wearable
Ask for the hearts to be shaped smoothly and kept in proportion to your nails. Because raised art has noticeable texture, a small number of well-placed accents can be more comfortable and visually balanced than covering every nail with multiple embellishments.
- Choose a pastel-pink jelly base with a sheer finish.
- Use clear gel hearts to create a water-drop effect.
- Place dimensional accents on selected nails.
- Keep the heart shapes smooth and neatly defined.
This is a standout option if you love 3D nail art and want a fresh take on classic Valentine’s hearts.
Final Thoughts
From a sheer milky-pink manicure with tiny hearts to glossy chrome, checkerboard patterns, and clear 3D accents, there are plenty of ways to make pink Valentine’s Day nails feel like your own. A single accent nail can keep a detailed design understated, while repeating the pattern across the set makes it more of a statement.
Use your preferred length, shape, and comfort level as a guide when choosing. Save a reference for your nail tech or simplify the details for a DIY version, then make the colors and accents fit the way you like to wear your nails.