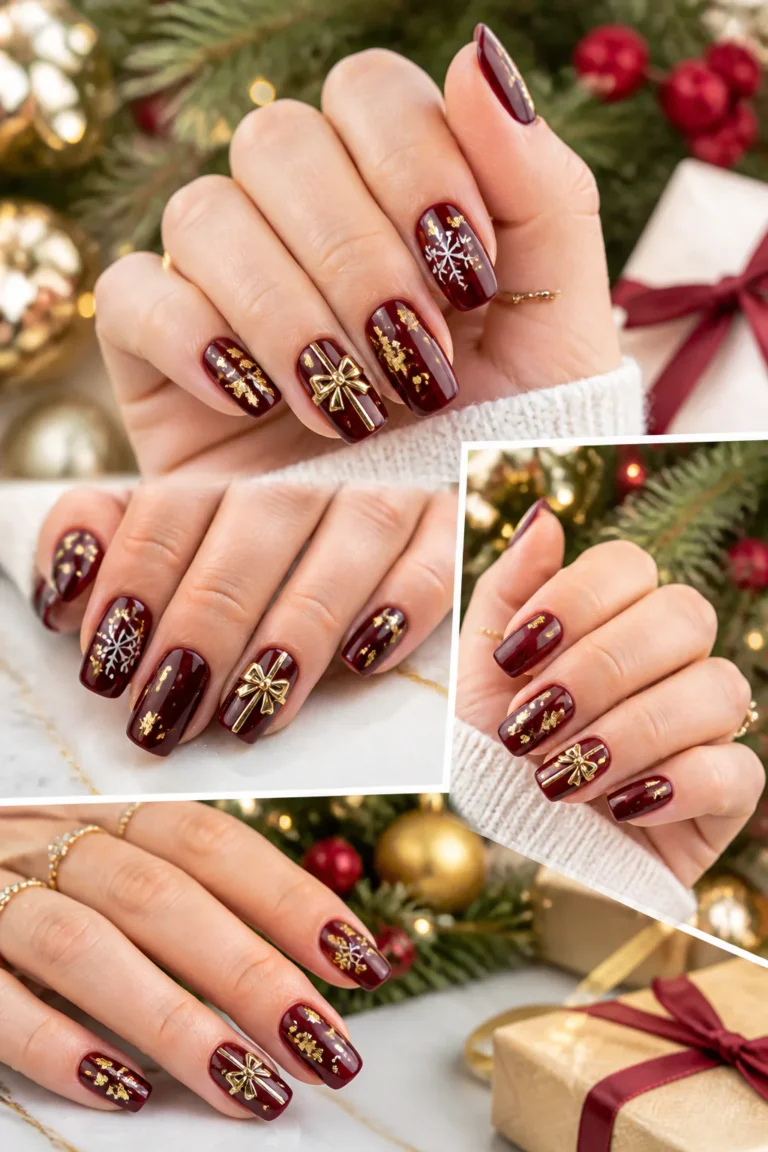
16 Stunning Snowflake Nails Ideas for a Winter Manicure
Snowflake nails can be soft and understated, bold and sparkling, or somewhere in between. The key is choosing a base color and finish that let the snowflake details feel intentional rather than crowded.
These 16 ideas range from delicate accent nails and minimalist French tips to rich winter shades, glitter, chrome, and cozy raised textures. Each look can be adapted to your preferred nail length and shape.
If you’re planning a salon manicure, save the details that appeal to you and discuss scale and placement with your nail artist. For a DIY set, decals, stamping plates, and a fine liner brush can help make crisp snowflakes easier to create.
1. Delicate White Snowflakes on a Nude Base

Video: @bornprettyofficial on YouTube. Style shown: white snowflakes hand-painted on a nude shimmer base.
A sheer milky pink or neutral base gives delicate white snowflakes a light, almost floating appearance. Keeping the design to one or two accent nails lets the fine details stand out while the rest of the manicure stays polished and easy to wear.
This look works beautifully on short or medium nails and suits rounded, oval, and almond shapes. It’s a lovely choice if you want winter nail art that feels subtle enough for everyday outfits, work, or a special occasion.
How to keep it delicate
Choose a base close to your natural nail tone, then use a fine brush or a small snowflake decal. Leave plenty of open space around the design so the lines remain easy to see.
- Use one or two accent nails rather than decorating every finger.
- Choose fine white lines instead of thick, opaque motifs.
- Finish with a glossy topcoat to smooth and protect the art.
2. Icy Blue Ombré Snowflake Nails

Video: @NailoraArts on YouTube. Style shown: icy blue nails with white snowflakes.
An icy blue ombré blends cool color with a soft, snowy finish. A fade from sky blue into white creates a wintry backdrop that feels more dimensional than a single-color manicure, while scattered snowflakes add detail without overwhelming the gradient.
This design is especially effective on longer nails, where there’s room for the transition between shades. On shorter nails, a concentrated blue tint near the tips can still create a crisp frosted effect.
Build a smooth winter fade
Blend the colors gradually, keeping the palest area open for white or silver snowflakes. A makeup sponge can help with a DIY gradient; stamped motifs or decals offer a neat alternative to painting each flake by hand.
- Fade pale blue into white or a milky neutral.
- Place snowflakes at varied heights for a scattered effect.
- Add a little silver holographic detail for extra shimmer.
- Seal the design carefully so glitter and decals lie flat.
3. Velvet Cat-Eye Winter Night Nails
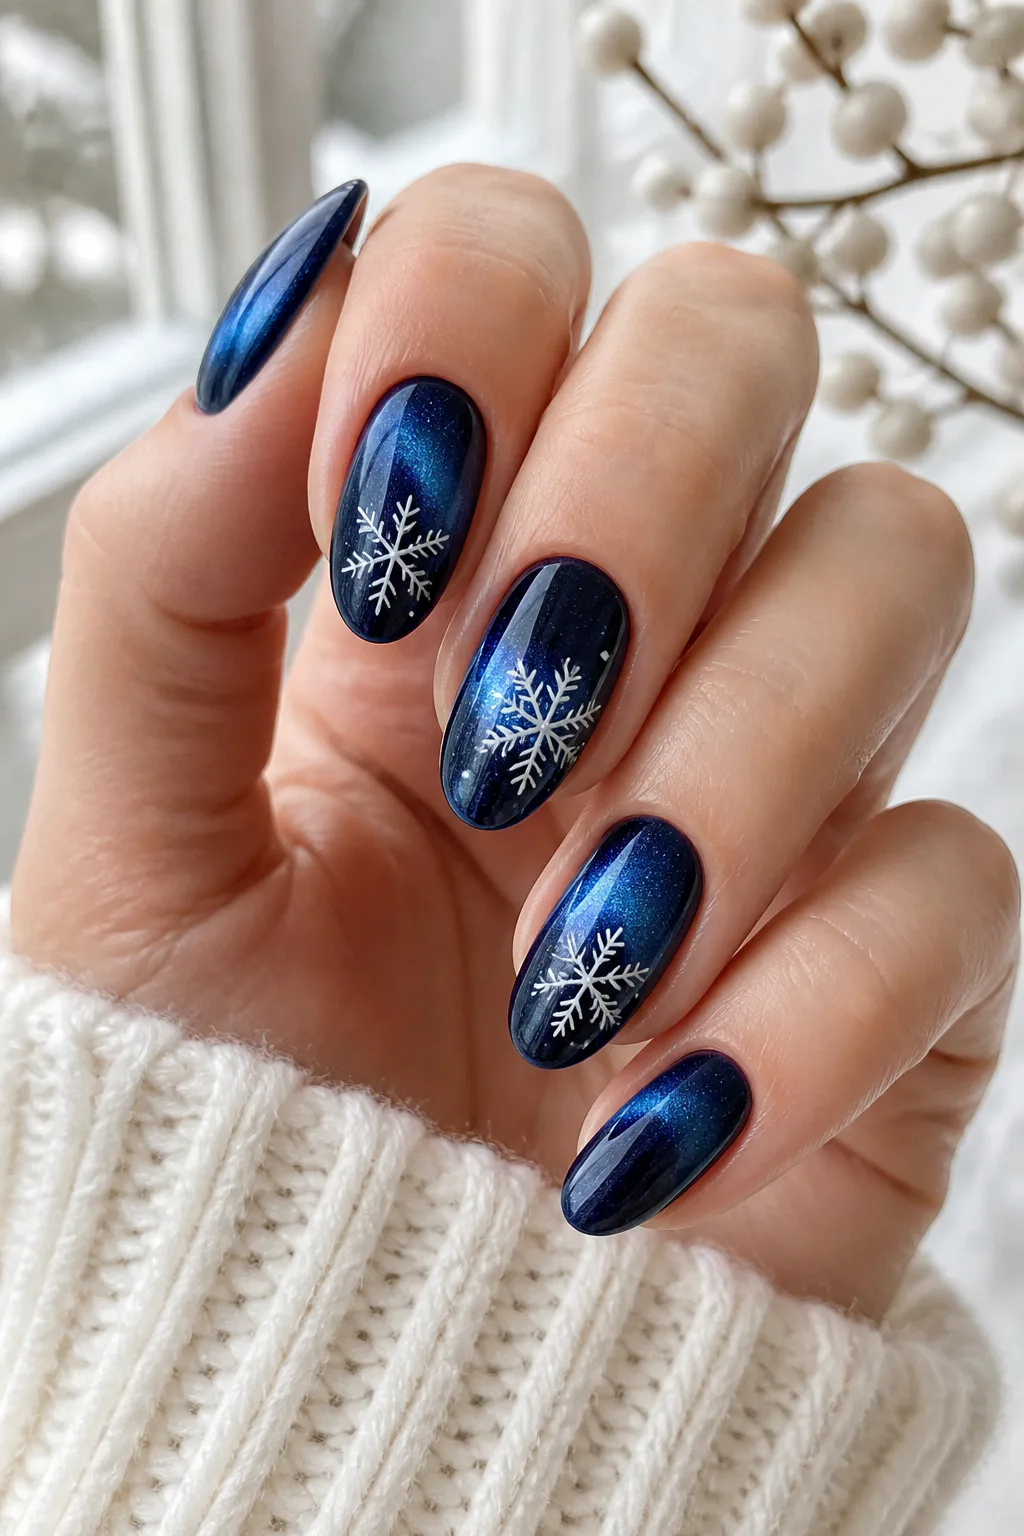
Video: @SignatureNailsBeauty on YouTube. Style shown: midnight blue velvet with a silver snowflake.
Deep magnetic velvet polish gives this manicure the mood of a dark winter sky. Midnight blue feels especially dramatic, while emerald creates a jewel-toned alternative; either shade can shift in the light for a luminous, velvety finish.
Crisp white snowflakes provide contrast against the rich base and look as if they’re suspended over a night scene. This idea suits statement nails, holiday gatherings, or anyone who prefers darker colors but still wants a seasonal motif.
Make the snowflakes stand out
Create the magnetic effect before adding the snowflake art, following the polish’s directions. Keep the motifs clean and fairly simple so they remain visible against the shifting background rather than blending into it.
- Choose midnight blue for a classic winter-night palette.
- Try deep emerald for a lush, less expected variation.
- Use white paint or decals for strong contrast.
- Leave some nails plain to show off the velvet effect.
4. Snowflakes on Minimalist French Tips
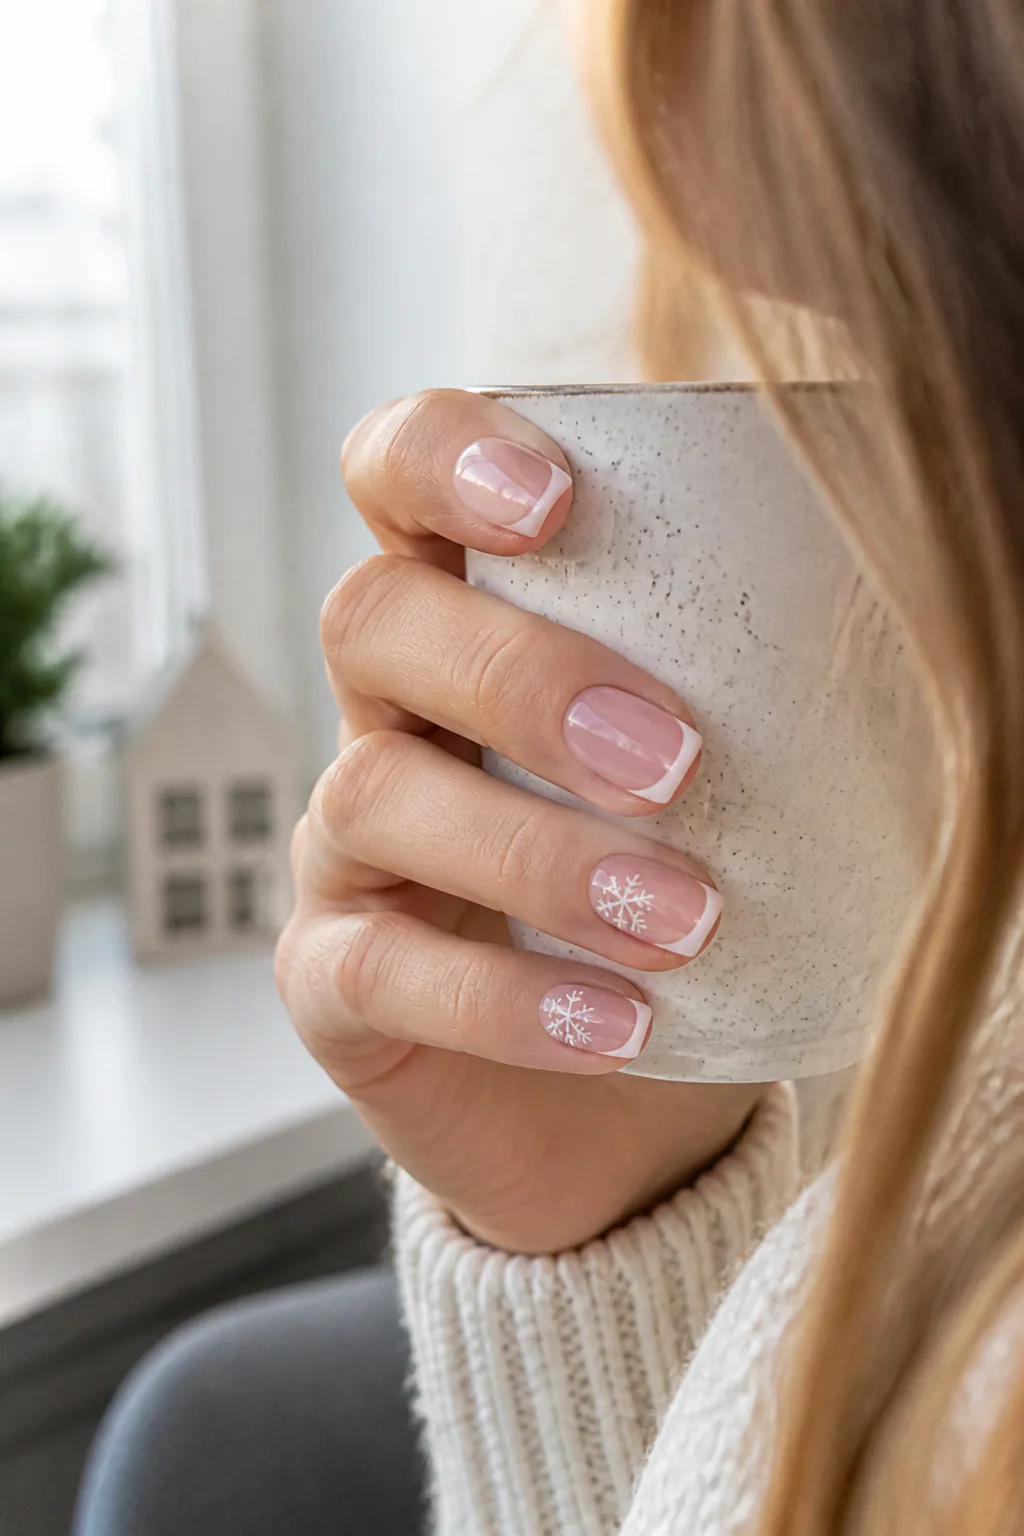
A tiny snowflake placed near the corner of a classic French tip adds a seasonal detail without changing the manicure’s clean, familiar look. The white tip and white motif feel coordinated, while a sheer pink or neutral base keeps the overall design light.
This is a practical option for anyone who likes understated nail art or wants a winter manicure that can transition easily between occasions. It works on short nails, too, as long as the snowflake is scaled to fit the available space.
Keep the placement precise
Let the French smile line remain the main feature, and position the snowflake just beside or above one corner. A small stamp or decal can help maintain crisp lines when the design is tiny.
- Keep the French tips thin for a delicate finish.
- Place the snowflake on one or two nails, not every tip.
- Match the motif’s white to the tip color.
- Use a glossy topcoat to unify the design.
5. Gold Leaf and Metallic Snowflakes
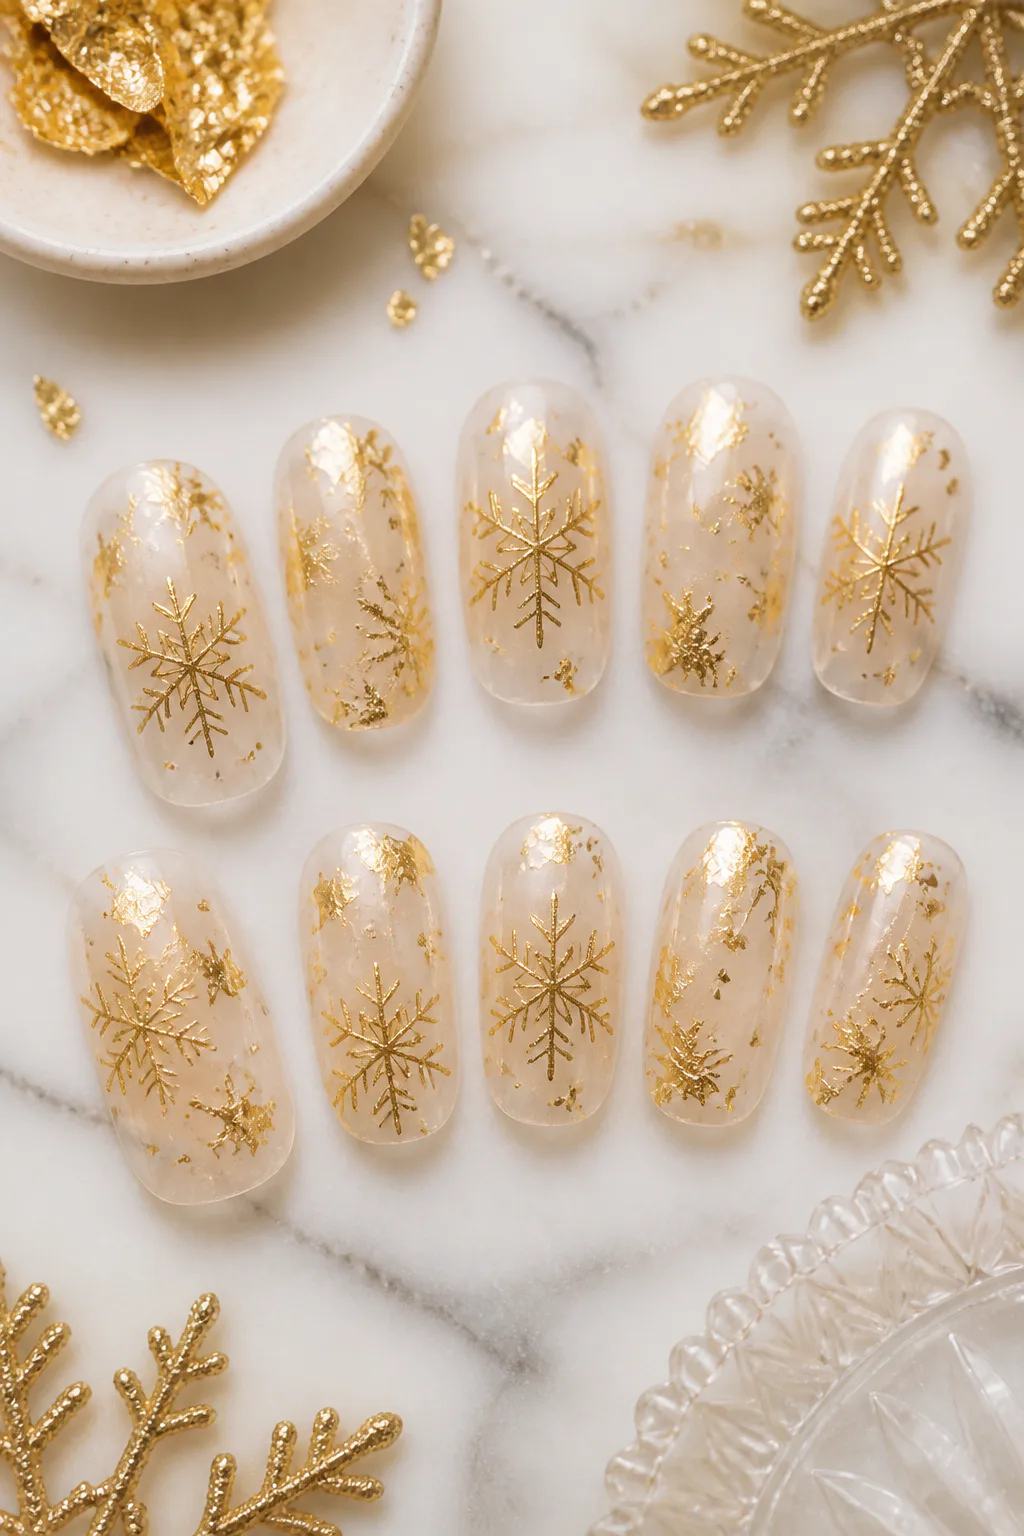
Gold leaf brings a warm, irregular shimmer to clear or sheer nails, while fine-lined metallic snowflakes add a more defined winter motif. Together, the two finishes create an elegant contrast: loose flecks of gold beside a carefully drawn design.
This look works well when you want festive sparkle without relying on a full glitter base. The transparent background keeps the manicure airy, making it a graceful choice for celebrations or for adding a little shine to a neutral outfit.
Balance the metallic details
Apply the gold leaf sparingly so it reads as scattered accents rather than a solid layer. Place the snowflake on a clear area of the nail, where its fine lines can be seen distinctly.
- Use a sheer or clear base to show off the gold flecks.
- Choose fine metallic snowflake lines for a refined look.
- Vary the leaf placement across the nails.
- Seal raised or loose foil beneath a smooth topcoat.
6. Frozen Chrome Glaze Snowflake Nails
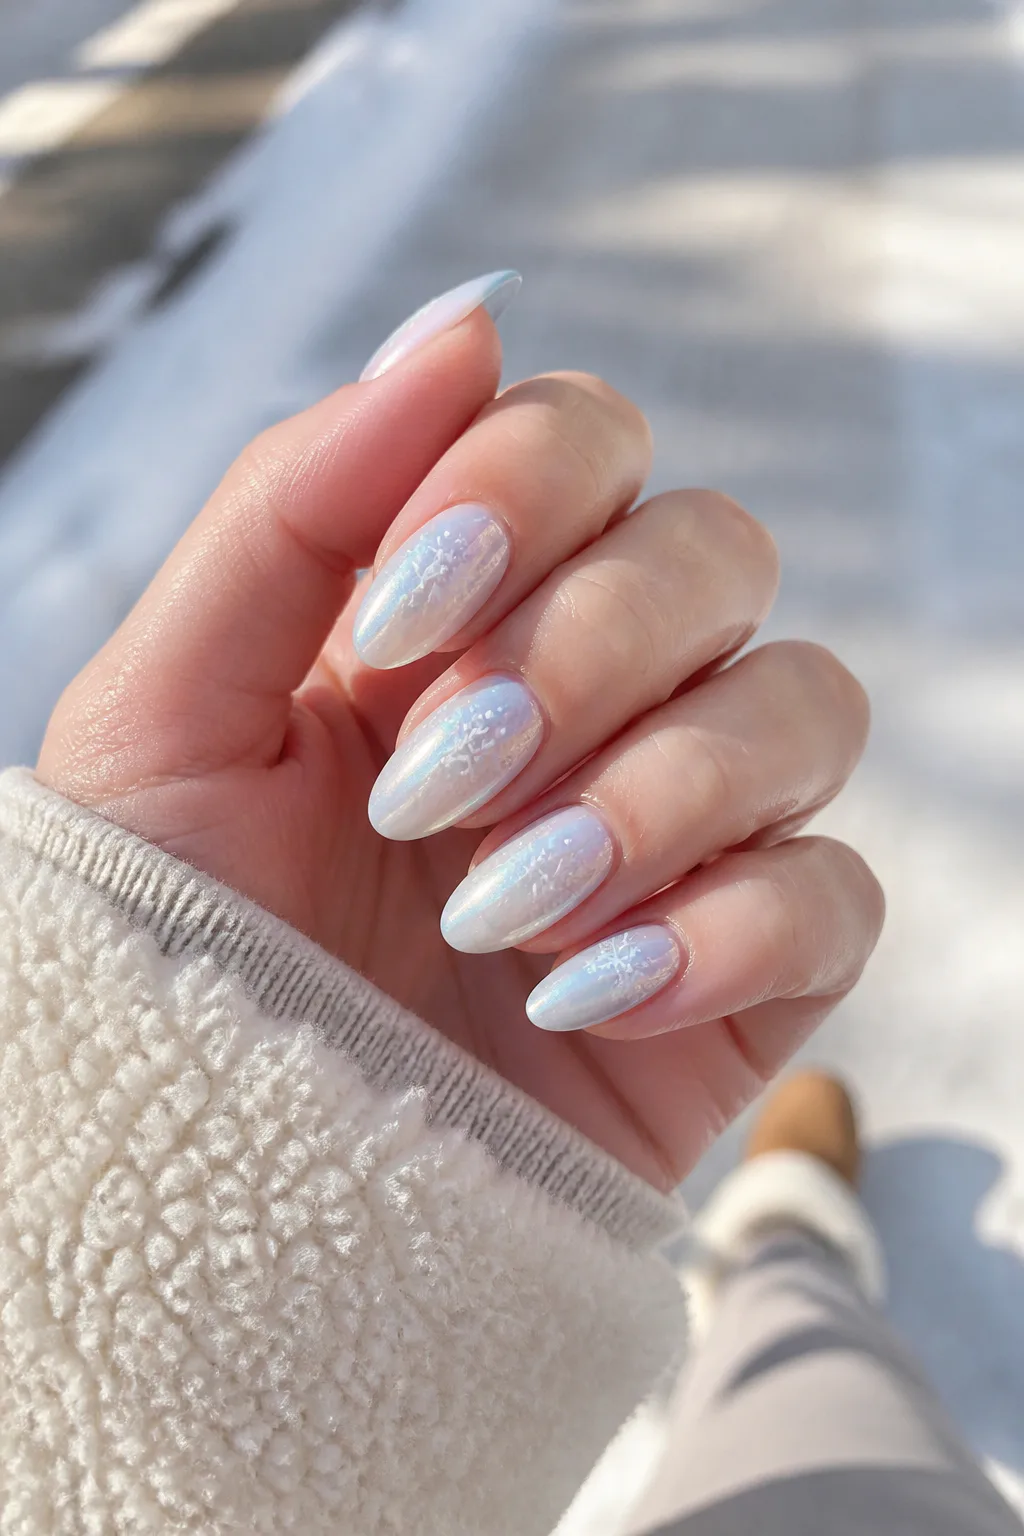
A pearlescent chrome glaze over a pale icy base gives nails a smooth, frosted glow. Subtle white snowflakes can sit beneath the glaze for a softly diffused effect or on top for a more defined, dimensional design.
The finish is luminous without needing chunky glitter, so it suits anyone drawn to a polished, modern winter manicure. Pale blue, cool pink, and milky white bases all work; choose the undertone that best complements your snowflake color.
Choose the right level of detail
For a delicate look, keep the snowflakes translucent or use a light touch with white polish. If you want the design to read clearly in photos, place a few sharper motifs over the finished chrome instead.
- Start with a pale icy shade beneath the pearlescent finish.
- Use a sheer snowflake effect for a soft, layered look.
- Keep some nails simple to let the glaze catch the light.
- Check that decals or hand-painted details are sealed smoothly.
7. Black Nails with Silver Snowflakes
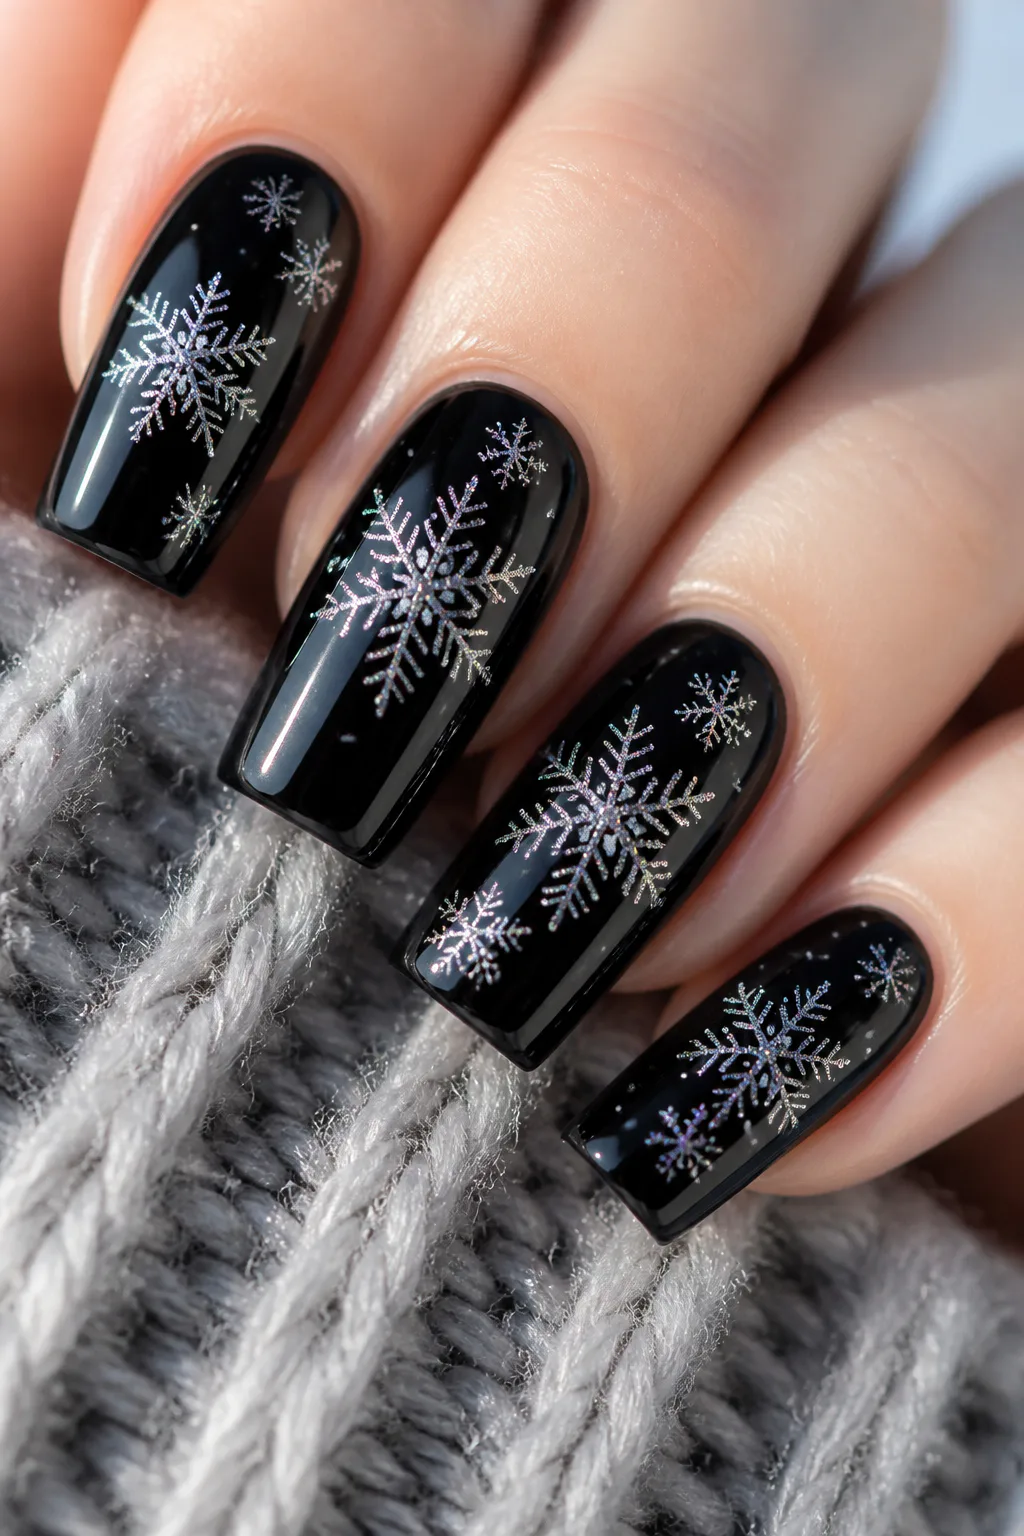
A black or deep espresso base makes silver snowflakes pop with striking contrast. Metallic polish catches the light against the dark background, while holographic details can add shifting flashes of color for a more dramatic winter-night effect.
This is a bold alternative to the usual pale seasonal palette and works particularly well on medium or long nails. For a more wearable version, use the dark base on just a few fingers and keep the remaining nails sheer or neutral.
Let contrast do the work
Choose snowflake designs with clear, open lines so the silver remains legible against the dark polish. A mix of one statement motif and smaller scattered flakes gives the set a considered, balanced feel.
- Try black for a graphic look or espresso for softer contrast.
- Use metallic silver or holographic snowflake details.
- Vary the size of the motifs without overcrowding the nails.
- Apply a smooth topcoat to bring out the shine.
8. Cozy Sweater Knit and Snowflake Nails
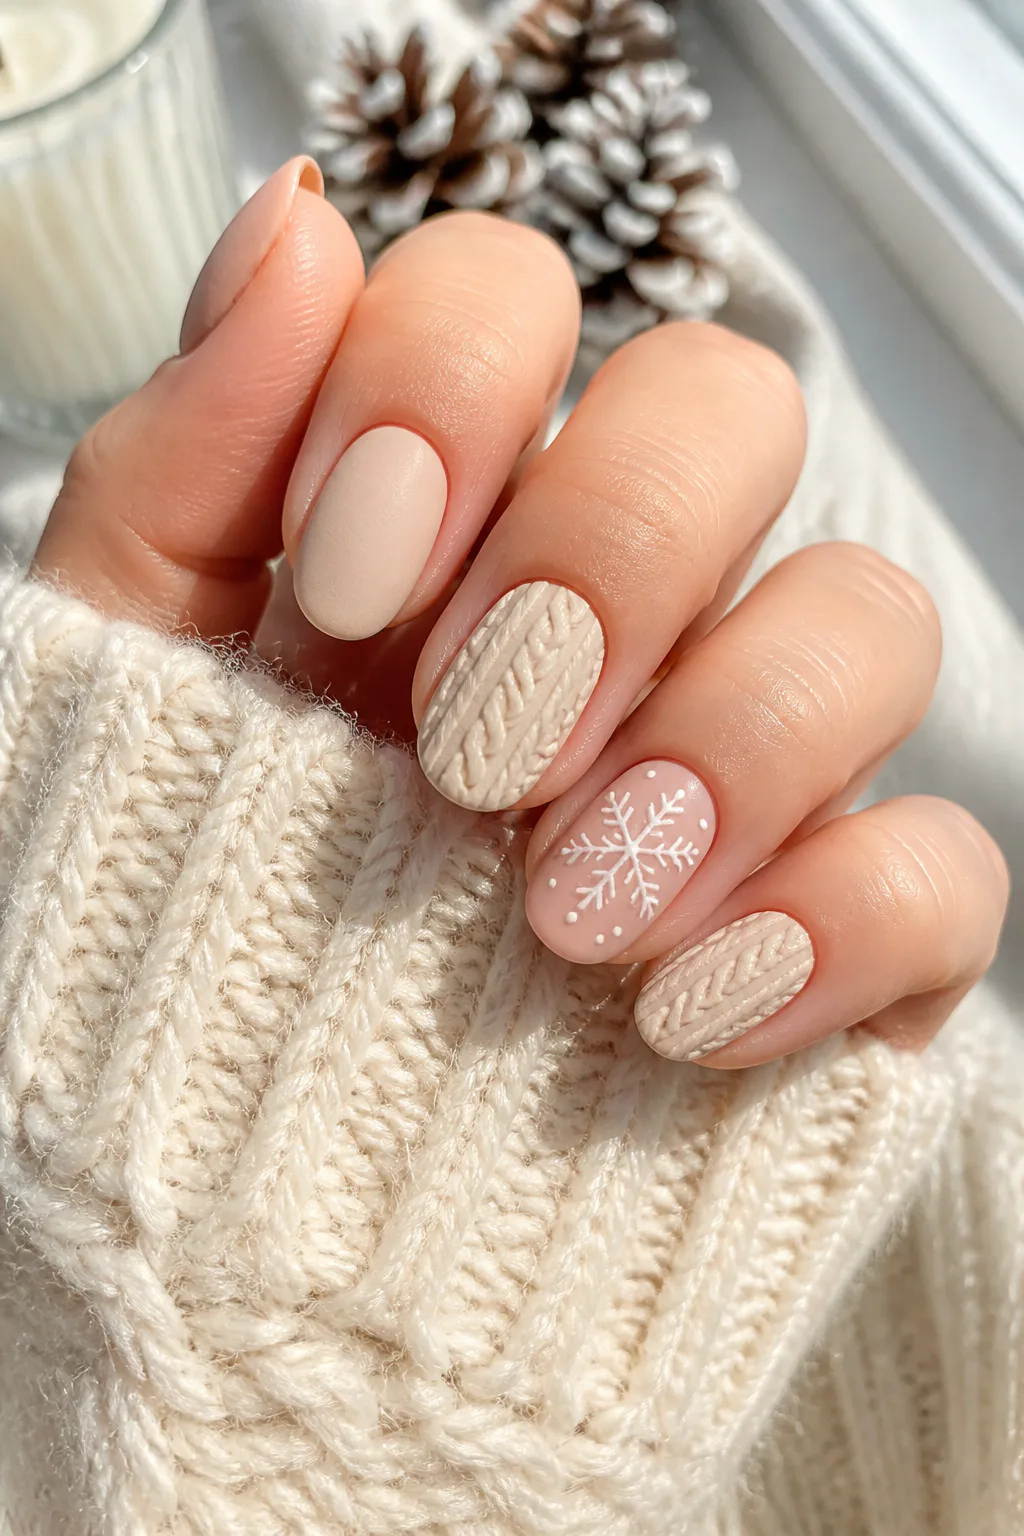
Matte neutrals and raised cable-knit details give this manicure a cozy, sweater-inspired texture. A clean snowflake accent brings in a crisp winter element, creating a pleasing contrast between soft-looking knit patterns and fine nail art.
Cream, taupe, and muted blush are easy base colors to wear, especially when the textured design is limited to a couple of nails. The look suits short or medium lengths and feels especially at home alongside warm knits and cold-weather layers.
Mix texture with open space
Raised knit patterns can be visually busy, so reserve a smoother nail for the snowflake. A matte topcoat enhances the cozy effect, while the accent can stay glossy or matte depending on the finish you prefer.
- Choose a soft neutral palette for a relaxed look.
- Place the raised cable pattern on one or two nails.
- Keep the snowflake simple and easy to see.
- Use a matte finish to emphasize the knit texture.
9. Chunky Glitter Blizzard Snowflake Nails

Video: @varnailcom on Instagram. Style shown: blue glitter nails with white snowflakes.
Full-coverage silver or icy-blue glitter creates a sparkling backdrop that resembles a flurry in motion. Crisp white snowflake outlines layered over the shimmer add structure, so the finished manicure feels like a deliberate blizzard rather than a plain glitter look.
This is a statement design for parties, winter celebrations, or anyone who loves a high-shine manicure. You can make it more wearable by using the glitter on accent nails and choosing a simpler coordinating shade for the rest.
Keep the glitter and art readable
Choose snowflake outlines with open centers and clear branches, then place them where they won’t disappear into the busiest clusters of sparkle. If you prefer a softer set, combine full-glitter nails with plain icy-blue ones.
- Use silver for a classic frosty effect or icy blue for color.
- Apply glitter evenly so the base looks intentional.
- Choose crisp white outlines for contrast.
- Topcoat thoroughly to smooth the textured surface.
10. Burgundy Nails with Champagne Snowflakes
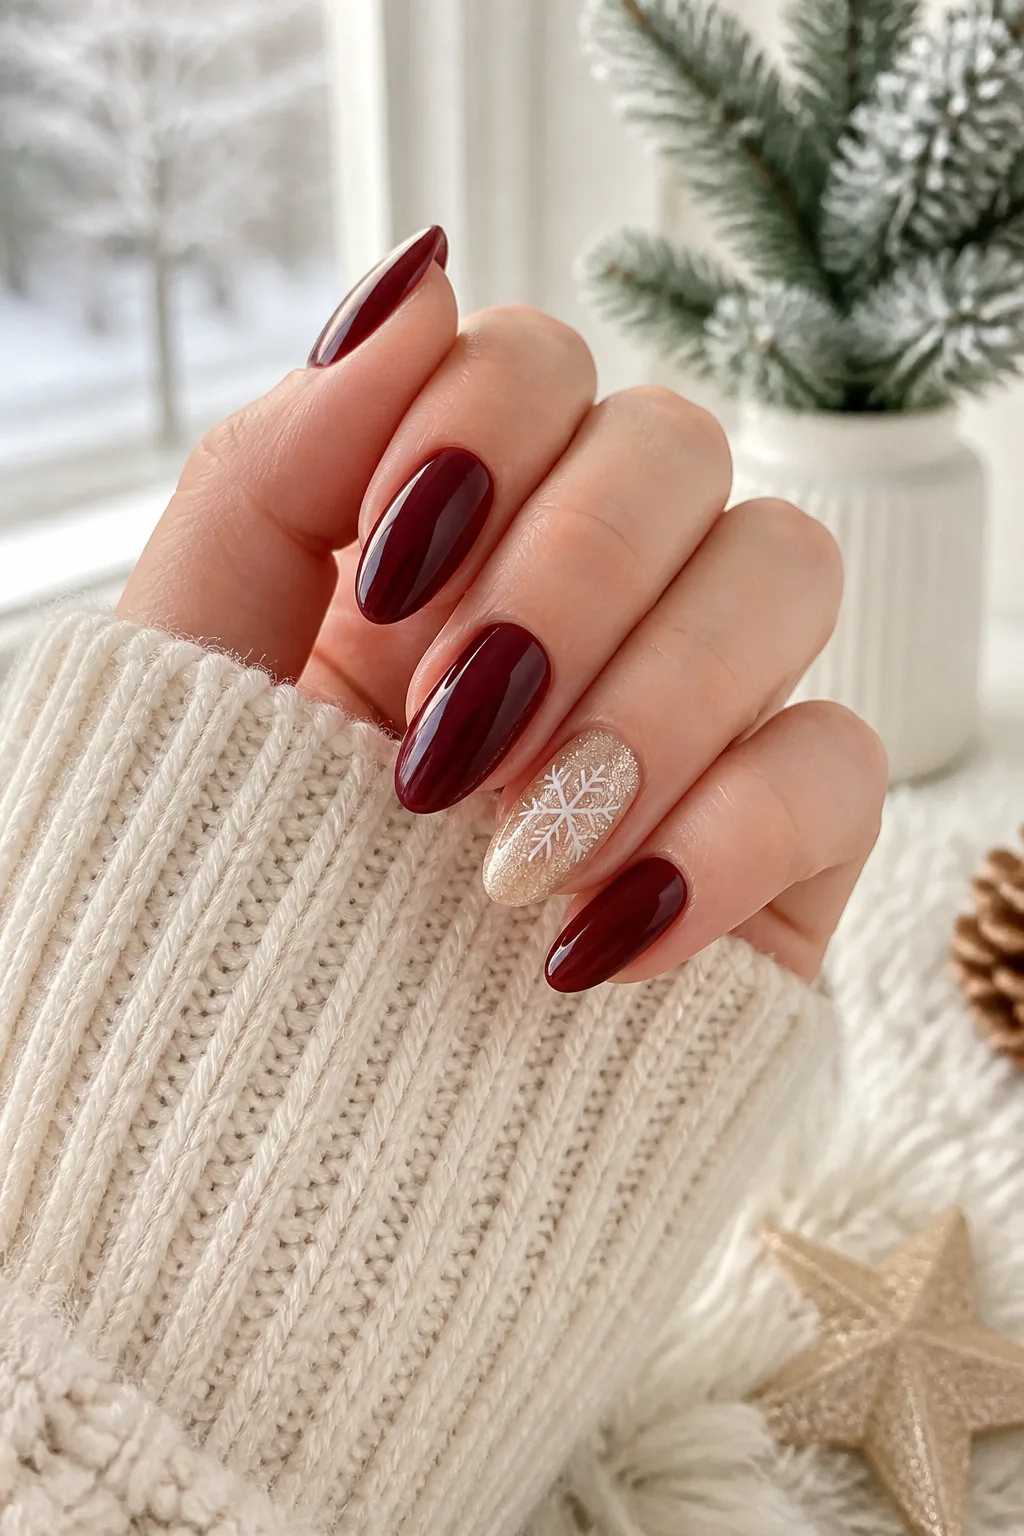
Deep wine or oxblood polish brings warmth and richness to a winter manicure. A champagne-shimmer accent nail softens the dark color and gives a delicate gold or white snowflake a luminous place to stand out.
This palette feels festive without being limited to holiday designs. It works on a range of nail shapes, and the contrast between glossy burgundy and soft metallic shimmer looks especially polished when the accent is kept simple.
Make the accent nail feel intentional
Use burgundy across most of the set, then reserve champagne shimmer for one or two nails. Add a single fine snowflake to the shimmer base, or choose a white motif if you want a stronger outline.
- Pick wine or oxblood for a deep, saturated base.
- Use champagne shimmer as a focused accent.
- Choose gold for a blended look or white for more contrast.
- Keep extra embellishments minimal to preserve the palette.
11. Geometric Negative-Space Snowflakes
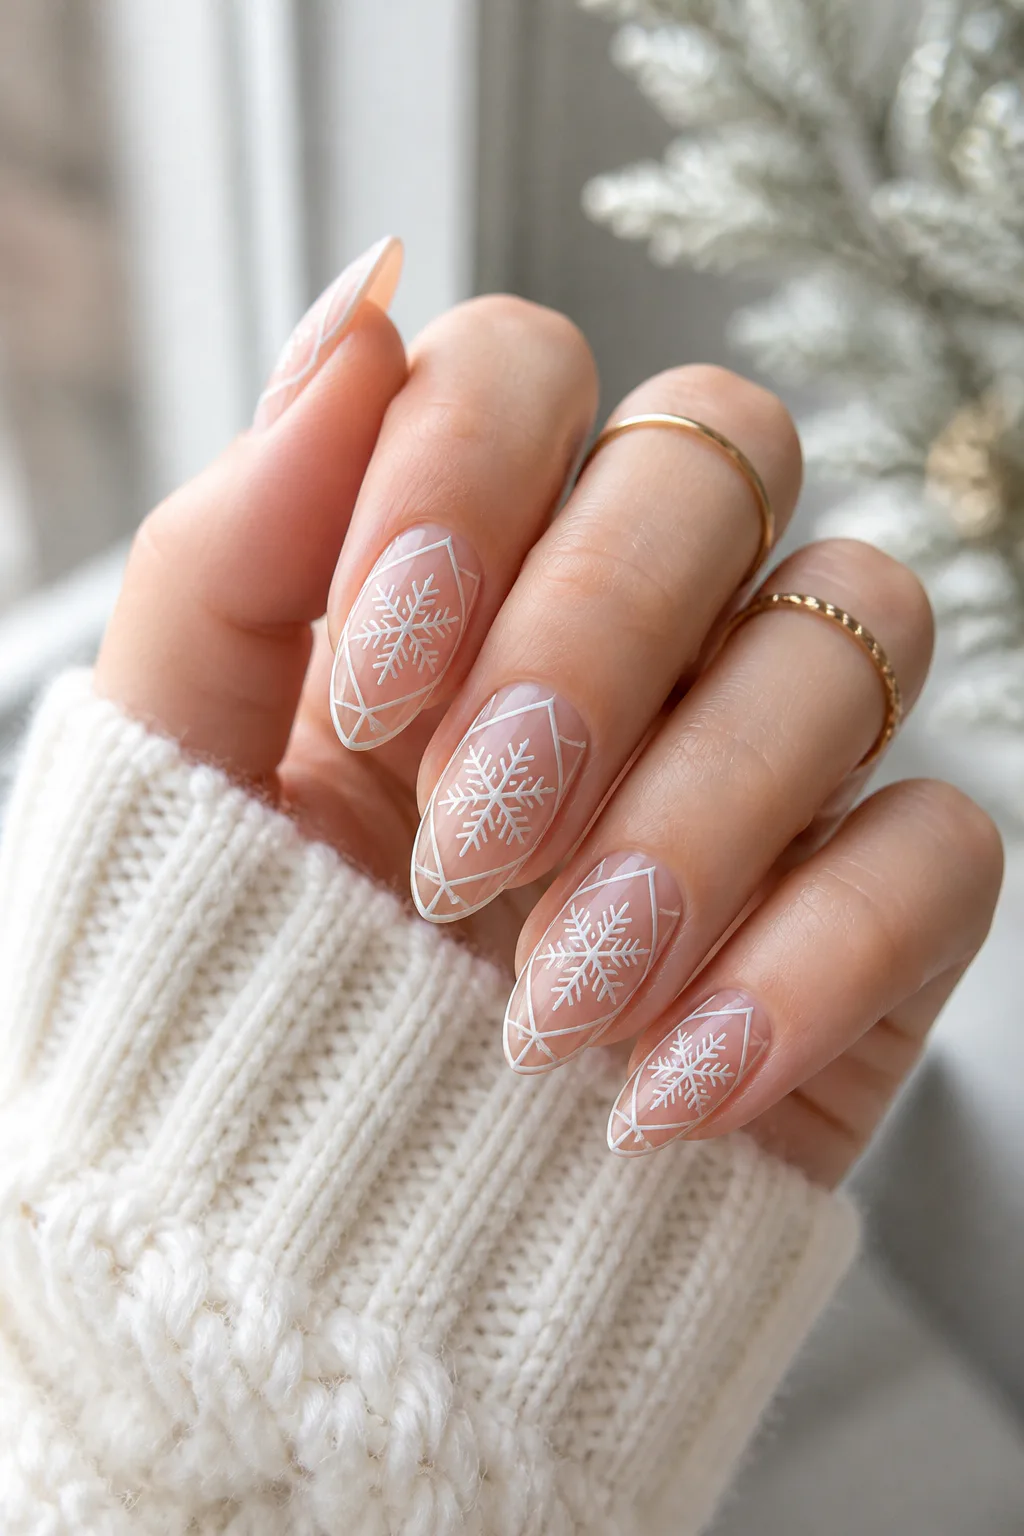
Negative-space nails leave parts of the natural nail visible, framing them with thin geometric lines. A sharply drawn snowflake at the center becomes the focal point, giving the manicure a modern, architectural feel rather than a traditional scattered-snow look.
This design pairs well with clear or sheer polish and can be adjusted to suit different nail lengths. On shorter nails, keep the framing lines simple; longer nails offer more room for angular borders and a larger central motif.
Keep the geometry clean
Fine striping tape, a liner brush, or a precise decal can help create straight borders. Leave enough clear space around the snowflake so both the shape and the negative-space frame remain easy to read.
- Use a clear or sheer base as the open-space background.
- Choose a few thin lines instead of a dense geometric grid.
- Center the snowflake within the frame.
- Repeat one line color across the set for cohesion.
12. Snow-Dipped Gradient Tips

A soft baby-boomer fade blends a natural-looking base into white tips, creating the impression of snow drifting across the ends of the nails. A crystalline snowflake decal adds a delicate focal point without interrupting the smooth gradient.
The subtle transition makes this idea easy to wear, while the seasonal detail keeps it from feeling like a standard French manicure. It looks graceful on oval and almond shapes, but the fade can be adapted to shorter nails with a lighter touch.
Keep the fade soft
Blend white gradually into a sheer pink or nude base, avoiding a hard line between the colors. Place one crystalline motif near the tip or on an accent nail so the design feels snowy rather than crowded.
- Choose a sheer base that complements your natural nail tone.
- Blend the white fade until the transition looks seamless.
- Use a decal with fine, reflective details for a crystalline effect.
- Keep other embellishments minimal to show the gradient.
13. Holographic Laser Flurry Nails
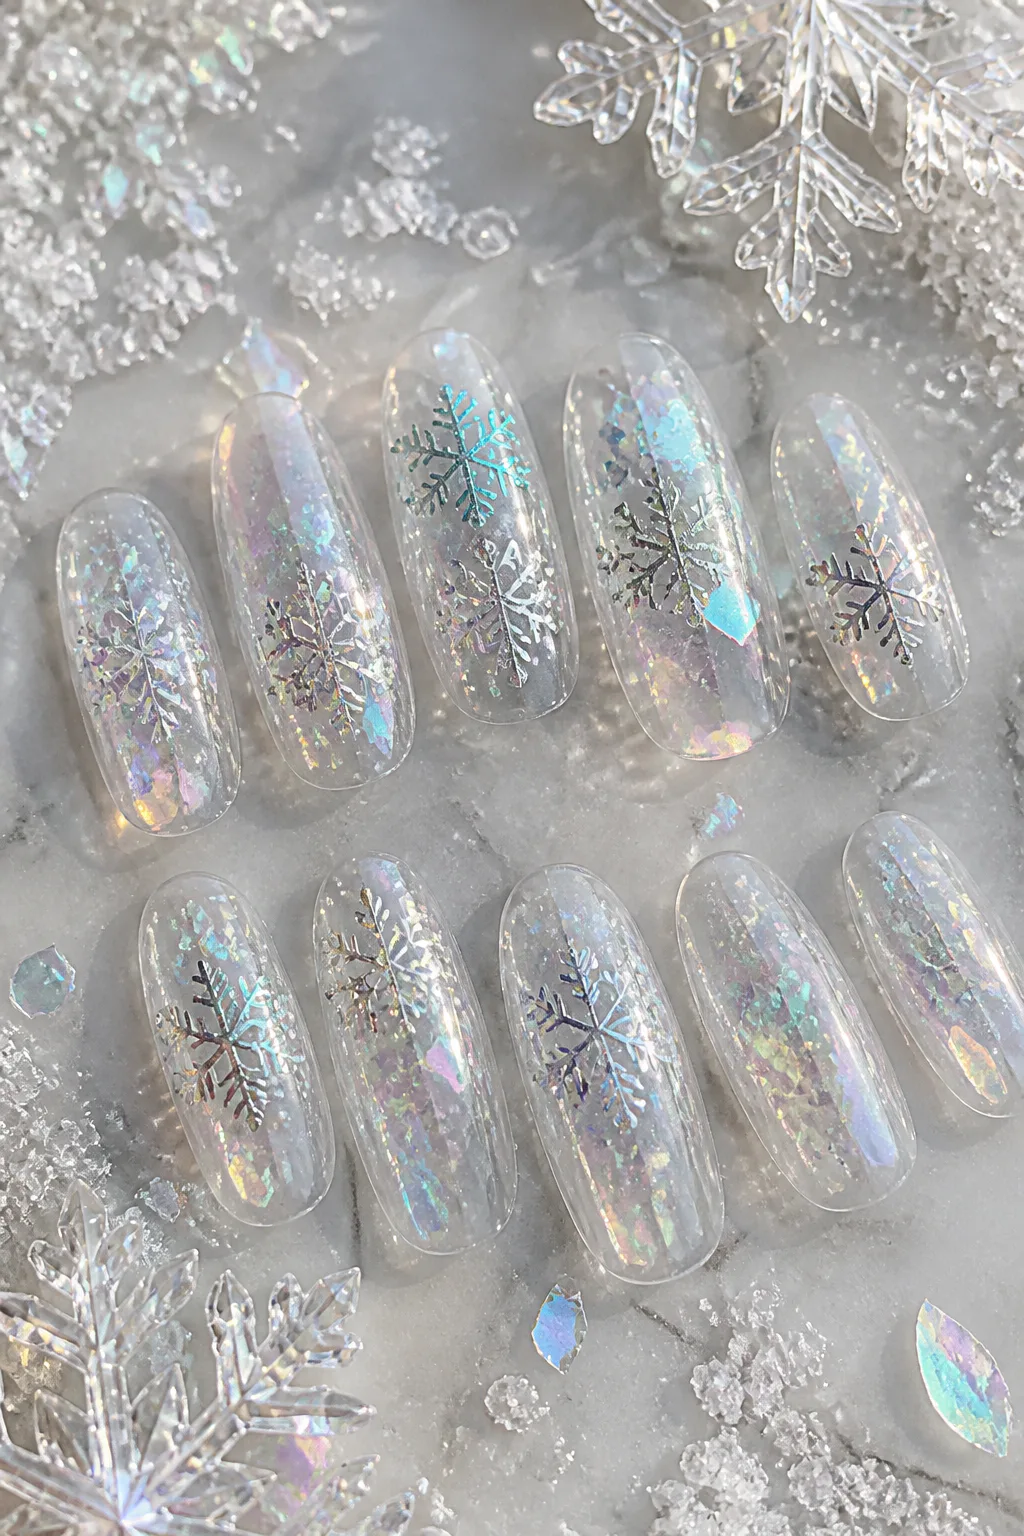
Translucent or clear nails layered with holographic flakes create a shifting, rainbow-like winter effect. Reflective snowflake stickers add recognizable shapes to the moving color, making the manicure feel like a laser-bright flurry rather than a simple shimmer finish.
This idea works particularly well on longer nails, where the clear background and layered pieces have room to show. Press-ons can make the look easier to achieve, but a salon artist can also arrange the flakes for a balanced finish.
Layer for a light-catching effect
Spread the holographic pieces unevenly so they look scattered rather than packed together. Place reflective snowflake motifs in open areas, and consider keeping a few nails simpler to give the brightest details room to shine.
- Start with a clear or translucent base.
- Use shifting holographic flakes in varied sizes.
- Add reflective snowflake stickers as focal points.
- Seal the layers so the surface feels smooth.
14. Rhinestone-Centered Blue Snowflakes
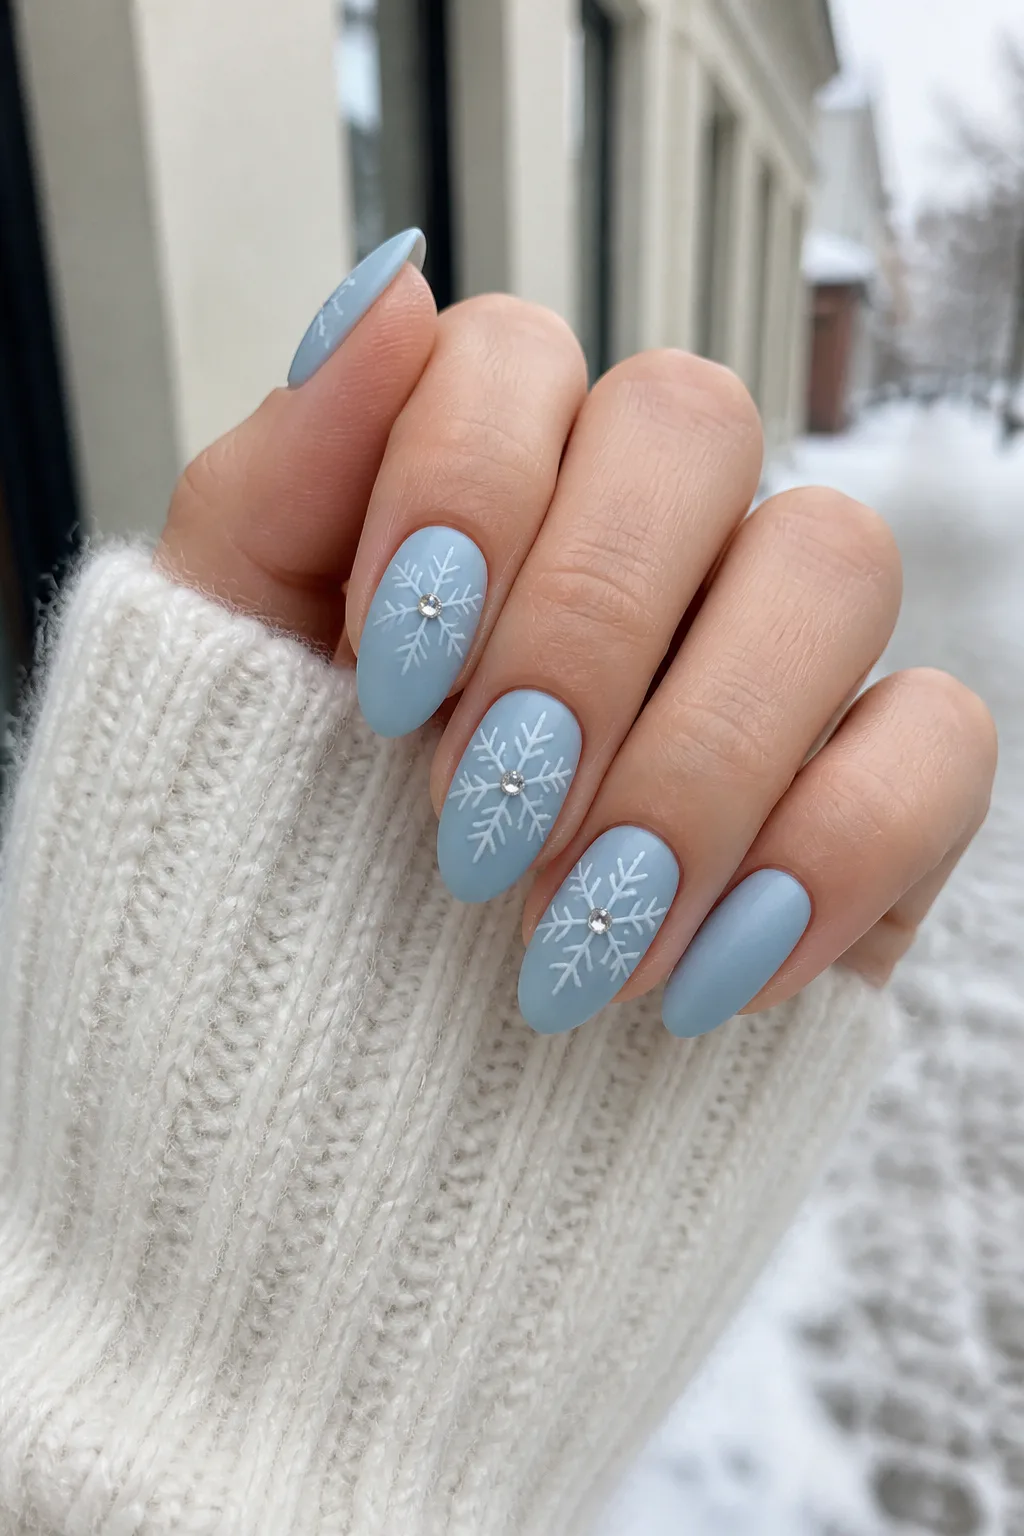
Soft blue matte polish provides a calm, snowy background for painted white snowflakes. A tiny rhinestone or crystal at each motif’s center adds a pinpoint of sparkle, giving the design a jeweled finish without covering the nails in gems.
This look balances a soft color and texture with a small, bright detail. It can be used across several nails for a coordinated set or kept to one or two accents if you prefer a subtler manicure.
Place crystals with care
Draw or apply the snowflake first, then position a small crystal at its center. Keep the stone proportionate to the motif so it enhances the design instead of hiding the fine lines.
- Choose a pale or muted blue base with a matte finish.
- Use clean white snowflake shapes for contrast.
- Select small crystals that fit the center of each motif.
- Secure embellishments well and avoid placing them too close to the edge.
15. Deep Emerald Forest Snowflake Nails
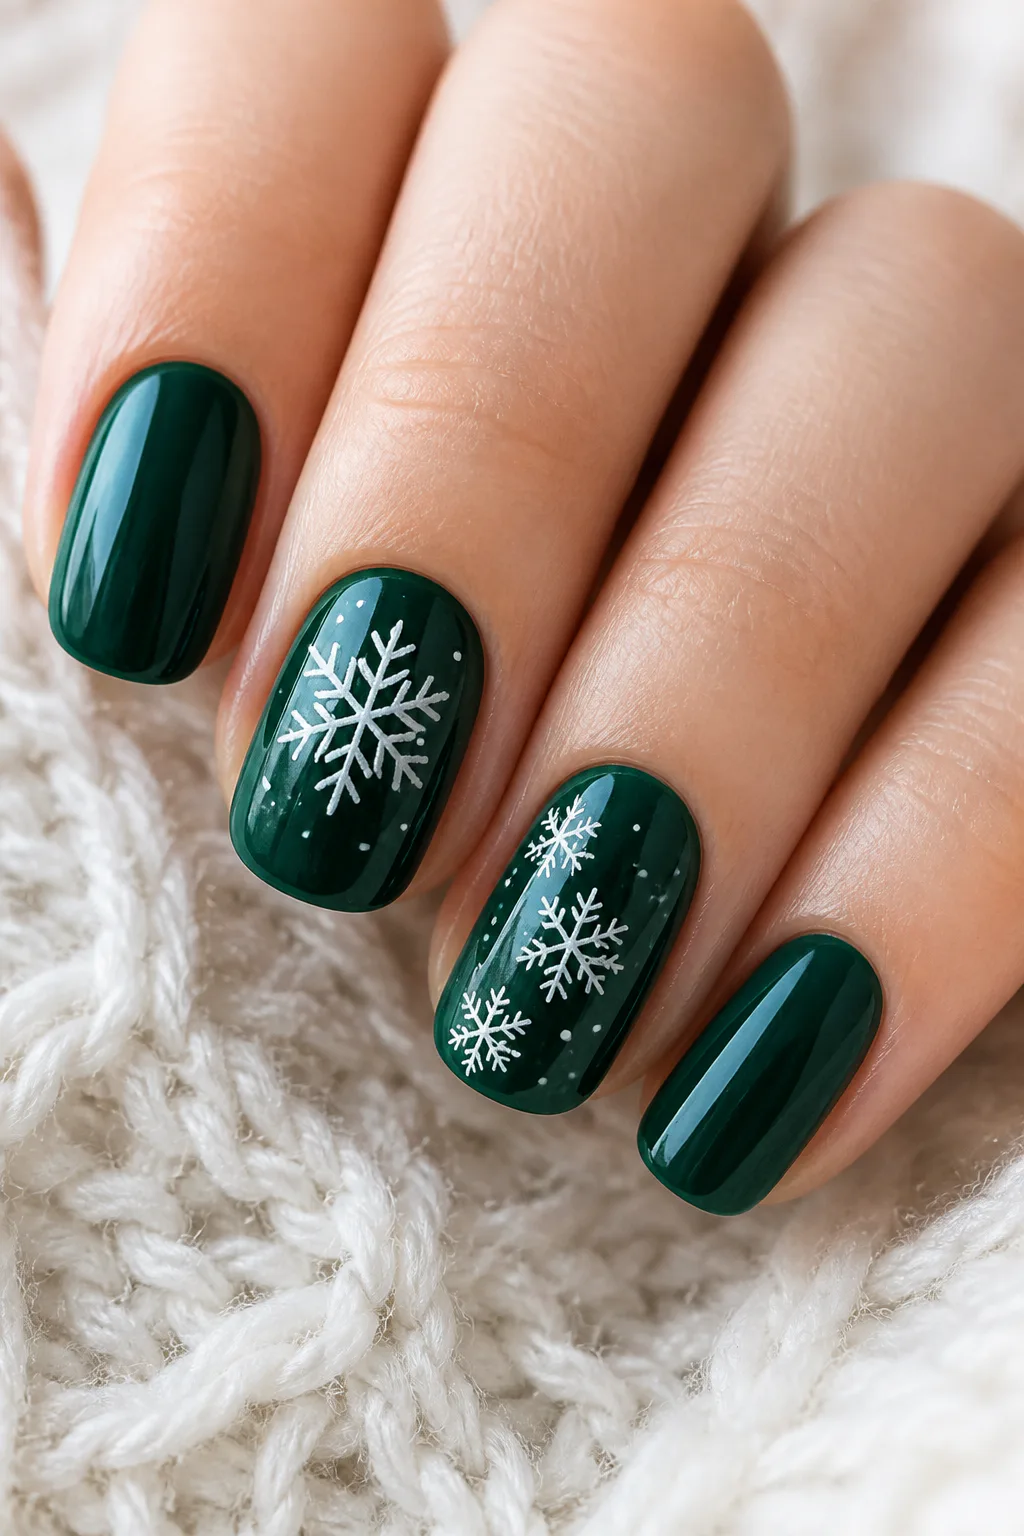
Dark pine-green polish gives snowflake art a rich, forest-inspired backdrop. Delicate white flakes stand out against the saturated color, creating a winter contrast that feels elegant and a little unexpected compared with the usual blue-and-white palette.
Emerald works beautifully as a full set, but it can also be paired with a sheer or metallic accent nail for a lighter effect. The design suits glossy finishes especially well, though a matte green base can make the white art feel softer.
Choose a balanced contrast
Use a crisp white for visibility and vary the snowflake size to keep the set from looking overly uniform. If you add shimmer, keep it restrained so the deep green and fine motifs remain the focus.
- Choose a dark pine or emerald crème polish.
- Paint white flakes in a mix of small and medium sizes.
- Leave a few nails plain to highlight the color.
- Try glossy or matte topcoat depending on the mood you want.
16. Pastel Lavender Frost Snowflake Nails

A soft purple base brings a dreamy, cool-toned twist to winter nail art. A pearlescent topcoat adds a frosted glow, while iridescent white or silver-lined snowflakes shift gently as the nails catch the light.
Lavender feels lighter than traditional dark winter shades, making it a sweet choice if you want a seasonal manicure with a pastel finish. The look works on short or long nails and can be kept subtle with just a few snowflake accents.
Let the shimmer stay soft
Choose a pale lavender rather than a highly saturated purple, then layer on a delicate pearl effect. Iridescent details complement the base, while fine silver outlines help snowflakes remain visible.
- Start with a soft pastel purple base.
- Add a pearlescent topcoat for a frosted finish.
- Use iridescent white or silver-lined snowflake art.
- Limit larger motifs so the set stays light and airy.
Final Thoughts
Snowflake nails can be as understated or as eye-catching as you like. A sheer nude base and tiny white accent suit a minimalist style, while velvet cat-eye polish, chunky glitter, chrome, and rhinestones bring extra drama to a winter manicure.
Use these ideas as a starting point and adjust the colors, placement, and number of decorated nails to fit your taste. Whether you’re working with a fine brush, decals, or a nail artist, a thoughtful balance of base color and snowflake detail can make the whole set feel cohesive.